Table of Contents
Advertisement
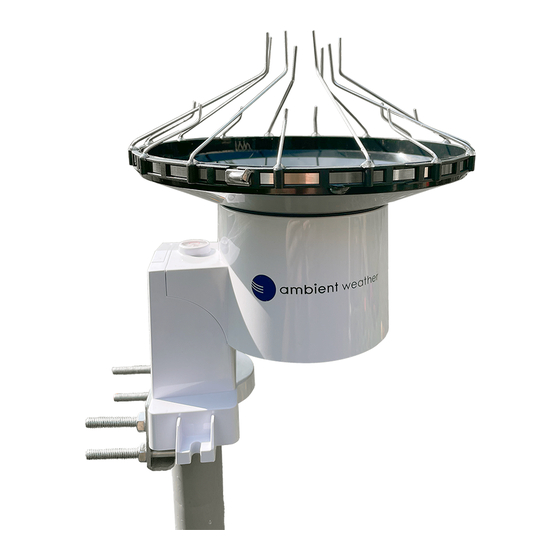
Ambient Weather WS-5000-RAIN Replacement Rain Collector
Table of Contents
1.
Quick Start Guide ....................................................................................................................................................... 2
2.
Pre-Installation Checkout and Site Survey ................................................................................................................. 2
2.1
Pre-Installation Checkout .................................................................................................................................... 2
2.2
Parts List ............................................................................................................................................................. 2
2.3
Rain Gauge Setup ............................................................................................................................................... 2
2.3.1
Install the Batteries in the Rain Gauge ........................................................................................................... 3
2.3.2
Register Rain Gauge on Display Tablet WS-2000/WS-5000 ......................................................................... 3
2.3.3
Site Survey .................................................................................................................................................... 5
2.3.4
Rain Gauge Mounting .................................................................................................................................... 6
2.3.5
Install the Funnel Coil Filter .......................................................................................................................... 7
3
Best Practices for Wireless Communication ............................................................................................................... 7
4
Display Tablet Operation ............................................................................................................................................ 8
4.3
Initial Display Tablet Operation .......................................................................................................................... 8
4.4
Home Screen Display.......................................................................................................................................... 9
4.5
Display Buttons ................................................................................................................................................. 10
4.6
Hourly Rain Icon ............................................................................................................................................... 10
4.7
Set Mode ........................................................................................................................................................... 11
4.7.4
Rainfall Units of Measure ............................................................................................................................ 12
4.7.5
Reset Weekly Rain at ................................................................................................................................... 12
4.7.6
Rainfall Season ............................................................................................................................................ 12
4.7.7
Reset Daily Rain at ...................................................................................................................................... 12
4.7.8
More ............................................................................................................................................................. 12
4.8
Calibration Mode .............................................................................................................................................. 13
5
Glossary of Terms ..................................................................................................................................................... 17
6
Specifications ............................................................................................................................................................ 17
6.3
Wireless Specifications ..................................................................................................................................... 17
6.4
Measurement Specifications ............................................................................................................................. 18
6.5
Power Consumption .......................................................................................................................................... 18
7
Maintenance .............................................................................................................................................................. 18
7.3
Array Maintenance ............................................................................................................................................ 18
8
Troubleshooting Guide.............................................................................................................................................. 18
9
Accessories ............................................................................................................................................................... 20
10
Liability Disclaimer .............................................................................................................................................. 20
11
FCC Statement ...................................................................................................................................................... 20
12
Warranty Information ............................................................................................................................................ 21
13
California Prop 65 ................................................................................................................................................. 21
Version 1.0
©Copyright 2020, Ambient LLC. All Rights Reserved.
User Manual
Page 1
Advertisement
Table of Contents

Related Manuals for Ambient Weather WS-5000-RAIN


Summary of Contents for Ambient Weather WS-5000-RAIN
-
Page 1: Table Of Contents
Ambient Weather WS-5000-RAIN Replacement Rain Collector User Manual Table of Contents Quick Start Guide ............................... 2 Pre-Installation Checkout and Site Survey ......................... 2 Pre-Installation Checkout ............................ 2 Parts List ................................2 Rain Gauge Setup ............................... 2 2.3.1 Install the Batteries in the Rain Gauge ......................3 2.3.2... -
Page 2: Quick Start Guide
This will allow you to check out all the functions, ensure proper operation and familiarize you with the rain gauge and calibration procedures. Parts List Item WS-5000-RAIN Rain Gauge Threaded nuts for U-Bolts (M5 size) Sensor array metal mounting plate to be used with U-Bolts... -
Page 3: Install The Batteries In The Rain Gauge
For the WS-2000/WS-5000 weather station, the following sensor IDs are assigned: WH65: WS-2902-ARRAY WS80BN: WS-5000-ARRAY Ultrasonic sensor array WH40E: WS-5000-RAIN Rain gauge WH32B: Indoor thermo-hygrometer-barometer Go to the Sensor ID screen by pressing the button corresponding to the , then use the button to... - Page 4 Select field Scroll field up Scroll field down return to Setup Figure 3 Figure 4 When complete press the return to Setup button. Within 3-5 minutes the display should show the WS- Version 1.0 ©Copyright 2020, Ambient LLC. All Rights Reserved. Page 4...
-
Page 5: Site Survey
5000-RAIN segment . See Figure 10 and Figure 11 for an explanation. 2.3.3 Site Survey Figure 5 Perform a site survey before installing the weather station. Consider the following: 1. You must clean the rain gauge every few months and change the batteries every 2-3 years. Provide easy access to the rain gauge and sensor array. -
Page 6: Rain Gauge Mounting
Make sure your display tablet is at least five feet away from any electronic device to avoid interference. 8. Visit Ambient Weather Mounting Solutions for assistance and ideas for mounting your weather station: http://www.ambientweather.com/amwemoso.html 2.3.4 Rain Gauge Mounting Install the sensor array plastic mounting bracket to your 1.25”... -
Page 7: Install The Funnel Coil Filter
Figure 7 Use the bubble level next to the rain sensor to make sure the sensor array is completely level. Note: If you cannot read the bubble level due to mounting constraints, place straddle a line or ruler level across the top of the rain gauge for easier viewing. 2.3.5 Install the Funnel Coil Filter To install the funnel coil filter, press the coil until the hook is inside the hole at the bottom of the funnel, and locked in place. -
Page 8: Display Tablet Operation
Display Tablet Operation Note: About This Section. The WS-5000-RAIN does not include a display. We include the following section in this manual to inform you how to reset your daily rain total in case the tipping bucket cycles during installation and show basic display rain functions. -
Page 9: Home Screen Display
Home Screen Display The display tablet home screen layout is shown in Figure . Figure 11 Description Description WeatherUnderground.com connection Channel indicator icon AmbientWeather.net connection icon Rain rate, daily, hourly, weekly, monthly and yearly rain Wi-Fi signal strength icon. Forecast icon based on rate of change of pressure An exclamation point ! indicates the display is connected to Wi-Fi but not the Internet. -
Page 10: Display Buttons
Description Description exceeds 70 ºF, which signifies conditions may be possible for lightning storms to form in the area. 5000-RAIN signal strength Hourly Rain Icon Display Buttons Figure 12 Icon Description Brightness control key Press this key to enhance the brightness Brightness control key Press this key to decrease the brightness Backlight on/off key... -
Page 11: Set Mode
The Hourly Rainfall Icon shows the accumulated rainfall for the last hour (60 mins). For the purpose of this icon, the console stores the rainfall every 5 minutes and displays the sum of the last 12 measurements (trailing 60-minute summary). Hourly Rain (in) Icon Hourly Rain (in) -
Page 12: Rainfall Units Of Measure
Select units of Select units of Select Select Scroll field Scroll field Select next return to measure measure or scroll value value down Set Page home scroll value up value down 4.7.4 Rainfall Units of Measure Press to change the rainfall units of measure between in and mm. 4.7.5 Reset Weekly Rain at x 12 Press... -
Page 13: Calibration Mode
Select field Scroll field up Scroll field down return to Setup Figure 15 Calibration Mode Press to Enter the Calibration (Correct) Mode Version 1.0 ©Copyright 2020, Ambient LLC. All Rights Reserved. Page 13... - Page 14 Figure 16 Increase Decrease Select Select Scroll field Scroll field Enter sub- return calibrated calibrated value value down setup mode to home value value To adjust the parameter, press to scroll to the parameter you wish to change. Press to highlight the sign (positive vs.
- Page 15 Parameter Type of Default Typical Calibration Source Calibration Temperature Offset Current Value Red Spirit or Mercury Thermometer (1) Humidity Offset Current Value Sling Psychrometer (2) Offset Current Value Calibrated laboratory grade barometer Barometer Offset Current Value Local airport (3) Barometer Wind Offset Current Value GPS, Compass (4)
- Page 16 Without a calibrated source, wind speed can be difficult to measure. We recommend using a calibrated wind meter (available from Ambient Weather) and a constant speed, high speed fan. (7) The rain collector is calibrated at the factory based on the funnel diameter. The bucket tips every 0.004”...
-
Page 17: Glossary Of Terms
Make sure you periodically clean the rain gauge funnel. Note: The purpose of calibration is to fine tune or correct for any sensor error associated with the devices margin of error. Errors can occur due to electronic variation (example, the temperature sensor is a resistive thermal device or RTD, the humidity sensor is a capacitance device), mechanical variation, or degradation (wearing of moving parts, contamination of sensors). -
Page 18: Measurement Specifications
Measurement Specifications The following table provides the specifications for the measured parameters. Measurement Range Accuracy Resolution Rain 0 to 236 in. ± 5% 0.004 in Figure 18 Transmission distance in open field: 100m (300 ft) Sensor reporting interval: 49 seconds RF Frequency: 915 MHz Power Consumption ... - Page 19 Problem Solution Outdoor sensor array Reset the sensor array. Press the reset button as described in Figure 1 #12. does not communicate to the display tablet. With an open-ended paperclip, press the reset button for 3 seconds to completely discharge the voltage. Take out the batteries and wait one minute, while covering the solar panel to drain the voltage.
-
Page 20: Accessories
Accessory Description Ambient Weather Mounting Ambient Weather provides the most comprehensive mounting solutions Solutions - for weather stations, including tripods, pole extensions, pole mounting https://ambientweather.com/weath kits, ground stakes and more. er-station-mounting Figure 19 10 Liability Disclaimer Please help in the preservation of the environment and return used batteries to an authorized depot. -
Page 21: Warranty Information
13 California Prop 65 WARNING: Use of the Ambient Weather Products can expose you to chemicals, including lead and lead compounds, which are known to the State of California to cause cancer and bisphenol A (BPA), and phthalates DINP and/or DEHP, which are known to the State of California to cause birth defects or other reproductive harm. - Page 22 Proposition 65 does not clarify whether exposure is to be measured only in normal operation, or in the event of misuse such as intentionally damaging, incinerating or consuming an Ambient Weather Product or component and Ambient Weather has not attempted to evaluate the level of exposure.
Need help?
Do you have a question about the WS-5000-RAIN and is the answer not in the manual?
Questions and answers