Table of Contents
Advertisement
Quick Links
Advertisement
Table of Contents

Related Manuals for LifeSpan Workplace SD9


Summary of Contents for LifeSpan Workplace SD9
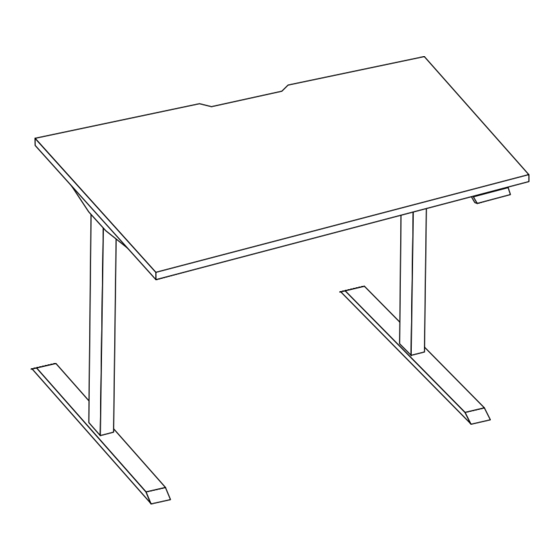
- Page 1 Life’s short. Live longer. Standing Desk Owner’s Manual for SD9 38"/48"/60" Desks...
- Page 2 If you need to contact LifeSpan customer service, visit our website at www.LifeSpanFitness.com and select customer service. Complete the information requested and we will respond to your inquiry within one business day.
-
Page 3: Table Of Contents
Table of Contents About Your Standing Desk ..................Specifications Warranty Exclusions and Limitations Registration Safety Tips Children and Pets Proper Grounding Standing Desk Assembly ..................Exploded View & Hardware Assembly Instructions Standing Desk Operations .................. Console Buttons Reset Standby Change Display Set Minimum Height Set Maximum Height Error Codes... -
Page 4: About Your Standing Desk
About Your Standing Desk Specifications Frame Frame Height 23.6" - 49.4" (60 - 125 cm) Memory Keys Standby Mode Frame Weight Dynamic Load 264.5 lbs (120 kgs) Capacity Frame Weight 56.2 lbs (25.5 kgs) 38" Desktop = 38 lbs (17.2 kgs) Desktop Weight 48"... -
Page 5: Warranty
In order to insure our product warranty and to ensure the safe and efficient operation of your LifeSpan product, only authorized parts can be used. The warranty is void if any parts other than those provided by LifeSpan are used. -
Page 6: Exclusions And Limitations
• This warranty is non-transferable form the original owner. Registration You must register your LifeSpan product before a warranty claim can be processed. To complete your registration online go to www.lifespanfitness.com/support/registration. Completing the product registration within 60 days of delivery is necessary to activate the warranty, as the warranty will not be valid unless the registration is properly completed within this timeframe. -
Page 7: Safety Tips
About Your Standing Desk Safety Tips While in Use • Make sure no obstacles are in the desk's path. • Make sure the desktop is not touching any walls. • Make sure all cords are appropriate length to accommodate the change in height. -
Page 8: Proper Grounding
Power Cord Options This standing desk should only be used with the proper power cord and power outlet. Several power cord options (shown below) are available from LifeSpan. We do our best to include the correct power cord with the standing desk for your area. - Page 9 SD9 Desk Assembly At LifeSpan we strive to make our equipment easy to assemble and start using. Parts that can be pre-assembled are always assembled and tested on the product line. Prior to starting the assembly process, take all the parts out of the box, remove plastic bags and lay everything out on the floor to become familiar with the components.
- Page 10 SD9 Desk Assembly Before You Begin Lay out all components and hardware to ensure that you have everything listed on this page. Hardware Included Item# Part Description Item# Part Description Side Bracket Foot Motor Control Unit Frame End Console Frame End Power Cord Center Rail Item #...
- Page 11 SD9 Desk Assembly Step 1: Attach Frame Ends to Legs Place one of the Legs (item 1) into the Frame End (part 3A and 3B) ensuring that the bar (arrow) is on ”top” in relation to the Leg (Item 1). Line up the holes on the Leg (item 1) with the holes on the Frame End (part 3A and 3B) Using the supplied Allen Wrench, insert four (4) M6x10 Machine Screws...
- Page 12 SD9 Desk Assembly Step 2: Attach Side Bracket Place the Side Bracket (item 5) onto the Frame End (item 3A and 3B). Insert two (2) M6x40 Machine Screws (item 13) through the two (2) holes and into the Frame Ends (item 3A and 3B). Using the supplied Allen Wrench, rotate each screw just a few turns.
- Page 13 SD9 Desk Assembly Step 3: Attaching Frame to Desk Place the assembly completed in Step 3 on the desktop and line up the furthest holes on the ends using two(2) M6x15 Machine Screws (item 14). Ignore these holes M6x15 Allen Wrench Insert the two Center Rails (with the cut facing inward) (part 4) to the Frame End (item 3A and 3B).
- Page 14 SD9 Desk Assembly Insert the other assembly completed in Step 3 to the Center Rails (item 4) and line up the furthest holes on the ends using two(2) M6x15 Machine Screws (item 14). M6x15 Allen Wrench Slide the Center Rails (item 4) to the middle position of the desktop. Finger tighten the eight(8) M6x10 Machine Screws (item 9).
- Page 15 SD9 Desk Assembly Step 4: Attaching the Feet Insert the Feet (item 2) to the Legs (item 1) using eight(8) M6x16 Machine Screws (item 10). Repeat on other leg. M6x16 Allen Wrench Step 5: Attaching the Console Position Console (item 7), M5x16 mark and predrill holes.
- Page 16 SD9 Desk Assembly Step 6: Attaching Motor Control Unit Place the Motor Control Unit (item 6) into position. Mark the hole locations onto the desk and drill holes matching the depth of the M5x16 Wood Screws. Place Control Box(item 6) back into position and screw into place with the two wood screws.
- Page 17 SD9 Desk Assembly Step 7: Connecting the Cables Connect the cables exiting the Legs directly into the Motor Control Unit. Connect the Console (part 7) cable to the Control Box (part 6).
- Page 18 SD9 Desk Assembly Use the adhesive backed Cable Clips (part 13) to secure the cables so they do not sag. Connect the Power Cord (part 8) to the Motor Control Unit (part 6). Cable Clip...
- Page 19 SD9 Desk Assembly Step 8: Turn Upright Turn the assembled desk right-side up. With at least two people, grab the Desk Base (not the desktop) and turn the desk right-side up. Adjust the pre- installed glides on the feet as needed. Plug the power cord into an outlet...
-
Page 20: Console Buttons
SD9 Desk Operations Console Buttons : Increases or decreases desk height. Display: Shows height range. Memory Keys: Pre-set buttons remember 4 different heights. M: Sets desk to desired height. Adjust desk height. Hold 'M' button down and the display will flash for 5 seconds. Press any memory key and this will store the position to this key. -
Page 21: Set Minimum Height
SD9 Desk Operations Set Minimum Height While holding down the M and 1 key the display will blink while still showing the current height. Press the buttons to adjust the desk to the minimum desired height. Press M + 1 to complete the setting. Set Maximum Height While holding down the M and 2 key the display will blink while still showing the current height. - Page 22 Standing Desk LifeSpan Fitness 785 West 1700 South Suite 1 Salt Lake City, UT. 84104 Phone: 801.973.9993 www.LifeSpanFitness.com 2023 Version 2.0...
Need help?
Do you have a question about the Workplace SD9 and is the answer not in the manual?
Questions and answers