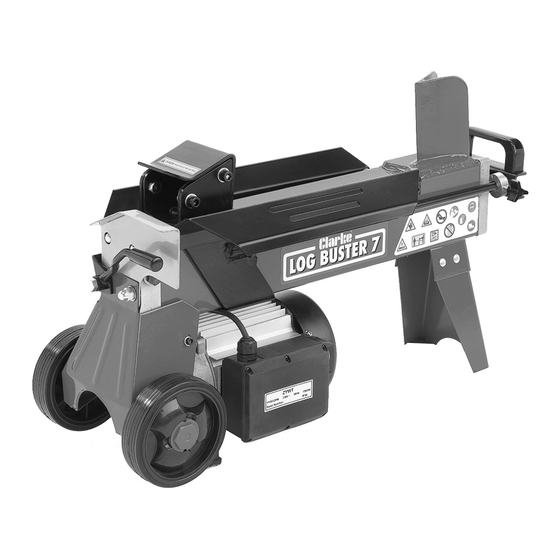
Summary of Contents for Clarke LOGBUSTER 7
- Page 1 4 TON LOG SPLITTER MODEL NO: LOGBUSTER 7 PART NO: 3402040 OPERATION & MAINTENANCE INSTRUCTIONS LS0616...
-
Page 2: Environmental Recycling Policy
INTRODUCTION Thank you for purchasing this CLARKE 4 Ton Log Splitter. Before attempting to use this product, please read this manual thoroughly and follow the instructions carefully. In doing so you will ensure the safety of yourself and that of others around you, and you can look forward to your purchase giving you long and satisfactory service. -
Page 3: General Safety Rules
GENERAL SAFETY RULES WARNING: READ ALL INSTRUCTIONS. FAILURE TO FOLLOW ALL INSTRUCTIONS LISTED BELOW MAY RESULT IN ELECTRIC SHOCK, FIRE AND/ OR SERIOUS INJURY. SAVE THESE INSTRUCTIONS. WORK AREA Keep the work area clean and well lit. Cluttered and dark areas invite accidents. Do not operate the log splitter in explosive atmospheres, such as in the presence of flammable liquids, gases or dust. - Page 4 USAGE AND CARE Do not force the log splitter. It will do the job better and safer at the rate for which it was designed. Disconnect the plug from the power source before making any adjustments, changing accessories, or storing the log splitter. Such preventive safety measures reduce the risk of starting the log splitter accidentally.
- Page 5 If the log moves away from the blade, retract the ram and rotate the log through as shown on the right. 10. Do not attempt to load the log in the machine whilst the log pusher is in motion. 11. Keep your hands well away from any splits and cracks which open in the log.
-
Page 6: Safety Symbols
SAFETY SYMBOLS... -
Page 7: Electrical Connections
ELECTRICAL CONNECTIONS Connect the mains lead to a standard, 230 Volt (50Hz) electrical supply through an approved 13 amp BS 1363 plug, or a suitably fused isolator switch. WARNING: THIS APPLIANCE MUST BE EARTHED IMPORTANT: The wires in the mains lead are coloured in accordance with the following code: Green &... -
Page 8: Identification Of Parts
IDENTIFICATION OF PARTS Description Part number Description Part number Log pusher plate LGLOGB701 Switch box LGLOGB709 Main body LGLOGB702 Wheels LGLOGB710 Wedge Control lever LGLOGB711 Lifting handle LGLOGB704 Guard LGLOGB712 Support leg LGLOGB705 Bleed screw LGLOGB713 Log retaining plates LGLOGB706 Oil Drain bolt with LGLOGB714 dipstick... -
Page 9: Before Use
BEFORE USE BLEEDING THE HYDRAULIC SYSTEM Before operating the log buster, the Bleed Screw Bleed Screw should be loosened by 2-3 turns until air can go in and out of the oil tank smoothly. • Air flow through the Bleed Screw hole may be detectable when the log buster is in operation. -
Page 10: Operation
OPERATION OPERATING THE LOG BUSTER This log buster is designed to be operated by one person only and requires two handed operation by the user - The left hand controls the hydraulic control lever and the right hand controls the push button switch. 1. -
Page 11: Freeing A Jammed Log
2. When the ram is at full extension, release the push button switch. • Keep the Control lever pressed down the prevent the ram from returning. 3. Loosen the handwheel on the return stop and slide the stop to the desired position •... -
Page 12: Maintenance
3. To refill with new oil, tilt machine backwards, using a clean funnel, pour in 3.5 Litres of Clarke hydraulic oil, IMPORTANT: Only use CLARKE HYDRAULIC OIL, available from your nearest dealer. Part No:... -
Page 13: Transport And Storage
TRANSPORT AND STORAGE MOVING THE LOG BUSTER CAUTION: BEFORE MOVING THE LOG BUSTER, MAKE SURE THE BLEED SCREW IS TIGHTENED TO AVOID OIL LEAKING. • Lift the front of the log buster by the handle and move the log buster to the woking area. -
Page 14: Specifications
50 mm PARTS AND SERVICING For Parts & Servicing, please contact your nearest dealer, or CLARKE International, on one of the following numbers PARTS & SERVICE TEL: 020 8988 7400 PARTS & SERVICE FAX: 020 8558 3622 or e-mail as follows: PARTS: Parts@clarkeinternational.com... -
Page 15: Declaration Of Conformity
DECLARATION OF CONFORMITY...


Need help?
Do you have a question about the LOGBUSTER 7 and is the answer not in the manual?
Questions and answers