
Related Manuals for Clarke LOGBUSTER P8


Summary of Contents for Clarke LOGBUSTER P8
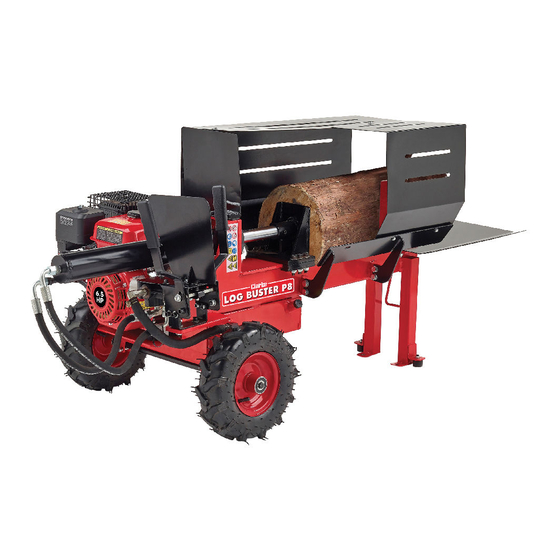
- Page 1 PETROL DRIVEN LOG SPLITTER MODEL NO: LOGBUSTER P8 PART NO: 3402041 OPERATION & MAINTENANCE INSTRUCTIONS ORIGINAL INSTRUCTIONS DL1221...
-
Page 2: Specifications
INTRODUCTION Thank you for purchasing this CLARKE Petrol Log Splitter product. Before attempting to operate the machine, it is essential that you read this manual thoroughly and carefully follow all instructions given. In doing so you will ensure the safety of yourself and that of others around you, and you can also look forward to the product giving you long and satisfactory service. -
Page 3: Safety Symbols
SAFETY SYMBOLS The following symbols represent important information about the product or instructions on its use. Read these Dispose of any used oil instructions in full in an environment- before using the friendly way. machine. Wear safety footwear! Do not use in the rain. Wear protective Danger! Keep clear of gloves! -
Page 4: General Safety Rules
GENERAL SAFETY RULES WARNING: READ ALL OF THESE INSTRUCTIONS. FAILURE TO FOLLOW ALL INSTRUCTIONS LISTED BELOW MAY RESULT IN FIRE AND/OR SERIOUS INJURY. SAVE THESE INSTRUCTIONS FOR FUTURE REFERENCE. WORK AREA 1. Keep the work area clean and well lit. Cluttered and dark areas invite accidents. -
Page 5: Avoid Dangerous Working Conditions
3. Maintain the log splitter. Check for misalignment or binding of moving parts, breakage of parts and any other condition that may affect the log splitters operation. If damaged, have the log splitter repaired before use. 4. Keep cutting tools sharp and clean. Properly maintained cutting tools with sharp cutting edges are less likely to bind and are easier to control. - Page 6 • ALWAYS check the oil level in the hydraulic oil tank. • ALWAYS check the oil level in the engine, see page 15. • NEVER operate your log splitter when it is in need of repair or is in poor mechanical condition.
- Page 7 • NEVER stand on the log splitter. • Serious injury could occur if the machine tips over. • DO NOT store anything above or near the log splitter where a person might stand on the log splitter to reach it. AVOID INJURY FROM AN UNEXPECTED ACCIDENT •...
-
Page 8: Maintain Your Log Splitter With Care
MAINTAIN YOUR LOG SPLITTER WITH CARE • ALWAYS clean the log splitter after each use. • Keep the log splitter clean and free from debris for best and safest performance. • Control levers and the power switch must be kept clean, dry and free from oil and grease at all times. - Page 9 ASSEMBLY NOTE: Due to the weight of this machine, it is recommended that the assembly be undertaken by 2 persons. WHEELS 1. Slide the wheel onto the end of the axle rod. • Make sure the air valve is on the outside of the wheel assembly.
- Page 10 CYLINDER (PUSHER) 1. Move Pusher back towards the steel stud. 2. Lift Pusher a little or move left or right to align the holes on the Pusher with the screws on the steel stud. 3. Tighten the two M8 nuts onto the two screws as shown.
-
Page 11: Control Levers
CONTROL LEVERS 1. Rotate the control lever upwards, making sure the hole on the lever matches the hole on the valve seat. 2. Fit the control lever into position using the M8 Hex bolt and washer supplied as shown. The bolt should pass through the hole on the valve seat. - Page 12 SAFETY PLATES & GUARDS 1. Fix the safety plate to the valve seat with the two M10 Hex bolts supplied, as shown 2. Fix the wood catcher to the work table using 4 x M8x30 bolts & M8 washers and nuts. 3.
- Page 13 4. Fix the back cover to the work table as shown, using 2 x M8x20 bolts & M8 washers and nuts. 5. Fix the small guard, using 2 x M6x16 bolts & M6 washers and nuts, as shown. On the opposite side, fix the big guard, using 3 x M6x16 bolts &...
-
Page 14: Set Up & Preparation For Operation
SET UP & PREPARATION FOR OPERATION 1. Place the logsplitter on a stable, flat and level work surface. 2. Familiarise yourself with the controls and features of this logsplitter mentioned in this manual. 3. Before operating the logsplitter, the hydraulic Bleed Screw should be loosened by rotating until air can go in and out of the oil tank smoothly. -
Page 15: Engine Start & Stop
ENGINE START & STOP STARTING THE ENGINE 1. Open the gas (petrol) valve by moving it to the right. 2. Close the choke by moving it to the left. NOTE: If the engine is already hot, it is not necessary to close the choke. - Page 16 3. Open the throttle by moving it to the left (Rabbit symbol). 4. Turn the engine switch to the ON position. 5. Gently pull the recoil starter handle until it engages, then pull it all the way out in a rapid pull. NOTE: This may take up to 5 pulls to start.
-
Page 17: Operation
OPERATION 1. Start the engine, as set out on pages 15/16. 2. Load log (between 120mm-520mm in length) onto table between the pusher and splitting blade. 3. Push both levers forward at the same time to start the cycle and engage the ram that will immediately start travelling down the machine. -
Page 18: Maintenance
2 grooves on the dipstick. 6. Replace dipstick making sure it is tightened to avoid leakage. NOTE: Fill the oil tank with suitable hydraulic oil available from your CLARKE dealer. • 1L - Part no: 3050830 • 5L - Part no: 3050835 Periodically check the oil level to ensure it is between the 2 grooves around the dipstick. -
Page 19: Troubleshooting
TROUBLESHOOTING PROBLEM CAUSE REMEDY When the control Oil level is too low. Check and fill up oil level. levers are pushed down, but the pusher does move. Ram/Pusher won’t Oil level is too low. Check and fill up oil level. retract. -
Page 20: Component Parts
COMPONENT PARTS... - Page 21 Description Description Oil Filter Wood Supporting Frame Left Oil Level Indicator Wood Supporting Frame Right Return Oil Pipe Wood Protection Guard High Pressure Oil Pipe C Operating Handle High Pressure Oil Pipe A Big Guard High Pressure Oil Pipe B Small Guard Work Table Wheel Axle...
-
Page 22: Declaration Of Conformity
DECLARATION OF CONFORMITY... -
Page 23: Associated Products
ASSOCIATED PRODUCTS Electric Chainsaw - Camouflage Chainsaw Chainsaw Lubrication CECS405C Bag - CCSB1 Oil - 1 litre •Powerful 2000w motor. •Suitable for small/ •Reduces friction to medium chainsaws extend life of the •Includes top quality with up to 20” bars blade 405mm Oregon Bar®...
Need help?
Do you have a question about the LOGBUSTER P8 and is the answer not in the manual?
Questions and answers