
Related Manuals for Clarke LOGBUSTER 8


Summary of Contents for Clarke LOGBUSTER 8
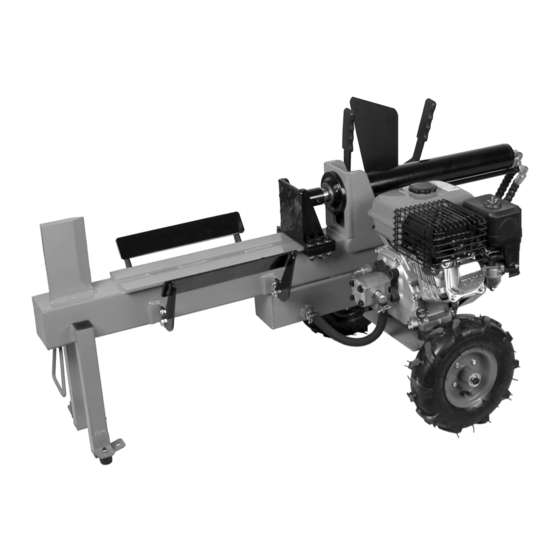
- Page 1 LOG SPLITTER MODEL NO: LOGBUSTER 8 PART NO: 3402042 OPERATION & MAINTENANCE INSTRUCTIONS ORIGINAL INSTRUCTIONS LS1017 - ISS 4...
- Page 2 INTRODUCTION Thank you for purchasing this CLARKE Log Splitter. Before attempting to use this product, please read this manual thoroughly and follow the instructions carefully. In doing so you will ensure the safety of yourself and that of others around you, and you can look forward to your purchase giving you long and satisfactory service.
-
Page 3: General Safety Rules
GENERAL SAFETY RULES WARNING: READ ALL INSTRUCTIONS. FAILURE TO FOLLOW ALL INSTRUCTIONS LISTED BELOW MAY RESULT IN SERIOUS INJURY. SAVE THESE INSTRUCTIONS. WORK AREA 1. Keep the work area clean and well lit. Cluttered and dark areas invite accidents. 2. Do not operate log splitters in explosive atmospheres, such as in the presence of flammable liquids, gases or dust. - Page 4 5. Keep cutting edges sharp and clean. Properly maintained cutting edges are less likely to bind. SERVICE 1. Have your log splitter serviced by a qualified repair person using only identical replacement parts. This will ensure that the safety of the log splitter is maintained. ADDITIONAL SAFETY RULES FOR LOG SPLITTERS Extra special care is required when using this powerful tool to safeguard yourself and that of others around you.
- Page 5 SIZE OF THE LOGS BEING SPLIT The image on the right shows the maximum log size that can be split. • It is important not to attempt to split a log for 350mm longer than 5 seconds as the pump may be damaged by the oil overheating.
-
Page 6: Safety Symbols
SAFETY SYMBOLS Parts & Service: 020 8988 7400 / E-mail: Parts@clarkeinternational.com or Service@clarkeinternational.com... -
Page 7: Fitting The Wheels
ASSEMBLY FITTING THE WHEELS 1. Slide the wheel onto the end of the axle. • Make sure the air valve is on the outside of the wheel assembly. 2. Secure the wheel using the circlip supplied. 3. Repeat with the other wheel to the other end of the axle and secure with the remaining circlip. -
Page 8: Fitting The Control Panel
FITTING THE CONTROL PANEL 1. Remove the nuts shown. 2. Rotate the control lever upwards and make it match the hole on the valve seat. 3. Fit the control lever into position using the bolt supplied as shown . The bolt should pass through the hole on the valve seat . - Page 9 MOUNTING THE RAM 1. Remove the nut/bolt and slide the pusher plate away from the ram. 2. Remove the nuts that are on the metal studs. 3. Slide the ram back over the metal studs. 4. Secure the ram by replacing the nuts securely.
-
Page 10: Before Use
3. If the oil reads low on the dipstick, add oil to the reservoir (Max 0.6 L). • We recommend the use of SAE10W-30 oil which is available from your Clarke dealer. • Do not overfill the oil reservoir. 4. Replace the oil filler cap. - Page 11 FUEL • Refuel in a well-ventilated area, away from any sources of ignition. • If the engine has been running, allow it to cool before refueling. • Do not leave fuel within the reach of children. • Refuel carefully to avoid spilling fuel. 1.
-
Page 12: Bleeding The Hydraulic System
BLEEDING THE HYDRAULIC SYSTEM Before operating the log splitter, the bleed screw should be loosened by 2-3 turns until air can go in and out of the oil tank smoothly. • Air flow through the bleed screw hole should be detectable when the log splitter is in operation. - Page 13 3. Open the throttle (C) by sliding it to the left (rabbit symbol). 4. Turn the engine switch (D) to the on (I) position. 5. Gently pull the recoil starter handle until it engages, then pull it all the way out in a rapid pull. •...
-
Page 14: Stopping The Engine
STOPPING THE ENGINE 1. Move the throttle lever to the right (idle position). 2. Set the engine switch to the off position. 3. Close the fuel valve by moving to the left. POSITIONING THE LOGS • Always place the logs on the log retaining frame. •... -
Page 15: Operation
OPERATION This log splitter is designed to be operated by one person only and requires two handed operation by the user. 1. Push the two hand control levers forwards simultaneously (towards the body of the ram assembly) . • The ram extension and pressure piece will begin to move, applying pressure to the log and starting the split. -
Page 16: Freeing A Jammed Log
FREEING A JAMMED LOG 1. Release both controls. 2. Pull and hold both levers back towards you • The log splitter will move back to its starting position. 3. Insert a wedge of wood below the jammed log. 4. Start the log splitter to push the wedge under the jammed log. Repeat above procedure with sharper sloped wedges of woods until the log is completely free. -
Page 17: Maintenance
MAINTENANCE WARNING: MAKE SURE THAT THE LOG SPLITTER IS SWITCHED OFF BEFORE STARTING ANY CLEANING OR MAINTENANCE PROCEDURES. SHARPENING THE WEDGE After using the log splitters for some time, sharpen the wedge of the log splitter using a fine-toothed file and smooth any burrs or crushed area along the cutting edge. -
Page 18: Cleaning The Air Filter
• If any part of the air filter is damaged contact Clarke spare parts department for a replacement. • Replace the foam element around the cage and replace the air filter into its original position and refit the air filter cover. -
Page 19: Changing The Spark Plugs
CHANGING THE SPARK PLUGS WARNING: ALLOW THE ENGINE TO COOL BEFORE REMOVING THE SPARK PLUG. 1. Remove the spark plug cap from the spark plug. 2. Use the spark plug spanner supplied to remove the spark plug. 3. Remove any carbon that has accumulated around the spark plug electrode. -
Page 20: Replacing The Hydraulic Oil
5. Close the oil drain screw and using a clean funnel, refill with 4 litres of fresh hydraulic oil through the oil bleed screw port • Only use CLARKE HYDRAULIC OIL, available from your nearest dealer. Part No:... -
Page 21: Troubleshooting
Wedge cutting edge is Refer to “Sharpening the blunt. Wedge” section to sharpen the cutting edge. Oil leaks. Contact your Clarke dealer. Unauthorized adjustment Contact your Clarke dealer. was made on Max. Pressure Limiting Screw. The ram moves Lack of hydraulic oil and... -
Page 22: Specifications
SPECIFICATIONS Part Number 3402042 Engine type Petrol (unleaded) Single Cylinder 4 stroke Capacity/displacement: 196 cc Oil Capacity 0.6 L Lubrication Grade SAE10W-30 Fuel Tank Capacity 3.8 Litres Weight 89 Kg Dimensions (L x W x H) 1420 x 740 x 595 mm A-weighted Sound Pressure Level 91 dB (A) Log Capacity... -
Page 23: Declaration Of Conformity
DECLARATION OF CONFORMITY Parts & Service: 020 8988 7400 / E-mail: Parts@clarkeinternational.com or Service@clarkeinternational.com...
Need help?
Do you have a question about the LOGBUSTER 8 and is the answer not in the manual?
Questions and answers