Bernina 540 User Manual
Hide thumbs
Also See for 540:
- Instructions manual (254 pages) ,
- Service and maintenance manual (218 pages) ,
- Service and maintenance manual (187 pages)
Table of Contents
Advertisement
Quick Links
Advertisement
Table of Contents

Related Manuals for Bernina 540


Summary of Contents for Bernina 540
- Page 1 BERNINA 540 User manual...
- Page 2 LOOKING FOR A NEW SEWING PROJECT? You can find what you want in “inspiration”, our sewing magazine. Thanks to great sewing patterns and detailed sewing instructions, every project succeeds right away. * Not available in all countries.
- Page 4 Welcome Dear BERNINA customer Congratulations! You have decided on BERNINA and therefore on a product which will delight you for years. For more than 100 years our family company has attached greatest importance to satisfied customers. As for me, it is a matter of personal concern to offer you Swiss development and precision at the height of perfection, future-orientated sewing technology and a comprehensive customer service.
-
Page 5: Table Of Contents
Introduction ............13 Adjusting the feed dog ..........33 BERNINA Quality control ........13 Slide-on table ............34 Welcome to the world of BERNINA ......13 Using the slide-on table ..........34 Overview Machine ..........15 Presser foot ............. 35 Overview front controls .......... - Page 6 Lubricating the machine ..........Deleting stitch patterns from the personal memory ..75 Packing the embroidery module ........Saving stitch patterns on the BERNINA USB stick ..75 Uploading a stitch pattern from the BERNINA USB stick System settings ........... 65 ..................
- Page 7 10.3 Sewing handlook quilt stitches ........ 115 Pintucks ..............97 10.4 Guiding the quilt work freely ........116 Pintucks ..............BERNINA Stitch Regulator (BSR) ......117 Overview pintucks ............Inserting the cord ............11.1 BSR mode 1 ............117 Sewing Pintucks ............
- Page 8 Table of Contents 12.2 Supplied accessories Embroidery module ....121 13.6 Embroidery hoop ............ 132 Overview accessory Embroidery module ...... 121 Overview Embroidery hoop selection ......132 Selecting the embroidery hoop ........132 12.3 Overview User Interface ......... 122 Tear-away stabilizers ............ 133 Overview functions/visual information ......
- Page 9 Administering embroidery motifs ........ 153 Children ............... 176 Saving embroidery motifs in the personal memory ..153 Seasons ................ 176 Saving the embroidery motif on the BERNINA USB stick Sports and hobby ............177 ................... 154 Animals ................ 178 Overwriting the embroidery motif in the personal Borders and Lace ............
-
Page 10: Important Safety Instructions
Do not view the LED light directly with optical instruments (e.g. magnifier). The LED light corresponds with protection class 1M. • When the LED light is damaged or defective, contact your BERNINA specialist dealer. WARNING To reduce the risk of burns, fire, electric shock or injury to persons: •... - Page 11 – turn power switch to «0». • Do not use bent needles. • Always use the original BERNINA stitch plate.The wrong stitch plate can cause needle breakage. • To disconnect, turn power switch to «0» and then remove the plug from the outlet.
-
Page 12: Important Information
• If you pass the machine to a third party, always include the instruction manual. Proper use Your BERNINA machine is conceived and designed for private household use. It is intended for sewing fabrics and other materials as described in this instruction manual. Any other use is not considered proper. BERNINA assumes no liability concerning consequences resulting from an improper use. - Page 13 Designates a low-risk hazard which can lead to minor or moderate injuries if not avoided. CAUTION Designates a hazard which can lead to material damage if not avoided. NOTICE Tips from BERNINA sewing experts are found next to this symbol.
-
Page 14: My Bernina
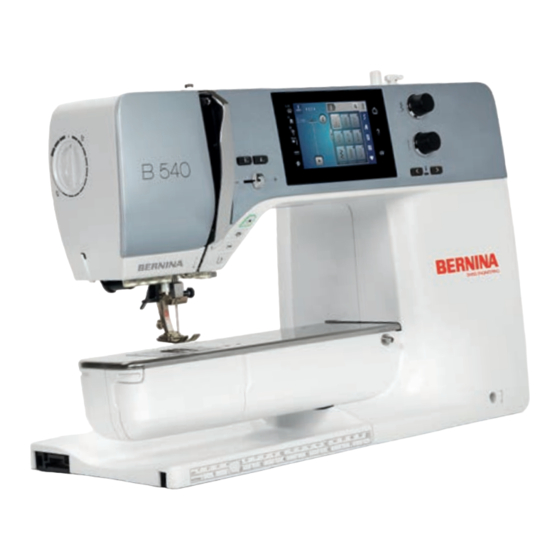
My BERNINA 1.1 Introduction With your BERNINA 540 you can sew, embroider and quilt. Delicate silk or satin fabrics as well as heavy- weight linen, fleece and denim can be sewn without any problems with this machine. Numerous practical as well as decorative stitches, buttonholes and embroidery motifs are at your disposal. - Page 15 Fancy instructions, free sewing patterns and embroidery motifs as well as many new ideas: all this you can find in the weekly blog by BERNINA. Our experts give valuable tips and explain step by step how you can achieve the desired result. In the community you can upload your own projects and exchange experiences and ideas with other sewing and embroidering enthusiasts.
-
Page 16: Overview Machine
My BERNINA 1.4 Overview Machine Overview front controls Quick reverse Needle up/down Thread cutter Presser foot pressure Securing Upper multifunction knob Start/Stop Lower multifunction knob Pattern end Needle left/right... -
Page 17: Overview Front
My BERNINA Overview front Connection for embroidery module Thread take-up lever cover Bobbin cover Presser foot pressure Connection for accessory (optional accessory) Thread take-up lever Presser foot Thread cutter Needle threader Fixing screw Sewing light Connection for slide-on table Thread cutter... -
Page 18: Overview Sideways
My BERNINA Overview sideways Foot control connector Retractable spool pin Feed dog up/down Air vents PC-connection Handwheel USB connection Power switch Spool pin Power cable connection Bobbin winding unit Touchscreen pen magnetic holder... -
Page 19: Overview Back
My BERNINA Overview back Air vents Bobbin winding unit Connection for slide-on table Thread pretension Connection for darning hoop Thread take-up lever Presser foot lifter Thread guide Carrying handle Thread cutter Spool pin BSR connection Thread guide Feed dog Retractable spool pin... -
Page 20: Supplied Accessories
My BERNINA 1.5 Supplied accessories Overview accessories machine Illustration Name Purpose Dust cover To protect the machine from dust and contamination. Accessories box To store the supplied accessories as well as the optional accessories. Free Hand System (FHS) To raise and lower the presser foot. -
Page 21: Use Of The Power Cable (Only Usa/Canada)
My BERNINA Illustration Name Purpose Height compensating tool To level an angled position of the presser foot sole when sliding over thick seams. Selection of needles For any common applications. Screwdriver red (slot) To loosen and tighten slotted screws. Brush To clean the feed dog and the looper area. -
Page 22: Overview Presser Feet
My BERNINA Overview presser feet Supplied standard presser feet Illustration Number Name Purpose Example Reverse pattern foot To sew various practical and decorative stitches. To sew forward and in reverse. Overlock foot To finish edges in stretch material. Automatic Buttonhole... -
Page 23: Accessory Box
My BERNINA Accessory box Drawer Foam pad Presser feet Automatic Buttonhole foot with slide Bobbin holder Selection of needles Spool discs Holder for 5.5 mm and 9.0 mm presser feet 1.6 Overview User Interface Overview functions/visual information Upper thread tension Stitch plate/Needle selection... -
Page 24: Overview System Settings
My BERNINA Overview System settings Sewing mode eco mode Embroidery mode Home Setup Program Help Tutorial Back to default setting Creative Consultant Overview selection menu sewing Practical stitches Buttonholes Decorative stitches Quilt stitches Alphabets Personal Memory Overview Icons Icon Name... -
Page 25: Needle, Thread, Fabric
My BERNINA Icon Name Purpose Icons «-/+» You can use the icons «-» and «+» to change setting values. Yellow frame around the A yellow-framed icon indicates that a setting icon or value has been changed in this function. This can be reset to the default setting by touching the yellow-framed icon. - Page 26 My BERNINA Illustration Needle name Needle description Purpose Jersey/Embroidery Mid-sized ball point For knitware, knitted good. needle For embroidering. 130/705 H SUK 60-100 Jeans needle Point, narrow point, For heavy-weight reinforced shaft fabrics such as jeans or 130/705 H-J 80-110 canvas.
-
Page 27: Example For Needle Description
My BERNINA Illustration Needle name Needle description Purpose Universal double Needle distance: For visible hems in 1.0/1.6/2.0/2.5/ stretch fabrics, pintucks, needle 3.0/4.0/6.0/8.0 decorative sewing. 130/705 H ZWI 70-100 Stretch double needle Needle distance: 2.5/4.0 For visible hems in stretch fabrics, pintucks, 130/705 H-S ZWI 75 decorative sewing. -
Page 28: Needle/Thread Combination
My BERNINA Needle/thread combination The needle/thread combination is correct, when the thread fits perfectly into the long groove and goes easily through the needle eye. The thread can be optimally secured. The thread can break and skipped stitches can occur when there is too much clearance in the long groove and the needle eye. -
Page 29: Sewing Preparation
Sewing preparation Sewing preparation 2.1 Accessory box Removing and attaching the accessory box The accessory box is fixed to the machine by means of four magnets. When attaching, the drawer has to be integrated in the accessory box. > Turn the carrying handle up and hold it in place. >... -
Page 30: Connection And Switching On
Attaching the knee lifter of the Free Hand System The lateral position of the knee lifter can be adjusted by your local BERNINA Dealer if required. > Insert the knee lifter into the opening at the front side of the machine. -
Page 31: Fixing The Touchscreen Pen
Sewing preparation > Adjust the sitting height so that the knee lifter can be operated with the knee. Fixing the touchscreen pen > Store the touchscreen pen at the magnet holder. Switching the machine on > Switch on the machine at the main switch to «I». 2.3 Foot control Regulating the speed via the foot control Via the foot control the speed is infinitely variable. -
Page 32: Raising/Lowering The Needle
Sewing preparation > Release the foot control to stop the machine. Raising/Lowering the needle > Sink the heel back on the foot control to raise/lower the needle. 2.4 Spool pin Retractable spool pin Raise the retractable spool pin With metallic or other special threads, it is recommend to use the retractable spool pin. The retractable spool pin is required when sewing with multiple threads, and can be used for spooling while sewing. -
Page 33: Horizontal Spool Pin
Sewing preparation > To raise the spool pin, push the spool pin down and release it. > To lock the spool pin, turn the spool pin anti-clockwise as far as it will go. > To release the lock, turn the spool pin clockwise as far as it will go. >... -
Page 34: Free Arm
> If available, slide the spool net over the thread spool. 2.5 Free arm The BERNINA 540 provides a solidly designed free arm which offers a lot of space for large project on the right of the needle. 2.6 Feed dog... -
Page 35: Slide-On Table
Sewing preparation Let the fabric be fed evenly; this results in a more perfect stitch formation. Pulling or pushing the fabric will result in uneven stitches. Holding back the fabric will result in uneven stitches. > Push the button «Feed dog up/down» to lower the feed dog. >... -
Page 36: Presser Foot
Sewing preparation > To remove the slide-on table, press the button at the table down and pull the slide-on table over the free arm to the left. 2.8 Presser foot Adjusting the presser foot position via the knee lifter of the Free Hand System >... -
Page 37: Having The Presser Foot Displayed In The User Interface
Sewing preparation Having the presser foot displayed in the User Interface The recommended presser foot for the selected stitch is displayed. In addition to that, optional presser feet can be displayed. > Switch the machine on. > Select a stitch pattern. –... -
Page 38: Instruction For Adjusting The Feed Dog
Sewing preparation 2.9 Instruction for adjusting the feed dog > Touch the icon «Feed dog up/down». > Raise or lower the feed dog according to the animation. 2.10 Needle and stitch plate Changing the needle > Raise the needle. > Switch the machine off and disconnect it from the power supply system. >... -
Page 39: Adjusting The Needle Position Up/Down
Sewing preparation > Touch the icon «Needle type/Needle size». > Select the needle type (1) of the inserted needle. > Select the needle size (2) of the inserted needle. Adjusting the needle position up/down > Push the button «Needle up/down» to lower the needle. >... -
Page 40: Needle Stop Up/Down (Permanent)
Sewing preparation Needle stop up/down (permanent) > Touch the icon «Needle stop up/down (permanent)» to fix the needle position permanently. – The machine stops with needle position down as soon as the foot control is released or the button «Start/Stop» has been pressed. >... -
Page 41: Threading
Sewing preparation 2.11 Threading Threading the upper thread Preparing the threading > Place the foam pad on the spool holder. > Place the thread spool on the spool holder so that the thread unwinds clockwise. > Add the appropriate spool disc. >... - Page 42 Sewing preparation Threading the needle > Guide the thread through the guides (6/7) above the presser foot. > Push the semi-automatic needle-threading lever (8) halfway down and pull the thread behind the grey needle-threading finger/hook to the left (9). > Guide the thread from the left to the right in front of the gray needle-threading finger/hook (11). >...
-
Page 43: Threading The Double Needle
Sewing preparation > Pull the loop of thread (14) to the rear until the end of the thread is pulled through the needle. > Pull the thread below the presser foot and through to the thread cutter (15), and cut it. Threading the double needle Prerequisite: •... -
Page 44: Threading The Triple Needle
Sewing preparation > Thread the second thread manually into the left needle. Threading the Triple Needle Always insert a foam pad when using the retractable spool pin. It prevents the thread from getting hooked at the spool pin. Prerequisite: • The triple needle is inserted. -
Page 45: Threading The Bobbin Thread
Sewing preparation > Attach the empty bobbin on the winding unit so that the silvery sensor surface is down. > Guide the thread to the left into the rear thread guide (1). > Guide the thread around the thread pretension clockwise (2). >... - Page 46 Sewing preparation > Press the bobbin case release at the bobbin case (1). > Remove the bobbin case. > Remove the bobbin from the bobbin case. > Insert the new bobbin so that the silvery sensor surface is facing the back of the bobbin case. >...
-
Page 47: Instruction How To Thread The Bobbin Thread
Sewing preparation > Pull the thread to the right under the spring (3), then lead the thread under the two thread guides (4) and pull upwards. > When inserting into the machine, hold the bobbin case so the thread guide (5) points upwards. >... -
Page 48: Setup Program
Setup Program Setup Program 3.1 Sewing settings Adjusting the upper thread tension Changes to the upper thread tension in the Setup Program affect all of the stitch patterns. You can also make changes to the upper thread tension which then apply for the selected stitch pattern in each case. The setting in the setup is retained after the machine is switched off. -
Page 49: Programming The Button "Thread Cutter
Setup Program > Touch the icon «Sewing settings». > To switch off securing stitches at the start of the pattern, set the switch to «0». > To switch on securing stitches at the start of the pattern, set the switch to «I». Programming the button «Thread cutter»... -
Page 50: Programming The Button "Quick Reverse
Setup Program > Touch the icon «Program buttons and icons». > Touch the icon «Program the securing button». > Touch the icon «Alter the number of securing stitches» to program subsequent securing stitches. > Touch the icons «-» or «+» to program the number of securing stitches. >... -
Page 51: Adjusting The Maximum Embroidering Speed
As the default setting, opened embroidery motifs are always displayed in the center of the hoop. You can use the switch «Restore saved embroidery motif position» to set that embroidery motifs are opened at the position in the hoop at which they had been saved in the BERNINA stitch software. > Tap «Home». -
Page 52: Calibrating The Hoop
Setup Program Calibrating the hoop The calibration of the embroidery hoop is the coordination of the needle to the center of the embroidery hoop. Prerequisite: • The embroidery module is connected. • The hoop is fitted with the corresponding embroidery pattern. >... -
Page 53: Programming Securing Stitches (Smart Secure)
Setup Program Programming securing stitches (Smart Secure) Embroidery motifs are programmed with or without securing stitches. The machine detects if no securing stitches are programmed and adds these. > Touch the icon «Home». > Touch the icon «Setup Program». > Touch the icon «Embroidery settings». >... -
Page 54: Changing The Measuring Unit
Setup Program > Touch the icon «Home». > Touch the icon «Setup Program». > Touch the icon «Embroidery settings». > Touch the icon «Thread cut settings». > Touch the switch in the upper portion of the display (1) to deactivate the automatic thread cut before the thread is changed. -
Page 55: Selecting Personal Settings
Setup Program > To change the unit of measurement in embroidery mode to mm, touch the icon «mm» (2). 3.3 Selecting personal settings > Touch the icon «Home». > Touch the icon «Setup Program». > Touch the icon «Own settings». >... -
Page 56: Monitoring Functions
Setup Program 3.4 Monitoring functions Activating the upper thread indicator > Touch the icon «Home». > Touch the icon «Setup Program». > Touch the icon «Monitoring settings». > To switch off the upper thread indicator, move the switch to «0». >... -
Page 57: Machine Settings
Setup Program 3.6 Machine settings Selecting a language > Tap «Home». > Tap «Setup Pogram». > Tap «Machine settings». > Tap «Language selection». > Tap the required language. Adjusting the brightness of the display The brightness of the display can be set to meet your individual needs. >... -
Page 58: Checking The Firmware Version
> Touch the icon «Setup Program». > Touch the icon «Machine settings». > Touch the icon «Information». > Touch the icon «Firmware and Hardware Information». Registering details of the dealer The contact details for your specialized BERNINA dealer can be entered. -
Page 59: Saving Service Data
> To enter the website or e-mail address for the specialized BERNINA dealer, touch the icon «Internet». Saving Service data The service data regarding the current status of the machine can be saved on the BERNINA USB stick (optional accessory) and provided to the specialized BERNINA dealer. -
Page 60: Back To Basic Setting
> Touch the icon «Service data». > Touch the icon «LOG». – The icon "LOG" has a white frame. > Ensure that the white frame is no longer displayed and remove the BERNINA USB stick (optional accessory). Back to basic setting ATTENTION: Using this function will delete all individually made settings. -
Page 61: Deleting Motifs On The Bernina Usb Stick
> Touch the icon «Confirm» to delete all embroidery motifs from the personal memory. Deleting motifs on the BERNINA USB Stick When motifs which won't be needed anymore are saved on the BERNINA USB Stick (Optional accessory), the stick can be connected to the machine and the data can be deleted. -
Page 62: Updating The Machine Firmware
For reasons of safety, it is also recommended to save data and settings on a BERNINA USB stick (optional accessory) before the firmware update is started. If personal data and settings should get lost during a firmware update, they can be transferred to the machine again afterwards. -
Page 63: Recovering Saved Data
> Remove the BERNINA USB stick (optional accessory) only after the saved data has been transferred successfully. > Insert the BERNINA USB stick (optional accessory) providing the saved data and settings into the USB port of the machine. > Touch the icon «Home». -
Page 64: Lubricating The Machine
> After lubricating, sew/embroider a test piece first. The Setup Program provides animations how to oil the machine. In chapter «Maintencance and cleaning» there are more illustrated step by step instructions Lubricating the machine. Always use BERNINA oil to lubricate. -
Page 65: Packing The Embroidery Module
Setup Program Packing the embroidery module To pack the embroidery module into the original packaging without moving the embroidery arm manually, the embroidery arm needs to be brought to its packing position. Prerequisite: • The embroidery module is connected with the machine. >... -
Page 66: System Settings
System settings System settings 4.1 Calling up the Tutorial The Tutorial gives information and explanations, covering various aspects of sewing, embroidering and the different stitches. > Touch the icon «Home». > Touch the icon «Tutorial». > Select the desired topic to get information. 4.2 Calling up the Creative Consultant The Creative Consultant informs you about decision support for sewing projects. -
Page 67: Creative Sewing
The basic setting of the upper thread tension is provided automatically as soon as a stitch pattern or an embroidery motif is selected. The upper thread tension is set optimally at the BERNINA factory and the machine has been tested. Metrosene-/Seralon thread size 100/2 (Company Mettler, Switzerland) is used for upper and bobbin thread. -
Page 68: Editing Stitch Patterns
Creative sewing When of using other types of sewing threads, the optimal upper thread tension may vary. Therefore it may be necessary to adjust the upper thread tension individually according to the sewing project as well as the desired stitch pattern. The higher the upper thread tension, the tighter the upper thread which means that the bobbin thread is pulled up to the top of the fabric. -
Page 69: Correcting The Balance
Creative sewing > To call up further setting options, touch the icon «Stitch length» (1). Correcting the balance Different fabrics, threads and stabilizers can affect the programmed stitch patterns so that they cannot be sewn out correctly. The electronic balance can correct these deviation and the stitch pattern can be adjusted optimally to the selected fabric. -
Page 70: Mirror Image Of Stitch Patterns
Creative sewing Mirror image of stitch patterns > Select a stitch pattern or alphabet. > Touch the icon «i»-Dialog. > Touch the icon «Mirror image left/right» to mirror the stitch pattern from left to tight. > Touch the icon «Mirror image up/down» to mirror the stitch pattern contrary to the sewing direction. Quick reverse >... -
Page 71: Combining Stitch Patterns
Creating Stitch pattern combinations In the Combi mode stitch patterns and alphabets can be combined according to your wish. By combining any alphabet letters, the logo BERNINA can be created. > Touch the icon «Single/Combi mode». > Select the desired stitch patterns. -
Page 72: Loading A Stitch Pattern Combination
Creative sewing Loading a stitch pattern combination > Touch the icon «Single/Combi mode». > Touch the icon «Personal memory». > > Touch the icon «Selection of stitch pattern combination». > Select a stitch pattern combination. Overwriting a stitch pattern combination >... -
Page 73: Deleting A Single Stitch Pattern
Creative sewing > Touch the icon «i»-Dialog to edit the single stitch pattern. Deleting a single stitch pattern > Create a stitch pattern combination. > Use the touchscreen pen/your finger to touch the required position (1) in the stitch pattern combination in order to select an individual stitch pattern. -
Page 74: Stitch Pattern Combination Subdivider 1
Creative sewing > Touch the icon «i»-Dialog. > Touch the icon «Edit the whole combination». > Touch the icon «Mirror image left/right» to mirror the whole stitch pattern combination from the left to the right. > Touch the icon «Mirror image left/right» again to reset the alterations to default setting. Stitch pattern combination Subdivider 1 A stitch pattern combination can be subdivided into several sections. -
Page 75: Programming Pattern Repeat
Creative sewing > Touch the icon «i»-Dialog. > Touch the icon «Edit combination at cursor position». > Touch the icon «Securing». – Every single pattern of the stitch pattern combination can be secured at the start or at the end. Programming pattern repeat >... -
Page 76: Overwriting Stitch Patterns From The Personal Memory
> Touch the icon «Confirm» to delete the stitch pattern. Saving stitch patterns on the BERNINA USB stick On the BERNINA USB stick stitch patterns, also those which have been individually edited, can be saved. > Select a stitch pattern, alphabet or buttonhole. -
Page 77: Uploading A Stitch Pattern From The Bernina Usb Stick
> Touch the icon «Personal memory». > Touch the icon «Load stitch pattern». > Touch the icon (1). > Insert the BERNINA USB stick into the USB port of the machine. > Touch the icon «USB stick». > Select the desired stitch pattern. -
Page 78: Securing Via The Icon "Securing
Creative sewing Securing via the icon «Securing» Every single pattern of a stitch pattern combination can be secured either at the beginning or at the end. > Touch the icon «i»-Dialog. > Touch the icon «Securing» before starting to sew. –... -
Page 79: Sewing Corners
Creative sewing 5.9 Sewing Corners When sewing corners, only a small section of the fabric is actually on the feed dog. Therefore it cannot grip the fabric well. By means of the height compensation tool the fabric can be fed evenly. >... -
Page 80: Practical Stitches
Practical stitches Practical stitches 6.1 Overview Practical stitches Stitch Stitch Name Description patterns number Straight stitch Seams and topstitching. Zig zag Reinforcing seams, finishing edges, sewing elastic seams and attaching lace. Vari overlock Sewing and finishing elastic fabrics in one step. - Page 81 Practical stitches Stitch Stitch Name Description patterns number Gathering stitch Most types of fabrics; gathering with shirring elastic, butted seams = butting two pressed edges and sewing together, decorative stitches. Stretch overlock Sewing and finishing elastic fabrics in one step. Tricot stitch Visible hems, visible seams in lingerie, sweaters, mending jersey.
-
Page 82: Sewing Straight Stitch
Practical stitches Stitch Stitch Name Description patterns number Single Straight stitch Used as a connecting stitch in a combination. Three Single Straight Used as connecting stitches in a combination. stitches Darning stitch For darning. 6.2 Sewing straight stitch Match the stitch length with the sewing project, which means for denim fabrics long stitches (ca. 3 – 4 mm), for fine fabrics short stitches (ca. -
Page 83: Securing With The Automatic Securing Program
Practical stitches 6.3 Securing with the automatic Securing Program Due to a determined number of 5 stitches sewn forward and 5 stitches sewn backward, the securing is regular. Prerequisite: • The Reverse pattern foot No. 1C is attached. > Touch the icon «Practical stitches». >... -
Page 84: Sewing Both Sides Of The Zipper From Bottom To Top
Practical stitches > Touch the icon «Practical stitches». > Select the Straight stitch No. 1. > Sew the seam up to where the zipper starts. > Sew the securing stitches. > Close the zipper length with long stitches. > Finish the seam allowances. >... -
Page 85: Sewing Triple Straight Stitch
Practical stitches > Start sewing in the center of the seam at the end of the zipper. > Sew diagonally along the edge of the zipper coils. > Sew the first side (1) from bottom to top. > Stop in front of the zipper pull with needle position down. >... -
Page 86: Sewing Triple Zig Zag
Practical stitches 6.7 Sewing Triple zig zag For firm fabrics, especially for denim, deckchair covers, awnings. Hems on items that need frequent washing. Finish the hem edges first. > Attach the Reverse pattern foot No. 1C. > Touch the icon «Practical stitches». >... - Page 87 Practical stitches > Work the rows in irregular lengths so that the thread is better spread over the fabric. > Sew the first rows not too close together and beyond the worn area. > Sew the rows in irregular lengths. >...
-
Page 88: Automatic Darning
Practical stitches > Sew another loose row. 6.9 Automatic darning The simple Darning Program No. 22 is especially suitable for quick darning of worn or damaged areas. It is recommended to use fine material as a backing for the worn and damaged areas or to stick an adhesive interlining. -
Page 89: Reinforced Darning, Automatic
Practical stitches 6.10 Reinforced darning, automatic The reinforced Darning Program No. 23 is especially suitable for quick darning of thin areas or snags. The reinforced Darning Program No. 23 replaces longitudinal threads in all fabrics. If the Darning Program does not cover the whole worn or damaged area, it is recommended to reposition the work and the sew the Darning Program again. -
Page 90: Finishing Edges
Practical stitches The Darning Program No. 34 is particularly suitable for worn or damaged area in heavy or firm fabrics such as denim or overalls. > Attach the Reverse pattern foot No. 1C. > Touch the icon «Practical stitches». > Select the reinforced Darning Program No. 34. 6.12 Finishing edges The Zig zag No. -
Page 91: Narrow Edgestitching
Practical stitches A double overlock seam is suitable for loose knits and cross seams in knits. When working with jersey, a jersey needle should be used to prevent damaging the knit fabric. When sewing stretch materials, use a stretch needle. >... -
Page 92: Edgestitching Using The Seam Guide (Optional Accessory)
Practical stitches 6.16 Edgestitching using the seam guide (optional accessory) When sewing parallel wider lines, it is recommended to guide the seam guide (optional accessory) along a sewn line. > Attach the Reverse pattern foot No. 1C or the Edge stitch foot No. 10/10C (optional accessory). >... -
Page 93: Sewing Blind Hems
Practical stitches 6.18 Sewing blind hems For invisible hems in medium to heavy-weight cotton, wool and blended materials. Prerequisite: • The fabric edges are finished. > Attach the Blindstitch foot No. 5 (optional accessory). > Touch the icon «Practical stitches». >... -
Page 94: Sewing Visible Hems
Practical stitches 6.19 Sewing visible hems The visible hem is especially suitable for elastic hems in jersey made of cotton, wool, synthetic and mixed fibers. > Attach the Reverse pattern foot No. 1C. > Touch the icon «Practical stitches». > Select the Tricot stitch No. 14. >... -
Page 95: Sewing Basting Stitches
Practical stitches 6.21 Sewing basting stitches For basting it is recommended to use a a thin darning thread. It can be removed easily. The basting stitch is suitable for work where a large stitch length is desired. > Attach the Darning foot No. 9 (optional accessory). >... -
Page 96: Decorative Stitches
Decorative stitches Decorative stitches 7.1 Overview Decorative Stitches Depending on the type of material, simple or more complex decorative stitches should be selected to best suit the material. • Decorative stitches which are programmed with simple straight stitches are particularly appropriate for light-weight materials, e.g. -
Page 97: Bobbin-Play
Decorative stitches 7.2 Bobbin-Play NOTICE Inappropriate bobbin case is used Damage of the bobbin case. > Use the special bobbinwork case (optional accessory). The bobbin can be filled with different thread material. For free-motion stitching to add texture. This method is similar to free-motion sewing, but it is done on the wrong side of the fabric. -
Page 98: Sewing Cross Stitches
Decorative stitches 7.3 Sewing cross stitches Cross stitch embroidery is a traditional technique and a charming addition to the other decorative stitches. If the cross stitches are sewn on a fabric with a linen texture, they look like hand-stitched cross stitching. When cross stitches are sewn with embroidery yarn, the stitch pattern appears fuller. -
Page 99: Inserting The Cord
Decorative stitches Pintuck foot Number Description # 31 (optional accessory) 5 grooves For heavy to medium-weight fabrics. In combination with the 3 mm double needle # 32 (optional accessory) 7 grooves For light to medium-weight fabrics. In combination with the 2 mm double needle # 33 (optional accessory) 9 grooves... -
Page 100: Sewing Pintucks
Decorative stitches > Place the cord spool on the knee lifter. > Check that the cord runs smoothly. > If the thread doesn't glide smoothly at the bobbin cover, leave the bobbin cover open. Sewing Pintucks The cord lies on the wrong side of the material and is held/sewn over by the bobbin thread. >... -
Page 101: Alphabets
Alphabets Alphabets 8.1 Overview Alphabet Block, outline and script writing, as well as Cyrillic, can be sewn in two different sizes. Block, outline and script writing, as well as Cyrillic, can also be sewn in small letters. For a perfect stitch formation, it is recommended to use the same thread color for upper and bobbin threads. The fabric can be reinforced with embroidery stabilizer on the wrong side. -
Page 102: Altering Font Size
Alphabets > Touch the icon «Display alphabets» (1) to open an extended enter mode. > Select the letters. > Touch the icon (2) (standard setting) to use upper case letters. > Touch the icon (3) to use lower case letters. >... -
Page 103: Buttonholes
Buttonholes 9.1 Overview Buttonholes To create the correct buttonhole for every button, every purpose and for every garment, your BERNINA 540 is equipped with a considerable collection of buttonholes. The corresponding button can be sewn on automatically. Eyelets can also be sewn. -
Page 104: Making Use Of The Height Compensation Tool
Buttonholes Buttonhole Buttonhole Name Description number Double-rounded For medium-weight to heavy fabrics buttonhole made from different materials. Narrow buttonhole with Decorative buttonhole for medium- double pointed bartack weight fabrics; blouses, dresses, jackets. Decorative buttonhole For decorative buttonholes in firmer, with double pointed non-elastic fabrics. -
Page 105: Using The Compensation Plate
Buttonholes 9.3 Using the compensation plate When sewing a buttonhole in difficult materials, it is recommended to use the compensation plate for buttonholes (optional accessory). It can be used along with the Buttonhole foot No. 3A. > Insert the compensation plate carefully from the side. 9.4 Marking buttonholes >... -
Page 106: Cord
Buttonholes > For keyhole and round buttonholes mark the lenght of the bead with chalk or a water-soluble pen on the fabric. For any subsequent buttonholes mark the starting point. The length of the keyhole is sewn additionally. 9.5 Cord Using cord with the Buttonhole foot with slide No. -
Page 107: Using Cord With The Buttonhole Foot No. 3C (Optional Accessory)
Buttonholes > Pull the cord ends into the slits. > Lower the buttonhole foot. > Sew the buttonhole in the usual manner. > Pull the cord through the buttonhole until the loop disappears in the bartack. > Pull the ends of the cord through to the wrong side of the fabric (using a hand stitching-needle), knot or secure with stitches. -
Page 108: Sewing A Test Sample
Buttonholes > Lower the buttonhole foot. > Sew the buttonhole in the usual manner. > Pull the cord through the buttonhole until the loop disappears in the bartack. > Pull the ends of the cord through to the wrong side of the fabric using a hand stitching-needle and knot or secure with stitches. -
Page 109: Determining The Buttonhole Length With The Buttonhole Foot With Slide No. 3A
Buttonholes > Touch the icon «Buttonhole slit width». > Turn the «Upper Multifunctional knob» or the «Lower Multifunctional knob» to adjust the buttonhole slit width as desired. 9.8 Determining the buttonhole length with the Buttonhole foot with slide No. 3A The button can be centered in the yellow circle on the display. -
Page 110: Sewing A Buttonhole Automatically
Buttonholes 9.10 Sewing a buttonhole automatically When the Buttonhole foot with slide No. 3A is used, the length of the buttonhole is measured automatically by the lens on the presser foot. The buttonhole will be duplicated and the machine switches to the next step automatically when the maximum length is reached. -
Page 111: Programming The Heirloom Buttonhole
Buttonholes 9.11 Programming the Heirloom buttonhole Prerequisite: • The Buttonhole foot with slide No. 3A is attached. > Touch the icon «Buttonholes». > Select the Buttonhole No. 63. > Sew the desired buttonhole length. > Push the button «Quick reverse» to program the length. –... -
Page 112: Sewing The Manual 5-Step Buttonhole With The
Buttonholes > Touch the icon «Scroll down» so that step 6 appears. – The machine sews the bottom bartack and stops automatically. > Touch the icon «Scroll down» so that step 7 appears. – The machine secures and stops automatically. 9.13 Sewing the manual 5-step buttonhole with the Buttonhole foot No. -
Page 113: Cutting Open Buttonholes With The Buttonhole Cutter (Optional Accessory)
Buttonholes > Cut the buttonhole from both ends to the middle. 9.15 Cutting open buttonholes with the buttonhole cutter (optional accessory) > Place the fabric on an appropriate piece of wood. > Position the cutter in the center of the buttonhole. >... -
Page 114: Sewing Eyelets
Buttonholes NOTICE! The adjustment of the thread shank is only possible when using the Button sew-on foot No. 18. > Loosen the screw on the back of the presser foot. > Push the bar upwards according to the thickness of the fabric. >... -
Page 115: Quilting
Quilting 10 Quilting 10.1 Overview Quilt Stitches Stitch Stitch Name Description pattern number 1301 Quilting, securing To secure at the sewing start and sewing end program with short stitches forward. 1302 Quilting straight stitch Straight stitch at 3 mm stitch length. 1303 Piecing stitch/Straight Straight stitch at 2 mm stitch length. -
Page 116: Quilting, Securing Program
Quilting 10.2 Quilting, Securing Program Prerequisite: • The Reverse pattern foot No. 1C is attached. > Touch the icon «Quilt stitches». > Select Quilt stitch pattern No. 1301. > Press the foot control. – The machine sews 6 stitches forward automatically when sewing is started. >... -
Page 117: Guiding The Quilt Work Freely
Quilting 10.4 Guiding the quilt work freely Quilt gloves with rubber fingertips (optional accessory) will help when guiding the fabric. It is recommended to use the slide-on table and the Free Hand System. With free-motion quilting, it is of advantage to quilt from the center outwards and to guide the fabric using smooth, round movements to form the design of your choice. -
Page 118: Bernina Stitch Regulator (Bsr)
BERNINA Stitch Regulator (BSR) 11 BERNINA Stitch Regulator (BSR) The BERNINA Stitch regulator equalizes the stitch length which results of the free movement of the fabric while free-motion sewing - a sewing technique which grows more and more popular. When free-motion sewing with the BSR presser foot, every stitch is equally long and the stitch formation is perfectly regular. -
Page 119: Changing The Presser Foot Sole
BERNINA Stitch Regulator (BSR) > Insert the plug for the cable vertically into the BSR connection (1) until you feel it click into place. > Switch the machine on. – The BSR display opens and the BSR 1 mode is activated. -
Page 120: Securing
BERNINA Stitch Regulator (BSR) • The knee lifter of the Free Hand System is attached. > Lower the feed dog. > Select the desired BSR mode. > Lower the presser foot. > Push the button «Start/Stop» or press the foot control and keep it pressed to start the BSR mode. - Page 121 BERNINA Stitch Regulator (BSR) > Touch the icon «Securing». > Press the foot control or the button «Start/Stop». By moving the fabric some short securing stitches are sewn, then the programmed stitch length is activated and the securing function is deactivated automatically.
-
Page 122: My Bernina Embroidery
My BERNINA Embroidery 12 My BERNINA Embroidery 12.1 Overview Embroidery module Release lever/carrying handle Guide rails for the machine Embroidery arm Connection to the machine Coupling for securing the hoop 12.2 Supplied accessories Embroidery module Overview accessory Embroidery module Illustration... -
Page 123: Overview User Interface
My BERNINA Embroidery Illustration Name Purpose Medium embroidery hoop To embroider medium-sized embroidery motifs up to 100 x 130 mm (3.94 × 5.12 in). Including the template for precise fabric positioning. USB Connecting cable To transfer data from the computer to the machine or vice versa. -
Page 124: Overview System Settings
My BERNINA Embroidery Overview System settings Sewing mode eco-Modus Embroidery mode Home Setup Program Help Tutorial Back to default setting Overview Selection menu embroidery Selection embroidery motifs Color information Editing embroidery motifs Embroidery 12.4 Important Embroidery information Upper thread A good quality thread (brand manufacturer) is essential for embroidery so that the embroidery is not affected negatively because of poor thread or thread breakage. -
Page 125: Bobbin Thread
Selecting the embroidery file format In order that embroidery motifs can be read by the BERNINA embroidery machine, they have to be created by the BERNINA Embroidery software and exported as .EXP file. Besides the actual embroidery file, a .BMP file and an .INF file are generated additionally. -
Page 126: Embroidery Test
Embroidering motifs by third-party providers BERNINA recommends uploading embroidery motifs of any file format via the free program ««ART-Link»» to the machine or a USB stick. Using «ART-Link» ensures that the embroidery motif can be read and embroidered correctly. «ART-Link» can be downloaded for free at www.bernina.com. -
Page 127: Step Stitch
My BERNINA Embroidery Step stitch Many short, equally long stitches are embroidered in offset rows closely next to each other which results in a densesly filled area. Connecting stitches Long stitches which are used to get from one part of the motif to the next. Before and after the connecting... -
Page 128: Embroidering Preparation
Embroidering preparation 13 Embroidering preparation 13.1 Attaching the Module Prerequisite: • Extension table must not be fitted. > Make sure that the module and the machine are placed on a stable, even surface. > Ensure that the embroidery arm can move freely. >... -
Page 129: Preparing The Machine
Please find all the embroidery motifs at the end of this instruction manual. In addition to that, embroidery motifs can be loaded from the personal memory or from the BERNINA USB stick (optional accessory). > Touch the icon «Home». -
Page 130: Selecting The Presser Foot In The User Interface
Embroidering preparation > Remove the presser foot (2). > Insert the embroidery foot from below into the bracket. > Press the clamping lever down. Selecting the presser foot in the User Interface After having attached the respective embroidery foot (Embroidery foot No. 26, supplied accessory with the embroidery module), you can select and save it on the machine. -
Page 131: Selecting The Embroidery Needle In The User Interface
Embroidering preparation > Loosen the fixing screw for the needle by hand. > Pull the needle downwards. > Hold the new needle with the flat side to the rear. > Slide the needle upwards as far as it will go. >... -
Page 132: Adjusting The Needle Position Up/Down
Embroidering preparation > Select the needle size (2) of the inserted needle. Adjusting the needle position up/down > To pull the thread upwards, touch the icon «Needle up/down». – The needle is lowered and raised once. Attaching the stitch plate There is a small hole in the area of the needle on the CutWork/straight stitch plate (optional accessory). -
Page 133: Selecting The Stitch Plate In The User Interface
Embroidering preparation Selecting the stitch plate in the User Interface After having replaced the stitch plate, it can be checked whether it can be used together with the selected needle. > Touch the icon «Stitch plates/Needle selection». > Select the stitch plate CutWork/Straight (optional accessory). Thread-up command The machine must be ready for embroidery to bring up the bobbin thread.The bobbin thread can be brought up in one step for a manual knotting. -
Page 134: Tear-Away Stabilizers
Embroidering preparation > Touch the icon «Hoop selection». – The machine selects the optimal embroidery hoop according to the size of the embroidery motif automatically. If the pre-set embroidery hoop would not be available, another desired embroidery hoop can be selected. When an embroidery hoop is attached which does not correspond with the selected one, the attached hoop is considered active and the embroidery motif area is displayed accordingly. -
Page 135: Using Water-Soluble Stabilizer
> Make sure that the arrows marks of both hoops match. > Attach the template holder. > Place the template in the inner hoop, so the BERNINA logo is at the front edge at the arrow mark until it clicks into place. -
Page 136: Attaching The Hoop
Embroidering preparation > Place the material and the inner hoop on the outer hoop so that the arrows of both hoops match. > Fit the hoops into each other; ensure that the material does not move. > Hoop the fabric to be embroidered tightly. >... -
Page 137: Overview Embroidery Functions
Embroidering preparation Overview Embroidery functions Centering the embroidery hoop to the needle 4 Grid on/off Moving the hoop to the back Motif center Moving the module for the sewing mode Virtual Positioning (is visible while scrolling) Center the needle to the embroidery hoop Relocating the embroidery hoop facilitates threading when the needle is close to the embroidery hoop. -
Page 138: Grid On/Off
Embroidering preparation > Touch the icon «Home». > Touch the icon «Sewing mode». Grid on/off When the center of the hoop and the grid are displayed, the embroidery motif can be positioned more exactly. > Touch the icon «Embroidery hoop display/Embroidery hoop selection». >... -
Page 139: Setup Program
Setup Program 14 Setup Program 14.1 Adjusting the embroidery settings in the Setup Program Further information about this topic (see page 49). -
Page 140: Creative Embroidering
Creative embroidering 15 Creative embroidering 15.1 Overview embroidering Embroidery time/Embroidery motif size in mm «i»-Dialog or inch Scaling up, downsizing and moving the Embroidery motif layers embroidery motif view Area to be embroidered 15.2 Selecting and changing the embroidery motif >... -
Page 141: Editing The Embroidery Motif
Creative embroidering 15.5 Editing the embroidery motif Overview Editing embroidery motif > To edit an embroidery motif, select the embroidery motif. > Touch the icon «i»-Dialog. Zoom out Mirror image left/right Zoom in Mirror image up/down Moving the view Duplicating Moving the motif Deleting Moving the motif... -
Page 142: Moving The Embroidery Motif In Enlarged View
Creative embroidering > Select an embroidery motif. > To activate the icon «Move the view», touch the icon «Zoom in». – The icon «Move the view» is active (dark grey) > Move the view of the embroidery motif. – The embroidery position is not altered. >... -
Page 143: Altering The Embroidery Motif Size Proportionally
Creative embroidering > Touch the icon «i»-Dialog. > Touch the icon «Rotate the motif». > Turn the «Upper Multifunctional knob» or the «Lower Multifunctional knob» to the right to rotate the embroidery motif clockwise. > Turn the «Upper Multifunctional knob» or the «Lower Multifunctional knob» to the left to rotate the embroidery motif counter-clockwise. -
Page 144: Mirroring Embroidery Motifs
Creative embroidering > Touch the icon «i»-Dialog. > Touch the icon «Alter the embroidery size». > To change the embroidery motif size disproportionally, the icon «Retain proportions» must not have a white frame. Only touch the icon «Retain proportions» when the icon has a white frame. –... -
Page 145: Changing The Stitch Type
Creative embroidering Changing the stitch type If the satin stitches are too long, they can be changed to step stitches. > Select an embroidery motif. > Touch the icon «i»-Dialog. > Touch the icon «Change the stitch type». > Touch the switch in the upper section of the display (1) to change the satin stitch to the step stitch. >... -
Page 146: Duplicating The Embroidery Motif
Creative embroidering > Touch the icon «Check embroidery motif size». check – The embroidery hoop travels all the way until the needle is at the position as it is indicated in the display. > Touch the icon «Corner top left» to select the top left corner of the embroidery motif. –... -
Page 147: Deleting An Embroidery Motif
Creative embroidering Deleting an embroidery motif The active embroidery motif is deleted. > Select an embroidery motif. > Touch the icon «i»-Dialog. > Touch the icon «Delete». 15.6 Combining embroidery motifs Combining embroidery motifs In the Combi-Mode several embroidery motifs can be combined. >... -
Page 148: Creating Lettering
Creative embroidering > Touch the icon «Add an embroidery motif». > Select another embroidery motif. > Select the combination (1). > Touch the icon «i»-Dialog. > Touch the icon «Duplicate». – The combination is duplicated (2). 15.7 Creating lettering Overview embroidery alphabets Embroidery motif Name Swiss Block... -
Page 149: Editing Words/Sentences
Creative embroidering Lettering can be positioned within the hoop as you like. When the embroidery motif is positioned outside the embroidering area, the hoop is outlined in red on the display. With the hoop selection it can be checked whether or not the embroidery motif can be embroidered in another hoop. When the lettering does not fit in any hoop, two single words can be combined and positioned below each other as the following example will show. -
Page 150: Changing The Colors Of The Embroidery Motif
Creative embroidering > Turn the «Lower Multifunctional knob» to move the embroidery motif vertically. > Touch the icon «Add motif». > Enter and also rotate the text «create». > Touch the icon «Embroidery hoop display/Embroidery hoop selection». > Touch the icon «Grid on/off» to position the text lines more exactly. 15.8 Changing the colors of the embroidery motif Overview changing the color Colors of embroidery motifs... -
Page 151: Changing The Colors
Creative embroidering Changing the colors > Select an embroidery motif. > Touch the icon «Color information». > Touch the icon «Change color/manufacturer» beside the color that you want to change. > To display additional colors, swipe up or down on the display. >... -
Page 152: Adding Basting Stitches
Creative embroidering Adding basting stitches The basting stitches can be embroidered along the embroidery hoop or along the embroidery motif. Therefore the connection between the fabric and the stabilizer can be improved. > Select an embroidery motif. > Touch the icon «Embroidering». >... -
Page 153: Reducing Color Changes
Creative embroidering > Select an embroidery motif. > Touch the icon «Embroidering». > Touch the yellow-framed icon «Cut the connecting stitches» to deactivate the function. > Touch the icon «Cut the connecting stitches» again to activate the function. Reducing color changes When the embroidery motifs overlap, the color changes cannot be reduced. -
Page 154: Administering Embroidery Motifs
Creative embroidering A tubular piece of fabric can be pulled over the free arm of the machine easily when the free arm is positioned to the left in parking position before the hoop is attached or removed. Push the button «Start/ Stop»... -
Page 155: Saving The Embroidery Motif On The Bernina Usb Stick
> Touch the icon «Save the motif». – The embroidery motif to be saved is outlined in yellow. > Insert the BERNINA USB stick into the USB port of the machine. > Touch the icon «USB stick». > Touch the icon «Confirm». -
Page 156: Importing Stitch Patterns
> Select an embroidery motif. Loading an embroidery motif from the BERNINA USB stick > Touch the icon «Selection». > Insert the BERNINA USB stick into the USB port of the machine. > Touch the icon «USB stick». > Select a personal embroidery motif. -
Page 157: Deleting An Embroidery Motif From The Bernina Usb Stick
Deleting an embroidery motif from the BERNINA USB stick > Touch the icon «Selection». > Touch the icon «Delete». > Insert the BERNINA USB stick into the USB port of the machine. > Touch the icon «USB stick». > Select the embroidery motif which is to be deleted. -
Page 158: Embroidery
The basic setting of the upper thread tension is provided automatically as soon as a stitch pattern or an embroidery motif is selected. The upper thread tension is set optimally at the BERNINA factory and the machine has been tested. Metrosene-/Seralon thread size 100/2 (Company Mettler, Switzerland) is used for upper and bobbin thread. -
Page 159: Embroidering Via The Foot Control
Embroidery Alterations of the upper thread tension affect the currently selected stitch pattern or embroidery motif. Permanent alterations of the upper thread tension for the sewing mode (see page 47) and for the embroidering mode (see page 49) can be made in the Setup Program. Prerequisite: •... -
Page 160: Appendix
Appendix 17 Appendix 17.1 Maintencance and cleaning Cleaning the display > Clean the display in the switched off status with a soft slightly damp microfiber cloth. Cleaning the feed dog Remove the thread remnants under the stitch plate regularly. Electronically driven components CAUTION Risk of injury near the needle and the hook. -
Page 161: Lubricating The Hook
Appendix > Flap down the fastening bracket along with the black hook race cover. > Remove the hook. > Clean the hook race area with the brush; never use a sharp instrument. > Hold the hook at the pin in the center with two fingers. >... - Page 162 > Remove the hook. > Give one drop of BERNINA oil down in the hook race. > Give one drop of oil in each of the two oil depots so that the felts are damp and make sure that the red- marked surface of the hook sleeve remains free of oil.
-
Page 163: Troubleshooting
Upper thread too tight or too > Adjust the upper thread tension. loose. Needle blunt or bent. > Replace the needle, make sure that a new BERNINA quality needle is used. Poor quality needle. > Use a new BERNINA quality needle. - Page 164 > Rethread. Poor quality thread. > Use quality thread. The stitch plate or the hook tip is > Contact the nearest specialized BERNINA dealer to have damaged. the damages repaired. > Replace the stitch plate. The thread is caught in the area >...
-
Page 165: Error Messages
> Place the machine in a warm room one hour before use. The machine doesn't start > Connect the machine and switch it on. The machine is damaged. > Contact the specialized BERNINA dealer. Neither the sewing light nor Settings in the Setup Program. > Activate it in the Setup Program. - Page 166 The needle position doesn't > Calibrate the hoop. correspond with the center of the hoop. The embroidery module is not > Connect the embroidery module to the machine. attached. > Contact the specialized BERNINA dealer to have the machine checked.
- Page 167 Appendix Message on the display Cause Solution The hoop is not attached. > Attach the hoop. The hoop is attached. > Remove the hoop. The movement of the hoop > Touch the icon «Confirm». follows. Mega Hoop top. > Bring the Mega Hoop to the top position. Mega Hoop center.
- Page 168 > Attach a larger embroidery hoop. Too less free capacity on the Not enough free capacity on the > Make sure that the BERNINA USB stick (optional BERNINA USB stick (optional BERNINA USB stick (optional accessory) is used. accessory).
-
Page 169: Storage And Disposal
The counter for the cutting cycles is reset. It is time for the regular The machine needs maintenance. > Contact the specialized BERNINA dealer. maintenance. Please contact your The message appears after the > Delete the message temporarily by touching the icon... - Page 170 Appendix Designation Value Unit Maximum speed 1000 Stitches per minute Measurements without the spool pin (W × H × D) 465 x 330 x 200 (18.30 x 12.99 x 7.87) (inch) Weight 11.5 Energy consumption Input voltage 100 – 240 Protection class (Electrical engineering) Production date: To be seen on the type label under «Code».
-
Page 171: Overview Stitch Patterns
Overview stitch patterns 18 Overview stitch patterns 18.1 Overview Stitch patterns Practical stitches Buttonholes Decorative stitches Natural stitches... - Page 172 Overview stitch patterns Cross stitches Satin stitches Ornamental stitches...
- Page 173 Overview stitch patterns Heirloom stitches Novelty...
-
Page 174: Overview Embroidery Motifs
Let your creativity run free. A vast selection of embroidery motifs is at your disposal. If one of the following pictograms is under the embroidery motif number, you can find additional information at www.bernina.com/specialeffects. Detached point Punchwork Design (motif) Hole embroidery... -
Page 175: Quilt Motifs
Overview stitch patterns Appliqué Puffy fonts CutWork Design (motif) Quilting PaintWork Design (motif) Trapunto CrystalWork Design (motif) Quilt motifs Embroidery motif Width x Embroidery motif Width x Height Height Colors Colors > mm > mm > inch > inch BD804 122 x 123 12499-06 101 x 101... -
Page 176: Ornaments
Overview stitch patterns Ornaments Embroidery motif Width x Embroidery motif Width x Height Height Colors Colors > mm > mm > inch > inch NB251 71 x 103 NB826-48 134 x 133 2.80 x 4.05 5.28 x 5.20 80090-06 83 x 37 21021-04 123 x 150 3.27 x 1.46... -
Page 177: Children
Overview stitch patterns Children Embroidery motif Width x Embroidery motif Width x Height Height Colors Colors > mm > mm > inch > inch BE790313 99 x 102 CK867 122 x 132 3.86 x 4.02 4.80 x 5.20 BE790309 87 x 149 BE790310 138 x 136 3.43 x 5.87... -
Page 178: Sports And Hobby
Overview stitch patterns Embroidery motif Width x Embroidery motif Width x Height Height Colors Colors > mm > mm > inch > inch NA592 114 x 51 NC009-48 18 x 94 4.49 x 2.00 0.70 x 3.70 NA597 56 x 52 2.21 x 2.05 Sports and hobby Embroidery motif... -
Page 179: Animals
Overview stitch patterns Embroidery motif Width x Embroidery motif Width x Height Height Colors Colors > mm > mm > inch > inch 12472-01 137 x 141 5.39 x 5.55 Animals Embroidery motif Width x Embroidery motif Width x Height Height Colors Colors... -
Page 180: Borders And Lace
Overview stitch patterns Borders and Lace Embroidery motif Width x Embroidery motif Width x Height Height Colors Colors > mm > mm > inch > inch 21021-25 33 x 71 12659-06 36 x 59 1.30 x 2.80 1.42 x 2.32 21002-21 21 x 151 FB436... -
Page 181: Designs With Special Effects
Overview stitch patterns Designs with special effects Embroidery motif Width x Embroidery motif Width x Height Height Colors Colors > mm > mm > inch > inch DW11 70 x 71 12448-09_ 121 x 161 2.76 x 2.80 4.80 x 6.30 21022-13_ 106 x 192 DW05... -
Page 182: Index
Index Index Embroidery test 125 Entering dealer data 57 Adjusting the hoop 51 Environmental Protection 11 Adjusting the presser position via the knee lifter of the Free Error messages 164 Hand System 35 Explanation of symbols 12 Adjusting the upper thread tension 47 Alphabets 100... - Page 183 Index Safety instructions 9 Saving a stitch pattern combination 70 Saving the service data 58 Select own settings 54 Selecting a stitch pattern 66 Selecting an embroidery motif 128 Selecting the language 56 Setting the display brightness 56 Setting the maximum sewing speed 47 Setting the securing stitches 47...
- Page 185 BERNINA International AG | CH-8266 Steckborn Switzerland | www.bernina.com | © Copyright by BERNINA International AG 1028855.10A.04 2019--09 EN...
Need help?
Do you have a question about the 540 and is the answer not in the manual?
Questions and answers