Table of Contents
Advertisement
Quick Links
E N
N IK K O
PO RTABLE AI R CO N DIT IO N ER ( L O CA L )
OPERATING INSTRUCTIONS
Read the instructions carefully before operating the appliance or carrying out maintenance work. Observe
all the safety instructions; failure to do so may lead to accidents and/or damage. Store these instructions in
a safe place for future reference.
V 05/23
Advertisement
Table of Contents

Related Manuals for Argo NIKKO


Summary of Contents for Argo NIKKO
- Page 1 N IK K O PO RTABLE AI R CO N DIT IO N ER ( L O CA L ) OPERATING INSTRUCTIONS Read the instructions carefully before operating the appliance or carrying out maintenance work. Observe all the safety instructions; failure to do so may lead to accidents and/or damage. Store these instructions in a safe place for future reference.
- Page 2 Appliance is filled with flammable Before installing and using the appliance, read the owner manual. gas R290. Before installing the appliance, Any repairs you need, contact the nearest read the installation manual. authorized Service Centre and strictly follow manufacturer’s Service Manual. THE REFRIGERANT R290 •...
- Page 3 GENERAL OPERATING AND SAFETY INSTRUCTIONS • This appliance is a local air conditioner designed for domestic use. • Only use this air-conditioner as described in this manual. • Ensure that the required voltage and frequency (220-240V~50Hz) match the available power source. •...
- Page 4 • Before moving or cleaning the device, ensure that it is unplugged from the socket. • Do not move the air conditioner while it is operating; first turn the appliance off, check for any condensate build-up and empty it if necessary. •...
- Page 5 In the event of a malfunction, contact the service centre directly. WARNING! • Do not expose the air conditioner to direct sunlight, as the colour of the materials may change; moreover, the appliance may overheat causing the protection mechanism to intervene and switch the appliance off. •...
-
Page 6: Description Of The Appliance
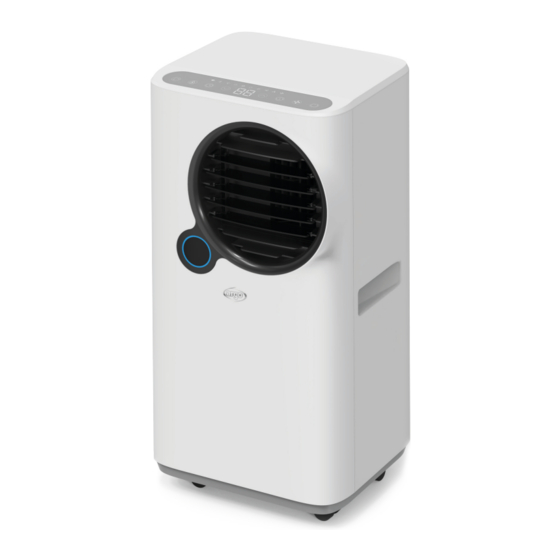
DESCRIPTION OF THE APPLIANCE 1. Control panel cooling mode) 2. Upper air inlet 10. Cable reel 3. Handle 11. Air filter 4. Wheel 12. Connection of exhaust hose 5. Vertical air louver 13. Filter of connection of exhaust hose 6. Horizontal air louver 14. -
Page 7: Appliance Start-Up
APPLIANCE START-UP Open the packaging and pull out the box. Remove the product and the other elements supplied (illustrated in the box below). HEATING TEMP TEMP WIFI °C/°F Fitting to apply Hose Terminal flat fitting Remote on the unit to which of expulsion to be placed between controller... - Page 8 USE WITH WINDOW UNIT KIT 1. To make the hole in the glass, it is also advisable to take the porthole kit accessory to the glazier (Fig. 1). 2. Insert the porthole into the window (Fig. 2). 3. Insert the circular connector for the porthole kit into the retractable hose and insert the retractable hose with the circular connector into the porthole without the cap (Fig.
-
Page 9: How To Use The Appliance
HOW TO USE THE APPLIANCE This appliance can be used for Cooling, Dehumidification and Ventilation. Before using the appliance, leave it in an upright position for at least two hours. Plug the power cord into an appropriate power outlet (220-240~V). Insert the batteries into the remote controller, observing the polarities. -
Page 10: Fan Mode (Fan)
3. FAN MODE (FAN) • Press the MODE button to select Ventilation until the corresponding icon appears. • In this mode, the fan speed can be adjusted. • The temperature cannot be adjusted. 4. AUTO MODE • Press the MODE button to select the AUTO operating mode, the icon lights up on the control panel. -
Page 11: Function Controls
FUNCTION CONTROLS BY REMOTE CONTROLLER How to insert batteries into the remote controller. Open the battery door on the back of the remote controller, slide to open the cover following the direction indicated by the arrow. Place the batteries in the remote controller, taking care to check the correct positioning of the polarities. - Page 12 FOR OPTIMAL WORKING OF THE REMOTE CONTROLLER, DIRECT THE TRANSMITTER HEAD TOWARDS THE RECEIVER LOCATED ON THE AIR CONDITIONER CONTROL BY REMOTE CONTROLLER 1. POWER button 2. HEATING MODE button (not active) 3. AUTO MODE button 4. SLEEP button 5. TEMP UP/DOWN buttons 6.
-
Page 13: Power Button
FUNCTION OF THE BUTTONS ON THE REMOTE CONTROLLER AND ON THE CONTROL PANEL (the numbers below refer to the control panel drawing) When the cable is connected to the power supply, the unit emits three beeps. Press this button to turn the unit on or off. The unit beeps. All the LEDs of the buttons light up on the control panel, and then turn off after a few seconds, while the LED of the POWER button remains on, but with a reduced intensity of brightness. - Page 14 By remote controller: On the remote controller, when this function is activated, the icon remains lit on the remote controller display. • To activate the On timer, press the button twice, 01 will be shown on the remote controller display. It is therefore possible, with the UP/DOWN buttons, to set the appliance on time up to 24 hours.
-
Page 15: Care And Maintenance
Problem Cause Solution Room temperature sensor failure. Contact a service centre. Failure of temperature sensor on the Contact a service centre. evaporator. Over temperature protection system Contact a service centre. Connect the PVC pipe to the condensate Alarm of full water tank drain hole CARE AND MAINTENANCE WARNING! - Page 16 TIPS FOR MAXIMIZING COMFORT AND MINIMIZING CONSUMPTION CHECK that: • the unit intake and delivery grilles are always free; • the air filters are always clean; a dirty filter will decrease the passage of air and reduce the unit’s performance; •...
- Page 17 SPECIALIST’S MANUAL Aptitude requirement for maintenance man (repairs. should be done only be specialists). • Any person who is involved with working on or breaking into a refrigerant circuit should hold a current valid certificate from an industry-accredited assessment authority, which authorises their competence to handle refrigerants safely in accordance with an industry recognised assessment specifìcation.
- Page 18 The following checks shall be applied to installations using flammable refrigerants: • The actual refrigerant charge is in accordance with the room size within which the refrigerant containing parts are installed; • The ventilation machinery and outlets are operating adequately and are not obstructed; •...
- Page 19 for use with most refrigerants but the use of detergents containing chiarine shall be avoided as the chiarine may react with the refrigerant and corrode the copper pipe-work. If a leak is suspected, all naked flames shall be removed/extinguished. If a leakage of refrigerant is found which requires brazing, all of the refrigerant shall be recovered from the system, or isolated (by means of shut off valves) in a part of the system remote from the leak.
- Page 20 • Labelling Equipment shall be labelled stating that it has been de-commissioned and emptied of refrigerant. The label shall be dated and signed. For appliances containing flammable refrigerants, ensure that there are labels on the equipment stating the equipment contains flammable refrigerant. •...
- Page 21 www.argoclima.com Argoclima assumes no responsibility for any errors or inaccuracies in the content of this manual and reserves the right to make to this, at any time and without notice, any changes deemed appropriate for any technical or commercial need. V 05/23...
Need help?
Do you have a question about the NIKKO and is the answer not in the manual?
Questions and answers