Table of Contents
Advertisement
Quick Links
S ING LE S PLI T A IR CO N DIT IO N ER S - R 3 2
U SER MANU AL an d INS TA L L ATIO N GU IDE
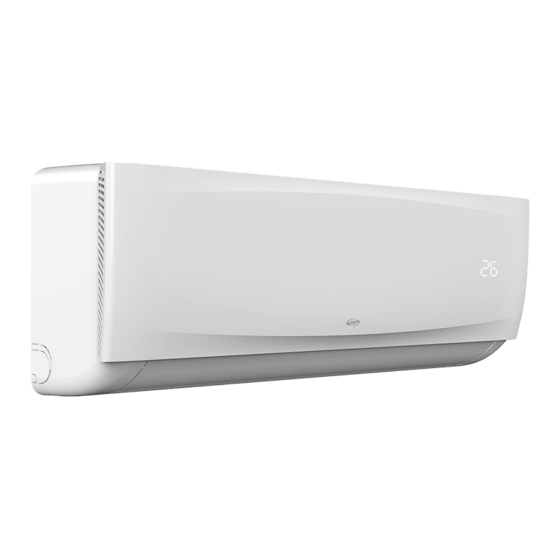
INDOOR UNIT
NEWAGE 9000 UI
NEWAGE 12000 UI
NEWAGE 18000 UI
Please read this manual carefully before installing and using the air conditioner, and retain for future
reference.
N E WA GE
V 11/22
OUTDOOR UNIT
NEWAGE 9000 UE
NEWAGE 12000 UE
NEWAGE 18000 UE
E N
Advertisement
Table of Contents

Related Manuals for Argo NEWAGE 9000 UI


Summary of Contents for Argo NEWAGE 9000 UI
- Page 1 S ING LE S PLI T A IR CO N DIT IO N ER S - R 3 2 U SER MANU AL an d INS TA L L ATIO N GU IDE INDOOR UNIT OUTDOOR UNIT NEWAGE 9000 UI NEWAGE 9000 UE NEWAGE 12000 UI NEWAGE 12000 UE...
-
Page 2: Table Of Contents
INDEX General warnings Safety precautions Notices for usage Description of parts Remote control guide WiFi guide (optional) Cleaning and care Troubleshooting Notices for the installation Indoor unit installation Outdoor unit installation Maintenance notes Warnings for the refrigeration system specialist REQUIREMENTS FOR INSTALLATION AND MAINTENANCE PERSONNEL All personnel who carry out installation and/or maintenance operations on the units must be equipped with PEF (European Refrigerators License) as required by the D.P.R. -
Page 3: General Warnings
GENERAL WARNINGS Appliance filled with flammable Before using the appliance, read the owner’s manual. gas R32. Before installing the appliance, Before repairing the appliance, read the read the installation manual. service manual. THE REFRIGERANT R32 • To realize the function of the air conditioner unit, a special refrigerant circulates in the system. The refrigerant is the fluoride R32 = GWP (Global warming potential). -
Page 4: Safety Precautions
SAFETY PRECAUTIONS WARNING • This appliance can be used by children aged from 8 years and above and persons with reduced physical, sensory or mental capabilities or lack of experience and knowledge if they have been given supervision or instruction concerning use of the appliance in a safe way and understand the hazards involved. - Page 5 be cut in time to prevent the occurrence of danger. • Don’t put hands or any objects into the air inlets or outlets. This may cause personal injury or damage to the unit. • Please note whether the installed stand is firm enough or not. If it is damaged, it may lead to the fall of the unit and cause the injury.
-
Page 6: Notices For Usage
INFORMATION FOR CORRECT DISPOSAL OF THE PRODUCT IN ACCORDANCE WITH THE EUROPEAN DIRECTIVE 2012/19/EU At the end of its working life this equipment must not be disposed of as an household waste. It must be taken to special local community waste collection centres or to a dealer providing this service. Disposing of electrical and electronic equipment separately avoids possible negative effects on the environment and human health deriving from an inappropriate disposal and enables its components to be recovered and recycled to obtain significant savings in energy and resources. -
Page 7: Description Of Parts
DESCRIPTION OF PARTS INDOOR UNIT Air inlet Emergency button Air inlet grille Panel Air filter Pipe protection ring Air louver Air outlet Air flap Remote controller OUTDOOR UNIT Air inlet Power cable Air outlet grille Connecting pipe Drain hose Uscita aria Air outlet Note: all the illustrations in this manual are for explanation purpose only. - Page 8 7. lf the remote controller is not to be used far a long period of time, remove the batteries first, lest the leakage from them may damage the remote controller. 8. Properly dispose the discarded batteries. INFORMATION FOR THE CORRECT DISPOSAL OF BATTERIES IN ACCORDANCE WITH EUROPEAN DIRECTIVE 2006/66/EC and MODIFICATIONS INTRODUCED BY DIRECTIVE 2013/56/EU Replace batteries when they are depleted.
- Page 9 3. SPEED BUTTON Press this button, you can select the fan speed as follows: Note: AUTO air speed is not available in FAN mode. 4. DISPLAY BUTTON It is possible to turn the remote control display on or off, while the unit is running, to extend the life of the batteries. 5.
- Page 10 turns off. The ventilation speed will automatically switch to the lowest level available to ensure maximum quiet operation during night rest. Note: press the MODE button or the ON/OFF button to cancel the SLEEP function setting. The SLEEP function cannot be activated in FAN mode. 12.
-
Page 11: Wifi Guide (Optional)
• Press the “ON/OFF” button again, the air-conditioner stops. DRY mode • Press the “MODE” button, select the drying operation mode. • By pressing the “ “ or “ “ you can set the temperature, the display changes as you touch the button. •... - Page 12 Once the control software is installed, enter the “Scanning Interface” (point 1, Fig.1) for downloading the Home Page. SCAN Function: by clicking “scan” and scanning the QR code on the right(Fig.2). After scanning the QR code, enter the activation code “6364d” (point 1, Fig.3) and click on activate (point 2, Fig.3) AcFreedom scan AcFreedom...
- Page 13 CONFIGURATION OF DEVICES After downloading and installing the app on your smartphone or tablet, you need to add the air conditioner as your new Wi-Fi device associated according to the following figure: Device List Add device Device List Add a new device to the WIFI network Air-conditioner WIFI name: XXXXX password:...
-
Page 14: Cleaning And Care
3. Remote control with wireless router Once the wireless router is connected to the Internet, activating the GPRS on the mobile terminal will enable the remote control of the devices. 1. The software provides help service through which the users may check the operational instructions of the software and other information. -
Page 15: Troubleshooting 1
Clean the air filter Use a vacuum cleaner or water to rinse the filter, and if the filter is very dirty (for example, with greasy dirt), clean it with warm water (below 45 °C) with mild detergent, and then put the filter in the shade to dry in the air. Mount the air filter Reinstall the dried filter in reverse order of removal, then cover and lock the panel. -
Page 16: Notices For The Installation 1
• The air conditioner itself does not have • Clean the air filter or activate the cleaning undesirable odor. If there is odor, it may function. The indoor unit blows out odor be due to accumulation of the odor in the environment. - Page 17 TABLE A - Minimum room area (m Charge amount (kg) ≤1.2 Floor location 14.5 16.6 19.3 24.8 27.8 34.3 37.8 41.5 45.4 49.4 53.6 Minimum room Window mounted 11.2 12.4 13.6 16.3 17.8 19.3 area (m Wall mounted Ceiling mounted Maintenance notes •...
- Page 18 • Keep leak detector in working state during the installation. • If R32 refrigerant leakage occurs during the installation, you shall immediately detect the concentration in indoor environment until it reaches a safe level. If refrigerant leakage affects the performance of the air conditioner, please immediately stop the operation, and the air conditioner must be vacuumed firstly and be returned to the maintenance station for processing.
- Page 19 • The minimum clearance between the air conditioner and the combustibles is 1.5 m. • The interconnection cord connect the indoor and outdoor units. You must first choose the right cable size before preparing it for connection. • Cable Types: •...
- Page 20 sufficient strength be securely fastened to the outdoor unit, to prevent falling that could cause personal injury or death as well as property loss. GROUNDING REQUIREMENTS • The air conditioner is the class I electrical appliance and must ensure a reliable grounding. •...
- Page 21 WALL-THROUGH HOLE 1. Make a hole with an electric hammer or a water drill at the predetermined position on the wall for piping, which shall slant outwardly by 5°-10°. Pipe protection 2. To protect the piping and the cables from being damaged running through ring the wall, and from the rodents that may inhabit in the hollow wall, a pipe protecting ring shall be installed and sealed with putty.
- Page 22 FIXING THE INDOOR UNIT 1. Hang the indoor unit on the peg board, and move the unit from left to right to ensure that the hook is properly positioned in the peg board. 2. Push toward the lower left side and the upper right side of the unit toward the peg board, until the hook is embedded in the slot and makes a “click”...
-
Page 23: Outdoor Unit Installation
INSTALLATION OF OUTDOOR UNIT DIMENSION DRAWING OF OUTDOOR UNIT INSTALLATION Space to the obstruction Air in side Space to the obstruction Space to the obstruction Air out side Installation outdoor unit bolt Outdoor unit size oh shape A (mm) B (mm) W1(W2)*H*D (mm) 665(710)x420x280 600(710)x500x240... - Page 24 INSTALL THE CONNECTION PIPE Connect the Outdoor Unit with Connecting Pipe: Aim the counter-bore of the connecting Taper nut Connection Stop valve pipe pipe at the stop valve, and tighten the Taper nut with fingers. Then tighten the Taper nut with a torque wrench.
- Page 25 1. To prevent air leakage and spilling tighten all connecting nut of all Pressure gauge Compound meter flare tubes. -76 cmHg Manifold valve 2. Connect the stop valve, charge hose, manifold valve, and vacuum Handle Lo Handle Hi pump. Charge hose 3.
-
Page 26: Maintenance Notes
MAINTENANCE NOTES ATTENTION: for maintenance or scrap, please contact authorized service centers. Maintenance by unqualified person may cause dangers. APPENDICES Connecting pipe diameter Additional refrigerant Piping configuration: Liquid pipe (mm) Gas pipe (mm) (g/m) Ф6.35 Ф9.52 PROCEDURE FOR EXTENDING THE PIPING Note: improper extension of piping is the main cause of refrigerant leaks. -
Page 27: Warnings For The Refrigeration System Specialist
WARNINGS FOR THE REFRIGERATION SYSTEM SPECIALIST Here are warnings and safety instructions for the maintenance of systems containing flammable refrigerant (repairs should only be carried out by specialists). 1. Any person involved in the work or in the interruption of a refrigeration circuit must be equipped with PEF (European Refrigerators License) as required by the D.P.R. - Page 28 the correct specifications. The manufacturer’s maintenance and service guidelines should always be followed. If in doubt, consult the manufacturer’s technical department for assistance. 7. Repairs on sealed components. During repairs to sealed components, all electrical supplies must be disconnected from the equipment being worked on before removing the sealed covers, etc. If it is absolutely necessary to have an electrical power supply to the equipment during maintenance, then a leak detection device must be placed at the most critical point to warn of a potentially dangerous situation.
- Page 29 If compressors or compressor oils need to be removed, make sure they have been evacuated to an acceptable level to ensure that flammable refrigerant does not remain within the lubricant. The evacuation process must be carried out before returning the compressor to suppliers. To speed up this process, only electrical heating of the compressor body must be used.
- Page 30 REGULATION (EU) No. 517/2014 - F-GAS The unit contains R32, a fluorinated greenhouse gas with global warming potential (GWP) = 675. Do not release R32 into the atmosphere. NEWAGE 9000 UE - Kg. 0,51 = 0,34 Tonn CO equiv. NEWAGE 12000 UE - Kg. 0,55 = 0,37 Tonn CO equiv.
Need help?
Do you have a question about the NEWAGE 9000 UI and is the answer not in the manual?
Questions and answers