Advertisement
Quick Links
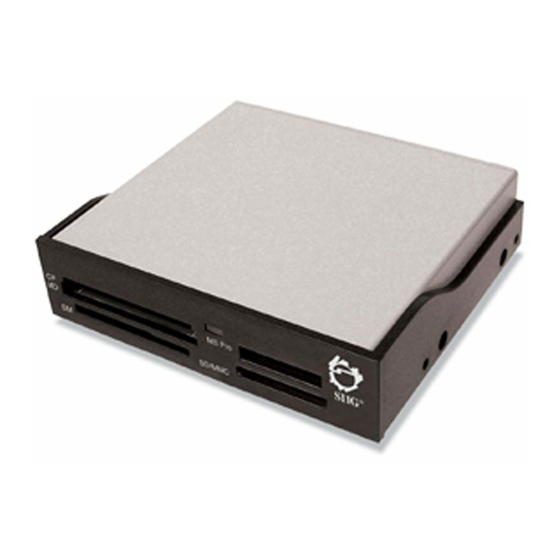
Introducing the Reader/Writer+Floppy
The USB 2.0 Bay Reader/Writer+Floppy easily adds front-
accessible multi-format memory card reader/writer
and floppy drive.
Features and Benefits
•
All-in-one drive bay design provides easy access
to universal memory card reader/writer and a
floppy drive
•
Supports SDHC and CF v4.0 (HSCF with Ultra
DMA mode)
•
Direct access port for Micro SD and M2 cards, no
adapter needed
Flash memory card interface
•
Compliant with USB specification rev. 2.0
•
Works with CompactFlash (CF) Type I & Type II,
Microdrive, SecureDigital (SD), MultimediaCard
(MMC), xD and Memory Stick memory cards
Note: USB 2.0 devices are limited to USB 1.1
speeds when they are connected to a USB 1.1 host
adapter.
Floppy drive interface:
•
Supports 1.6MB and 2.0MB floppy diskettes
04-0520A
USB 2.0 Bay Reader/
Writer + Floppy
Quick Installation Guide
1
Advertisement

Subscribe to Our Youtube Channel
Summary of Contents for SIIG USB 2.0 Bay Reader/Writer+Floppy
- Page 1 USB 2.0 Bay Reader/ Writer + Floppy Quick Installation Guide Introducing the Reader/Writer+Floppy The USB 2.0 Bay Reader/Writer+Floppy easily adds front- accessible multi-format memory card reader/writer and floppy drive. Features and Benefits • All-in-one drive bay design provides easy access...
- Page 2 4-pin power connector from system power supply ® • Windows 2000 / XP (32-/64-bit) / Server 2003 (32-/64-bit) / Vista (32-/64-bit) Package Contents • USB 2.0 Bay Reader/Writer+Floppy • 5.25" mounting rack and mounting kit • USB converter cable (4-pin/TypeA) • Quick Installation Guide Layout...
- Page 3 Floppy drive power connector Floppy drive connector Figure 2. Rear Panel 5.25" Mounting Rack Assembly Important: Use the Mounting Rack Assembly only when installing the hub into a 5.25" drive bay. Figure 3: Mounting Rack Assembly...
- Page 4 4-pin USB Connector Figure 4. 4-pin USB Connector Note: The 4-pin USB Connector is keyed to plug into the 4-pin row of a USB Pin-out Header. Make sure that the Red wire is plugged into the +5VDC pin on the header. USB Pin-out Header On most motherboards, the internal USB Pin-out Header consists of 9 pins arranged in 2 rows;...
- Page 5 USB Converter Cable The USB Converter Cable is needed if you plan to connect the Reader/Writer to a Type A USB port instead of a USB pin-out header. Match up the wires by color when connecting the Reader/Writer's 4-pin USB Connector to the USB Converter Cable's 4-pin header, then plug the other end into a Type A USB port.
- Page 6 Installing the Reader/Writer+Floppy Important: In order for the Reader/Writer+Floppy to work properly, the driver of your existing USB 2.0 host adapter must be installed properly. Turn OFF the power to your computer and all connected peripheral devices. Unplug the power cord from the back of the computer.
- Page 7 Figure 7. Connecting the Power Cable Connect the floppy drive ribbon cable (not included) to the Reader/Writer+Floppy's floppy drive connector. Make sure the stripe on the cable is on the side opposite the power connector, see Figure 8 below. Note: In order for the floppy drive to work, the 4- pin USB connector must be connected and operating properly.
- Page 8 Note: If your system has an internal Type-A USB port you may choose to connect the Reader/Writer+Floppy's 4-pin USB connector via the included 4-pin header to USB adapter. Refer to Figure 6, on page 5 for more information. Replace the computer cover and reconnect the power cord.
- Page 9 Inserting Memory Cards and Floppy Disk For CompactFlash, MicroSD, M2, IBM MicroDrive, Memory Stick, MultiMediaCard and SecureDigital memory cards, insert with the top label facing up. For Floppy disks, insert with the top label facing up. Accessing Memory Cards When the Reader/Writer+Floppy is successfully installed, three Removable Disk icons appear in My Computer.
- Page 10 Blank Page...
-
Page 11: Technical Support And Warranty
Step 1: Submit your RMA request. Go to www.siig.com, click Support, then RMA to submit a request to SIIG RMA. If the product is determined to be defective, an RMA number will be issued. Step 2: After obtaining an RMA number, ship the product. - Page 12 Fremont, CA 94538-3152, USA Ph: 510-657-8688 USB 2.0 Bay Reader/Writer+Floppy is a trademark of SIIG, Inc. SIIG and the SIIG logo are registered trademarks of SIIG, Inc. Microsoft, Windows and Windows Vista are either registered trademarks or trademarks of Microsoft Corporation in the United States and/or other countries. Pentium is a registered trademark of Intel Corporation.


Need help?
Do you have a question about the USB 2.0 Bay Reader/Writer+Floppy and is the answer not in the manual?
Questions and answers