dbx DriveRack 240 User Manual

dbx DriveRack 240 User Manual

Complete equalization & loudspeaker management system
Table of Contents

Advertisement

Quick Links

®
Complete Equalization & Loudspeaker Management System
240
241
®
User Manual

Advertisement

Table of Contents
loading
Need help?

Need help?

Do you have a question about the DriveRack 240 and is the answer not in the manual?

Questions and answers

Summary of Contents for dbx DriveRack 240

  • Page 1 ® Complete Equalization & Loudspeaker Management System ® User Manual...
  • Page 2 IMPORTANT SAFETY INSTRUCTIONS WARNING FOR YOUR PROTECTION C A U T I O N PLEASE READ THE FOLLOWING: KEEP THESE INSTRUCTIONS R I S K O F E L E C T R I C S H O C K D O N O T O P E N A T T E N T I O N : HEED ALL WARNINGS...
  • Page 3 • this device may not cause harmful inter- February 8, 2001 ference, and • this device must accept any interference European Contact: Your Local dbx Sales and Service Office or received, including interference that may Harman Music Group 8760 South Sandy Parkway Sandy, Utah 84070 USA cause undesired operation.
  • Page 4: Table Of Contents

    ™ DriveRack Table of Contents Introduction 4.6 Post-Crossover Parametric EQ .......26 4.7 Compressor/Limiter (Dynamics)....26 0.1 Defining the 240/241DriveRack™ ....ii 4.8 Speaker Alignment Delay ......28 0.2 Service Contact Info........iii 4.9 Output .............28 0.3 Warranty............iv 0.4 Quick Start ............v Section 5 - Utilities 5.1 Security Levels ..........30 Section 1 - Getting Started 5.2 Security Passwords .........31...
  • Page 5 ™ DriveRack INTRODUCTION INTRO CUSTOMER SERVICE INFO Defining the DriveRack WARRANTY INFO ®...
  • Page 6: Defining The 240/241Driverack

    DriveRack™. 0.1 Defining the 240/241 DriveRack™ System The dbx 240/241 DriveRack™ is the most effective way to manage all aspects of post mixer pro- cessing and signal routing. The 240/241 DriveRack essentially becomes the only device that you will need between the mixer and the power amps.
  • Page 7: Service Contact Info

    After expiration of the warranty, a reasonable charge will be made for parts, labor, and packing if you choose to use the factory service facility. In all cases, you are responsible for transportation charges to the factory. dbx will pay return shipping if the unit is still under war- ranty.
  • Page 8: Warranty

    In no event shall dbx or its dealers be liable for special or con- sequential damages or from any delay in the performance of this warranty due to causes beyond their control.
  • Page 9: Quick Start

    ™ DriveRack Section i Introduction 0.4 Quick Start For those of you that wish to jump right in, the following information has been provided to act as a quick start guide for optimizing performance of the 240/241 DriveRack units. Signal Path Block Diagram The following diagram shows the logical and intuitive signal path of the input, effect modules, and output of the 240 and 241 DriveRack units.
  • Page 10 ™ DriveRack Section i Introduction Front Panel Navigation of the 240 DriveRack • Once all of the connections have been made and the unit is powered up you can navigate through the entire signal path of the 240 DriveRack from the front panel of the unit. The display provides you with a clear and concise overview of each aspect of the signal path from the input to the output section.
  • Page 11 Section 1 ™ DriveRack Getting Started ®...
  • Page 12: Section 1 - Getting Started

    ™ DriveRack Section 1 Getting Started 1.1 Rear Panel Connections (240)
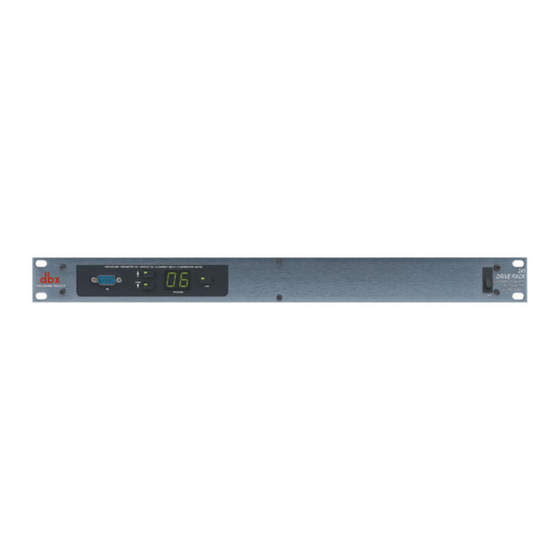
 IEC Power Cord Receptacle The 240 comes with an universal power supply that will accept voltages ranging from 100V- 240V at frequencies from 50Hz-60Hz. An IEC cord is included. Switch Closure Connection This Euroblock-type connector is used to interface the 240 with wall-mount zone control sys- tem switches.
  • Page 13: Rear Panel Connections (241)

    The four output mute buttons are used for independently muting each output of the 240 DriveRack™. Power Switch Turns the 240 DriveRack™ on and off. Note: dbx Professional Products recommends that power amplifiers connected to the DriveRack™, should be powered down prior to cycling the power on the DriveRack™.
  • Page 14: Front Panel (241)

    ™ DriveRack Section 1 Getting Started Outputs 1-4 The output section of the 240 DriveRack™ offers four electronically balanced XLR and two Euroblock connectors. Note: The XLRs are wired in parallel with the Euroblock connectors. Inputs 1-2 The input section of the 240 DriveRack™ offers two electronically balanced XLR and Euroblock connectors.
  • Page 15: Section 2 - Editing Functions

    Section 2 ™ DriveRack Editing Functions EDITING FUNCTIONS ®...
  • Page 16: Basic Navigation Modes

    ™ DriveRack Section 2 Editing Functions Editing The 240 DriveRack™ has been carefully designed and engineered to ensure that all aspects of operation are intuitive and logical. Simply stated, the 240 DriveRack™ operating system was Functions designed with user’s best interest in mind. Editing the 240 DriveRack™ can be done by utiliz- ing key functions and tools.
  • Page 17 ™ DriveRack Section 2 Editing Functions 2.2 FX Button Array Overview (cont.) PREVIOUS PAGE - Moves to the previous page in the currently selected effect menu. NEXT PAGE - Moves to the next page in the currently selected effect menu. XOVER - Selects the Crossover menu.
  • Page 18: Navigating The Pre-Eq Section

    ™ DriveRack Section 2 Editing Functions 2.3 Navigating the Pre-crossover EQ Section To edit the parameters of the EQs used in a selected program, simply use the following procedure. From program mode, press the Pre-EQ button to reach the EQ module to be edited. Once you have reached the desired EQ, Successive presses of the Pre-EQ button will move through each channel (input).
  • Page 19: Navigating The Crossover Sections

    ™ DriveRack Section 2 Editing Functions 2.5 Navigating the XOVER Sections To edit the parameters of the Crossover used in a selected program, simply use the following procedure. From program mode, press the X-OVER button. Once you have reached the Crossover module, Navigate through the Pages of the selected Crossover module by pressing the "Next Page"...
  • Page 20: Navigating The Dynamics Section

    ™ DriveRack Section 2 Editing Functions 2.7 Navigating the Dynamics Section To edit the parameters of the Dynamics module used in a selected program, simply use the following procedure. From program mode, press the X-OVER button to move to the Dynamics module. Once you have reached the Crossover module, successive presses of DYNAMICS button will move through each channel that utilizes a Dynamics module.
  • Page 21 Section 3 ™ DriveRack SOFTWARE CONFIGURATION FUNCTIONS ®...
  • Page 22: Section 3 - Configuring The Driverack

    ™ DriveRack Section 3 Configuring the DriveRack™ The Configuring section of the 240 and 241 DriveRack™ units will be your key to successful navigation of the configuration functions of the DriveRack™. The following information pro- vides, descriptions about program functions and in depth configuration options of the 240 and 241 DriveRack™...
  • Page 23: Editing Factory Programs

    ™ DriveRack Section 3 Configuring the DriveRack™ Navigation Modes Once you have selected a program that utilizes a configuration that accommodates your appli- cation, the DriveRack™ offers instant access to edit effect types within the selected configura- tion. To instantly access an effect module, simply press the corresponding button in the button array for the desired module.
  • Page 24: Saving Factory Program Changes

    ™ DriveRack Section 3 Configuring the DriveRack™ 3.4 Saving Factory Programs Changes Once you are satisfied with the changes that have been made to a factory or user program, the DriveRack™ allows you to save these changes to the program as a custom USER program by simply pressing the STORE button and the display will appear something like this: NAME: 2Way w/ PEq/GEq...
  • Page 25: Creating A User Configuration

    ™ DriveRack Section 3 Configuring the DriveRack™ 3.5 Creating a User Configuration User Configuration creation is an ideal feature available in the DriveRack™ line. Even with the versatility of the Factory configurations within the DriveRack™, there may be an application that requires a unique “custom”...
  • Page 26 ™ DriveRack Section 3 Configuring the DriveRack™ the DATA wheel will move you to the Linked module selection. When effect modules are linked, any changes that you make to any parameter, will be made to the same effect in the other linked channels. For example, if a change is made to the delay time in the linked post crossover delay module, the change will take place in all other linked(up to four) output channel delay modules.
  • Page 27 ™ DriveRack Section 3 Configuring the DriveRack™ and rotating (to change values), the DATA wheel. • If Custom Post-effects linking is selected, depending on the current configuration, you will be allowed to link post effects to specific outputs. The following illustration shows the post effects linking, utilizing a 2X4 crossover: PEQ U 1-2 PEQ U...
  • Page 28: Saving Configuration Changes

    ™ DriveRack Section 3 Configuring the DriveRack™ Press DATA wheel to load • Upon pressing the DATA wheel, your new custom configuration will be loaded into the currently selected program. You must save the program to retain configuration changes before moving to the next program, or turning the power off.
  • Page 29: Section 4 - Detailed Parameters

    Section 4 ™ DriveRack PARAMETERS DETAILED PARAMETERS ®...
  • Page 30: Input Routing

    ™ DriveRack Section 4 Section 4 Detailed Parameters The DriveRack™ units (240 and 241) offer complete editing flexibility, by offering in-depth con- trol over every parameter within each effect module. The following section will provide you with descriptions and explanations of all parameters within the DriveRack™ units. 4.1 Input Routing The signal routing begins at the INPUT ROUTING block of the DriveRack™...
  • Page 31: Delay (Pre-Crossover)

    ™ DriveRack Section 4 Detailed Parameters The following figure shows the constant Q parametric filter. Flatten/Restore This parameter either flattens or restores all bands to the last saved settings. Band 1 Frequency 20 to 20kHz (Low Shelf) Selects the frequency of the low pass shelf parametric EQ. Slope 1 3-12dB/Octave Sets the slope of the low shelf parametric EQ.
  • Page 32: Crossovers

    ™ DriveRack Section 4 Section 4 Detailed Parameters Units - MilliSeconds, Feet or Meters Selects the unit of measurement for the delay. Length Selects the amount of delay. Delay length will correspond directly with the selected unit of measurement. Max Delay lengths are: 1.0 second, 1127 feet or 343 meters. Adjustments are in approximately 20 micro-second increments.
  • Page 33 ™ DriveRack Section 4 Detailed Parameters 4.5.2 LINKED STEREO FILTER Filter Type 1 - Wire, Lowpass, Highpass and Bandpass Selects the desired filter type. Lowpass 1 - 20Hz to 20kHz Selects the desired Lowpass crossover frequency. Highpass 1 - 20Hz to 20kHz Selects the desired Highpass crossover frequency.
  • Page 34 ™ DriveRack Section 4 Section 4 Detailed Parameters 4.5.4 3-BAND CROSSOVERS - 1X3 Low Frequency rolloff 1 - 20Hz to 20kHz Selects the desired Lowpass crossover frequency. High Frequency rolloff 1 - 20Hz to 20kHz Selects the desired Highpass crossover frequency. Type 1 - Butterworth (BW), Bessel and Linkwitz-Riley(L-R) Selects the desired cross-over filter type.
  • Page 35 ™ DriveRack Section 4 Detailed Parameters High Frequency rolloff 1 - 20Hz to 20kHz Selects the desired Highpass crossover frequency. Type 1 - Butterworth (BW), Bessel and Linkwitz-Riley(L-R) Selects the desired crossover filter type. Low Slope 1 - 6-24dB/Octave (BW, Bessel) 12-24dB/Octave (L-R) Sets the Lowpass slope of the crossover filter.
  • Page 36: Post-Crossover Parametric Eq

    ™ DriveRack Section 4 Section 4 Detailed Parameters Type 4 - Butterworth (BW), Bessel (BS) and Linkwitz-Riley(L-R) Selects the desired crossover filter type. Low Slope 4 - 6-24dB/Octave (BW, Bessel) 12-24dB/Octave (L-R) Sets the Lowpass slope of the crossover filter. High Slope 4 - 6-24dB/Octave (BW, Bessel) 12-24dB/Octave (L-R) Sets the Highpass slope of the crossover filter.
  • Page 37 ™ DriveRack Section 4 Detailed Parameters Dynamics On/Off Turns the compressor/limiter module on and off. Dynamics Select Compressor/Limiter When set to “comp,” the compressor is active. When set to “Lim,” the limiter is active. OverEasy Off to 10 There are ten levels of OverEasy® that can be used for the limiters. The point when the com- pressor starts to compress is the "knee."...
  • Page 38: Speaker Alignment Delay

    ™ DriveRack Section 4 Section 4 Detailed Parameters Ratio 1.0 to Inf:1 Ratio is the amount the 240 and 241 DriveRack™ units reduce the signal level of the sound that is above the threshold. A 2:1 ratio means that if the incoming signal is 2dB over the threshold the 240 and 241 DriveRack™...
  • Page 39: Section 5 - Utilities

    Section 6 ™ DriveRack Utilities UTILITIES SECTION ®...
  • Page 40: Security Levels

    ™ DriveRack Section 5 Utilities The Utility section of the 240 and 241 DriveRack™ units, contains many important functions. The Utility section gives you the ability to perform several key operational functions to the DriveRack™ including: Security settings, Power-up features, Program list organization and Display contrast settings.
  • Page 41: Security Passwords

    ™ DriveRack Section 5 Utilities 5.2 Security Passwords Once security levels have been assigned to the various modules and functions, you can now proceed to set your operating security password. This Password (High or Med) will prevent any unwanted users from manipulating operating parameters and functions of mod- ules within the DriveRack™...
  • Page 42: Program Change/Program List

    ™ DriveRack Section 5 Utilities • From Program mode, press the UTILITY button and move to the security page that appears as follows: Set Clearance • If you wish to change the security level clearance at this point, rotate the DATA wheel to select either the Medium or High level of clearance and the screen will appear as follows: Set Clearance...
  • Page 43: Contrast Adjustment

    ™ DriveRack Section 5 Utilities From Program mode, press the UTILITY button and use the PREV PG and NEXT PG but- tons to move to the page that appears something like this: Prg Chg Normal List Size • Note that the underscore indicates the currently selected parameter for editing. To select parameters to edit from the current page, simply press the DATA wheel until the underscore is under the parameter that you wish to edit.
  • Page 44: Power-Up (Mutes/Saved)

    ™ DriveRack Section 5 Utilities Contrast PUP Mute • Select the Contrast adjustment by pressing the DATA wheel until the con- trast percentage is selected. Once the contrast has been selected, proceed to rotate the DATA wheel until the desired contrast has been established. To exit, simply press the PROGRAM/CONFIG button.
  • Page 45: Switch Closure Setup

    ™ DriveRack Section 5 Utilities To access and edit the Load Stored option of the unit, use the following procedure. • From Program mode, press the UTILITY button and use the PREV PG and NEXT PG button to move to the page that appears as follows: Load Stored •...
  • Page 46 ™ DriveRack Section 5 Utilities • There are several options for assigning functionality to these selected switches and are as follows: SYSTEM MUTE: Mutes or unmutes all outputs with sequential press- es. PROGRAM UP: Advances up and loads one program at a time each time it is pressed.
  • Page 47 Section 6 ™ DriveRack DriveWare ®...
  • Page 48: Driveware Installation

    RS232 COMM port must be turned off. INSTALL • Install the DriveRack™ GUI interface from either the dbx Professional Products website at: www.dbxpro.com or from the CD ROM onto your your PC or laptop. • Once the software is downloaded or CD is loaded, simply double click on the file named: DriveRack™...
  • Page 49 ™ DriveRack SECTION 6 GUI Install The utility menus will appear as follows: • To customize the mode of operation to best suit your needs, it is recommended that at this point, you set your desired preferences in the preference folder, which can be accessed in the file menu and will appear as follows: ®...
  • Page 50: Cable Specs

    ™ DriveRack SECTION 6 GUI Install Note: The Baud rate must be set to 38400. GUI Recommended Cable Specifications: PC GUI Interface - DB-9 female-to-female nul modem cable. (10 feet) ® DriveRack™ User Manual...
  • Page 51: Section 7 - Application Guide

    Section 7 ™ DriveRack APPLICATION GUIDE ®...
  • Page 52: 2-Way Foh

    ™ DriveRack Section 7 Application Guide This Application guide section is provided to offer suggested installation applications of the DriveRack™ units that will allow you to optimize peak performance of the units. Note that the six included applications represent the extensive flexibility of the DriveRack™ units. These applications can be used verbatim, or as sample reference guide templates for designing count- less audio applications.
  • Page 53: 2X4 Delay Cabinets

    ™ DriveRack Section 7 Application Guide 7.2- 2X4 Delay Cabinets Hardware Note Make sure that all outputs are muted on the DriveRack™ prior to adding power to any devices in the signal path (pre and post DriveRack™). Connect the outputs from the mixer to the inputs of the DriveRack™. 2.
  • Page 54: L-C-R W/Sub

    ™ DriveRack Section 7 Application Guide 7.3 L-C-R w/Sub Hardware Note Make sure that all outputs are muted on the DriveRack™ prior to adding power to any devices in the signal path (pre and post DriveRack™). Connect the outputs from the mixer to the inputs of the DriveRack™. 2.
  • Page 55: Multi-Zone Controller

    ™ DriveRack Section 7 Application Guide 7.4 - Multi-Zone Controller Hardware Note Make sure that all outputs are muted on the DriveRack™ prior to adding power to any devices in the signal path (pre and post DriveRack™). 1. Connect the outputs from the mixer to the inputs of the DriveRack™. 2.
  • Page 56: Time Delay

    ™ DriveRack Section 7 Application Guide 7.5 Time Delay (Delay Stacks) Note Make sure that all outputs are muted on the DriveRack™ prior to adding power to any devices in the signal path (pre and post DriveRack™). Connect the outputs from the mixer to the inputs of the DriveRack™. 2.
  • Page 57: Programmable Insert

    ™ DriveRack Section 7 Application Guide 7.6 - Programmable Insert EQ Note Make sure that all outputs are muted on the DriveRack™ prior to adding power to any devices in the signal path (pre and post DriveRack™). Connect the send of the channel or output to the input of the 240/241. 2.
  • Page 58: Single Room Multi-Zone

    ™ DriveRack Section 7 Application Guide 7.7 - Single Room Multi-Zone Hardware Make sure that all outputs are muted on the DriveRack™ prior to adding power to any Note devices in the signal path (pre and post DriveRack™). 1. Connect the outputs from the mixer to the inputs of the DriveRack™. 2.
  • Page 59: Appendix

    Appendix ™ DriveRack ®...
  • Page 60: Factory Reset

    ™ DriveRack Appendix A A.1 Factory Reset In the event that a reset is required, the 240/241 DriveRack™ units offer you the option of performing a “Soft” or “Hard” reset. The Soft Reset resets all operating parameters except user programs. The Hard Reset Procedure will reset all pro- grammable information back to the factory defaults.
  • Page 61: Flash Downloads

    ™ DriveRack Appendix A A.3 Flash Downloads The 240 and 241 DriveRack™ units have the ability to update their operating systems (OS) with the latest version avail- able via the Internet. In order to perform a flash download your PC must be able to receive/transmit information through the RS-232 connector.
  • Page 62: Specifications

    30Ω Max Output Level: +25.5 dBu into 1kΩ +22dBu into 600Ω System Performance Type: dbx Type IV™ Conversion System Dynamic Range line: >105 dB unweighted, 108 dB A-weighted Type IV™ dynamic range: 120 dB with transient material, A-weighted, 22kHz BW...
  • Page 63 30Ω Max Output Level: +25.5 dBu into 1kΩ +22dBu into 600Ω System Performance Type: dbx Type IV™ Conversion System Dynamic Range line: >105 dB unweighted, 108 dB A-weighted Type IV™ dynamic range: 120 dB with transient material, A-weighted, 22kHz BW...
  • Page 64 ™ DriveRack Appendix A Word length: 24 bits Latency: 74.9 samples typical THD + Noise: 0.005% typical at +4dBu, 1kHz, 0dB input gain Frequency Response: 20Hz- 20kHz, +/-0.5dB Interchannel Crosstalk: <-100dB at 1kHz Functions: Pre EQ Type: One 31-band Graphic EQ per input channel, or 9 band Parametric EQ per input channel Both inputs linkable Range:...
  • Page 65: Crossover Diagrams

    ™ DriveRack Appendix A A.6 Crossover Diagrams Wire: Filters: Crossovers: Linked Sub-Sub 2X3(2-band) 2X4(2-band) 2X4 w/sub (3-band) ® DriveRack™ User Manual...
  • Page 66: Gain Jumper Warning

    ™ DriveRack Appendix A A.7 Gain Level Jumpers CAUTION: These servicing instructions are for use by qualified service personnel only. To reduce the risk of electric shock, do not perform any servicing other than that contained in the operating instructions unless you are qualified to do so.
  • Page 67: Input And Output Section Diagrams

    ™ DriveRack Appendix A A.8 Input and Output Diagrams XLR 1 Input 1 Gain DSP Input 1 Euroblock Input 2 Gain Input 1 Gain XLR 2 DSP Input 2 Input 2 Gain Euroblock Limiter Level Detect ® DriveRack™ User Manual...
  • Page 68 ™ DriveRack Appendix A USER NOTES: ® DriveRack™ User Manual...
  • Page 69 ® 8760 South Sandy Parkway • Sandy, Utah 84070 Phone: (801) 568-7660 • Fax (801) 568-7662 Int’l Fax: (801) 568-7583 Questions or comments? E-mail us at: customer@dbxpro.com or visit our World Wide Web home page at: www.dbxpro.com A Harman International Company 18-6386-A...

This manual is also suitable for:

Driverack 241

Table of Contents