Table of Contents
Advertisement
Advertisement
Table of Contents

Related Manuals for dbx DriveRack VENU 360


Summary of Contents for dbx DriveRack VENU 360
- Page 1 Owner’s Manual...
- Page 2 5. The foregoing is in lieu of all other warranties, expressed or implied, and dbx neither assumes nor authorizes any person to assume on its behalf any obligation or liability in connection with the sale of this product. In no event shall dbx or its dealers be liable for special or consequential damages or from any delay in the performance of this warranty due to causes beyond their control.
-
Page 3: Table Of Contents
Table of Contents Overview �������������������������������������������������������������������������������������������� 2 Noise Gate (GAT) Module �����������������������������������������������������������������������������������71 Introduction �����������������������������������������������������������������������������������������������������������������2 Parametric EQ (PEQ) Modules �������������������������������������������������������������������������� 73 Features �����������������������������������������������������������������������������������������������������������������������3 AutoEQ (AEQ) Module ����������������������������������������������������������������������������������������75 Subharmonic Synth (SUB) Module ������������������������������������������������������������������ 77 Installation ���������������������������������������������������������������������������������������� 4 Crossover Module �������������������������������������������������������������������������������������������������� 79 Installation Recommendations �������������������������������������������������������������������������������4 Limiter (LIM) Module ���������������������������������������������������������������������������������������������81 Making Connections ������������������������������������������������������������������������������������������������4 RTA �����������������������������������������������������������������������������������������������������84... -
Page 4: Overview
Use the VENU360 control app to connect to the ever-growing online database, where you can instantly download and apply the latest tunings from JBL , Crown , dbx, and more. ® ® Thanks for choosing dbx. We hope the VENU360 proves to be an invaluable tool for your loudspeaker processing needs. -
Page 5: Features �����������������������������������������������������������������������������������������������������������������������3 Autoeq (Aeq) Module
Features • Up To 5X6 Routing With 3X6 Signal Processing • 24-Bit A/D & D/A Converters • dbx Type IV™ Conversion System • 48 or 96kHz, 32-Bit Floating-Point Processing • Sample Rate Conversion • Setup Wizard For Easy System Configuration •... -
Page 6: Installation
3� 4� If you plan to calibrate the system using the built-in Wizards, connect the optional dbx RTA-M measurement microphone to the front-panel RTA Mic Input using a balanced microphone cable of suitable length and place it in a microphone stand. -
Page 7: Network Connections
Network Connections To connect directly to a computer: Download and install the free DriveRack VENU360 1� Direct Computer Connection control app from the iTunes Store, the Android ® ® Market, or dbxpro.com (for Mac and PC). DriveRack VENU360 Connect a crossover CAT5, CAT5e, or CAT6 Ethernet 2�... - Page 8 To connect to a wired network switch or router: Wired Network Switch Connection 1� Download and install the free DriveRack VENU360 control app from the iTunes Store, the Android ® ® DriveRack VENU360 DriveRack VENU360 Market, or dbxpro.com. 2� Connect a straight-through CAT5, CAT5e or CAT6 Ethernet cable (sold separately) to the Ethernet port on the VENU360.
- Page 9 To connect to a Wi-Fi network router: Wi-Fi Network Router Connection 1� Download and install the free DriveRack VENU360 control app from the iTunes Store, the Android ® ® DriveRack VENU360 DriveRack VENU360 Market, or dbxpro.com. Connect a straight-through CAT5, CAT5e, or CAT6 2�...
-
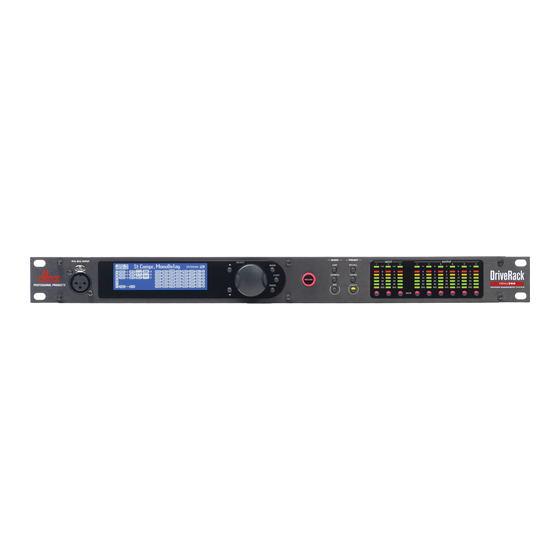
Page 10: User Interface & Connectors
1. RTA MIC INPUT Connect the dbx RTA-M measurement microphone (sold separately) to this balanced XLR input jack for easy calibration of the sound system using the built-in Wizards or for use with the RTA. This jack supplies +48V phantom power. - Page 11 The dbx Type IV™ conversion system built into the VENU360 will clamp down on excessively loud input signals to prevent the A/D converters from clipping.
- Page 12 The multi-colored threshold LEDs located at the top of the output meters indicate output limiter activity within the corresponding output channels. The three colored states are: • Green Indicates the signal level is under threshold and no limiting is occurring. •...
-
Page 13: Rear Panel
Rear Panel 1. AC Power Inlet Connect the included IEC power cable to this power inlet. The power supply in the VENU360 is a switch-mode power supply and can be operated using a mains voltage of 100-240V, 50Hz/60Hz. 2. Ethernet Port This RJ-45 connector allows the VENU360 to be connected to a local network and controlled using the free DriveRack VENU360 control app. -
Page 14: Getting Started
Getting Started Operating Modes Explained Home Mode This is the default operating mode. It is the mode the VENU360 enters when it initially boots and is the mode which displays the home screen. There are various home screens to choose from when in Home mode. See ‘The Home Screens’... -
Page 15: The Home Screens
The Home Screens The home screen is the first screen which appears in the LCD display after the VENU360 fully initializes (this mode is referred to as “Home” mode). There are seven home screens to choose from, providing the instant visual feedback you need, when you need it. - Page 16 RTA Home Screen This home screen provides quick access to the Real-Time Analyzer. The graphic to the left of the RTA displays the signal source feeding the RTA, which is set with the RTA SOURCE parameter in the RTA menu. See ‘RTA’...
-
Page 17: Menu Navigation
Menu Navigation The VENU360 menu navigation is laid out as shown in the below diagram. Menu Navigation Tree Diagram HOME MODE Press RTA Button RTA Menu Con guration Map Home Screen Press RECALL Button Preset Recall Menu Dynamics Gain Home Screen Press STORE Button Preset Store Menu Dynamics Threshold... -
Page 18: Configuring The Venu360
The VENU360 Wizards walk you through the configuration and optimization process with simple, step-by-step instructions, making it easy to setup the VENU360 for your application. Using the optional dbx RTA-M measurement microphone, the Wizards can optimize your sound system by helping adjust your system level balance and analyzing your room and applying accurate room EQ –... - Page 19 Run AutoEQ/Level Assist Wizard Level Assist/AutoEQ Mic Position 1 AutoEQ Mic Position 2 When used with the optional dbx RTA-M measurement microphone, these Wizards help Left Speaker Center/Mono Speaker Right Speaker...
- Page 20 • Mic Response When the dbx RTA-M option is selected, AutoEQ will automatically compensate for the frequency response of the dbx RTA-M microphone, providing more accurate AutoEQ results. Select the FLAT option if using a measurement microphone other than the dbx RTA-M.
-
Page 21: Configuring Xlr Inputs, Master Clock Source, & Src
Configuring XLR Inputs, Master Clock Source, & SRC The VENU360 allows you to select either the internal crystal oscillator for clock master or one of the AES inputs. Built-in sample rate conversion (SRC) allows both AES inputs to be used when connecting two different digital devices, each with its own clock, or when connecting digital AES signals operating at sample rates other than 48 or 96 kHz. - Page 22 AES Connections Using Sample Rate Other Than 48 or 96 kHz VENU360 Inputs When connecting digital AES sources operating at sample rates other than 48 or 96 kHz, SRC can be used to allow such devices to be used with the VENU360. In this type of application, you must set the VENU360’s clock source to one of the “INTERNAL”...
-
Page 23: Using Configuration Mode
Using Configuration Mode This section describes how to make manual configuration changes to modify a preset for your application. The easiest way to configure the VENU360 is to use the built-in Wizards. This works well for configuring most systems utilizing full range up to mono 4-way crossover configurations (3-way main speakers with subs), as well as for configuring stage monitors. - Page 24 TIP: When done making configuration changes, pressing the CONFIG button twice will perform the “Quick Apply” function, for slightly faster operation. NOTE: The VENU360 will load the new configuration and automatically mute all outputs – this is a safety feature. When ready to audition the system, unmute the outputs.
-
Page 25: Configuring Mixers/Routers
Configuring Mixers/Routers Input signals in the VENU360 can be mixed or routed to the input processing chains or directly to the output processing chains. On the input processing chains, signals can be mixed or routed from any of the 7 direct inputs (e.g., Analog1, Analog2, AES1, etc.). - Page 26 To configure a Mixer/Router: 1. Press the CONFIG button. 2. Select a Mixer/Router module using the SELECT wheel and UP/ DOWN buttons. 3. Press the SELECT wheel to enter the Mixer/Router Configuration menu. 4. Select the desired option by turning then pressing the SELECT wheel.
-
Page 27: Configuring Processing Module Insert Types
Configuring Processing Module Insert Types Processing module inserts are indicated in the on-screen configuration map by brackets at the top of their columns, as shown to the right. There are two configurable insert slots in the “input” processing chains and one configurable insert slot in the “mid”... - Page 28 To configure insert module types: 1. Press the CONFIG button. 2. Select an insert module using the SELECT wheel and UP/DOWN buttons. 3. Press SELECT then select the “Edit Module Insert Type” option with the SELECT wheel. 4. Select the desired option by turning then pressing the SELECT wheel.
-
Page 29: Configuring Crossover Types
Configuring Crossover Types Crossover types can be selected in Configuration mode. To configure Crossover module types: 1. Press the CONFIG button. 2. Select a Crossover module using the SELECT wheel and UP/DOWN buttons. Press the SELECT wheel to enter the Crossover Type Selection menu. - Page 30 There are a total of 52 crossover types to select from. They are categorized by input configuration (i.e., mono, stereo, and LCR). Each input configuration type has various output configuration types (e.g., full range, multi-way, multi-mono, aux-fed subwoofers, etc.). The following table shows all the crossover configuration types available in the VENU360. Crossover Types Ref # # Of Inputs/Outputs Crossover Name...
- Page 31 Crossover Types Ref # # Of Inputs/Outputs Crossover Name Crossover Configuration Icon Supported Speaker Configuration Mono Mains x2 + Aux Sub Mono Mains x2 + Mono Subs x2 Mono Mains x2 + Aux Subs x2 Mono Mains x3 Mono Mains x3 + Mono Sub Mono Mains x3 + Aux Sub Mono Mains x3 + Mono Subs x2 LEGEND: FR=Full Range, S=Sub,...
- Page 32 Crossover Types Ref # # Of Inputs/Outputs Crossover Name Crossover Configuration Icon Supported Speaker Configuration Mono Mains x3 + Aux Subs x2 Mono Mains x3 + Mono Subs x3 Mono Mains x3 + Aux Subs x3 Mono 2Way Mono 2Way + Mono Sub Mono 2Way + Aux Sub Mono 2Way x2 LEGEND: FR=Full Range, S=Sub,...
- Page 33 Crossover Types Ref # # Of Inputs/Outputs Crossover Name Crossover Configuration Icon Supported Speaker Configuration Mono 2Way x2 + Mono Sub Mono 2Way x2 + Aux Sub Mono 2Way x2 + Mono Subs x2 Mono 2Way x2 + Aux Subs x2 Mono 2Way x3 Mono 3Way Mono 3Way + Mono Sub...
- Page 34 Crossover Types Ref # # Of Inputs/Outputs Crossover Name Crossover Configuration Icon Supported Speaker Configuration Mono 3Way + Aux Sub Mono 3Way x2 Mono 4Way Mono 5Way Mono 6Way Stereo Full Range Stereo Mains + Mono Sub LEGEND: FR=Full Range, S=Sub, LEGEND: M=Mono, L=Left, AS=Aux Sub, H=High, M=Main or C=Center, R=Right, A=Aux...
- Page 35 Crossover Types Ref # # Of Inputs/Outputs Crossover Name Crossover Configuration Icon Supported Speaker Configuration Stereo Mains + Aux Sub Stereo Mains + Mono Subs x2 Stereo Mains + Aux Subs x2 Stereo Mains + Stereo Subs Stereo 2Way Stereo 2Way + Mono Sub Stereo 2Way + Aux Sub LEGEND: FR=Full Range, S=Sub, LEGEND: M=Mono, L=Left,...
- Page 36 Crossover Types Ref # # Of Inputs/Outputs Crossover Name Crossover Configuration Icon Supported Speaker Configuration Stereo 2Way + Mono Subs x2 Stereo 2Way + Aux Subs x2 Stereo 2Way + Stereo Subs Stereo 3Way LCR Full Range LCR Mains + Mono Sub LCR Mains + Mono Subs x2 LEGEND: FR=Full Range, S=Sub, LEGEND: M=Mono, L=Left,...
- Page 37 Crossover Types Ref # # Of Inputs/Outputs Crossover Name Crossover Configuration Icon Supported Speaker Configuration LCR Mains + Mono Subs x3 LCR Mains + Stereo Subs LCR Mains + LCR Subs LCR 2Way LEGEND: FR=Full Range, S=Sub, LEGEND: M=Mono, L=Left, AS=Aux Sub, H=High, M=Main or C=Center, R=Right, A=Aux Mid, L=Low...
-
Page 38: Linking/Unlinking Processing Modules
Linking/Unlinking Processing Modules Processing modules can be linked and unlinked in Configuration mode to best suit the application. Most processing modules can be linked/unlinked in the configuration. To link/unlink processing modules: 1. Press the CONFIG button. 2. Turn the SELECT wheel and/ or press the UP/DOWN buttons to navigate the on-screen configuration map and select the... -
Page 39: Naming Outputs
Naming Outputs Outputs are automatically named based on selections made in the Setup Wizard or when selecting crossover types in Configuration mode. Because of this, Crossover modules should be configured first, before naming outputs. If it is determined that the default output names must be modified for an application, it is very easy to do so in Configuration mode. One way to do this is to simply select an output name from the built-in list. -
Page 40: Operating The Venu360
Operating The VENU360 This section of the manual describes how to edit VENU360 audio processing parameters and manage presets. Editing Processing Module Parameters (Edit Mode) To edit a processing module’s parameters: 1. Press the EDIT button. 2. Select the module you wish to edit using the SELECT wheel and UP/ DOWN buttons. -
Page 41: Copying/Pasting Processing Module Settings
Copying/Pasting Processing Module Settings In Edit mode, the COPY/PASTE buttons allow you to copy all parameters of a module and paste them to another like processing module. A like processing module is one that is of the same processing type and contains the same parameters as the processing module that was copied. -
Page 42: Managing Presets
Managing Presets The VENU360 has two types of presets: user and factory. The user presets occupy preset memory locations 1-75. The factory presets occupy preset memory locations 76-100. The difference between these preset types is that factory presets are meant to be used as templates and cannot be overwritten and user presets can be overwritten and are designed to store your custom presets. -
Page 43: Storing Presets
Storing Presets Once you are satisfied with the changes made to a preset, you can store them to a user preset memory location. To store a preset: 1. Press the STORE button. 2. The current name of the preset will be shown in the LCD display and you now have the option to keep it or rename it. -
Page 44: Copying Presets
Copying Presets Presets can be copied from one memory location to another. This can be useful for creating a backup of a preset within the VENU360 box, creating variations of similar presets, or for creating an initial preset template and then copying that preset template for use at each venue the system is used. -
Page 45: Deleting Presets
Deleting Presets User presets can be deleted. Deleting a user preset creates an empty preset. When an empty preset is loaded, no signal will pass through the VENU360. A new configuration can be created in an empty preset by running the System Setup Wizard or pressing the button. -
Page 46: Manually Optimizing A System Using The Venu360
Manually Optimizing A System Using The VENU360 About Speaker & Amplifier Tunings The VENU360 has a Setup Wizard to help you configure your sound system. When you run the Setup Wizard, it will ask you to select the make and model of your speakers and amplifiers from a list of available options, referred to as “tunings”. There are speaker tunings and amplifier tunings. -
Page 47: Manual System Optimization Tips ���������������������������������������������������������������������45 Ethernet Cable Recommendations & Diagrams
Manual System Optimization Tips TIP: You may want to disable the HOME TIME OUT feature located in the Utility menu before performing any of the following system optimization procedures. This will ensure the VENU360 does not revert back to the home screen throughout the process. - Page 48 multi-way main speakers will require certain drivers to be polarity inverted when operating in bi-amped or tri-amped mode. When selecting any bi-ampable or tri-ampable main speaker from the VENU360’s speaker tuning list in the Setup Wizard, such polarity inversion will be performed for you automatically. If your multi-way main speaker model isn’t listed in the VENU360 and you can’t find tuning information for them, check the loudspeaker’s spec sheet or documentation, or contact the speaker manufacturer as they will usually be able to provide this information.
-
Page 49: 3� Setting Gain Structure & Limiters
If the crossover is configured with bands using only a high-pass or low-pass filter (such as in the 2-way example shown below) you shouldn’t have to worry about adjusting the PHASE parameter. However, if band-pass filters are used (such as in the 3-way example shown below) then phase adjustments will likely be necessary. - Page 50 Amplifiers are fixed gain devices. Turning down the amplifier input attenuators does not change the potential output of the amplifier, it only requires more input voltage to get full output power. Many amplifiers will clip with an input level greater than +6 dBu when the input attenuators are turned all the way up.
- Page 51 THRESHOLD’s are set all the way up to 0.0 dB. Note that once the first limiter has been set you can use the COPY PASTE buttons to copy the settings to all other limiters. Also, turn off all VENU360 input EQs (speaker tuning EQs should be left on), dynamics processing, and Sub Synth modules and ensure all “input”...
-
Page 52: 4� Balance The System's Frequency Response
EQ, which translates to smaller gain adjustments in the EQ and better sound quality. You can perform this procedure while listening to your reference music and do it by ear, or use the dbx RTA-M reference mic and RTA. The music you choose to use for reference should contain full-bandwidth audio and should be something you have spent much time listening to and are extremely familiar with. -
Page 53: 5� Ring Out The System With Afs
Make any further adjustments using the GEQ’s individual frequency bands. Repeat for stage monitor, zone, or delay fill speakers if required. 4� 5. Ring Out The System With AFS After system EQ has been applied, performing the ring-out procedure allows you to squeeze a little more gain out of the system before the onset of feedback. -
Page 54: 6� Add Finishing Touches
NOTE: When ringing out the system in Fixed mode, any sound detected by AFS will trigger filters to be set. Therefore, make sure the microphones are active, but there is no signal present at the mics when AFS is active in Fixed mode. 6. -
Page 55: Processing Modules & Parameters
Processing Modules & Parameters This section of the manual provides descriptions of all the processing modules available in the VENU360, their associated parameters, and how to edit them. Inputs Module The VENU360 has 7 fixed inputs. The input assignments are: IN1: Analog1, IN2: Analog2, IN3: Analog3, IN4: AES1, IN5: AES2, IN6: AES3, and IN7: AES4. -
Page 56: Router Module
Router Module The Router module lets you route a single signal or mono-summed signal to an input or output processing chain, see ‘Configuring Mixers/Routers’ on page 23 for diagrams and further information on available routing options. The graph in the Router indicates signal levels, clipping, master gain fader position, and master mute status. To edit a Router module: 1. -
Page 57: Mixer Module
Mixer Module The Mixer module lets you mix multiple signals together and feed them to an input or output processing chain, see ‘Configuring Mixers/Routers’ on page 23 for diagrams and further information on available mixing options. There are three types of Mixer modules available in the VENU360, they are: Input Mixers, 123 Mixers, and ABC Mixers. 123 and ABC Mixers are only available on the output processing chains and allow you to mix signals from either the 1/2/3 or A/B/C bus points. - Page 58 and no signal will pass from the Mixer. NOTE: The front-panel Mix/Route meters monitor the signal level from the configured input Mixers/Routers. The front-panel Mix/Route Mute buttons enable the “MASTER MUTE” parameters inside the configured input Mixers/Routers.
-
Page 59: Advanced Feedback Suppression (Afs) Module
Advanced Feedback Suppression (AFS) Module Feedback is caused when an in-phase audio loop is created between an input transducer (such as a guitar pickup or microphone) and an output transducer (a loudspeaker). The VENU360 includes the exclusive AFS (Advanced Feedback ™... - Page 60 NOTE: Where applicable, signals sent to the AFS detector for analysis are mono summed. If one of these summed signals is polarity inverted, AFS will not be able to detect feedback – as the feedback will cancel out before being analyzed.
- Page 61 • CLEAR <PRESS SELECT> Selecting this option then pressing the SELECT wheel triggers the clear function, which removes set AFS filters. The clear function allows you to either clear only the Live filters or all AFS filters so you can ring out the system for a new venue.
- Page 62 TIP: You can change the TYPE parameter at any time. This allows you to use narrow notch filters in combination with wider notch filters. For example, you could set the TYPE parameter to MUSIC then ring out the system in Fixed mode, switch over to Live mode, then set the TYPE parameter to SPEECH/MUSIC for the Live filters.
- Page 63 filters on feedback during your live performance, try increasing the SENSITIVITY setting. If you find AFS mistaking an instrument for feedback, try decreasing the SENSITIVITY setting. • HIGH PASS [0Hz - 500Hz] This parameter places a high-pass filter in the AFS detector path. If you don’t want AFS to have the ability to set any filters below a set frequency (for example, if you don’t want AFS to notch any frequencies below 100Hz), adjust this parameter to the frequency below which you want AFS to ignore.
-
Page 64: Automatic Gain Control (Agc) Module
Automatic Gain Control (AGC) Module Automatic Gain Control is used in zone applications to keep the average level of a signal constant. Think of it as a slow reacting compressor/upward expander. It accomplishes this by allowing you to set a target level and a window size around the target (the window size sets how much the signal level is allowed to deviate from the target). - Page 65 • WINDOW [1dB - 10dB] WINDOW INDICATOR This parameter sets the amount of target level deviation allowed. For most applications, a window of 2 to 3 dB maintains the signal adequately. The AGC Window Indicator (shown to the right) indicates when the input signal level is below Input Signal Below Window the window, in the target region, or above the window.
-
Page 66: Delay (Dly) Modules
Delay (DLY) Modules There are three Delay module types available in the VENU360, they are: the Backline Delay (input), Fill Delay (mid), and Alignment Delay (output). Their names are merely identifiers used to differentiate them and describe their intended purpose, however they are all identical in operation, just located at different points in the signal path. - Page 67 the acoustic signal from the main FOH system (e.g., balcony delay fills, tower delay fills, etc.). Each of the Delay module menus will show “global” status of all Delays in the configured preset, so you can see exactly where Delay modules have been configured, which modules are turned on, and if delays have been set – as shown in the below graphic.
-
Page 68: Compressor (Cmp) Module
Compressor (CMP) Module A compressor is used to compress the dynamic range of the audio signal, bringing up the lower level portions of the signal and restricting the higher level portions of the signal. In live sound applications, it is common to compress the audio at different stages in the signal chain. - Page 69 Compressor Parameters • COMPRESSOR [OFF, ON] Turns the Compressor module on and off. L O W L I M • THRESHOLD [-60dB to 0dB] THRESHOLD INDICATOR M I D L I M I Sets the level at which the compressor will begin compressing the signal. For example, if the THRESHOLD is set to -10 dB, any signal which exceeds -10 H I G H L I M dB will be compressed, while any signal lower than -10 dB will be left alone...
- Page 70 Generally, a hard knee compressor will sound louder, more aggressive, and more audible when compressing. The softer the knee, the smoother and less noticeable the compression will be. Use proper judgement, depending upon the application and/or genre of music being reproduced through the sound system and experiment to find the best setting that works for your application.
-
Page 71: Graphic Eq (Geq) Module
Graphic EQ (GEQ) Module The 31-band Graphic EQ module can be used to adjust the sound system’s frequency response and is available for those who prefer to use this time-tested tool for system EQ. Manually edit the GEQ bands or select one of the “Quick Curves” options to get you started. - Page 72 GEQ Parameters • GRAPHIC EQ [OFF, ON] Turns the GEQ module on and off. • QUICK CURVE [MANUAL, FLAT, MY BAND, SPEECH, VENUE, DJ] This parameter allows you to select from pre-set EQ curves. Note that you can select one of these Quick Curves and then further edit the individual GEQ bands manually from there if required.
-
Page 73: Noise Gate (Gat) Module
Noise Gate (GAT) Module The Noise Gate module is used to remove unwanted low-level noise in a sound system. A noise gate will “close” when an insufficient signal level is present (signal level is below threshold) and “open” when a sufficient signal level is present (signal level exceeds threshold). - Page 74 Gate Parameters • GATE [OFF, ON] This parameter turns the Gate module on and off. • THRESHOLD [-70dB to 0dB] THRESHOLD INDICATOR Sets the level at which the gate will open. For example, if the THRESHOLD parameter is set to -40 dB, any signal which exceeds -40 dB will open the gate. Any signal lower than -40 dB will be attenuated by the amount determined by the RATIO and MAX ATTEN settings.
-
Page 75: Parametric Eq (Peq) Modules
Parametric EQ (PEQ) Modules There are two types of PEQ modules available in the VENU360: 12-band input PEQs and 8-band output PEQs. The 8-band output PEQs are intended to be used for speaker tuning EQ. The 12-band input PEQs can be configured in one of the input processing module insert slots and used for system EQ tasks, see ‘Configuring Processing Module Insert Types’... - Page 76 PEQ Parameters • PARAMETRIC EQ [OFF, ON] Turns the selected PEQ module on and off. • FLATTEN [RESTORE, FLAT] Select the FLAT option to zero out the selected PEQ (set all bands to 0 dB). Select the RESTORE option to retrieve the settings you had before you selected the FLAT option.
- Page 77 AutoEQ (AEQ) Module The AEQ modules are 14-band parametric EQs which reside in the mid processing section of the VENU360 (pre crossover). These modules are automatically adjusted by the built-in AutoEQ Wizard. When running the AutoEQ Wizard, the first 10 AEQ bands will be set.
- Page 78 AEQ Parameters • AutoEQ [OFF, ON] Turns the selected AEQ module on and off. • FLATTEN [FLAT, MANUAL, AUTOEQ] Select the FLAT option to zero out the AEQ (set all bands to 0 dB). If any manual changes are made to AEQ settings, the MANUAL option will automatically be selected to indicate this.
-
Page 79: Subharmonic Synth (Sub) Module
Subharmonic Synth (SUB) Module dbx’s subharmonic synthesis (or sub-synth) processing has been specifically optimized to enhance the low frequencies in audio material and was designed for use in a variety of professional audio applications, including nightclub and dance DJ mixing, theatre and film sound, music recording, live music performance, and broadcasting. Using traditional EQ to enhance this extremely low frequency region can increase noise potential and stage rumble (low-frequency feedback) in live PA systems. - Page 80 Subharmonic Synth Parameters • SUBHARMONIC SYNTH [OFF, ON] Turns the Subharmonic Synth module on and off. • SUBHARMONICS [0% - 100%] Sets the overall level of the sub-synth effect. • 36-56 HZ LEVEL [0% - 100%] Adjusts how much of the sub-synth effect is added between the 36 Hz to 56 Hz region. If the sound becomes too “woofy”...
-
Page 81: Crossover Module
Crossover Module A crossover is used to divide the broadband signal into separate frequency bands. This allows each loudspeaker or driver in a sound system to operate within its optimal frequency range. Using an active crossover, like that in the VENU360, has the additional benefits of increasing the efficiency of your power amplifiers, lowering intermodulation distortion, and in some cases, improving the drivers’... - Page 82 Crossover Parameters • “BAND NAME” LP FREQUENCY [16 Hz - 20 kHz, OUT] Adjusts the cutoff frequency of the low-pass filter. • “BAND NAME” LP TYPE [BW 6, BW 12, BW 18, BW 24, BW 30, BW 36, BW 42, BW 48, LR 12, LR 24, LR 36, LR 48] Selects the low-pass filter type and slope rate.
-
Page 83: Limiter (Lim) Module
Limiter (LIM) Module Limiters are used to set a ceiling on the signal level, preventing the signal from exceeding a predetermined threshold. For this reason, they are used to prevent the overdriving of equipment. Limiters are compressors with high ratios (typically, a ratio of around 10:1 or higher is generally considered limiting). - Page 84 Limiter Parameters • LIMITER [OFF, ON] Turns the selected Limiter module on and off. L O W L I M I T E R • THRESHOLD [-60 dB to 0 dB] THRESHOLD INDICATOR M I D L I M I T E R Sets the level at which the limiter will kick in and begin limiting the signal.
- Page 85 • HOLD [0s - 500ms] Sets a timer which starts when the signal falls back below threshold and, once the time has elapsed, allows the limiter to release, thereby preventing the limiter from releasing prematurely. When AUTO is on, this parameter is ignored and set dynamically.
-
Page 86: Rta
The 31-band RTA (Real-Time Analyzer) allows you to monitor the sound system’s frequency response. A bulit-in signal generator is also available in the RTA menu. The signal generator and RTA can be used to manually fine-tune and troubleshoot the system or to help identify system feedback and resonant frequencies. Since the signal generator can be steered to each of the direct inputs, it can also be used to verify signal routing in a preset configuration. - Page 87 RTA Source Routing Options RTA Source Options RTA Source Options RTA Source Options Description Routing Diagram Description Routing Diagram Description Routing Diagram Route RTA Route IN7 Route Bus A (AES 4) Route IN1 Route Bus 1 Route Bus B (Analog 1) Route IN2 Route Bus 2 Route Bus C...
- Page 88 • SIGNAL TYPE [PINK, WHITE, SINE] There are three signal type options to select from, they are: PINK, WHITE, and SINE. Some analyzers are calibrated to read “flat” across the frequency spectrum when white noise is used, others are calibrated to read flat when pink noise is used, and some allow you to select between the two.
- Page 89 Utility Menu The Utility menu allows you to edit global system parameters and provides VENU360 system information. To edit Utility parameters: 1. Press the UTILITY button. 2. Use the SELECT wheel and UP/ DOWN buttons to navigate the menus and edit parameters. Utility Parameters •...
- Page 90 • CLOCK SOURCE [INTERNAL 48 kHz, INTERNAL 96 kHZ, AES 1&2, AES 3&4] Selects which clock the VENU360 will sync to and the sample rate of the internal clock. See ‘Configuring XLR Inputs, Master Clock Source, & SRC’ on page 19 for further information on clocking. •...
- Page 91 • PRESET RECALL LIST Sets the range of presets accessible from the front panel. By default, the PRESET RECALL LIST is set to allow access to all 100 presets. Turning the SELECT wheel counter-clockwise will narrow the list of presets available for use. Turning the SELECT wheel clockwise will expand the list of presets available for use.
-
Page 92: Power-Up Functions
Power-Up Functions Power-up functions allow you to reset DriveRack VENU360 presets and settings, lock out the front-panel controls, and force the VENU360 to power up with the output mutes enabled. These power-up functions are accessed by pressing and holding certain buttons upon power up. The following section describes the power-up functions available in the VENU360 and how to use them. -
Page 93: System Lockout
System Lockout This power-up function locks out the VENU360’s front panel controls to prevent unauthorized tampering. The available options are: • Unlocked This is the default setting and allows access to all VENU360 functions from the front-panel controls. • Locked When this option is selected, all front-panel controls will be locked and a “LOCKED”... -
Page 94: Soft Reset
Soft Reset The Soft Reset function resets all Utility settings in the VENU360 back to their factory default state without resetting user presets. WARNING! Performing the Soft Reset procedure will reset all analog input and output clip levels, clock source, and XLR input format settings in the Utility menu back to their factory default state. -
Page 95: Application Guide
Application Guide Use these diagrams and notes for reference when initially connecting and configuring the VENU360 for your application. Application 1: Full Range Mains This application is suited for full range systems which do not require an active crossover. In this type of configuration, the VENU360 will send full range signal through outputs 1&2. -
Page 96: Application 2: Full Range Mains + Subs
Application 2: Full Range Mains + Subs This application is suited for use with a system consisting of two full range main speakers and subs. The last two available outputs can be configured for zone, delay fill, or stage monitor use if required. Application Notes: •... -
Page 97: Application 3: Bi-Amplified Mains + Aux-Fed Subs
Application 3: Bi-Amplified Mains + Aux-Fed Subs This application is suited for use with a system consisting of bi-ampable 2-way main speakers and aux-fed subs. If you’re not familiar with the term “aux-fed subs”, here’s a brief explanation. The idea is to use an available post-fade/post-EQ aux send from the mixing console to feed only the channels which contain low-frequency information (e.g., bass guitar, kick drum, floor tom, etc.) to the subs. -
Page 98: Application 4: Lcr Full Range Powered Mains + Subs
Application 4: LCR Full Range Powered Mains + Subs This application is suited for use with an LCR system consisting of full range main speakers and subwoofers. Application Notes: • Make sure your mixer and amplifiers (or powered speakers) are turned off before making connections. •... -
Page 99: Application 5: Full Range Stage Monitors
Application 5: Full Range Stage Monitors This application is suited for use with up to 6 full range stage monitors. Application Notes: • Make sure your mixer and amplifiers (or powered speakers) are turned off before making connections. • Make connections as described in ‘Making Connections’ on page 4 then apply power to the system according to the instructions described in ‘Applying Power’... -
Page 100: Application 6: Bi-Amplified Stage Monitors
Application 6: Bi-Amplified Stage Monitors This application is suited for use with up to 3 bi-ampable 2-way stage monitors. Application Notes: • Make sure your mixer and amplifiers (or powered speakers) are turned off before making connections. • Make connections as described in ‘Making Connections’ on page 4 then apply power to the system according to the instructions described in ‘Applying Power’... -
Page 101: Application 7: Using The Aes Digital Inputs
Application 7: Using The AES Digital Inputs Any of the previous applications described can accommodate AES signals if you’re using a digital mixer. This application illustrates the power and flexibility of the VENU360 and is suited for use with a digital console which has at least 2 AES outputs, a PA system up to 2-way, and up to 4 full range stage monitors. -
Page 102: Preset List
Preset List User Preset # Factory Preset # Name Crossover Configuration Stereo Full Range Mains Stereo Mains + Mono Sub Stereo Mains + Stereo Subs Stereo Mains + Aux Subs x2 Stereo Mains x4 + Mono Sub Stereo Mains x4 + Stereo Subs Stereo 2Way Mains Stereo 2Way Mains + Mono Sub Stereo 2Way Mains + Stereo Subs... - Page 103 User Preset # Factory Preset # Name Crossover Configuration Mono Full Range Main Mono Mains x2 + Mono Sub Mono Mains x2 + Mono Subs x2 Mono Mains x2 + Aux Subs x2 Mono 2Way Mains x2 Mono 2Way Mains x2 + Mono Sub Mono 2Way Mains x2 + Mono Subs x2 Mono 2Way Mains x2 + Aux Subs x2 Mono 3Way Mains x2...
- Page 104 User Preset # Factory Preset # Name Crossover Configuration LCR 2Way Mains Full Range Stage Monitors x6 2Way Stage Monitors x3 TIP: All factory presets have 1x1 (full range) crossovers configured for any remaining available outputs. The signal feeding these outputs will be fully attenuated in the Mid Mixers for safety reasons. However, you can easily edit the settings in these Mid Mixers or quickly modify the configuration and change the mixing/routing options on these outputs for additional stage monitor, zone, or delay fill use.
-
Page 105: Using The Venu360 Control Application
The DriveRack VENU360 control app also adds the ability to connect directly to the ever-growing online tuning database (internet connection required), where you can download additional tunings from Crown ® ® , dbx ® , and more! NOTE: You can control one VENU360 device on the network at a time using the VENU360 control app. -
Page 106: Networking
Networking Networking Overview The VENU360 can be connected to a network for control using the free VENU360 control app. The VENU360 supports DHCP and static IP addressing. The following section provides a brief description of the most common network settings. •... -
Page 107: Network Troubleshooting
Network Troubleshooting The VENU360 ships with DHCP enabled. If you are connecting the VENU360 to a network which has a router or switch with an enabled DHCP server, connecting the VENU360 to the network should as easy as plugging the VENU360 into the switch/ router with the correct type of Ethernet cable. - Page 108 If you’ve verified you are using the correct type of Ethernet cables and all cables are known-working but you still can’t connect, go to step 5. 5� Check Switch/Router Configuration Settings Check the settings in your network switch or router (consult the documentation which came with your network switch or router to see how to enter the utility used for configuring it).
-
Page 109: Technical Information
Technical Information Firmware Updates The USB or Ethernet connector on the back panel of the VENU360 can be used to perform firmware updates. Connect the USB port to a compatible computer for performing firmware updates using the VENU360 Firmware Update Utility application. When a firmware update becomes available, this Firmware Update Utility application will be found on the VENU360 product page at dbxpro.com. - Page 110 DSP Block Diagram Driver Alignment Delays Limiters 8-Band Parametric EQs Crossovers Mid Inserts Real Time Analyzer (RTA) AutoEQs Mid Routers/Mixers Input Inserts 2 Input Inserts 1 Advanced Feedback Suppression Input Routers/Mixers Inputs (IN1-IN7) Signal Generator...
- Page 111 Ethernet Cable Recommendations & Diagrams Straight-Through Use straight-through CAT5, CAT5e, or CAT6 Ethernet cables to connect the VENU360 to your network switch/router. The below diagrams show the pinout of straight-through Ethernet cables. These are the most common type of Ethernet cables available.
-
Page 112: Audio Cable Diagrams
Audio Cable Diagrams TO NEXT DEVICE (INPUT) TO NEXT DEVICE (INPUT) FROM SOURCE DEVICE (OUTPUT) FROM SOURCE DEVICE (OUTPUT) RING SLEEVE SLEEVE RING (GROUND) (COLD -) (COLD -) (GROUND) HOT + HOT + COLD - COLD - SLEEVE SLEEVE (HOT +) (HOT +) FEMALE XLR TO TRS PHONE TRS PHONE TO MALE XLR... -
Page 113: Dimensions
Dimensions... -
Page 114: Specifications
Alignment Delay: Up to 1000 ms per output channel A/D PERFORMANCE A/D Converter: 24-bit with dbx Type IV™ Conversion System A/D Dynamic Range: 117 dB A-weighted, 114 dB unweighted, 22 kHz BW Type IV Dynamic Range: 129 dB with transient material, A-weighted, 22 kHz BW;... -
Page 115: Additional Resources
Additional Resources dbx Website http://dbxpro.com DriveRack VENU360 Product Page http://dbxpro.com/en-US/products/driverack-VENU360 dbx Support http://dbxpro.com/en-US/support dbx User’s Forum http://dbxpro.com/forum... - Page 116 Phone: (801) 566-8800 Website: dbxpro.com Support: dbxpro.com/en-US/support dbx Professional Products is a registered trademark of Harman © 2015 Harman All rights reserved DriverRack VENU360 Owner’s Manual ® PN: 5058681-A Macintosh, iOS, iPhone, iPad, iTunes, and App Store are trademarks of Apple Computer Incorporated, registered in the U.S.
Need help?
Do you have a question about the DriveRack VENU 360 and is the answer not in the manual?
Questions and answers