Table of Contents
Advertisement
Advertisement
Table of Contents

Related Manuals for Sony NXCAM HXR-NX70E


Summary of Contents for Sony NXCAM HXR-NX70E
- Page 1 4-273-940-13(1) Digital HD Video Table of contents Camera Recorder Getting started Recording/Playback Operating Guide Advanced operations Saving images with an external device Customizing your camcorder Additional information Quick reference HXR-NX70E/NX70P...
-
Page 2: Read This First
Read this first Supplied items The numbers in ( ) are the supplied quantity. AC Adaptor (1) Power cord (Mains lead) (1) Component A/V cable (1) A/V connecting cable (1) USB cable (1) ... - Page 3 The camcorder is dust & rain proof. See card with your camcorder before the first use “About dust & rain proof performance of the (p. 58). Formatting the memory card will erase camcorder” (p. 6). all the data stored on it and the data will be irrecoverable.
- Page 4 Notes on optional accessories Notes on battery pack/AC Adaptor We recommend using genuine Sony accessories. Be sure to turn off the camcorder before Genuine Sony accessories may not be available moving the battery pack or AC Adaptor. in some countries/regions.
-
Page 5: Notes On Use
In this manual, the DVD disc recorded with high definition image quality (HD) is called AVCHD recording disc. Design and specifications of your camcorder and accessories are subject to change without notice. Notes on use Do not do any of the following. Otherwise, the ... -
Page 6: About Dust & Rain Proof Performance Of The Camcorder
Wipe the area clean with a soft cloth. Scratches or deformation of the sealing gasket may lead to water entering the camcorder. If the sealing gasket becomes scratched or deformed, consult your Sony dealer or local authorized Sony service facility. - Page 7 The drain on the lower side is designed to expel any water or sand entering via the clearance of the zoom lever. Drain If sand caught in the parts of the camcorder impairs their movement, remove the sand with a blower, etc., and then operate them repeatedly.
-
Page 8: Table Of Contents
Table of contents Read this first..................2 Notes on use. - Page 9 Advanced operations Useful functions for recording movies and photos........42 Zooming.
- Page 10 Saving images with an external device Selecting a method for saving images with an external device......64 The devices on which the created disc can be played back.
- Page 11 Maintenance and precautions..............114 About the AVCHD format..
-
Page 12: Getting Started
Getting started Step 1: Attaching the supplied microphone and lens hood with lens cover You do not need to attach the XLR Adaptor or microphone when you use the internal microphone. Attaching the XLR Adaptor Accessory shoe XLR Adaptor Active Interface Shoe ... -
Page 13: Attaching The Microphone
When detaching the XLR Adaptor Unplug the connector plug of the XLR Adaptor from the Active Interface Shoe beforehand. Detach the XLR Adaptor after having loosened the screw of the XLR Adaptor. Attaching the microphone Microphone holder INPUT1 jack Release lever ... -
Page 14: Attaching The Lens Hood With Lens Cover
Put the microphone cable into the cable holder. Hook the cable in the outer cable holder. See page 52 on the settings for the audio recording. When detaching the microphone cable Detach the microphone from the microphone holder. ... - Page 15 To remove the lens hood with lens cover Turn the lens hood in the opposite direction to the arrow in the illustration while pressing the PUSH (lens hood release) button. Tips If you attach or remove a 37mm (1 1/2 in.) PL filter or MC protector, remove the lens hood with lens ...
-
Page 16: Step 2: Charging The Battery Pack
Step 2: Charging the battery pack POWER switch (charge) lamp Align the mark DC plug on the DC plug with that on the To the wall outlet DC IN jack. (wall socket) AC Adaptor DC IN jack Power cord (Mains lead) You can charge the “InfoLITHIUM”... - Page 17 Attach the battery pack by sliding it in the direction of the arrow until it clicks. Fit the grooves of the battery pack into those of the camcorder, and slide the battery pack in. Close the LCD screen of the camcorder () after closing the battery cover ().
- Page 18 When the battery is charged, disconnect the AC Adaptor from the DC IN jack of your camcorder. Charging time Approximate time (min.) required when you fully charge a fully discharged battery pack. Battery pack Charging time NP-FV70 (supplied) NP-FV100 The charging times shown in the table above are measured when charging the camcorder at a ...
- Page 19 To use a wall outlet (wall socket) as a power source Make the same connections as “Step 2: Charging the battery pack” (p. 16). Even if the battery pack is attached, the battery pack is not discharged. Charging the battery pack abroad You can charge the battery pack in any countries/regions using the AC Adaptor supplied with your camcorder within the AC 100 V - 240 V, 50 Hz/60 Hz range.
-
Page 20: Step 3: Turning The Power On, And Setting The Date And Time
Step 3: Turning the power on, and setting the date and time Slide the POWER switch to ON while pressing the green button. MODE lamp Press and hold the green button. POWER button Select the desired language, then touch [Next]. Touch the button on the LCD screen Select the desired geographical area with... - Page 21 Set [Summer Time], then touch [Next]. If you set [Summer Time] to [On], the clock advances 1 hour. Select the date format, then touch [Next]. Select the date and time, touch to set the value, then touch [Next] The clock starts.
-
Page 22: Changing The Language Setting
To turn off the power Slide the POWER switch to OFF (CHG). Changing the language setting You can change the on-screen displays to show messages in a specified language. (MENU) [Setup] [ (General Settings)] [Language Setting] a Touch desired language ... -
Page 23: Step 4: Making Setting Adjustments Before Recording
Step 4: Making setting adjustments before recording The LCD panel Open the LCD panel 90 degrees to the camcorder (), and then adjust the angle (). 90 degrees (max.) 180 degrees (max.) 90 degrees to the camcorder Tips ... -
Page 24: The Viewfinder
The viewfinder When you make recording with the viewfinder, close the LCD panel. If the indications in the viewfinder appear blurred, adjust the viewfinder lens adjustment lever located beneath the viewfinder. Viewfinder lens adjustment lever Notes You may see primary colors shimmering in the viewfinder when you move your line of sight. This is not a ... - Page 25 Notes Do not remove the pre-attached eyecup. ...
-
Page 26: Step 5: Preparing The Recording Media
Step 5: Preparing the recording media The recording media that can be used are displayed on the screen of your camcorder as following icons. Memory card Internal memory In the default setting, both movies and photos are recorded on this recording media. You can perform recording, playback and editing operations on the selected medium. - Page 27 Types of memory card you can use with your camcorder SD Speed Class Described in this manual “Memory Stick PRO Duo” media (Mark2) “Memory Stick PRO — Duo” media “Memory Stick PRO- HG Duo” media SD memory card SDHC memory card Class 4 or faster SD card SDXC memory card...
- Page 28 Insert the memory card with the notched edge in the direction as illustrated until it clicks. ACCESS lamp (memory card/internal memory) Memory card ACCESS lamp Note the direction of notched corner. The [Preparing image database file. Please wait.] screen appears if you insert a new memory card.
- Page 29 To eject the memory card Open the cover and lightly push the memory card in once.
-
Page 30: Recording/Playback
Recording/Playback Recording In the default setting, movies and photos are recorded on a memory card. Movies are recorded with high definition image quality (HD). Tips To change the recording media, see page 26. Fasten the grip belt. Open the shutter of the lens hood with lens cover by sliding the lens cover lever to OPEN. -
Page 31: Recording Movies
Recording movies (Movie): When recording a movie (Photo): When recording a photo [STBY] [REC] START/STOP button MODE button Press MODE to turn on the (Movie) lamp. Press START/STOP to start recording. The recording lamp lights up during recording (p. 127). To stop recording, press START/STOP again. -
Page 32: Shooting Photos
Notes The maximum continuous recordable time of movies is about 13 hours. When a movie file exceeds 2 GB, the next movie file is created automatically. It will take several seconds until you can start recording after you turn on the camcorder. You cannot ... - Page 33 Press MODE to turn on the (Photo) lamp. The LCD screen display switches for photo recording mode. Press PHOTO lightly to adjust the focus, then press it fully. Tips See page 110 on the recordable number of photos. ...
-
Page 34: Playback On The Camcorder
Playback. on.the.camcorder In the default setting, movies and photos that are recorded on a memory card are played. Tips To change the recording media, see page 26. The camcorder displays recorded images in an event automatically, based on the date and time. ... - Page 35 : To the previous/next event Event name Change to the movie/photo recording mode Time-line bar Change Event Scale button The Event Index screen appears when you touch the event that is displayed on the center. You can also choose an event by touching ...
-
Page 36: Operating The Camcorder While Playing A Movie
Operating the camcorder while playing a movie You can use the functions shown in the figure below while the camcorder is playing a movie. The figure below will be displayed when you select [ MOVIE/PHOTO] (the default setting) or [ MOVIE] by touching the Switch Image Type button on the Event Index screen. -
Page 37: Viewing Photos
Viewing photos You can use the functions shown in the figure below while you are viewing photos. The figure below will be displayed when you select [ PHOTO] by touching the Switch Image Type button on the Event Index screen. Delete Context Next... -
Page 38: Connecting A Monitor Or A Tv
Connecting a monitor or a TV Connection methods and the image quality (high definition (HD) or standard definition (STD)) viewed on the TV screen differ depending on what type of monitor or TV is connected, and the connectors used. HDMI OUT jack A/V Remote Connector Connecting to component/HDMI input jack(s) -
Page 39: Connecting To S Video/Video Input Jacks
Connecting to S VIDEO/video input jacks When movies are recorded with high definition image quality (HD), they are played back in standard definition image quality (STD). When movies are recorded with standard image quality (STD), they are played back in standard definition image quality (STD). Monitor/TV To S VIDEO/ audio input jacks... - Page 40 List of the output resolution Output resolution [HDMI/Component] Setting] (p. 93) HDMI Component (p. 56) 1080p/576i 1080p 1080p 720p/576i 720p 720p 1080i/576i 1080i 1080i Quality 576p 576p 576p 576i 576i 576i 1080p/576i 576i 576i 720p/576i 576i 576i 1080i/576i 576i 576i Quality 576p 576p...
- Page 41 When your TV is monaural (When your TV has only one audio input jack) Connect the yellow plug of the A/V connecting cable to the video input jack and connect the white (left channel) or red (right channel) plug to the audio input jack of your TV or VCR. When connecting to your TV via a VCR Connect your camcorder to the LINE IN input on the VCR using the A/V connecting cable.
-
Page 42: Advanced Operations
Advanced operations Useful functions for recording movies and angle and about 80 cm (about 31 1/2 in.) for photos telephoto. You can magnify images up to 14 times zooming, when [ SteadyShot] is set to Zooming [Active]. You can magnify images up to 10 times the Tips ... -
Page 43: Adjusting The Focus
Adjusting the focus Set the ZOOM/FOCUS/IRIS switch to FOCUS. FOCUS is assigned to the manual ring . Rotate the manual ring and adjust the focus. changes to when the focus cannot be adjusted any farther. changes to when the focus cannot be adjusted any closer. -
Page 44: Using The Expanded Focus
When you touch a point other than a When you adjust focus manually You can also adjust focus by touching face (MENU) [Camera/Audio] [ (Manual A double-lined frame appears at the point Settings)] [Focus]. you touch and the camcorder adjusts the focus automatically. -
Page 45: Capturing Smiles Automatically (Smile Shutter)
Notes Capturing smiles automatically may appear when the capacity of the (Smile Shutter) recording media is not enough or when you record photos continuously. You cannot record A photo is recorded automatically when photos while is displayed. the camcorder detects the smile of a person Depending on the [ REC Mode] or ... -
Page 46: Recording Information On Your Location (Gps)
Notes Notes The NightShot function uses infrared light. It may take a while before the camcorder starts Therefore, do not cover the infrared port with triangulating. your fingers or other objects. If the camcorder cannot triangulate, the ... -
Page 47: Displaying The Histogram
areas of the picture while the right area shows Displaying the histogram the brighter areas. You can also display the histogram by touching (MENU) [Camera/Audio] (Shooting Assist)] [Histogram] Recording in mirror mode HISTOGRAM button When you press the HISTOGRAM button, the [Histogram] window appears on the screen. -
Page 48: Registering My Button
To preset the time code Registering My Button Touch (MENU) [TC/UB] You can register MENU items that you use [TC Preset]. frequently on My Buttons (p. 33). Select the 2 digits you want to set, then set the value with /. -
Page 49: Adjusting Manually
Adjusting manually light decreases the more that you close the aperture (increasing F value). The current F value appears on the screen. During recording or standby, set the AUTO/MANUAL switch to MAN. When the iris is automatically adjusted, press the IRIS button . -
Page 50: Adjusting The Gain
To use automatic iris adjustment To adjust the gain automatically temporarily Set [Gain] to [Auto]. Keep pressing the IRIS PUSH AUTO The gain value disappears. button (). The iris is adjusted automatically while the button is pressed. Adjusting the shutter speed To adjust the iris automatically You can manually adjust and fix the shutter Press the IRIS button . -
Page 51: Adjusting White Balance
your camcorder attached to a tripod is Auto recommended. The white balance is adjusted automatically. When recording under fluorescent lamps, sodium lamps, or mercury lamps, the picture Outdoor ( ) may flicker or change colors, or may have The white balance is appropriately adjusted horizontal bands of noise. -
Page 52: Audio Setup
Audio setup When the white balance has been set with [One You can select the method for inputting Push], if the lighting conditions changed by sound on the camcorder from 3 types; bringing your camcorder outdoors from inside internal microphone, MIC input jack or the house, or vice versa, you need to redo the XLR Adaptor. -
Page 53: Using An External Microphone (Sold Separately)
Using an external microphone (sold separately) MIC input jack When an external microphone is connected to the MIC input jack, sound is switched to that of the external microphone. Sound is not switched during recording. Using the supplied microphone Attach the XLR Adaptor when you use the Inputting external sound supplied microphone (ECM-XM1). -
Page 54: Adjusting The Recording Level
Selecting the recording level Turn the AUDIO LEVEL dial or AUTO/MAN (CH1) switch to adjust the volume to the AUDIO LEVEL (CH1) dial proper level. AUTO/MAN (CH2) switch AUDIO LEVEL (CH2) dial Confirm that the volume is at the proper level with headphones or audio Switching wind noise reduction to level meter (p. -
Page 55: Using An External Audio Device
ATT 0dB: -60dBu Using an external audio device ATT 10dB: -50dBu Set as follows when you use a microphone ATT 20dB: -40dBu other than the supplied microphone or an Notes external audio device (mixer, etc.). When the INPUT1/INPUT2 (LINE/MIC/ ... -
Page 56: Setting The Image Quality And Recording Media
Setting the image quality and recording media Selecting the frame rate You can select the frame rate to be used to Selecting high definition image record high definition image quality (HD) quality (HD) or standard image movies. Using [50i] is recommended for quality (STD) standard recording. -
Page 57: Selecting The Recording Mode
Selecting the recording mode Recording mode Types of media You can switch the recording mode to HQ/LP select the movie quality when recording On this camcorder high definition image quality (HD) movies ([Highest Quality ] is the Internal recording default setting). The recording time of the media recording media is changed depending on Memory card... -
Page 58: Performing The Format
When the internal recording media is Performing the format selected on the [Format] screen, touch Formatting deletes all the movies and [Empty]. photos to recover recordable free space. (MENU) [Rec/ Touch Media SET] [Format]. Select the recording media to be ... -
Page 59: Making Good Use Of Your Camcorder
Making good use of your camcorder Deleting movies and photos You can free media space by deleting movies and photos from recording media. Notes When [ Setting] is set to You cannot restore images once they are STD Quality], appears deleted. -
Page 60: Protecting Recorded Movies And Photos (Protect)
To undo the protection of movies and Protecting recorded movies and photos photos (Protect) Touch the movie or photo marked with Protect movies and photos to avoid deleting in step 4. them by mistake. disappears. will be displayed on the protected To protect all movies/photos in an images. - Page 61 power during dubbing. Select the image to be copied. Tips [Multiple Images]: Touch the image to The original copy of the image will not be deleted after the copy operation has been be copied, and mark it with . You can completed.
-
Page 62: Dividing A Movie
A slight difference may occur from the point Dividing a movie where you touch and the actual dividing point, as your camcorder selects the dividing You can divide a movie to delete point based on about half-second increments. unnecessary parts. Only simple editing is available on the ... - Page 63 Notes The image size is fixed based on the image quality of the movie. If the movie was recorded with one of the following image quality levels, the image size will be set as shown below. High definition image quality (HD): 2.1 M ...
-
Page 64: Saving Images With An External Device
Saving images with an external device Selecting a method for saving images with an external device You can save high definition image quality (HD) movies using an external device. Select the method to be used according to the device. External devices Connecting cable Page External media device... -
Page 65: The Devices On Which The Created Disc Can Be Played Back
The devices on which the created disc can be played back DVD disc with high definition image quality (HD) AVCHD format playback devices, such as a Sony Blu-ray disc player or a PlayStation DVD disc with standard definition image quality (STD) Ordinary DVD playback devices, such as a DVD player. -
Page 66: Saving Images On An External Media Device
(USB storage For details on available external media devices, devices), such as an external hard disk go to the Sony support website in your drive. You can also play back images on the country/region. camcorder or another playback device. -
Page 67: Saving Desired Movies And Photos
View] or Event Index is displayed) of the Connect the external media external media device. Disconnect the USB Adaptor Cable. device and touch [Copy.] on the camcorder screen. Notes Movies and photos that are stored on The number of scenes you can save on the ... -
Page 68: Playing Back Images In The External Media Device On The Camcorder
To perform [Direct Copy] manually When you selected [Multiple You can perform [Direct Copy] manually Images], touch the image to be while the camcorder is connected to an saved. external media device. Touch (MENU) [Edit/Copy] appears. [Direct Copy] on the [Event View] screen of the external media device. -
Page 69: Creating A High Definition Image Quality (Hd) Disc With A Dvd Writer
AC Adaptor for this After the operation is completed, operation (p. 19). touch on the Sony DVD writer may not be available in some countries/regions. camcorder screen. Connect the AC Adaptor and the Disconnect the USB cable. -
Page 70: Creating A Standard Definition Image Quality (Std) Disc With A Recorder, Etc
Connect your camcorder to the wall outlet (wall (White) socket) using the supplied AC Adaptor for this operation (p. 19). AUDIO Sony DVD writer may not be available in some countries/regions. High definition image quality (HD) movies (Red) -
Page 71: Saving Images With A Computer
Saving images with a computer Preparing a computer (Windows) Connect your camcorder to the You can perform following operations using recording device (a disc recorder, “Content Management Utility. ” etc.) with the A/V connecting Importing images to a computer cable ... -
Page 72: Step 2 Installing The Supplied Software "Content Management Utility
Hard disk Place the supplied CD-ROM Disk volume required for installation: “Content Management Utility” in Approximately 100 MB Only the NTFS or exFAT file system can be the disc drive of your computer. used for importing videos or registering them The installation screen appears. - Page 73 To disconnect your camcorder from the computer Click the icon at the bottom right of the desktop of the computer [Safely remove USB Mass Storage Device- Drive]. Touch [Yes] on the camcorder screen. Disconnect the USB cable. ...
-
Page 74: Customizing Your Camcorder
Customizing your camcorder Using menus You can enjoy using your camcorder more by making good use of menu operations. The camcorder has various menu items under each of 6 menu categories. Shooting Mode (Items for selecting a shooting mode) p. 79 Camera/Audio (Items for customized shooting) ... -
Page 75: Menu Lists
Menu lists You can register items with on My Buttons (p. 48). Shooting Mode Records movies. Movie Shoots photos. Photo Records fast moving subjects in slow-motion. Smooth Slow Rec Divides two seconds of fast movement into frames Golf Shot which are then recorded as a movie and photos. Camera/Audio (Manual Settings) Sets the gain... - Page 76 (Face) Detects a face. Face Detection Automatically takes a shot whenever a smile is detected. Smile Shutter 45, 85 Sets the smile detection sensitivity using the smile Smile Sensitivity shutter function. (Audio) Switches the audio format. Audio Format Sets recording sensitivity of the internal microphone. Int.
- Page 77 TC/UB Change the display of the time code/user bit. TC/UB Disp Sets the time code. TC Preset Sets the user bit. UB Preset Selects how the time code advances. TC Run Selects the recording type on the recording media. TC Make Selects whether or not to save the actual time in the user UB Time Rec bit code.
- Page 78 Make the supplied Wireless Remote Commander not Remote Ctrl be used. Selects the language to be used on the LCD screen. Language Setting Adjusts the touch panel. Calibration Displays the battery information. Battery Info Displays the total hours of operation. Operation Time (Clock Settings) Sets the [Date &...
-
Page 79: Shooting Mode (Items For Selecting A Shooting Mode)
Shooting Mode (Items for selecting a shooting mode) Notes You cannot record sound. See “Using menus” (p. 74) on the operation. Image quality is not as good as that of normal The default settings are marked with . recording. -
Page 80: Camera/Audio (Items For Customized Shooting)
Camera/Audio (Items for customized shooting) The camcorder sets the point when the loudest sound in the past 1 second is detected, as the See “Using menus” (p. 74) on the operation. sound of a club hitting the ball. The default settings are marked with . ... - Page 81 Focus AE Shift You can adjust the focus manually (p. 43) You can adjust the brightness of the with touch control. You can select this automatic exposure adjustment. function also when you want to focus on a Off certain subject intentionally. Adjusts the exposure automatically.
- Page 82 Notes Off When you switch the [ Cinematone] Does not detect the subject. function on or off, the image will be paused temporarily. When the camcorder detects the subject, the icons that correspond to the detected Self-Timer condition are displayed.
- Page 83 Digital Zoom SteadyShot You can select the maximum zoom level. You can compensate for camera shake. Note that the image quality decreases when Set [ SteadyShot] to [Off] ( ) when you use the digital zoom. using a tripod (sold separately), then the image becomes natural.
- Page 84 Auto Back Light Color Bar Your camcorder adjusts the exposure for You can display or record color bars in the backlit subjects automatically. movie recording mode. This function helps you to adjust colors when you view movies On recorded with your camcorder on a TV or Adjusts the exposure for backlit subjects a monitor.
- Page 85 Notes Tips You cannot set [Date Rec] in the following For better face detection performance, shoot the cases. subject(s) under the following conditions: When [ Frame Rate] is 50p or 25p Shoot in a sufficiently bright place ...
- Page 86 Smile Sensitivity Int. Mic. Wind NR Sets the smile detection sensitivity for using You can record a movie with less wind the Smile Shutter function. noise by cutting the low-frequency sound input from the internal microphone. Slight Smile Detects even a slight smile. ...
- Page 87 Histogram Peaking You can adjust the histogram (p. 47) with On/Off touch control. When you select [On], appears and you can display an image on the screen Off with its outlines enhanced. This function Does not display the histogram. helps you to adjust the focus.
- Page 88 Aspect Camera Data Display You can display markers at the boundaries When you set this function to [On], you of the display area defined by 4:3 the aspect can constantly display the iris, gain and ratio. The default setting is [Off]. shutter speed settings on the screen.
-
Page 89: Rec/Media Set (Items For Setting Up Image Quality Or The Recording Media)
Rec/Media SET (Items for setting up image quality or the recording media) Image Size You can select a size for the photos you are See “Using menus” (p. 74) on the operation. going to shot. The default settings are marked with . ... -
Page 90: Tc/Ub (Items For Setting Up The Time Code Or User Bit)
TC/UB (Items for setting up the time code or user bit) Format See page 58. TC/UB Disp Repair Img. DB F. See page 47. See page 103, 105. TC Preset File Number See page 48. You can select the way to assign file number UB Preset of photos. -
Page 91: Edit/Copy (Items For Editing)
Edit/Copy (Items for editing) TC Make See “Using menus” (p. 74) on the operation. Preset Delete Records the newly set time code on the See page 59. recording media. Regenerate Protect Reads the last time code of the previous recording from the recording media and See page 60. -
Page 92: Setup (Other Setup Items)
Setup (Other setup items) See “Using menus” (p. 74) on the operation. Camera Data The default settings are marked with . Movie Data Code During playback, your camcorder displays the information (Date/Time, Camera Data, Coordinates) recorded automatically at the time of recording. ... - Page 93 HDMI/Component Disp Output You can set the format of the image You can select where to output the display output to HDMI and component jacks information, such as time code. (resolution). LCD Panel Outputs the information to the LCD screen 1080p/576i and viewfinder.
- Page 94 LCD Brightness Display Setting You can adjust the brightness of the LCD You can set the duration of displaying the screen. icons or indicators on the LCD screen. Normal Auto Normal setting (normal brightness) Displays for about 3 seconds. The rec & zoom buttons on the LCD screen is displayed in the Bright recording mode.
- Page 95 How to check the triangulating REC Lamp (Recording lamp) information You can make the camera recording lamp Color of the satellites/ Status on the front of your camcorder not to turn triangulating gauge No signal, but orbit (black) information for the ...
- Page 96 Battery Info Area Setting You can check the estimated remaining You can adjust a time difference without capacity of the battery. stopping the clock. Select your local area when using the camcorder in other time zones. Refer to the world time difference information on page 112.
- Page 97 Auto Area ADJ (Auto area adjustment) The camcorder can compensate for time differences automatically by acquiring location information from the GPS system. On Compensates for time differences automatically. Does not compensates for time differences automatically. Notes You must set the date and time on your ...
-
Page 98: Additional Information
in order to investigate the problem. However, outlet (wall socket) or remove the battery your Sony dealer will neither copy nor retain pack, then reconnect it after about 1 minute. your data. If the functions still do not work, press RESET (p. - Page 99 camcorder and take it to a warm place. Leave [AE Shift] [White Balance Shift] the camcorder there for a while, then turn on [IRIS] your camcorder. [Gain] [Shutter Speed] The menu settings have been changed [AGC Limit] automatically.
- Page 100 Set [Display Setting] to [On] (p. 94). disconnect the AC Adaptor from the wall outlet (wall socket) and contact your Sony There are dots in the shape of a grid on dealer. The battery pack may be damaged. the screen.
- Page 101 take it to a warm place. Leave the camcorder Memory card there for a while, then turn on the camcorder. Photos cannot be recorded. Operations using the memory card cannot be performed. You cannot record photos together with [Smooth Slow Rec] and [Golf Shot]. If you use the memory card formatted on a ...
- Page 102 the image device (CMOS sensor) reads out There is a time difference between the image signals, the subjects passing by the lens point when START/STOP is pressed and rapidly might appear crooked depending on the point that the recording movie is the recording conditions.
- Page 103 surround sound is down-mixed to 2ch stereo Playback and played back on your camcorder. Images cannot be played back. Playing back images stored on memory card on other devices Select the type of recording media you want to play back (p. 26). Select the image quality of the movie you want ...
- Page 104 When you are using the S VIDEO plug, Connecting to a computer make sure the red and white plugs of the A/V connecting cable are connected (p. 40). The computer does not recognize the The top, bottom, right, and left edges camcorder.
-
Page 105: Self-Diagnosis Display/Warning Indicators
persists even after you have tried a couple out. For the type of memory card you can use of times, contact your Sony dealer or local with your camcorder, see page 27. No memory card is inserted (p. 26). - Page 106 Description of warning messages ( Warning indicators pertaining to external media formatting) If messages appear on the screen, follow the The external media device may be damaged. instructions. The external media device is not formatted Recording media correctly. (Warning indicator pertaining to Cannot recognize the internal memory.
- Page 107 Copy and take data backup to other device camcorder (p. 27). (such as a computer), and then format the Contact your Sony dealer. memory card on the camcorder (p. 58). The size of the inserted memory card is not ...
-
Page 108: Recording Time Of Movies/Number Of Recordable Photos
Recording time of movies/number of recordable photos Unable to access external media. Use the external media in a stable condition Expected time of recording and (vibration-free, at room temperature, etc.) Confirm that the external media is not playback with each battery pack ... -
Page 109: Expected Recording Time Of Movies
Playing time Notes The number in ( ) is the minimum recordable Approximate time available when you use a time. fully charged battery pack. Tips (unit: minute) You can record movies of a maximum of 3,999 Battery pack scenes with high definition image quality (HD), NP-FV70... -
Page 110: Expected Number Of Recordable Photos
[Linear PCM] Notes Bottom: When [ Audio Format] is set to The unique pixel array of Sony’s ClearVid and [Dolby Digital] the image processing system allow still image Standard definition image quality (STD) resolution equivalent to the sizes described. -
Page 111: Using Your Camcorder Abroad
Using your camcorder abroad Power supply System Used in You can use your camcorder in any Australia, Austria, Belgium, countries/regions using the AC Adaptor China, Czech Republic, Denmark, Finland, Germany, supplied with your camcorder within the Holland, Hong Kong, Hungary, AC 100 V to 240 V, 50 Hz/60 Hz range. - Page 112 World time difference Time-zone Area setting Time-zone Area setting differences differences –08:00 Los Angeles, Tijuana Lisbon, London –07:00 Denver, Arizona +01:00 Berlin, Paris –06:00 Chicago, Mexico City +02:00 Helsinki, Cairo, Istanbul –05:00 New York, Bogota +03:00 Moscow, Nairobi –04:00 Santiago +03:30 Tehran –03:30...
-
Page 113: File/Folder Structure On The Recording Media
File/folder structure on the recording media The file/folder structure is shown below. You do not usually need to acknowledge the file/ folder structure, when recording/playing back movies and still images on the camcorder. “Memory Stick PRO Duo” media up: [100PNV01] [101PNV01] SD memory card, SDHC memory card, SDXC ... -
Page 114: Maintenance And Precautions
Maintenance and precautions camcorder. About the AVCHD format About GPS What is the AVCHD format? The GPS (Global Positioning System) is a The AVCHD format is a high definition system that calculates geographical location digital video camera format used to record from highly accurate US space satellites. -
Page 115: About The Memory Card
bridge, or in locations where magnetic fields About the memory card are generated, such as near high voltage cables. A memory card formatted by a computer Near devices that generate radio signals of the (Windows OS/Mac OS) does not have same frequency band as the camcorder: near guaranteed compatibility with your camcorder. -
Page 116: About The "Infolithium" Battery Pack
On the memory card adaptor and transfers the contents in an encrypted format. When using memory card with memory card compliant device inserting memory card About the “InfoLITHIUM” battery into memory card adaptor, make sure the memory card is inserted facing in the correct pack direction. -
Page 117: About Handling Of Your Camcorder
longer time. To discharge the battery pack on your Put the battery pack in a pocket to warm it camcorder completely, turn on the power and up, and install it on your camcorder right leave your camcorder in recording standby until before you start taking shots. - Page 118 (or vice versa) or when you use your camcorder casing, unplug your camcorder and have it in a humid place as follows: checked by a Sony dealer before operating it You bring your camcorder from a ski slope any further.
- Page 119 On adjustment of the touch panel surface In hot or humid locations ([Calibration]) When the lens is exposed to salty air such as The buttons on the touch panel may not work at the seaside correctly. If this happens, follow the procedure Store in a well-ventilated location subject to ...
-
Page 120: Specifications
Specifications System Note on disposal/transfer of the Signal format: PAL color, CCIR standards memory card HDTV 1080/50i, 1080/50p specification Even if you delete data in the memory card or Movie recording format: format the memory card on your camcorder or HD: MPEG-4 AVC/H.264 AVCHD format a computer, you may not delete data from the compatible (1080/50p: original format) - Page 121 (ECM-XM1), the viewfinder at 0 lx (lux) (NIGHTSHOT is set to [On]) normal brightness: 3.5 W The unique pixel array of Sony’s ClearVid During camera recording using the and the image processing system allow microphone (ECM-XM1), the LCD screen at still image resolution equivalent to the normal brightness: 3.6 W...
- Page 122 On trademarks Rechargeable battery pack NP-FV70 Maximum output voltage: DC 8.4 V “NXCAM” logo is a trademark of Sony Output voltage: DC 6.8 V Corporation. “AVCHD” and “AVCHD” logotype are Maximum charge voltage: DC 8.4 V trademarks of Panasonic Corporation and Sony Maximum charge current: 3.0 A...
- Page 123 NEX-FS100 L.L.C., 250 STEELE STREET, SUITE 300, as the model for your camcorder. DENVER, COLORADO 80206. http://www.sony.net/Products/Linux/ We would prefer you do not contact us about the THIS PRODUCT IS LICENSED UNDER THE contents of source code.
-
Page 124: Quick Reference
Quick reference Screen indicators Right Center Indicator Meaning Left Right Wide Rec (89) Recording image quality (HD/STD) (56), frame rate (50p/50i/25p) (56) and recording mode (PS/FX/ FH/HQ/LP) (57) 00h00m Remaining battery Recording/playback/ bottom editing media (26) Left While the camcorder is Indicator Meaning connected to an external... - Page 125 Bottom Indicator Meaning View Images button (34) Wind Noise Reduct. (86) Audio Level Display (88) Low Lux (81) AE Shift (81) White Balance Shift (81) Tele Macro (82) Cinematone (82) Shutter Speed (81) IRIS (81) White Balance (51) Slide show button Data file name (37) 101-0005 Protected image (60)
-
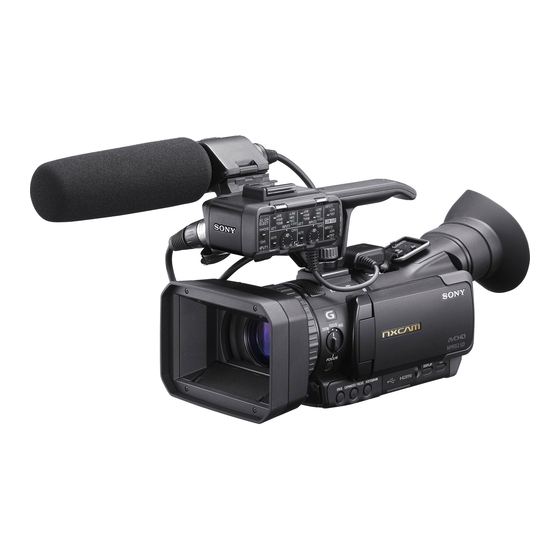
Page 126: Parts And Controls
Parts and controls Figures in ( ) are reference pages. Active Interface Shoe (12) Internal microphone (52) (Movie) lamp (31) Accessory shoe (12) MODE button (31, 33) IRIS PUSH AUTO button (50) (Photo) lamp (32) NIGHTSHOT button (45) ... - Page 127 Microphone (13) Power zoom lever (42) Handgrip PHOTO button (33) XLR Adaptor (12) Viewfinder (24) Lens cover lever (14) Large eyecup (24) Manual ring Lens (G lens) LCD screen/Touch panel (23, 47) MIC input jack ...
- Page 128 Lens hood with lens cover (14) AUDIO LEVEL (CH1) dial (54) ZOOM/FOCUS/IRIS switch (42, 43, 49) AUTO/MAN (CH2) switch (54) FOCUS button (43) AUDIO LEVEL (CH2) dial (54) IRIS button (49) LOW CUT (INPUT2) switch (54) ...
-
Page 129: Wireless Remote Commander
PLAY button Remote Commander may not function properly. In this case, replace the battery with STOP button a Sony CR2025 lithium battery. Use of another DISPLAY button (23) battery may present a risk of fire or explosion. ... -
Page 130: Index
Index A/V connecting cable....70 Data Code ......21, 92 HD/STD Setting ......56 Abroad ........111 Date & Time ........20 HDMI/Component ....93 AE Shift ........81 Date & Time Format ....96 HDMI TC Output ......93 AGC Limit ........80 Date & Time Setting ....96 Histogram ......47, 87 Area Setting .........96 Date/Time ........21 HQ ..........57... - Page 131 Shooting Assist......76 White Balance Shift ....81 Shooting Mode......79 Wide angle ........42 NightShot ........45 Shutter Speed ......81 Wide Rec ........89 NIGHTSHOT Light ....84 Smile Sensitivity ......86 Smile Shutter ......45, 85 Zebra ..........87 One Push ........51 Smooth Slow Rec ......79 Zoom ..........42 Operation Time ......96 Specifications ......120 Original ........61...
- Page 132 2011 Sony Corporation Printed in Japan ...
Need help?
Do you have a question about the NXCAM HXR-NX70E and is the answer not in the manual?
Questions and answers