Advertisement
Quick Links
Please read this information first
Read entire instruction sheet before beginning assembly
and installation.
Check parts on parts listing before beginning assembly.
Many accessories are available for this product. Please
contact customer service or visit website for more
information.
The retainer bar (D) in step 6 must be placed with ex-
truded side towards the anti rollout hook (C).
Pay close attention to the assembly of the threaded flush
mount tube (N) in step 8. The retaining collar (K) threads
up into the horizontal support (G). The set screw (W) is
then installed from the inside of that collar into the notch
in the tube. Refer to drawings for correct placement.
The placement of set screw (W) in detail 3 of step 8 is
essential to the safety of the installation.
Visit the Peerless Web Site at www.peerlessmounts.com
Installation and Assembly
- Jumbo 2000
®
1 of 13
For customer service call 1-800-729-0307 or 708-865-8870.
Models:
OP-JMW2630, OP-JMW2640,
OP-JMW2640D, OP-JMW2650,
OP-JMW2650D, OP-JMW2655
os
MAXIMUM OSHPD LOAD
CAPACITY: 96 lb (43.5 kg)
ISSUED: 05-18-05 SHEET #: 128-9155-2 07-11-05
pd
Advertisement

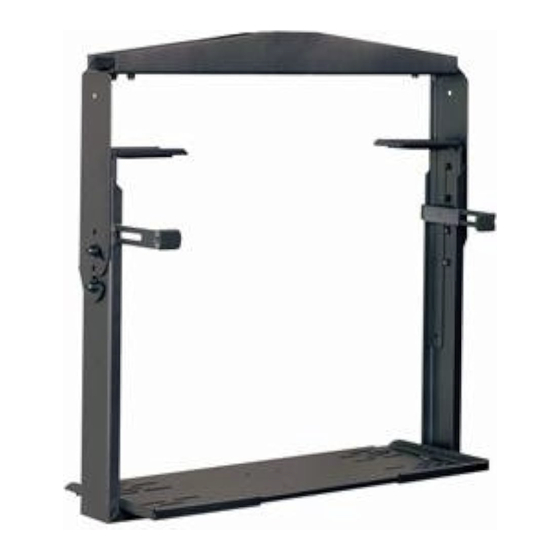
Summary of Contents for PEERLESS Jumbo 2000 OP-JMW2630
- Page 1 The placement of set screw (W) in detail 3 of step 8 is essential to the safety of the installation. 1 of 13 ISSUED: 05-18-05 SHEET #: 128-9155-2 07-11-05 Visit the Peerless Web Site at www.peerlessmounts.com For customer service call 1-800-729-0307 or 708-865-8870.
- Page 2 2 of 13 ISSUED: 05-18-05 SHEET #: 128-9155-2 07-11-05 Visit the Peerless Web Site at www.peerlessmounts.com For customer service call 1-800-729-0307 or 708-865-8870.
- Page 3 3 of 13 ISSUED: 05-18-05 SHEET #: 128-9155-2 07-11-05 Visit the Peerless Web Site at www.peerlessmounts.com For customer service call 1-800-729-0307 or 708-865-8870.
- Page 4 For use only to support Jumbo Mount TV Brackets or Note: Read entire instruction sheet before other products as specified by Peerless. Combine only you start installation and assembly. as specified (see specifications below). WARNING • Installer must verify that the wall will safely support four times the combined weight of all attached equipment and hardware.
- Page 5 "edge to edge" stud finder is highly recommended. 2X OR 3X STUDS BLOCKING (BY ENGINEER OF RECORD) 5 of 13 ISSUED: 05-18-05 SHEET #: 128-9155-2 07-11-05 Visit the Peerless Web Site at www.peerlessmounts.com For customer service call 1-800-729-0307 or 708-865-8870.
- Page 6 Use holes shown below POWERS WEDGE BOLT (560-1165) WASHER (540-9401) 6 of 13 ISSUED: 05-18-05 SHEET #: 128-9155-2 07-11-05 Visit the Peerless Web Site at www.peerlessmounts.com For customer service call 1-800-729-0307 or 708-865-8870.
- Page 7 WARNING • When installing Peerless wall mounts on cinder block, verify that you have a minimum of 1-3/8" of actual concrete surface in the hole to be used for the concrete anchors. Do not drill into mortar joints! Be sure to mount in a solid part of the block, generally 1"...
- Page 8 Attach adhesive pads (F) to top clamps (E). Insert plastic covers (Y) onto ends of anti-rollout hooks (C). 8 of 13 ISSUED: 05-18-05 SHEET #: 128-9155-2 07-11-05 Visit the Peerless Web Site at www.peerlessmounts.com For customer service call 1-800-729-0307 or 708-865-8870.
- Page 9 TV bottom.] Attach at four places as close to the four corners of the TV bottom as possible. 9 of 13 ISSUED: 05-18-05 SHEET #: 128-9155-2 07-11-05 Visit the Peerless Web Site at www.peerlessmounts.com For customer service call 1-800-729-0307 or 708-865-8870.
- Page 10 Position TV on support tray (A), thread belt through slots in top handle 180°. clamps (E). Secure TV with belt as directed in detail 1, 2 & 3. 10 of 13 ISSUED: 05-18-05 SHEET #: 128-9155-2 07-11-05 Visit the Peerless Web Site at www.peerlessmounts.com For customer service call 1-800-729-0307 or 708-865-8870.
- Page 11 (approximately 1 1/2") between the horizontal support arm and top clamps [see step 9]. Leave about 1/4" of exposed thread. DETAIL 1 DETAIL 2 11 of 13 ISSUED: 05-18-05 SHEET #: 128-9155-2 07-11-05 Visit the Peerless Web Site at www.peerlessmounts.com For customer service call 1-800-729-0307 or 708-865-8870.
- Page 12 Insert one screw/washer combo (T) through slot in each tilt bracket (H & I). Hand tighten. 12 of 13 ISSUED: 05-18-05 SHEET #: 128-9155-2 07-11-05 Visit the Peerless Web Site at www.peerlessmounts.com For customer service call 1-800-729-0307 or 708-865-8870.
- Page 13 Visit the Peerless Web Site at www.peerlessmounts.com For customer service call 1-800-729-0307 or 708-865-8870. © 2005 Peerless Industries, Inc. All rights reserved. Peerless is a registered trademark of Peerless Industries, Inc. All other brand and product names are trademarks or registered trademarks of their respective owners.


Need help?
Do you have a question about the Jumbo 2000 OP-JMW2630 and is the answer not in the manual?
Questions and answers