Table of Contents
Advertisement
Quick Links
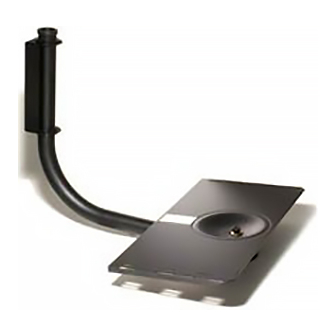
Installation and Assembly - TV Wall Mount
R
• Do not begin to install your Peerless product until you have read and understood the instructions and warnings
contained in this Installation Sheet. If you have any questions regarding any of the instructions or warnings, call
Peerless customer service at 1-800-729-0307.
• This product should only be installed by someone of good mechanical aptitude, has experience with basic
building construction, and fully understands these instructions.
• Make sure that the supporting surface will safely support the combined load of the equipment and all attached
hardware and components.
• Never mount this product to a metal stud wall construction unless the stud can be verified to be constructed of
25 gauge steel minimum, the drywall is 1/2" thick minimum and you obtain and use the Peerless accessory kit
for metal studs.
• Never exceed the Maximum UL Load Capacity.
• If mounting to wood wall stud wall construction, make sure that mounting screws are anchored into the center of
the studs. Use of an "edge to edge" stud finder is highly recommended.
• Always use an assistant or mechanical lifting equipment to safely lift and position equipment.
• Tighten screws and nuts firmly, but do not overtighten. Overtightening can damage the items, greatly reducing
their holding power. See suggested torque values where applicable within these instructions.
IMPORTANT! Certain types of walls require additional mounting hardware...
WALL CONSTRUCTION
Wood Stud, Wood Beam
Solid Concrete, Cinder
Block
Metal Stud (Attachment to
metal studs has not been
evaluated by UL and the
product is not UL listed if
attached to metal studs.)
Other or unsure?
PM 13, PM 13S,
The Maximum UL Load Capacity for this
PM 13W
product is rated up to 13" TV, 125 lb
PM 20, PM 20C,
The Maximum UL Load Capacity for this
product is rated up to 20" TV, 125 lb
PM 20S, PM 20W
PM 27, PM 27C,
The Maximum UL Load Capacity for this
PM 27S, PM 27W
product is rated up to 27" TV, 125 lb
Before you start make sure all of the parts
shown are included with your product. See page
5 for a complete parts list.
Visit the Peerless Web Site at www.peerlessindustries.com
WARNING
ADDITIONAL HARDWARE REQUIRED
none
Contact Customer Service for accessory kit
unless you have a PM 20C or PM 27C which
includes concrete fasteners
Do not attach except with Peerless accessory kit
for metal studs; Contact Customer Service for
Peerless accessory kit for metal studs.
Contact Customer Service
Models: PM 13, PM 13S, PM 13W, PM 20,
PM 20C, PM 20S, PM 20W, PM 27, PM 27C,
PM 27S, PM 27W
M
1 of 12
ISSUED: 07-17-96 SHEET #: 170-9001-7 10-26-04
For customer service call 1-800-729-0307 or 708-865-8870.
B
A
G
H
I
J
L
N
C
D
E
F
E
K
Advertisement
Table of Contents

Related Manuals for PEERLESS PM 13


Summary of Contents for PEERLESS PM 13
- Page 1 Installation and Assembly - TV Wall Mount Models: PM 13, PM 13S, PM 13W, PM 20, PM 20C, PM 20S, PM 20W, PM 27, PM 27C, PM 27S, PM 27W WARNING • Do not begin to install your Peerless product until you have read and understood the instructions and warnings contained in this Installation Sheet.
- Page 2 PLAN AHEAD! If you wish to mount TV as close to ceiling 3" (76 mm) as possible measure TV height and use dimensions provided to calculate dimension X. 13" (330 mm) * 16.5" (419 mm) ** * PM 13, PM 13S, PM 13W, PM 20, PM 20S, PM 20W, PM 20C ** PM 27, PM 27S, PM 27W, PM 27C, PM 27WC BE SURE TO DRILL...
- Page 3 WARNING • If your model does not include concrete fasteners, contact customer service for the appropriate accessory kit to install the product on concrete or cinder block. • When installing Peerless wall mounts on cinder block, verify that you have a minimum of 1-3/8" of actual concrete surface in the 5/16"...
- Page 4 Snap bushings Insert support arm Join support arm Support arm (E) into wall (K) into wall bracket (K) and support retainer (C) will bracket (F). (F), then insert arm retainer (C) hold support arm support arm with retainer pin (K) in place on retainer (C).
-
Page 5: Parts List
Parts List Description Qty. Part Number Washer Head Screw (black) 5S1-015-C03 #14 x 2.5 (6 mm x 65 mm) Washer Head Screw (cadmium) 5S1-015-C04 #14 x 2.5 (6 mm x 65 mm) Plastic Ring 590-1018 Support Arm Retainer (black) 590-1051 Support Arm Retainer (white) 590-1052 Support Arm Retainer (silver) - Page 6 Français Español Montage et installation-Monture murale pour télévision PM 13, PM 13S, PM 13W, Modèles: Instalación y ensamblaje - Montaje de TV para la pared Modelos: PM 20, PM 20S, PM 20W, PM 27, PM 27S, PM 27W, PM 20C, PM 27C AVERTISSEMENT •...
- Page 7 Français Español IMPORTANT ! De la visserie additionnelle est nécessaire pour le montage sur certains types de murs ... IMPORTANTE: Ciertos tipos de paredes requieren tornillería adicional de montaje... CONSTRUCTION VISSERIE ADDITIONNELLE NECESSAIRE CONSTRUCCION TORNILLERIA ADICIONAL REQUERIDA Montants à bois, poutre en bois Aucune Vigas de madera Ninguna...
- Page 8 Français Español PREPAREZ-VOUS ! Si vous désirez monter le téléviseur aussi près que 3" (76 mm) possible du plafond, mesurez la hauteur de l’appareil et servez-vous des dimensions fournies pour calculer la dimension X. ¡PLANIFIQUE CON ANTICIPACION! Si desea montar el televisor lo más 13"...
- Page 9 Français Español AVERTISSEMENT • Si ce modèle n’inclut pas de fixations pour béton, contacter le service clientèle pour obtenir le kit d’accessoire approprié permettant d’installer le produit sur du béton ou des blocs en béton de mâchefer. • Avant d’installer les supports muraux Peerless sur des blocs de béton de mâchefer, vérifier qu’il existe une surface en béton d’au moins 3,43 cm (1 3/8 po) dans le trou de 0,7 cm (5/16 po) de diamètre qui sera utilisé...
- Page 10 Français Español AVERTISSEMENT 5/16" (8 mm) 5/16" (8 mm) • Toujours fixer les chevilles à expansion pour béton directement au béton porteur. • Ne jamais fixer une coquille d’expansion sur du béton recouvert de plâtre, de cloison sèche ou autre matériau de finition.
- Page 11 Français Español Enfoncez les Reliez le bras de soutien Le dispositif de retenue Enfoncer le bras de coussinets (E) (K) à son dispositif de (C) maintient le bras de support (K) dans le d’un coup sec retenue (C) avec la soutien (K) en place sur support mural (F), puis dans le support...
- Page 12 Visit the Peerless Web Site at www.peerlessindustries.com For customer service call 1-800-729-0307 or 708-865-8870. © 2004 Peerless Industries, Inc. All rights reserved. Peerless is a registered trademark of Peerless Industries, Inc. All other brand and product names are trademarks or registered trademarks of their respective owners.
Need help?
Do you have a question about the PM 13 and is the answer not in the manual?
Questions and answers