CS Instruments Ultracam LD510 Short Instruction Manual
Hide thumbs
Also See for Ultracam LD510:
- Instruction manual (68 pages) ,
- Instruction manual (67 pages)
Table of Contents
Advertisement
Quick Links
EN - English
SALES OFFICE SOUTH
Zindelsteiner Straße 15
D-78052 VS-Tannheim
DEUTSCHLAND
Tel.: +49 (0) 7705 978 99-0
Fax: +49 (0) 7705 978 99-20
info@cs-instruments.com
www.cs-instruments.de
LD 500_SHORT BAL_V2.06 EN
Short Instruction Manual
Ultracam, LD 510 / LD500
Page 1 of 32
SALES OFFICE NORD
Gewerbehof 14
D-24955 Harrislee
Deutschland
Tel.: +49 (0) 461 807 105-0
Fax: +49 (0) 461 807 105-15
Advertisement
Table of Contents

Related Manuals for CS Instruments Ultracam LD510


Summary of Contents for CS Instruments Ultracam LD510
- Page 1 EN - English Short Instruction Manual Ultracam, LD 510 / LD500 SALES OFFICE SOUTH SALES OFFICE NORD Gewerbehof 14 Zindelsteiner Straße 15 D-78052 VS-Tannheim D-24955 Harrislee DEUTSCHLAND Deutschland Tel.: +49 (0) 7705 978 99-0 Tel.: +49 (0) 461 807 105-0 Fax: +49 (0) 7705 978 99-20 Fax: +49 (0) 461 807 105-15 info@cs-instruments.com...
-
Page 2: Safety Instructions
CS Instruments GmbH & Co. KG offers no guarantee in relation to the suitability for any other purpose and accepts no liability for any printing errors in this operation manual. The same applies to conse- quential damage in connection with the delivery, capacity or use of this device. - Page 3 EN - English The following accumulator is included in this electric device Battery type chemical system accumulator LiIon 2S1P Information for safe removal of the battery • Warning: Make sure that the battery is completely empty. • Removal of the battery Removing the battery cover Disconnecting the connerctor Carefully pull out the battery...
-
Page 4: Intended Use
EN - English 2. Intended use The LD 500 is a leak detector for quick and reliable leak detection in/on compressed air systems. The LD 500 leak detector evaluates the ultrasonic waves generated by the leakage based on distance and pressure. It is solely designed and constructed for the intended use described here and may only be used for this purpose. -
Page 5: Preparing The Device
EN - English Altitude Up to 4000m above sea level Max. Humidity <95% rH, without condensation Permissible degree of contamination Protection class IP20 UltraCam, Acoustic Trumpet, Straightening Tube, Available attachments Gooseneck, Parabolic Mirror UltraCam 30 Digital Microphones, 5 LED’s, 1 Light sensor 4. - Page 6 EN - English Checking the current firmware and firmware updates Regularly check the manufacturer homepage for a new firmware version. We are continuously devel- oping the product so you can use the device with the most up-to-date software version including all available functions.
- Page 7 EN - English Configuration of LD 500 Home → Configuration In the configuration settings, the unit system can be se- lected and the required parameters entered to calculate the leakage costs per year. ➔ Select ISO or US unit system ➔...
- Page 8 EN - English 5.3.1 Setting the LD 500 parameters Entering the parameters is necessary for the calculation of the leak flow rate. The following settings must be made. ➔ Sensor type (manual selection only necessary for sensor types with- out autotool recognition) Change the sensor type according to the application and ambient conditions, see chapter 7.4.
- Page 9 EN - English 5.3.2 Setting the LD 500 measurement place Home → Configuration → Measurement place The measurement place is stored for each leakage in its journal data (xml file). This information can be viewed later in the software leakage report. The company and building can be recorded upon entering the building, the place identifies the exact position of the leakage so it can be easily found again when doing repairs.
-
Page 10: Leakage Detection
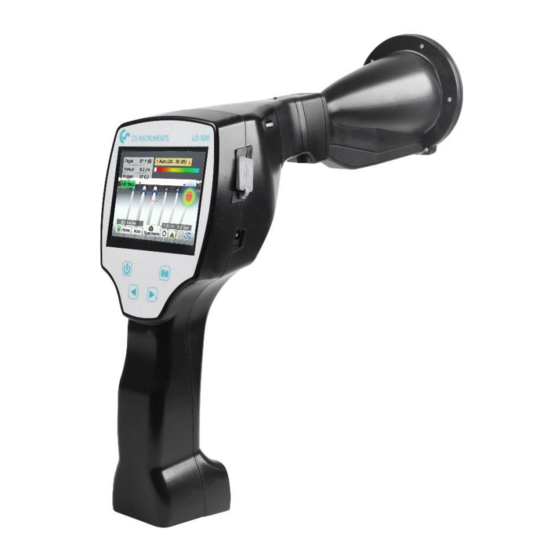
EN - English 6. Leakage detection This chapter describes the best use of the device in practice. Leakage detection procedure The following procedure should be performed in the company on a periodic basis to consistently keep the leakage rate to a minimum. The aim should be a sustainable leakage rate of 5 to 10 % as one-time detection and elimination does not permanently reduce the leakage rate and new leakages will occur again afterwards. - Page 11 EN - English Surface leakage detection with the LD 500 After start-up, the device shows the leakage detection view. The following figure lists the various functions and displays. Sensitivity level button Display block for: Bar graph display of signal Signal level in dB | Leakage level size | Costs /year Laser "On"...
- Page 12 EN - English The new UltraCam has a digital data interface to the LD 500 LD 510. That the LD 500 / LD 510 can communicate with the UltraCam, the following prerequisites must be met: - The main board must be "HW-Stand 2.0" to enable communication between the main body of the LD 500 and the tool.
- Page 13 EN - English and the camera image, even in noisy environments. Optical leak detection: The UltraCam uses 30 digital mems, a camera, an FPGA and a processor to calculate the ult- rasound map. The algorithm used is called beamforming and is based on the delay and sum function.
- Page 14 EN - English 10 % Recommended value! If there is no ult- rasound source, the screen will not be colored 30 – 70% If strong ultrasonic so the sensitivity can sources are present – be reduced that the colored area beco- mes none.
- Page 15 EN - English Recommended distance for ultrasound imaging • 0.3 - 5 meters (low ultrasound level environments) • 0.3 - 2 meters (challenging environments) • 0.1 meter for small leaks Loss and cost - first indicated • Leak is in the center of the circle of leak detection •...
-
Page 16: Description Of Functionality
EN - English Intelligent illumination: manual 6.4.2 Automatic Distance measurement The integrated distance measurement module is available with the UltraCam and optional with the Acoustic Trumpet. The following requirements must be met to use the functionalities: • The Main Board must be "intelligent" to enable the communication between the main body of the LD 500 and the tool. - Page 17 EN - English Note: For the trumpet, the valid distance range is 1 – 6 meters or 40" – 236". 4. The LD 500 will actualize the distance automatically now. The actual measured distance is shown in the grey bar “Dist:”. The used distance for the cost quantification is shown in the small bar below next to the pressure's left side.
- Page 18 EN - English States Best – case: Used distance parameter internally: “Dist:” is green, the distance module's measurement is robust, and the used distance is within the valid range. Move into the valid distance range: Used distance parameter internally: Distance measurement = robust but out range! LD 500_SHORT BAL_V2.06 EN Page 18 of 32...
- Page 19 EN - English 6.4.3 Acoustic trumpet (standard attachment) The acoustic trumpet bundles incident ultrasonic waves, thereby extending the range of the device. This behaviour makes it ideal for medium distances. The leakage can be heard from large distances, for precise de- tection, the user must approach the leakage and consistently follow the "loudest"...
- Page 20 EN - English The sensitivity of the gooseneck has been reduced to dampen noise. This makes it ideal for targeted, local testing of compressed air components at high noise levels, for example in systems using pneu- matic cylinders and in compressed air distribution cabinets. Quantification distance (distance) →...
- Page 21 EN - English Sensitivity levels 0 – 60 dB = Highest sensitivity level of the device (use with small leaks and no noise), selection with the "HiSn" button or the "Sensitivity" button 10 – 70 dB = Leakages and noises get "less noisy", the range is reduced. 20 –...
- Page 22 EN - English 6.5.4 Procedure for leakage detection Different approaches to leakage detection are recommended depending on the ambient condi- tions. Option 1 – In what direction can the leakage be heard? This method is used to aim in all directions and find the loudest point.
- Page 23 EN - English Other problems that can make measuring more difficult There may be further problems in leakage detection, these are de- scribed in the following sub-chapter. To reduce any problems, we generally recommend to use the correct attachment, as outlined in chapter 6.4 Selection of accessories, and to reduce the sensitivity.
- Page 24 EN - English Documenting the leakage If the leakage has been found, the pressure and distance to the leakage adjusted and the leakage de- scribed, it can be "captured" with the "Save" button. Afterwards it is possible to check the parameters (pressure and distance) and to precisely define the measurement place with company, building and loca- tion.
- Page 25 EN - English Exporting journal data Once all leakages have been documented, the data must then be exported to a USB stick. Here, the user has the option of selecting the start and end time of the exported leakages. Attention: If the «DELETE leakage data» function is acti- vated, ALL leakages in the memory will be irretrievably deleted.
-
Page 26: Software Licensing
EN - English 7. Using the CS Leak Reporter software V1 & V2 Main functions: • Administration of companies/buildings/projects/measurements • Documentation and reporting The V1 user interface is used here as an example. The V2 has the functionalities of the CS Leak Reporter V1 and additional improvements Dashboard: Installing the Leak Reporter software... - Page 27 EN - English Leakage data import The data import takes place as a sequence: (1) Selection of a folder (2) Selection of an XML file (3) Selection of the leaks to be imported (4) Destination of the imported leaks The LD 5X0 exports the leaks on the USB stick. You use then the data import menu item to transfer the exported data from the LD 5X0 of the USB stick into the leak reporter software.
- Page 28 EN - English After selecting the XML file, you can filter the leaks according to their “company” and “build- ing” or a freely selectable time period: (1) Selecting individual leaks (2) Filtering by one or more companies (3) Filtering by one or more buildings (4) Defining the start period (first leak) (5) Defining the end period (last leak) Options...
-
Page 29: Selecting Projects
EN - English Selecting projects Path: Dashboard → Companies→ Project (eye of the corresponding project) Each «Data import» corresponds to a project. Here, the desired project of the company in question must now be selected. The leakage overview for the project will then be displayed. -
Page 30: Creating Reports
EN - English Editing individual leakages Using the eye, a detail view of each individual leakage can now be opened and then edited. Path: Dashboard → Companies→ Project →(eye of the corresponding leakage) In this menu, you can: • upload an additional image •... - Page 31 EN - English Modifying company master data (customer) Path: Dashboard → Companies→ Master data In this screen the contact details of the customer, which will be printed in the report, can be en- tered. Modifying project master data Path: Dashboard → Companies→ Project → Master data In this screen, the parameters of the project can be adapted if the configuration of the LD 500 was faulty or incomplete.
-
Page 32: Scope Of Delivery
EN - English 8. Scope of delivery LD 500 is available either as a single unit or in a set. The set contains all the components and accesso- ries that are protected in a rugged and shock-resistant transport case. Transport case (0554 0106) Soundproof headset...
Need help?
Do you have a question about the Ultracam LD510 and is the answer not in the manual?
Questions and answers