Table of Contents
Advertisement
Quick Links
Advertisement
Table of Contents

Related Manuals for Tatu Marchesan PHP 3


Summary of Contents for Tatu Marchesan PHP 3
- Page 2 IDENTIFICATION Dealer: Owner: Firm / Farm: City: State: No. of the Certificate of Guarantee: Serial / No.: Date: Invoice No.: Product: Notes:...
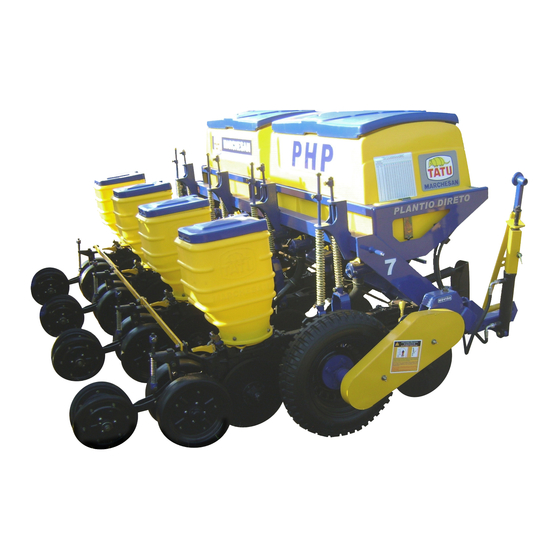
- Page 3 Introduction A the planter hydraulic and fertilizer machine, model PHP is modern, agile, and versatile. Especially designed for small properties, it performs with excellence no-till or conventional tillage of corn, soybeans, beans, sorghum, and other grains. It is provided in the 3-point hitch version, with a choice of 3, 5 or 7 row units.
-
Page 4: Table Of Contents
Index 1. To the owner 2. To the operator 4 a 7 Be careful with environment / Operation safety 4 a 6 Transportation on truck or trailer / Safety stikers 6 e 7 3. Technical specifications 8 e 9 4. Complete row 5. -
Page 5: To The Owner
To the owner The acquisition of any TATU product assures to the original purchaser the following rights: • Warranty Certificate • Instructions Manual • Technical Assistance by the dealer on equipment delivery The owner has the obligation of inspect the conditions of the product on delivery, as well as knowing the warranty terms. - Page 6 To the operator Dear User! Respect the environment. Dispose your trash properly. This gesture of respect helps protect our environment. Be careful with environment Products such as oil, fuel, filters, batteries and the like, in if spilled to the ground can penetrate to the underground layers, compromising the nature.
- Page 7 To the operator Never use your hands to check hydraulic leaks, escaping oil under pressure, may have sufficient pressure and may have sufficient force to penetrate the skin, maybe cause several injuries. Never attempt to change the adjustments, clean or lubricate the equipment, when the same is turned on or in movement.
-
Page 8: Be Careful With Environment / Operation Safety 4 A
To the operator • Use only trained and qualified personnel to operate the equipment. • While at work or during transportation, only the presence of the operator is allowed on the tractor. • Do not allow children to play near or over the equipment, while it is in operation, during transportation or stored. -
Page 9: To The Operator
When the planter is equipped with line marker. Adhesive label set Model Code Code Code 05.03.03.3853 05.03.03.3874 05.03.03.3865 Label set PHP 3 & 5 rows Smaller logo Larger logo PHP logo 05.03.03.3853 05.03.03.3854 05.03.03.3897 Label set PHP 7 rows Smaller logo Larger logo PHP logo Marchesan Implementos e Máquinas Agrícolas “TATU”... - Page 10 Technical specifications Settings Capacity deposit Number Engine (liters) Spacing Transport Weight Model power (mm) width (mm) (kg) Seed rows (hp) Fertilizer (each) 550, 600, 650, 700, 750, 800, 850, 900, 950 1900 60 - 65 or 1000 450 or 500 650, 700, 750, 800, 850 or 70 - 75...
-
Page 11: Technical Specifications
Technical specifications 1900 mm 2150 mm NOTE For PHP 5 and 7 lines, see transport width on table of page 8. Marchesan Implementos e Máquinas Agrícolas “TATU” S.A. -
Page 12: Complete Row
Complete row unit No-till or conventional tillage 1 - Seed hopper with quick coupling easy and cleaning an adjustment 6 - Hinged angled closing wheels with adjustable angle and pressure. 2 - Double springs provide proper load and travel for planting in different soil conditions. -
Page 13: Assembly
Assembly To facilitate the PHP planters transportation , they are factory assembled, and you only have to install the cutting discs according to the follow guidelines: Assembling the cutting discs Lower the Parking stand (A), and make sure that the planter is well supported. Attach the cutting disc (B), to the support at the row unit, by fastening it with bolts (C). -
Page 14: Preparing To The Tractor/ Hitching To The Tractor
Preparing for work Preparing to the tractor If necessary, add fill up with water or counterweights to the front of the tractor or in rear wheels for better traction and better stability. Hitching to the tractor To hitch the planter to the tractor, choose a location as flat as possible. 1- Lower the tractor hydraulic system fully. -
Page 15: Leveling The Planter / Planter Position For Tranportation
Preparing for work Leveling the planter Using the upper arm (A) of the third point, adjust the leveling of the equipment. Planter position for transportation Fully raise the row units actuating the hydraulic system. Lift the parking stands (B), as in the figure. IMPORTANT •... -
Page 16: Spacing Between Row Units / Position Of The Row Units In The Frame
Preparing for work Spacing between row units According to the number of row units requested, the planter is factory assembled with the minimum row unit spacing, with flexibility for different spacing; i.e. for planting crops which require greater distance between rows. Position of the row units in the frame Even number of lines: Mark up the center of the chassis and measure half spacing to the right and, half to... -
Page 17: Spacing Tables
Preparing for work Spacing tables Number of Chassi Spacings rows 550, 600, 650, 700, 750, 800, 850, 900, 950 or 1000 450 or 500 Number of Chassi Spacings rows 650, 700, 750, 800, 850, or 900 500, 550 or 600 Number of Chassi Spacings... - Page 18 Preparing for work Procedures to change spacing Carry out the changing of spacing on a clean, flat and firm location. The planter must be properly hitched to the tractor. 1) Lower the parking stand (A) and properly wedge the frame of the planter to prevent accidents. Make sure the planter is well supported to prevent DANGER accidents.
- Page 19 Preparing for work The following instructions are required while removing or inserting row NOTE units in the planter. 3) Unscrew the bolts (D) of the locking sleeve of the hexagonal shaft. 4) Free the fertilizer hoses (E) releasing the fasteners (F). 5) Release the holder bars (G) by removing the bolts (H) along with the bushings, washers, and nuts (I).
-
Page 20: Procedures To Change Spacing 16 A
Preparing for work Procedures to change spacing 6) When a row unit is removed from the planter, place the cover (G) over the auger that will not be used, in order to close the fertilizer outlet. IMPORTANT Retighten all the sets, paying closer attention to the following aspects: •... - Page 21 Preparing for work Procedures before planting • Before you start planting, carry out a general inspection of the planter, retightening all bolts and nuts, and also verifying the conditions of all pins and cotter pins in order to prevent future damage. Repeat this operation after the first day of work. •...
-
Page 22: Procedures Before Planting / Planning The Planting - The Right Stand 19 E
Preparing for work Calculation: Distance when loaded – Distance when unloaded x 100 Distance when unloaded The tires must have the same profile, the same calibration pressure, and NOTE the same spring adjustment over the arms of the transporting wheels. To achieve a stand of 50.000 plants per hectare at harvest, whose seed contains: Germination rate = 95% Physical purity = 90... - Page 23 Preparing for work The use of graphite Powder graphite should be mixed with the seeds to make distribution easy and increase the life cycle of the distribution assembly. Amount of graphite per KG of seed Type of seed treated with insecticide Type of distribution system: Round and small Round and large...
-
Page 24: Preparing For Work 12 A
Preparing for work Special attention should also be paid to the supports with the seed toothed rollers, as well as the proper operation of all seed ejectors. Support with 5-tooth roller is factory assembled and can be used with all seed plates with a row of holes or slots, ex.: for corn - holes, soybean, delinted cotton, bean, etc. -
Page 25: Adjustments And Operations 23 A
Adjustments and operations Seed distribution The number and size of holes and slots of the seed plates, as well as their thickness, vary depending on grain size and the desired amount. The amount of seed per linear meter can be modified by the driving shaft gears {D} (14, 18, 22, 26, 30, 34, and 38 teeth), and {E} driven shaft (14, 18, 22, 26, 30, 34, and 38 teeth). -
Page 26: Seed Distribution Table
Adjustments and operations Seed distribution table ... -
Page 27: Seed Calculation Per Meter For Different Number Of Holes Of The Disks
Adjustments and operations Seed calculation per meter for different numbers of holes of the disks To utilize a disc with holes in a different number of tables, one can find the amount of seed per linear meter by performing the following calculation: Table 34 holes disk, ratio 14 x 22 the seeds quantity in meter is equal to 2.76. - Page 28 Adjustments and operations Fertilizer distribution The Fertilizer distribution is made by a auger, and the variation in the amount are obtained modifying the driving shaft gears {D} and driven shaft {E}. Procedures to change sprockets • Remove the cover (A) from the transporting wheel, unscrewing the wing nuts (B) and flat washers.
-
Page 29: Fertilizer Distribution / Procedures To Change Sprockets 26 E
Adjustments and operations ATTENTION • Table on page 28 indicates the quantities obtained with the 2-inch pitch coil augers (standard). Such auger carries approximately 35 grams of granular commercial fertilizer a turn. • Seed and fertilizer distribution tables in this manual should be used as a reference to start adjusting the planter. -
Page 30: Fertilizer Distribution Table
Adjustments and operations Fertilizer distribution table T A B E L A D E D I S T R I B U I Ç Ã O D E ADUBO - Quantidade em kg/ha - Condutoras Helicoidais Passo 2” (50,8 mm) Standard T A B L E OF D I S T R I B U T I O N F ERTILIZER - Amount in kg/ha - Augers of 2”... -
Page 31: Practical Test For Distribution Of Seed And Fertilizer
Adjustments and operations Data in the previous tables (seed and fertilizer) may vary due to IMPORTANT many factors. Therefore, we request that you carefully notice the following item. Practical test for distribution of seed and fertilizer The most appropriate way to assess the amount of seed and fertilizer to be distributed is on the actual ground where planting will be carried out, as follows: •... -
Page 32: Auxiliary Calculation For Fertilizer Distribution
Adjustments and operations Auxiliary calculation for fertilizer distribution In order to distribute other amounts of fertilizer with spacing and areas which are different from those presented in the tables, we suggest a quick calculation, in which all data used may be replaced by data of your own interest simply using the formula below, which contains the following elements: A = area to be fertilized (m²). -
Page 33: Oscillating Coulter Blade Assembly / Opening The Furrows And Fertilizer Position
Adjustments and operations Oscillating coulter blade assembly (no-till planting) The cutter discs assembly are designed for lateral oscillation, to follow uneven grounds. While working do not make any sharp turns. Row unit components may be damaged. The vertical oscillation (or Flotation) of the cutter discs assembly is provided by the springs (A) which must preserve the factory adjusted pressure and allow the necessary... -
Page 34: Rods Scarifiers / Depth Of Fertilizer
Adjustments and operations Rods scarifiers T h e r o d s s c a r i f i e r s h a v e fertilizer conductors with height adjustment (A). Allowing product placement at different depths, regardless of the working depth of the stems. -
Page 35: Opening The Furrows For Seeds
Adjustments and operations Opening the furrows for seeds The furrows for seeds are opened by the double-disc openers which also have adjustable and flexible scrapers to remove the earth accumulated on their internal part. Depth of seeds and articulation of lines The control of the seed depth is made individually by gauge wheels (A) that have... -
Page 36: Depth Of Seeds / Adjustment Of Compactors 33 E
Adjustments and operations The angled closing wheels (V-shaped) press the soil laterally and can work in two positions according to the type of soil and conditions of the straw. In order to do that, remove the bolts (A) and shift the angle closing wheel position. The user will decide the best position of the angled closing wheels for his property, which depends on the soil type, haystacks, topography and cultivation installed. -
Page 37: Operations - Important Aspects
Adjustments and operations Operations - Important aspects • Retighten all nuts and bolts after the first day of work. Check the conditions of pins and cotter pins. • Observe lubrication intervals carefully. • The correct calibration of the planter's tires is important to keep the uniformity of the planting. -
Page 38: Optional
Optional Seed distribution discs As optional items, the MARCHESAN provides seed discs with holes, slots or blind seed discs, for different cultivations, as listed below: Number of Size of Seed plates holes or Thickness Code hole / slot slots Corn (Black) 28 Slots 15,5 x 11,5 mm 4,0 mm... -
Page 39: Lubrication / Lubrication Points 37 E
Maintenance Lubrication In order to reduce the wearing caused by attrition among moving parts of the equipment, it is necessary making a correct lubrication, as in indicated bellow. • Be sure about the lubricant quality, about your efficiency and purity, avoiding use of products contaminated by water, dirt and others. - Page 40 Maintenance Lubricate every 10 hours Marchesan Implementos e Máquinas Agrícolas “TATU” S.A.
-
Page 41: Maintenance Of The Fertilizing Metering
Maintenance Maintenance of the fertilizing metering For the maintenance correct of fertilizer metering system or to make any kind of repair in his internal part, do it in the following way: • Remove the square shaft (A), with the conical gear(B) and the bearing(C). •... -
Page 42: Cleaning Seed Meters / Maintenance Of The Wheel Hubs
Maintenance Cleaning seed meters It is required to carry out the cleaning of whole of the seed system daily, and in order to do so, remove the disc and observe the operation of the seed ejector. This way you will be ensuring the best planting stand. -
Page 43: How To Replace The Tires
Maintenance How to replace the tires If the planter tires need repairs proceed as follows: - Try to change it on a flat and firm place, with the planter hitched to the tractor. - Raise the planter completely, lower the parking stand, freeing the tire from the ground. - Remove the cover (A) releasing the wing nuts and flat washers (B). -
Page 44: Maintenance 37 A
Maintenance Machine planter's maintenance • Remove the fertilizer hoses, and wash them immediately, only with water and neutral soap. • Wash the whole machine with water only. • Wash the fertilizer augers with special attention, in order to remove any adherences. •... -
Page 45: Important
Important The Marchesan S/A reserves the rights to make improvements in ATTENTION the design, material or specifications of the machinery, equipment or parts without obligation to make similar changes in machinery, equipment or parts previously sold. The drawings are simply illustrations. Some pictures of this manual appear without the safety devices (protective cover, etc.), removed to enable a better view and detailed instructions. -
Page 46: Note
Note Marchesan Implementos e Máquinas Agrícolas “TATU” S.A.
Need help?
Do you have a question about the PHP 3 and is the answer not in the manual?
Questions and answers