Table of Contents
Advertisement
Quick Links
Advertisement
Table of Contents

Subscribe to Our Youtube Channel
Related Manuals for Tatu Marchesan PST4


Summary of Contents for Tatu Marchesan PST4
- Page 2 IDENTIFICATION Dealer: Owner: Firm / Farm: City: State: No. of the Certificate of Guarantee: Serial / No.: Date: Invoice No.: Product: Notes:...
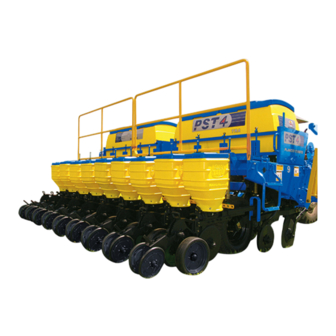
- Page 3 Introduction The PST4 planter is specially designed to perform no-till or conventional planting of corn, soybean, rice, bean, peanut, cotton with linter, delinted cotton, sorghum and others with superior quality. It features depth control, that along with the unaligned double discs, provides a soil compaction with higher efficiency and a better flow rate of straw.
-
Page 4: Table Of Contents
Table of contents 1. To the owner 2. To the operator 5 to 11 Working safely 5 to 7 Truck or trailer transportation Lifting points Safety stickers 10 & 11 3. Components 4. Data sheet 5. Assembly 14 to 19 Drawbar assembly Extensor assembly Hydraulic circuit (7 to 10 row units) - Page 5 Table of contents Seed depth and flotation range of the row units 44 to 46 Auxiliary depth control Wheel springs adjustment Service platform Finishing instructions Safety fuse of the transmission Row markers / Working angle 52 & 53 Operations - Important points 8.
-
Page 6: To The Owner
To the owner The acquisition of any Tatu product assures to the original purchaser the following rights: • Warranty certificate; • Instructions manual; • Technical assistance by the dealer on equipment delivery. However, the owner must check the condition of the equipment on delivery, as well as knowing the warranty terms. -
Page 7: To The Operator
• The instructions under this symbol refers to the safety of the operator or third parties, therefore it should be carefully read and observed. The PST4 planter is simple to operate, requiring however the basic and essential cautions to its handling. Always keep in mind that safety requires constant attention, observation and prudence during plantation, transportation, maintenance and storage. - Page 8 To the operator Never use your bare hands to check hydraulic leaks, the high pressure can cause several injuries. Never attempt to change the adjustments, clean or lubricate the equipment when the same is switched on or in movement. Be careful while driving on slopes. Risk of overturn. Prevent that chemical products (i.e.: fertilizers, treated seeds) make any contact with your skin or clothes.
- Page 9 To the operator • Only trained and qualified personnel is allowed to operate the equipment. • While working or during transportation, only the presence of the operator is allowed on the tractor. • Do not allow children to play near or over the equipment, while it is operating, during transportation or storage.
-
Page 10: Truck Or Trailer Transportation
To the operator Truck or trailer transportation Marchesan does not advise the equipment traffic on highways, because this practice involves serious security risks in addition to being prohibited by the current existing traffic law. The transportation for long distances should be done on truck, trailer or others by following these safety guidelines: •... -
Page 11: Lifting Points
To the operator Lifting points The PST4 planter has adequate lifting points, being two in the rear and one in the front part of the equipment. When lifting with a hoist, it is essential to hitch the cables to these points. -
Page 12: Safety Stickers
To the operator Safety stickers The safety stickers warn about the equipment points that require more attention and they should be kept in good repair. If these stickers become damaged or illegible, replace them. Marchesan provide stickers, upon request and indication of the respective serial number. - Page 13 To the operator 05.03.03.1565 A D V E R T Ê N C I A W A R N I N G A D V E R T E N C I A • Antes de acionar a plantadeira, observe se não há pessoas ou animais na área de ação dos marcadores de linha ou embaixo da plantadeira.
-
Page 14: Components
Components 01 - Frame 02 - Drawbar 03 - Drawbar stabilizer 04 - Tractor hitch 05 - Jack 06 - Fertilizer row unit 07 - Fertilizer box 08 - Seed row unit 09 - Seeds box 10 - Ladder 11 - Hydraulic marker 12 - Transmission set 13 - Disc blade 14 - Hitch pin... -
Page 15: Data Sheet
Data sheet Hoppers capacity Tractor required Number Working * Transport Weight of row width Fertilizer Seeds Scarifier width (mm) (kg) units (mm) (Liters) (Liters) spindle 3245 2410 2620 2900 4555 1040 60 - 68 84 - 96 2840 3050 3695 3350 4170 1040... -
Page 16: Assembly
Assembly The planter leaves the factory semi-assembled to facilitate transportation, being necessary just a few adjustments to start the job. Follow the instructions below: Drawbar assembly The drawbar (A) leaves the factory assembled and articulated. Lower it, remove the lock (B) and loosen the junction axle and the lock pins. PST 4 Marchesan Implementos e Máquinas Agrícolas “TATU”... -
Page 17: Extensor Assembly
Assembly Extensor assembly Assemble the parts found in the components box, according to the instructions below: • Place the hitch (C) to the tractor, using a junction axle (D) and cotter pin. • Fasten the hose support (E) to the drawbar using spring washers and nuts. •... -
Page 18: Hydraulic Circuit (7 To 10 Row Units)
Assembly Hydraulic circuit (7 to 10 row units) Item Description Qty. 3/8 x 4000 TC-TM hose 3/8 x 4300 TC-TM hose Male quick coupler 1/2" NPT w/ lid PST 4 Marchesan Implementos e Máquinas Agrícolas “TATU” S.A. -
Page 19: Hydraulic Circuit (11 And 12 Row Units)
Assembly Hydraulic circuit (11 and 12 row units) Item Description Qty. 3/8"x 1500 TC - TC hose 3/8" x 4000 TR - TM hose Oil conductor Male quick coupler 1/2" NPT w/ lid PST 4 Marchesan Implementos e Máquinas Agrícolas “TATU” S.A. -
Page 20: Row Unit Assembly (Rear Part)
Assembly Row unit assembly (rear part) Fasten the unaligned double disc (A) to the seed row arm (B) using bolts (C), spring washers and nuts. Couple the hopper (D) that has a quick locking (E). To avoid damages to the quick locking and seed disc locking, never overtight the quick lock adjuster (F) and leave it facing the threaded stud of the quick lock (G). - Page 21 Assembly After assembling the rear part of the row unit, lock the depth control (A) using bolts (B), spring washers and nuts. PST 4 Marchesan Implementos e Máquinas Agrícolas “TATU” S.A.
- Page 22 Working preparation Tractor preparation If necessary, use counterweights on the rear wheels or in the front part of the tractor. Hitching to the tractor 1º. Hitch the drawbar to the tractor hitch bar, placing the pin and r-clip. If necessary, use the drawbar extensor arm (third point) to facilitate hitching.
-
Page 23: Working Preparation
Working preparation Planter leveling Level the equipment using the third point of the extensor (A). To facilitate the use of the extensor, activate the hydraulic cylinder to relieve the drawbar in the traction bar. After leveling, lock the nut (B) and level the equipment, leaving the coulter blade in the desired depth. - Page 24 Working preparation During transportation and maintenance, always use the safety locks (B) on the hydraulic cylinder rods of the row markers and wheelsets. Only fill the planter in the work place. IMPORTANT Never transport the planter with load excess. PST 4 Marchesan Implementos e Máquinas Agrícolas “TATU”...
-
Page 25: Procedures Before Operating The Planter
Working preparation Procedures before operating the planter The following instructions must be carefully observed in order to get the best working performance and to extend the planter lifetime. When putting the planter in operation for the first time during off season or after a long inactive period, follow the instructions below: 1) Move and lock the lever (A) to release the chain tightener. - Page 26 Working preparation Spacing between row units PST4 leaves the factory with a minimum row spacing according to the requested number of row units, allowing a possibility of other spacings if the crop needs it. Positioning the row units in the frame...
-
Page 27: Spacing Tables
Working preparation Spacing tables Check all possible spacings below and follow the assembly instructions on page 24. Frame Number of row units Spacings 750 - 800 - 850 - 900 600 - 650 - 700 3245 500 - 550 Frame Number of row units Spacings 500 - 550... -
Page 28: Procedures To Change The Spacing
Working preparation Procedures to change the spacing To change the spacing choose a flat, firm and clean place. Before lowering the jack (A), it is necessary to position them between the row units that already have the desired spacing. Place the supports (B) in the rear angle bracket ends. - Page 29 Working preparation Procedures to change the spacing Relieve the control valve pressure and follow the instructions below: 1) Remove the drawbar (A) by removing the pins (B) and loosening the bolts (C), nuts, springs, wheelsets, clutches, levers, coulter blades and fertilizer rows, so it is possible to displace these components in the frame.
- Page 30 Working preparation Procedures to change the spacing 3) Loosen the bolts (E) that fasten the support bearing of the hexagonal axle and release the chain tightener (F), if necessary. 4) Totally remove the hexagonal shaft (G). 5) Release the fertilizer hoses (H). 6) Release the nuts (I) to facilitate the movement of the rod support.
- Page 31 Working preparation 8) Loosen the stabilizer bars (J) by removing the bolts (K), brackets, washers and nuts. The stabilizer bars keep an uniform spacing between the seed rows. The longer bars are for spacings from 800 to 900 mm. 9) To close the fertilizer outlet, place the chutes (L) over the augers that will not be used.
-
Page 32: Planning The Plantation - Correct Seed Rate
Working preparation Planning the plantation - Correct seed rate Consider that the amount of plants in the harvest is always smaller than the number of seeds distributed in the planting operation, due to the following factors: germination rate, physical purity, vigor (provided in the seed pack), plagues and diseases that may take place during the cultivation cycle. - Page 33 NOTE • Do not transit with load excess over the planter. Ideal working speed The PST4 works with higher efficiency from 5 to 7 Km/h. When planting corn, operate on a speed range from 5 to 5.5 km/h. NOTE It is necessary to keep a constant speed during the whole job.
- Page 34 Working preparation Graphite powder use The graphite powder should be combined to the seeds to facilitate the distribution and to increase the lifetime of the metering device. Amount of graphite per kilogram of seed Seeds treated with insecticide Planter distribution system: Small and round Big and round...
- Page 35 Working preparation Special attention should be given to the rocker arm and seed sprocket, as well as the good operation of all seed meterings. • The rocker arm and the pulley of 5 teeth goes assembled with the equipment and can be used in all places with one row of slots or holes, i.e.: corn in round shape, soybean, delinted cotton, bean and others.
-
Page 36: Adjustments And Operations
Adjustments and operations Seeds distribution The amount and size of the holes/slots and the thickness of the seed plates can vary according to the grain size and the desired plant amount. Adjust the seed rate per linear meter through the sprocket combinations of the Drive Shaft {A} (14, 18, 22, 26, 30, 34 and 38 teeth) and Driven Shaft {B} (14,18, 22, 26, 30, 34 and 38 teeth). -
Page 37: Seed Distribution Table
Adjustments and operations Seed distribution table - 05.03.03.2997 ... -
Page 38: Calculation Of Seeds/Meter According To The Number Of Holes
Adjustments and operations Calculation of seeds/meter according to the different number of holes in the seed plates When using a seed plate that has a number of holes that is not included in the table, it is possible to find the amount of seeds/meter it will distribute by doing the calculation below: In the table from the previous page, for a seed plate that has 24 holes (26 x 38), the amount of seeds per meter equals 2.23. - Page 39 Adjustments and operations Fertilizer distribution The fertilizer distribution is made through the augers and the different rates are adjusted by the sprocket combinations of the Drive Shaft {C} (14, 18, 22, 26, 30, 34 and 38 teeth) and Driven Shaft {D} (14, 18, 22, 26, 30, 34 and 38 teeth). Procedures to change the sprocket •...
- Page 40 Adjustments and operations • The table {A} on the following page shows the obtained amount ATTENTION with the 2" coil pitch augers (standard). This auger transports approximately 35 grams of granulated commercial fertilizer per turn. • The table {B} on the following page shows the obtained amount with the 1"...
- Page 41 Adjustments and operations Fertilizer distribution table PST 4 Marchesan Implementos e Máquinas Agrícolas “TATU” S.A.
- Page 42 Adjustments and operations The data on the previous tables (seed and fertilizer) can vary due to IMPORTANT several factors. Therefore, carefully observe the following procedures. Practical test of seed and fertilizer distribution The most indicated way to assess the amount of seed and fertilizer rate is performing the test on the same field the plantation will take place, following these steps: •...
- Page 43 Adjustments and operations Auxiliary calculation for the fertilizer distribution To distribute other amounts of fertilizer in different spacings and areas from those presented in the tables we suggest a quick calculation, where all used data can be changed to one of your own interest. Use the formula below, which contains the following elements: A = Area to be fertilized (m B = Spacing between rows of the crop (m).
- Page 44 Adjustments and operations Oscillating coulter blades (no-till) The coulter blades possesses lateral oscillation movements to follow the curves in the field. During working, do not perform sharp turns. This act can cause damage to the row components. The vertical oscillation (or flotation) of the coulter blades is provided by the springs (A), which allows the necessary articulation to follow the soil profile and to transpose obstacles.
- Page 45 Adjustments and operations Scarifier spindle The scarifier spindles feature height adjusment (A) in the fertilizer dispensers, regardless of the rods, allowing the placement of the product in different depths, regardless of the rods working depth. The working angle (B) of the rods can also be adjusted according to the soil hardness.
- Page 46 Adjustments and operations Opening the seed furrows The furrows for seeds are open through unaligned double discs; which possess flexible and adjustable scrapers in order to remove the earth that accumulates in their internal parts. The seed rows feature adjustments to control the working pressure over the soil. Seed depth and floating range of the row units The seed depth control is made individually through the gauge wheels (A), which possess adjustments through the handler (B).The graduation allows to adjust the seed...
- Page 47 Adjustments and operations 0.5 cm 1 cm The press wheels in "V" shape firm the soil around the seed and are able to work in several positions according to the soil type and conditions of the straw. 1) Make the correct adjustment of the floating range and the downward pressure by the lever that allows to operate in four positions and one neutral position.
-
Page 48: Seed Depth And Flotation Range Of The Row Units 44 To
Adjustments and operations Seed depth and floating range of the row units Adjust the seed row floating ranges through the brackets (C) in the upper part of the rods. The working pressure on the soil is adjusted by the brackets (D) in the lower part of the rods. -
Page 49: Auxiliary Depth Control
Adjustments and operations Auxiliary depth control In light and loose soils (sandy), use the rod stops (A) to help in the depth control. PST 4 Marchesan Implementos e Máquinas Agrícolas “TATU” S.A. -
Page 50: Wheel Springs Adjustment
Adjustments and operations Wheels springs adjustment The wheels have free articulation to follow the soil profile. The wheel pressure over the soil can be adjusted by the springs (A) and all wheels should have the same adjustment. The free-turning sprocket (B) should be always assembled in the same position as the illustration. -
Page 51: Service Platform
Adjustments and operations Service platform The service platform (A) is antiskid, wide and with articulation to facilitate maintenance and to fill up the planter. When in use, the platform should be hold by the frame support (B) and when articulated, it should be hold by the lock. Lock NOTE The platform (A) should only be used to fill up the planter. -
Page 52: Finishing Instructions
Adjustments and operations Finishing instructions The clutches can toggle the seed and fertilizer distribution to on or off automatically but can also be turned off manually so it is possible to perform the finishings and it just uses half planter. In order to do so, activate the lever (A) in the lateral of the fertilizer hopper to turn off the clutches. -
Page 53: Safety Fuse Of The Transmission
Adjustments and operations Safety fuse of the transmission To protect the seed and fertilizer system, the planter has safety fuses (A) on the drive shafts and hexagonal shafts. Whenever necessary, replace for an original one. PST 4 Marchesan Implementos e Máquinas Agrícolas “TATU” S.A. -
Page 54: Row Markers / Working Angle 52
Adjustments and operations Row markers The row marker utilization is very important to achieve an uniform spacing in the plantation, thus facilitating the cultivation and harvest. For this practical adjustment it is necessary to keep the front and rear NOTE gauges with the same measure, being the central measure of the front tires equal to the rear ones. - Page 55 Adjustments and operations WARNING BEFORE STARTING TO RAISE OR MOVE THE PLANTER, CHECK FOR PEOPLE OR ANIMALS NEAR OR UNDER THE PLANTER, ESPECIALLY IN THE ROW MARKER ACTION AREA Working angle The marker discs feature angle and distance adjustments to facilitate the soil opening. In order to do so, loosen the nut and adjust as necessary.
-
Page 56: Operations - Important Points
Adjustments and operations Operations - Important points • Retighten nuts and bolts after the first day of planting. Check the conditions of all pins and cotter pins. • Carefully observe the lubrication intervals. • The correct inflation of the tires is important to maintain the planting uniformity. Keep the same inflation for all tires (60 PSI). -
Page 57: Seed Plates
Optional Seed plates Optionally, MARCHESAN supplies slotted or perforated seed plates for several crops, according to the list below: Amount Hole/slot Serial Seed plates of holes/ Thickness dimension number slots Corn (Black) 28 slots 15.5 x 11.5 mm 4 mm 05.03.01.6194 Corn (Red) 28 slots... -
Page 58: Automatic Reset Of The Rod
Optional Automatic reset of the rod The automatic reset rod (A) is used for irregular soils. The bolt (B) adjusts the pressure on the rod spring. To assembly the rod (A), fasten it on the arm of the fertilizer row (C) using bolts (D), spring washers and nuts. -
Page 59: Depth Control With Angular Adjustment (Rubber)
Optional Depth control with angular adjustment (Rubber) Marchesan optionally supplies seed rows that have adjustable gauge wheels with depth control system. This system provides a fine and greater pressure adjustment over the soil to facilitate the closing of seed furrows. •... -
Page 60: Depth Control With Angular Adjustment (Iron)
Optional Depth control with angular adjustment (Iron) • Assemble the "V" iron gauge wheels (H) to the gauge system (A) using bolts (I), flat washers, spring washers and nuts. • The gauge wheels assembly steps should be followed according to the previous page. -
Page 61: Depth Wheel System With Iron Gauge
Optional Depth wheel system with iron gauge • Assemble the depth control wheel rubber band (A) to the depth control (B) using bolts (C) and nuts. • Assemble the "V" iron gauge wheels (D) to the depth control (B), locking it with bolts (E), flat washers, spring washers and nuts. -
Page 62: Depth Control System With Quick Adjustment Gauge
Optional Depth control system with quick adjustment gauge • Assemble the laced wheels with closed center (A) to the depth control (B) using bolts (C), pressure washers and nuts. • Assemble the "V" gauge wheels (D) to the depth control (B), locking it using bolts (E) and spring washers. -
Page 63: Clutch Electronic Reset
Optional Clutch electronic reset Marchesan optionally supplies an electronic reset for the clutch. The command panel (A) should be installed in a place that is easy to access for the tractor conductor. For a bigger commodity, we recommend installing the control panel (A) in the tractor cab, thus facilitating the clutch reset. -
Page 64: Single Seed Hopper
Optional Single seed hopper Marchesan optionally supplies a single seed hopper (A). PST 4 Marchesan Implementos e Máquinas Agrícolas “TATU” S.A. -
Page 65: Tatu Pm 100 Monitor
Optional TATU PM 100 monitor The TATU PM 100 monitor is designed to suit the needs of each user. It was developed by the world's best seller of planter monitors and offers the finest technology on the market. The TATU PM 100 tracks seeds in planters up to 16 row units and it is a TATU optional part when a planter is acquired. -
Page 66: Tatu Pm 400 Monitor
Optional TATU PM 400 monitor The TATU PM 400 monitor is designed to suit the needs of each user. It was developed by the world's best seller of planter monitors and offers the finest technology on the market. The TATU PM 400 tracks seeds and fertilizer in planters up to 18 row units and it is a TATU optional part when a planter is acquired. -
Page 67: Tatu Precision Agriculture (Apt) 65
Optional TATU precision agriculture (APT) The APT system was created with an electronic communication pattern that allows that products from different manufacturers communicate with one another. Thus, it is possible to control all equipments from a single terminal station. The system will be operated from the tractor cab by a virtual terminal (VT) that can command every function. - Page 68 Optional TATU precision agriculture - Components connection PST 4 Marchesan Implementos e Máquinas Agrícolas “TATU” S.A.
-
Page 69: Mechanical Row Marker
Optional Mechanical row marker Mechanical row marker NOTE Adjust the chain (A) and watch its hitch center closely; the hitch center must never exceed the articulation center. PST 4 Marchesan Implementos e Máquinas Agrícolas “TATU” S.A. -
Page 70: Hydraulic Row Marker
Optional Hydraulic row markers Fasten the hydraulic row marker support (A) on the side of the frame using bolts (B), spring washers and nuts. Couple the marker arm (C) to the support (A) using bolts (D), flat washers, articulation brackets, spacing brackets and nuts. Then, lock the extensor (E) using bolts (F), and the row marker disc blade (G) using a spring washer and nut. -
Page 71: Hydraulic Circuit For The Row Marker 69
Optional Hydraulic circuit for the row marker PST 4 Marchesan Implementos e Máquinas Agrícolas “TATU” S.A. - Page 72 Optional Item PST4 - 7 row units Item PST4 - 8 row units Complete sequence valve Complete sequence valve 3/8 x 2500 TR-TC hose 3/8 x 2700 TR-TR hose 3/8 x 2700 TR-TC hose 3/8 x 3000 TR-TC hose 3/8 x 4000 TC-TM hose...
-
Page 73: Optional 55 To
Optional Sequence valve operation For the correct operation of the sequence valve and the proper alternation of the row markers, it is necessary to always activate the command lever until the hydraulic cylinders stroke is completed and keep the lever activated for more three or four seconds. Never activate the hydraulic cylinders partially. -
Page 74: Lubrication
Maintenance Lubrication In order to reduce the wearing caused by the friction in the moving parts of the equipment, it is necessary to make a correct lubrication, as indicated below: • Be certified about the lubricant quality, with relation to its efficiency and purity, avoiding the use of products contaminated by water, earth and others. - Page 75 Maintenance Lubricate every 10 operating hours PST 4 Marchesan Implementos e Máquinas Agrícolas “TATU” S.A.
-
Page 76: Lubricate Every 50 Operating Hours
Maintenance Lubricate every 50 operating hours PST 4 Marchesan Implementos e Máquinas Agrícolas “TATU” S.A. -
Page 77: Fertilizer Metering Maintenance
Maintenance Fertilizer metering maintenance For the correct fertilizer metering maintenance or to make any kind of repair in its internal part, proceed as follows: • Remove the squared shaft (A) with bevel gear (B) and the bearing (C). • Remove the inner squared shaft (D), along with the bevel gear (E), bearing (F) and the fixation nut (G) by the frontal part of the metering. -
Page 78: Cleaning The Seed Metering
Maintenance Cleaning the seed metering It is necessary to make a general cleaning in each seed metering daily. To do this, remove the seed plate and observe the metering mechanism operation. By doing so, the best planting will be assured. When using graphite powder NOTE with treated/inoculated seeds,... -
Page 79: How To Replace The Tires 77
Maintenance How to replace the tires When the planter tires need repairs, proceed as follows: • Support the equipment in the rear angle bracket using the stanchions and parking stands. • Totally retreat the hydraulic cylinder to lift the tire from the soil. •... - Page 80 Maintenance • Carefully observe the correct position of the chain and wheelset tightener. If it is necessary to remove the free turn transmission activation (A), observe NOTE its proper assembly in the correct position, according to the illustration. PST 4 Marchesan Implementos e Máquinas Agrícolas “TATU”...
-
Page 81: Maintenance 72 To
Maintenance Planter maintenance • Remove the fertilizer hoses and wash them immediately just with water and neutral soap. • Wash the whole planter using only water. • Wash carefully the fertilizer augers in order to remove adherences. • Verify all the moving parts of the planter for wearing occurence. If necessary, replace some parts and leave the planter ready for the next planting season. -
Page 82: Titanium Apollo
Titanium Apollo Titanium Apollo PST 4 Marchesan Implementos e Máquinas Agrícolas “TATU” S.A. -
Page 83: Assembly 80
Assembly Seed dosing system for mechanical machines Titanium is a mechanical distribution seed system. It provides an easy maintenance to the farmer. It is an easy-to-use equipment because it works as a seed plate. It features several technologies in order to provide a greater security and an excellent planting to the farmer. Components and assembly Weight reducer Brush flow... -
Page 84: Working Preparation
Working preparation Standard seed plates - TITANIUM Seed plates Amount of holes Serial number CORN 28 holes 05.03.01.6204 SOYBEAN 90 holes 05.03.01.6217 SOYBEAN 90 holes 05.03.01.6218 Optional seed plates - TITANIUM MARCHESAN optionally supplies seed plates for several cultivations, according to the list below: Seed plates Amount of holes... -
Page 85: Maintenance
Maintenance Main technologies Vi e w : A l l o w s a r e a l t i m e visualization of the seed plate while working, what is practical when choosing the plate and to adjust it when planting incorrectly (skip/ double seeds). -
Page 86: Important
Important MARCHESAN S/A reserves the right at any time to make improvements ATTENTION in the design, material or specifications of machinery, equipment or parts without thereby becoming liable to make similar changes in machinery, equipment or parts previously sold. Images are for illustration purposes only. Some illustrations in this manual appear without the safety devices, removed to allow a better view and detailed instructions.
Need help?
Do you have a question about the PST4 and is the answer not in the manual?
Questions and answers