Table of Contents
Advertisement
Advertisement
Table of Contents

Related Manuals for Glow-worm EASICOM 3 28c


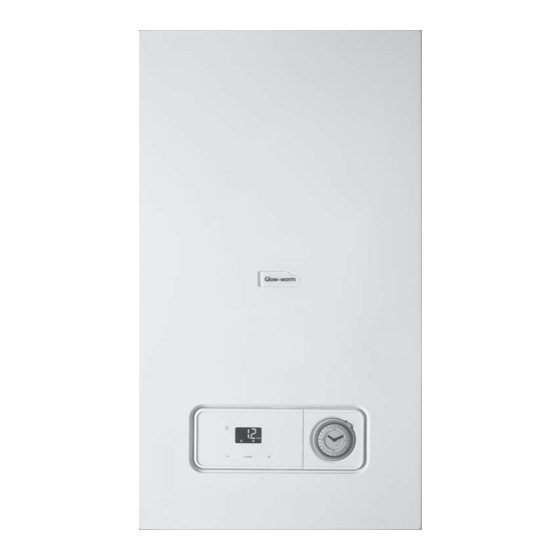
Summary of Contents for Glow-worm EASICOM 3 28c
- Page 1 Installation and main- tenance instructions EASICOM 3 GB, IE...
-
Page 2: Table Of Contents
Contents Contents Filling the hot water circuit ........18 Checking and adjusting the gas ratio setting..19 Safety ..............4 7.10 Checking leak-tightness ........21 Action-related warnings ......... 4 Adapting the unit to the heating installation............21 Risk caused by inadequate qualifications....4 Burner anti-cycling time ........ - Page 3 Contents Commissioning Checklist......... 41 Combustion chart ..........44 Lengths of the air/flue pipe....... 45 Technical data............ 45 Index ................... 47 0020239562_02 EASICOM 3 Installation and maintenance instructions...
-
Page 4: Safety
1 Safety Safety Intended use There is a risk of injury or death to the user or Action-related warnings others, or of damage to the product and other Classification of action-related warnings property in the event of improper use or use The action-related warnings are classified in for which it is not intended. - Page 5 Safety 1 ▶ If possible, close the gas isolator cock on ▶ Secure against being switched back on the product. again. ▶ Warn other occupants in the building by ▶ Wait for at least 3 minutes until the capa- yelling or banging on doors or walls. citors have discharged.
-
Page 6: Regulations (Directives, Laws, Standards)
1 Safety workshops, cleaning businesses or similar locations, choose a separate installation room in which the room air is technically free of chemical substances. 1.4.11 Risk of material damage caused by frost ▶ Do not install the product in rooms prone to frost. -
Page 7: Notes On The Documentation
47-019-51 These products are only designed for natural gas systems. Benchmark Glow-worm is a licensed member of the Benchmark Scheme. The serial number is located on the identification plate (1) and in the short operating instructions (2) (→ Page 7). -
Page 8: Functional Elements: Combination Unit
4 Set-up Ignition electrode Flow rate sensor Information on the Meaning identification plate Heating pump Level of protection Primary heat exchanger Bypass Heating mode Heating expansion Diverter valve vessel Hot water generation Nominal heat output range in heating CE label mode Nominal heat output range in heating mode (condensing technology) -
Page 9: Checking The Scope Of Delivery
Set-up 4 Checking the scope of delivery Minimum clearances ▶ Check that the scope of delivery is complete and intact. Quantity Description Heat generator Bag with accessories – Bag with seals – Condensate drain hose – Drain spigot of the expansion relief valve –... -
Page 10: Removing/Installing The Front Casing
4 Set-up Pull the front casing forwards at the bottom edge. Conditions: The load-bearing capacity of the wall is sufficient, The fixing material may be used for the wall Lift the front casing upwards from the bracket. 4.9.2 Installing the front casing ▶... -
Page 11: Installation
Installation 5 4.10.2 Installing the side section Caution. ▶ Risk of material damage due to heat trans- Refit the components in the reverse order. fer during soldering. ▶ Only solder connectors if the connectors Installation are not yet screwed to the service valves. Danger! Note Risk of scalding and/or damage due to... -
Page 12: Connecting The Drain Pipework For The Expansion Relief Valve
5 Installation ▶ Purge the gas pipe before start-up. During installation remove all burrs from inside of cut pipe work and avoid excessive adhesive which may trap small Check whether the connections (→ Page 21) are leak- pockets of water close to the pipe wall which can freeze tight. -
Page 13: Connecting The Drain Cock
Installation 5 5.4.1.3 External termination into a gulley or hopper 5.4.1.6 External termination into soakaway 500mm min L = 3m max L = 3m max Ø19mm Ø100mm Ø19mm Ø30mm Ø30mm 5.4.1.4 Internal termination into combined sink 5.4.1.7 External termination into rain water down waste pipe Ø19mm... -
Page 14: Electrical Installation
5 Installation Electrical installation 5.6.3 Carrying out the wiring Danger! Risk of death from electric shock! 30 mm max. The power supply terminals L and N remain live even if the product is switched off: Shorten the connection cables to the appropriate ▶... -
Page 15: Operation 6
Operation 6 Conditions: If installing a multi-circuit control. ▶ Change the pump mode (d.18) from Eco (intermittent pump operation) to Comfort (continuous pump opera- tion). Conditions: If you are connecting a control (230 V). 230V~ 230V~ ▶ Connect the control to the main plug. ▶... -
Page 16: Displaying The Status Codes
7 Start-up Proceed accordingly for all parameters that need to be Note changed. If you do not press any button for 15 minutes, Press and hold the button for 3 seconds to finish the current programme is automatically can- configuring the diagnostics codes. celled and the basic display is shown. -
Page 17: Checking And Treating The Heating Water/Filling And Supplementary Water
Start-up 7 Checking and treating the heating Caution. water/filling and supplementary water The use of unsuitable heating water may cause aluminium corrosion and a result- Caution. ing lack of leak-tightness. Risk of material damage due to poor-qual- In contrast to steel, grey cast iron or copper, ity heating water for example, aluminium reacts with alkaline ▶... -
Page 18: Avoiding Danger Arising From Insufficient Water Pressure
7 Start-up ◁ Avoiding danger arising from insufficient An automatic air vent function is activated if the pressure exceeds 0.05 MPa (0.5 bar) for longer than water pressure 15 seconds. The filling pressure must be between 0.10 and 0.15 MPa Purge each radiator until the water escapes normally, (1.0 and 1.5 bar). -
Page 19: Checking And Adjusting The Gas Ratio Setting
Start-up 7 Checking and adjusting the gas ratio 7.9.2 Checking the gas connection pressure (gas setting flow pressure) Only a qualified competent person is authorised to imple- ment the settings on the gas valve. Each destroyed seal must be restored. The CO2 adjusting screw must be sealed. - Page 20 7 Start-up ▶ You must not start up the boiler. Note The actual reading on the digital pressure Conditions: Gas flow pressure in the permissible range gauge should ideally be 0,05 MPa (0,5 bar) ▶ End the check programme P.01. plus an additional pressure corresponding ▶...
-
Page 21: Checking Leak-Tightness
Adapting the unit to the heating installation 8 7.10 Checking leak-tightness 8.1.2 Resetting the remaining burner anti-cycling time ▶ Check the gas pipe, the heating circuit and the hot water ▶ circuit for leak-tightness. Hold the button down for more than 3 seconds. ▶... -
Page 22: Setting The Bypass
9 Adjusting the hot water temperature ▶ Setting the bypass Explain to the end user how the safety devices work and where they are located. ▶ Conditions: Two-stage pump Inform the end user how to handle the product. ▶ In particular, draw attention to the safety information which the end user must follow. -
Page 23: Setting The Co₂ Content
Inspection and maintenance 11 ▶ Compare the measured value with the corresponding Check whether the air-quality requirements with regard value in the table. to carbon monoxide are fulfilled. ▶ Checking the CO₂ content Fit the front panel. Great Britain 11.6 Removing the gas-air mixture unit front casing on / front casing off Note... -
Page 24: Cleaning The Heat Exchanger
11 Inspection and maintenance 11.8 Checking the burner Search the surface of the burner for possible damage. If you see any damage, replace the burner. Install the two new burner seals. 11.9 Checking the ignition electrode Remove the gas-air mixture unit (6). Disconnect the connection (2) and the earthing cable (1). -
Page 25: Cleaning The Condensate Siphon
Inspection and maintenance 11 11.12 Cleaning the filter in the cold water inlet Close the main cold water supply line. Drain the product on the hot water side. Remove the connection piece from the connection for the product's cold water supply. Clean the filter in the cold water inlet without removing 11.13 Cleaning the heating filter Using water to clean the condensate tray (1). -
Page 26: Installing The Gas-Air Mixture Unit
12 Troubleshooting 11.14 Installing the gas-air mixture unit 12.2 Calling up the fault memory Install the burner. The last ten fault codes are stored in the fault memory. ▶ Install the gas-air mixture unit. Hold the button down for more than 7 seconds. Install the air intake pipe. - Page 27 Troubleshooting 12 Remove the temperature sensor (3). Remove the upper clip (1). Remove the lower clip (4). Remove the supply pipe (5). Remove the air intake pipe (2). Remove the plug from the gas valve assembly (3) and from the fan (4). Unscrew the gas connection pipe's connection (1) from the gas valve assembly.
- Page 28 12 Troubleshooting 13. Lift the heat exchanger up slightly and remove it to- Undo the nut (3). gether with the condensate tray. Remove both screws on the support plate (1). 14. Remove the ignition transformer (1). Remove the support plate. 15.
-
Page 29: Checking The Product For Leak-Tightness
Drain the product. (→ Page 26) 14 Customer service For contact details for our customer service department, you can write to the address that is provided on the back page, or you can visit www.glow-worm.co.uk. 0020239562_02 EASICOM 3 Installation and maintenance instructions... -
Page 30: Appendix
Appendix Appendix Check programmes – Overview Note Since the programme table is used for various products, some programmes may not be visible for the product in question. Display Meaning P.01 Burner operation on adjustable heat input: The product operates after ignition with the heat input set between "0" (0% = Pmin) and "100" (100% = Pmax). The function is active for 15 minutes. - Page 31 Appendix Dia- Values Default set- gnostics Parameter Unit Increment, select, explanation Own setting ting Min. Max. code ℃ – – d.04 Water temperature in the Current value cylinder adjustable ℃ – – d.05 Determined heating flow Current value set target temperature adjustable ℃...
- Page 32 Appendix Dia- Values Default set- gnostics Parameter Unit Increment, select, explanation Own setting ting Min. Max. code – – d.22 Status of the hot water Current value off = No current requirement request adjustable on = Current requirement – – d.23 Status of the heating Current value...
- Page 33 Appendix Dia- Values Default set- gnostics Parameter Unit Increment, select, explanation Own setting ting Min. Max. code d.51 Correction of the max- -2500 -1000 Adjustable imum fan speed Fan speed = Display value x 10 – d.58 Solar circuit reheating 0 = Boiler's Legionella protection Adjustable function deactivated...
-
Page 34: C Status Codes - Overview
Appendix Dia- Values Default set- gnostics Parameter Unit Increment, select, explanation Own setting ting Min. Max. code – – – d.91 Status DCF77 Current value adjustable – – d.93 Setting the product code Adjustable The Device Specific Number (DSN) can be found on the iden- tification plate. -
Page 35: D Overview Of Fault Codes
Appendix Status code Meaning S.32 Fan waiting time: Fan speed outside of the tolerance values S.33 Forced fan operation until the pressure monitor is switched S.34 Frost protection active S.39 Underfloor heating contact open S.41 Water pressure too high S.42 Flue non-return flap closed S.46 Protection mode: Minimum load... - Page 36 Appendix Fault code Meaning Possible cause F.32 Fan frost protection function active: Fan Plug on fan not correctly plugged in, multiple plug on PCB not correctly speed outside the tolerance values plugged in, break in cable harness, fan blocked, Hall sensor defective, elec- tronics defective F.49 eBUS fault: Voltage too low...
-
Page 37: E Wiring Diagram: Combi Boiler
Appendix Wiring diagram: Combi boiler Burner off RT 24V X106 eBUS – Burner 24V= 230V~ RT 230Vac 230Vac Main PCB 3-port diverter valve Interface PCB Pressure sensor Timer Flow rate sensor Temperature sensor on the heating flow External ignition transformer Temperature sensor on the heating return Heating pump Ionisation and ignition electrode... -
Page 38: Inspection And Maintenance Work - Overview
Appendix Inspection and maintenance work – Overview The table below lists the manufacturer requirements with respect to minimum inspection and maintenance intervals. If na- tional regulations and directives require shorter inspection and maintenance intervals, you should observe these instead of the intervals listed in the table. -
Page 39: G Opening In The Air/Flue Pipe
Appendix Opening in the air/flue pipe D, E Positioning of the opening of a fan-supported flue gas pipe Minimum dimen- Installation site sions Directly below an opening, air bricks, opening windows, etc., that can be opened. 300 mm Above an opening, air bricks, opening windows, etc., that can be opened. 300 mm Horizontally to an opening, air bricks, opening windows, etc., that can be opened. -
Page 40: Horizontal Terminal Positioning
Appendix Horizontal terminal positioning BS 5440-1 recommends that fanned flue chimney terminals should be positioned as follows: a) at least 2 m from an opening in the building directly opposite, and b) so that the products of combustion are not directed to discharge directly across a boundary if the products are likely to cause a nuisance to a neighbour or discharge over a walkway or patio. -
Page 41: H Commissioning Checklist
Appendix Commissioning Checklist Benchmark Commissioning and Servicing Section It is a requirement that the boiler is installed and commissioned to the completed in full. www.centralheating.co.uk © Heating and Hotwater Industry Council (HHIC) 0020239562_02 EASICOM 3 Installation and maintenance instructions... - Page 42 Appendix GAS BOILER SYSTEM COMMISSIONING CHECKLIST This Commissioning Checklist is to be completed in full by the competent person who commissioned the boiler as a means of demonstrating compliance with the appropriate Building Regulations and then handed to the customer to keep for future reference. CONTROLS Optimum start control Fitted...
- Page 43 Appendix SERVICE RECORD It is recommended that your heating system is serviced regularly and that the appropriate Service Interval Record is completed. Service Provider SERVICE 01 SERVICE 02 ² % ² % ² % ² % SERVICE 03 SERVICE 04 ²...
-
Page 44: I Combustion Chart
Appendix Combustion chart PRIOR TO CO AND COMBUSTION RATIO CHECK NOTE The boiler manufacturer’s installation instructions should have been followed, gas type verified and gas THE AIR GAS RATIO VALVE IS FACTORY supply pressure/rate checked as required prior to commissioning. SET AND MUST NOT BE ADJUSTED As part of the installation process, especially where a flue has been fitted by persons other than the DURING COMMISSIONING UNLESS THIS... -
Page 45: J Lengths Of The Air/Flue Pipe
Dia. 80/125 (L) ≤ 9 m ≤ 22 m EASICOM 3 24c Length ≤ 9 m ≤ 22 m EASICOM 3 28c air/flue pipe Length of the C33 type air/flue pipe C33 type flue pipe Dia. 60/100 (L) Dia. 80/125 (L) ≤... - Page 46 Appendix Technical data – Domestic hot water EASICOM 3 24c EASICOM 3 28c Specific flow rate (D) (ΔT = 30 K) 11.7 l/min 13.6 l/min in accordance with EN 13203 Continuous flow rate (ΔT = 35 K) 602 l/h 699 l/h Specific flow rate (ΔT = 35 K)
-
Page 47: Index
Index Index Power supply............... 14 Preparing the repair work ............ 26 Air/flue pipe, installed ............5 Preparing, repair work ............26 Pressure sensor ..............29 Article number ............... 7 Pump ................... 21 Pump head ................28 Burner anti-cycling time............21 Pump output Setting................ - Page 48 Nottingham Road ‒ Belper ‒ Derbyshire DE56 1JQ Telephone 01773 824639 ‒ Technical helpline 0330 100 7679 After sales service 0330 100 3142 0020239562_02 www.glow-worm.co.uk 0020239562_02 ‒ 15.11.2017 © These instructions, or parts thereof, are protected by copyright and may be repro- duced or distributed only with the manufacturer's written consent.
Need help?
Do you have a question about the EASICOM 3 28c and is the answer not in the manual?
Questions and answers
can you a supupumpmantery