Glow-worm 30ci Instructions For Use, Installation & Servicing
Fanned flue boilers
Hide thumbs
Also See for 30ci:
- Instructions for use installation and servicing (60 pages) ,
- Instructions for use installation and servicing (148 pages)
Table of Contents
Advertisement
Installation and Servicing
30ci
G.C. No. 47-047-20
30si
G.C. No. 41-047-70
Hepworth Heating Ltd., Nottingham Road, Belper, Derbyshire. DE56 1JT
Supplied By www.heating spares.co Tel. 0161 620 6677
Instructions for Use
To b e l e f t w i t h t h e u s e r
Fanned Flue
Combination Boiler
Fanned Flue
System Boiler
4000123434-2. 01.03
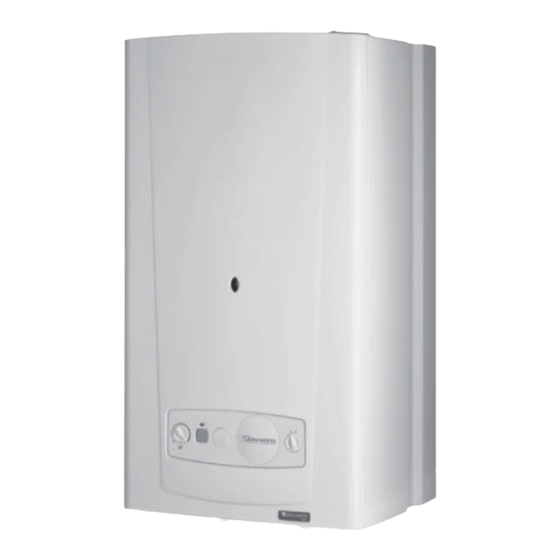
30si shown
Advertisement
Chapters
Table of Contents

Related Manuals for Glow-worm 30ci


Summary of Contents for Glow-worm 30ci
-
Page 1: Instructions For Use
4000123434-2. 01.03 Instructions for Use Installation and Servicing To b e l e f t w i t h t h e u s e r 30ci Fanned Flue Combination Boiler G.C. No. 47-047-20 30si Fanned Flue System Boiler G.C. No. 41-047-70 30si shown Hepworth Heating Ltd., Nottingham Road, Belper, Derbyshire. -
Page 2: Guarantee Registration
Guarantee Registration Thank you for installing a new Glow-worm appliance in your home. Glow-worm appliances' are manufactured to the very highest standard so we are pleased to offer our customers’ a Comprehensive Guarantee. This product is guaranteed for 24 months from the date of installation or 30 months from the date of manufacture, whichever is the shorter, for parts. -
Page 3: Table Of Contents
User Controls and Lighting Analogue Programmer 24ci only Digital Programmer 24ci only Technical Data General Information Heating System Design Domestic Hot Water System Design (30ci) Boiler Schematic 30ci Boiler Schematic 30si Boiler Location, Flue and Ventilation INSTALLATION Fixing jig INSTRUCTIONS... -
Page 4: Important Information
Important Information Gas safety (Installation and use) Regulations All external wiring between the appliance and the electrical supply and earthing requirements shall comply with the current In your interests and that of gas safety, it is the law that ALL gas IEE Regulations. -
Page 5: Appliance Introduction
Servicing organisation or Heatcall using the telephone number on the inside front cover of this literature. Appliance Introduction The 30ci and 30si boilers are wall mounted modulating boilers This boiler may be installed in any room, although particular with electronic ignition providing central heating and hot water. -
Page 6: Appliance Safety Devices
Appliance Safety Devices Air flow rate safety device Frost protection If the flue is obstructed, the built in safety system will turn the The appliance has a built in frost protection device that boiler OFF, the fan will continue to run. The boiler will be ready protects the boiler from freezing. -
Page 7: User Controls And Lighting
It is supplied factory set to 38˚C to 73˚C PROGRAMMER Pressure gauge (bar) 30 ci Only Domestic hot water temperature selector (30ci Only) and temperature ° minimum setting approx. 38˚C up to maximum setting 65˚C. gauge ( The ECO setting is ideally suited for all the requirements of normal family use (showers, washing up etc.). -
Page 8: Analogue Programmer 24Ci Only
Programmer Instructions for Use Analogue Programmer (30 ci only) Digital Programmer Kit. (30ci Only) Part No. A20086. Fitted as standard. Part No. A20087. Not fitted as standard. Setting the time, see diagram 3 KEYPAD DESCRIPTION • Rotate the dial clockwise, by hand, until the indicator arrow is See diagram 4 for position of keypads as described below, pointing to the current time. - Page 9 Programmer Instructions for Use NOTE: MULTIPLE ON OR OFF EVENTS MAY BE Programming 24 Hour or 7 Day Schedules PROGRAMMED, SEE EXAMPLE. It may be helpful to write out the programme schedules before BEFORE PROCEEDING WITH SETTING THE TIME AND beginning.
- Page 10 Programmer Instructions for Use Event Review Troubleshooting To review the programs at any time, press Prog. key. Events PROBLEM: Days are flashing, pressing any key does nothing will appear in the order they were entered with repeated except key turns output ON and OFF. presses of the Prog.
-
Page 11: Technical Data
1 Technical Data 30ci 30si Heating Heating Heat input (max) NET Q 32,6 kW Heat input (max) NET Q 32,6 kW 111,231 BTU/H 111,231 BTU/H Heat input (min) NET Q 13,3 kW Heat input (min) NET Q 13,3 kW 45,380 BTU/H... -
Page 12: General Information
1 Technical Data The 30ci and 30si are delivered in two separate packages: • The boiler including fixing jig complete with isolating valves and fittings. • The flue system Net lift weight (boiler only) 30ci 37 kg 30si 36 kg... -
Page 13: Heating System Design
An additional expansion vessel can be fitted to the system if required, see • The 30ci and 30si are for use with sealed central heating diagram 3.2. systems. Guidance on vessel sizing is also given in a current issue of a •... - Page 14 Model Minimum flow rate 30ci 21.26 litres per minute 3.2 Filling the system 30ci 30si 21.26 litres per minute A filling device is fitted to the boiler to initially fill the system and This is equal to 20°C differential at maximum...
-
Page 15: Domestic Hot Water System Design (30Ci) 4
4 Domestic Hot Water System Design. 30ci Only General - All domestic hot water circuits, connections, fittings • The flow restrictor, supplied in the document envelope, must must be in accordance with the relevant standards and water be fitted as diagram 7.1, limiting the flow through the boiler to supply regulations. -
Page 16: Boiler Schematic 30Ci
5 Boiler Schematic 30ci 1 - Fan. 2 - Air pressure switch. 3 - Heat exchanger. 4 - Overheat thermostat. 5 - Combustion chamber. 6 - Expansion vessel. 7 - Flame sense electrode. 8 - Burner. 9 - Ignition electrode. -
Page 17: Boiler Location, Flue And Ventilation
6 Boiler Location, Flue and Ventilation 6.1 Boiler Location The recommended clearances are shown in diagram 6.1. Note: The boiler must be mounted on a flat wall which is sufficiently robust to take its weight when full. If in doubt, expert advice should be obtained, in the event of the wall being found not suitable. -
Page 18: Fixing Jig
FIXING JIG A - Heating flow isolating valve. Inclusive Isolating Valves B - 30ci only Domestic hot water outlet. C - Gas service cock. D - 30ci only Cold water inlet isolating valve. -
Page 19: Boiler Preparation And System Connections
8 Boiler Preparation and System Connections 8.1 Cutting the flue hole • Remove the wall template, follow the instructions given on the REAR TOP FLUE wall template. 80 min. OUTLET • Position the wall template, taking due regard of the minimum clearances for the selected flue application, see diagram 8.1. -
Page 20: Boiler Installation
• Ensure the plastic plugs are removed from water and gas pipes. NOTE: There will be some spillage of water. • (30ci Only) Fit the cold water inlet restrictor (supplied in the document envelope) into cold water inlet isolating valve, see diagram 7.1. -
Page 21: Horizontal Telescopic Rear Flue Installation
10 Horizontal Telescopic Rear Flue Installation 10.1 Horizontal Telescopic Rear flue - kit No. A2018000, refer to diagram 10.1 Suitable for installations that require a flue length "L" 193 - 510mm. For flue lengths less than 328mm the duct will need to be cut, see diagram 10.2. - Page 22 10 Horizontal Telescopic Rear Flue Installation 10.2 Sealed chamber cover FAN RETAINING EARTH • Unscrew and remove the two retaining screws from the sealed BOLTS LEAD chamber cover, see diagram 10.2 • Lift cover up and off pins on top of boiler. 10.3 Fan Removal, refer to diagram 10.3 •...
-
Page 23: Horizontal Telescopic Top Flue Installation
11 Horizontal Telescopic Top Flue Installation The Horizontal Telescopic Top Flue, Kit No. A2004500 Suitable for installations that require a flue length "L" from 430 70mm minimum to 660 maximum. If longer flueing is required extensions and bends are available, see note below. If the flue length, see diagram 11.2. -
Page 24: Fixing Collar Seal
11 Horizontal Telescopic Top Flue Installation 11.3 Installation of telescopic flue assembly STEP 1. • For flue lengths less than 0.5m fit the restrictor (supplied in the document envelope) inside the fan outlet, see diagram 11.3. FLUE LENGTH Outside wall face •... -
Page 25: Horizontal Top Flue Installation
12 Horizontal Top Flue Installation 12a.1 The Horizontal Top flue - kit 86285H Suitable for installations that require a max. flue length "L" of 740mm. 70mm If a shorter flue length is required, the flue can be cut to a min. length"L"... -
Page 26: Gasket
12 Horizontal Top Flue Installation 12a.4 Installation of horizontal top flue Outside Flue assembly wall face centre line Important: If the flue has been cut, ensure that there are no burrs that could damage the ‘O’ ring. • For flue systems less than 0,5 m long, fit the flue restrictor (a) into the fan outlet, see diagram 10a.4. -
Page 27: Electrical Connection
13 Electrical Connection 13.1 Mains Cable WARNING: This appliance must be earthed. This appliance must be wired in accordance with these instructions. Any fault Important: If a replacement supply cable is required it must be arising from incorrect wiring cannot be put right under the purchased. - Page 28 13 Electrical Connection 13.3 Mains Voltage External Controls WARNING: UNDER NO CIRCUMSTANCES MUST ANY MAINS VOLTAGE BE APPLIED TO ANY OF THE TERMINALS ON THE VOLTAGE FREE HEATING CONTROLS STRAIN CONNECTION TERMINAL. RELIEF When mains voltage external controls are used, remove the MAINS VOLTAGE HEATING CONTROLS CONNECTION PLUG from the fittings pack and install on the control interface PCB as follows.
- Page 29 • The boiler is connected to the electrical supply. • The gas service cock is open. Turn the switch OFF ( 0 ) 30ci shown Diagram 14.1 2. • Open the three water isolating valves. Note: Isolating valves are shown in the: OFF position...
- Page 30 14 Commissioning 5. • Bleed each radiator to remove air, ensure all • Leave cap open on automatic air vent. bleed screws are re-tightened. • If necessary repressurise the system, refer to procedure 4 8. • Open various hot water taps to bleed system 7.
-
Page 31: Changing Gas Type
It is the Law that any servicing is carried out by a competent is indicated when system is COLD. person. 30ci Only Flush the domestic hot water system by opening the Advise the user of the precautions necessary to prevent damage hot water taps for several minutes. -
Page 32: Routine Cleaning And Inspection
Switch on the electrical supply and gas supply, then operate the • Isolate boiler from the gas and electrical supplies. boiler. • (30ci Only) Drain the Domestic hot water circuit, refer to diagram 17.2. To Drain the Domestic hot water circuit (30ci Only) BOILER DRAIN VALVE •... - Page 33 • Unhook each panel from the front retaining tabs. • Pull each panel forward from the rear retaining tabs to remove. Diagram 17.3 30ci shown Diagram 17.4 4000123434-2 Supplied By www.heating spares.co Tel. 0161 620 6677...
- Page 34 Diagram 17.5 DO NOT USE ANY TOOL LIKELY TO DAMAGE PAINTED FINISH OF HEAT EXCHANGER. 3.5mm 17.12 Domestic water inlet filter 30ci Only, refer to diagram 17.10 3.5mm If the water flow rate through the appliance has reduced it may be necessary to clean or replace the domestic water inlet filter.
- Page 35 Diagram 17.9 FAN RETAINING EARTH BOLTS LEAD CLIP DOMESTIC WATER INLET FILTER HOUSING POWER SUPPLY LEADS FILTER Diagram 17.8 30ci Only Diagram 17.10 FLAT FILTER RETAINING CLIP 30ci shown Diagram 17.11 4000123434-2 Supplied By www.heating spares.co Tel. 0161 620 6677...
-
Page 36: Fault Finding
18 Fault Finding Before trying to operate the boiler make sure that : Overheat thermostat reset button • All gas supply cocks are open and that the gas supply has Refer to Section 20.10 to locate the overheat thermostat been purged of air. reset button. - Page 37 No display on control panel • 230V supply • PCB fuse • Connection between PCBs No domestic hot water 30ci Only) • Loose connections on control board (PCB), Fault F9 No central heating • Connections on air pressure switch (electrical or tubes)
- Page 38 Connect 1 and 2 on J10, Faulty main PCB. does boiler fire in central heating? Faulty 230V controls board. 30ci ONLY FAULT: NO HOT WATER, BUT THE HEATING IS WORKING Insufficient water pressure. Is the water pressure greater The appliance will not operate.
- Page 39 18 Fault Finding F1 FAULT DISPLAYED FAULT: THE BURNER LIGHTS BUT THEN GOES OUT. THERE IS NO FLAME DETECTED. The flame is not spreading across the whole burner and is not reaching • Check that the gas taps are fully open the sensing electrode.
- Page 40 - Check set point P3. (Refer to Commissioning) - Check dip switch setting. (Refer to Commissioning) - Check the adjustment of the by-pass internal and external (If fitted). - 30ci Only Check the 3-way valve is not passing into the domestic hot water heat exchanger. 4000123434-2...
- Page 41 18 Fault Finding 30ci ONLY FAULT: THE WATER AT THE TAPS IS LUKE-WARM. Is the temperature higher if you reduce Check the 3-way valve is not passing the flow through the taps? into the radiators. (The radiators should stay cold in Summer setting) Check that the cold water inlet restrictor is fitted.
-
Page 42: Wiring Diagram 30Ci
19 Wiring Diagram 30ci AIR PRESSURE SWITCH IGNITION PLUG ELECTRODES IGNITOR UNIT SENSE ELECTRODE PUMP CONTROL OVERHEAT VALVE THERMOSTAT CHASSIS THERMISTOR EARTH WATER PRESSURE SENSOR THREE-WAY VALVE MAINS VOLTAGE HEATING CONTROLS PLUG 230V SWITCHED LIVE FROM OPTIONAL FROST STAT. 230V SWITCHED LIVE FROM HEATING CONTROLS. -
Page 43: Wiring Diagram 30Si
19a Wiring Diagram 30si AIR PRESSURE SWITCH IGNITION PLUG ELECTRODES SENSE ELECTRODE IGNITOR UNIT CONTROL VALVE OVERHEAT PUMP CH THERMOSTAT CHASSIS THERMISTOR EARTH WATER PRESSURE SENSOR MAINS VOLTAGE HEATING CONTROLS PLUG 230V SWITCHED LIVE FROM OPTIONAL FROST STAT. 230V SWITCHED LIVE FROM HEATING CONTROLS. REMOVE VOLTAGE FREE LINK CONTROLS VOLTAGE FREE... -
Page 44: Replacement Of Parts
• Open drain valve fitted at the lowest point in the system. • Allow air into the system by opening a radiator bleed screw or the boilers drain valve (f). (30ci Only) To Drain the Domestic hot water circuit BOILER DRAIN VALVE • Close boiler isolating valve (d). - Page 45 • Disconnect air pressure switch electrical connections. RESTRICTOR • Unclip to remove air pressure switch. 20.4 (30ci Only) Domestic water inlet filter If the water flow rate through the appliance has reduced it may be necessary to clean or replace the water inlet filter.
- Page 46 20 Replacement of Parts 20.9 Burner injector assembly, refer to diagram BURNER INJECTOR 20.6. Before starting refer to the front of Section 20 Important information. • Remove the front panel, refer to Section 17.3. • Lower the control panel, refer to Section 17.4. •...
- Page 47 20 Replacement of Parts 20.13 Heat exchanger, refer to diagram 20.7. 20.16 User interface board, refer to diagram 20.10. Before starting refer to the front of Section 20 Important information. Before starting refer to the front of Section 20 Important information.
- Page 48 20 Replacement of Parts CONTROL BOARD PCB (CONTROL BOARD) COVER 30ci shown Diagram 20.9 230V CONTROLS CONTROL PANEL PROGRAMMER BOARD USER INTERFACE BOARD MAINS SWITCH Diagram 20.10 30ci shown 4000123434-2 Supplied By www.heating spares.co Tel. 0161 620 6677...
- Page 49 • Disconnect pump cable from pump (avoid straining cables). • Connect electrical connection to replacement pump head. • Fit replacement pump head. 20.21 (30ci Only) Filling system tap, refer to diagram 20.12. Before starting refer to the front of Section 20 Important information.
- Page 50 20.1. Pull out slotted metal clip securing boiler drain valve into housing, remove boiler drain valve. Diagram 20.13 20.24 (30ci Only) Water flow sensor, refer to diagram 20.14. Before starting refer to the front of Section 20 Important information. • Remove the front panel, refer to Section 17.3.
- Page 51 Drain down the boiler, refer to relevant part of Section 20.1. • Remove the igniter unit, refer to Section 20.33. Pull out slotted metal clip, ease out bypass valve from bypass valve housing. 30ci shown Diagram 20.16 20.27 Automatic air vent, refer to diagram 20.16.
- Page 52 VALVE • Undo discharge pipe union nut. • Pull out slotted metal clip from valve body and remove valve. 20.31 (30ci Only) Three-way valve head, refer to diagram 20.20. Before starting refer to the front of Section 20 Important information.
- Page 53 • Pull upwards to release and remove the ignition unit from the retaining slot. Diagram 20.22 20.34 (30ci Only) Domestic hot water plate to plate heat exchanger Before starting refer to the front of Section 20 Important DOMESTIC HOT WATER information.
- Page 54 • Lift up to remove the boiler from the wall. • Remove sealed chamber cover, refer to Section 17.4. • Remove the combustion chamber cover, refer to Section 30ci shown 17.5. • Remove the fan, refer to Section 17.10. • Remove air pressure switch sensing tube from the side of the flue hood, see diagram 17.9.
-
Page 55: Spare Parts
Part No. G.C. No. Central heating thermistor 801935 E91-959 801860 E92-062 Air pressure switch 801862 E92-063 30ci Only Domestic water flow sensor 801910 E84-014 Printed circuit board - Main 801915 E91-904 Pump head (50W) 801857 E92-064 System water pressure sensor... - Page 56 Because of our constant endeavour for improvement details may vary slightly from those in the instructions. 4000123434-2 Supplied By www.heating spares.co Tel. 0161 620 6677...
Need help?
Do you have a question about the 30ci and is the answer not in the manual?
Questions and answers