Glow-worm 24cxi Instructions For Use Installation And Servicing
High efficiency
condensing
combination boilers
Hide thumbs
Also See for 24cxi:
- Installation and servicing (68 pages) ,
- Instructions for use installation and servicing (52 pages) ,
- Instructions for use manual (20 pages)
Table of Contents
Advertisement
Advertisement
Chapters
Table of Contents

Related Manuals for Glow-worm 24cxi


Summary of Contents for Glow-worm 24cxi
-
Page 1: Instructions For Use
2000225065A.01.03 Instructions for Use Installation and Servicing To b e l e f t w i t h t h e u s e r 24cxi G.C. No. 47-047-23 30cxi G.C. No. 47-047-24 38cxi G.C. No. 47-047-27 High Efficiency Condensing Combination Boilers Hepworth Heating Ltd., Nottingham Road, Belper, Derbyshire. -
Page 2: Guarantee Registration
Guarantee Registration Thank you for installing a new Glow-worm appliance in your home. Glow-worm appliances are manufactured to the very highest standard so we are pleased to offer our customers a Comprehensive Guarantee. This product is guaranteed for 24 months from the date of installation or 30 months from the date of manufacture, whichever is the shorter, for parts. -
Page 3: Table Of Contents
Contents The instructions consist of three parts, User, Installation and Servicing Instructions, which includes the Guarantee Registration Card. The instructions are an integral part of the appliance and must, to comply with the current issue of the Gas Safety (Installation and Use) Regulations, be handed to the user on completion of the installation. CONTENTS DESCRIPTION SECTION... -
Page 4: Important Information
Important Information External wiring must be correctly earthed, polarised and in Gas safety (Installation and use) Regulations accordance with the relevant standards. In your interests and that of gas safety, it is the law that ALL gas In GB this is BS 6891. appliances are installed and serviced by a competent person in In IE this is the current edition of I.S.813 "Domestic Gas accordance with the above regulations. -
Page 5: Appliance Introduction
Important Information Protection Against Freezing The appliance has a built in frost protection programme as long as the electricity and gas are left switched on. Any other exposed areas of the system should be protected by a separate frost thermostat. If the mains electricity and gas are to be turned off for any long periods during severe weather, it is recommended that the whole system, including the boiler, should be drained to avoid... -
Page 6: Appliance Safety Devices
The boiler casing can be cleaned with a damp cloth, followed by a dry cloth to polish. If a part is required contact Heatcall (Glow-worm’s own service organisation) using the telephone number on the inside front Do not use abrasive or solvent cleaners. -
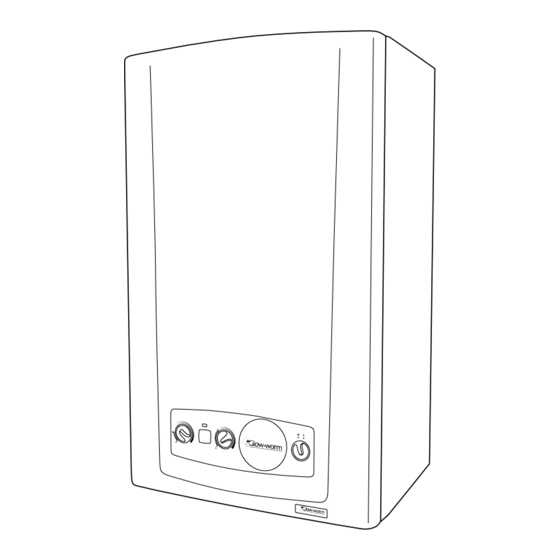
Page 7: Operating The Boiler
Turn mains reset switch to I clockwise. 4. If you are in any doubt about the boiler being filled with water contact your installer or Heatcall (Glow-worm’s own service Central Heating Temperature Control: organisation) using the telephone number on the inside front 0: Temperature control is Off. - Page 8 2. A tap extension tool is provided to facilitate this. Close the tap. If the system repeatedly loses pressure, YOU MUST CONTACT YOUR INSTALLER OR HEATCALL (GLOW-WORM’S OWN SERVICE ORGANISATION) USING THE TELEPHONE NUMBER ON THE INSIDE FRONT COVER OF THIS BOOKLET.
-
Page 9: General Information
1 General Information BOILER FLUE INSIDE WALL FIXING FACE SAFETY DISCHARGE DRAIN Diagram 1.1 IMPORTANT NOTICE The appropriate Buildings Regulations either The Building Regulations, The Building Regulations (Scotland),The Building The boiler is supplied in one pack, the flue and fixing jig are Regulations (Northern Ireland). - Page 10 EXPANSION THERMISTOR The Seasonal Efficiency Domestic Boilers UK (SEDBUK) is VESSEL Class 'A' : 24cxi - 90.3%, 30cxi - 90.3% & 38cxi - 90.6%. OVERHEAT CUT-OFF The value is used in the UK Government's Standard Assessment Procedure (SAP) for energy rating of dwellings. The test data...
-
Page 11: Boiler Location And Ventilation
2 Boiler Location and Ventilation 2.1 Location This boiler is not suitable for outdoor installation. This boiler may be installed in any room, although particular attention is drawn to the installation of a boiler in a room containing a bath or shower where reference must be made to the relevant requirements. -
Page 12: Flue Location And Ventilation
3 Flue Location and Ventilation 3.1 Flue Position and Length WALL THICKNESS 'X' = 75 TO 554mm The standard horizontal flue is fitted onto the top of the boiler using the flue elbow. See diagrams 3.1and 3.2 to determine whether a standard flue can be used. -
Page 13: Flue Location And Ventilation 3
3 Flue Location and Ventilation 3.4 Terminal Position The minimum acceptable siting dimensions for the terminal from obstructions, other terminals and ventilation openings are shown in diagram 2.1. For Ireland the minimum distances for flue terminal positioning must be those detailed in I.S.813 "Domestic Gas Installations". -
Page 14: Heating System
4 Heating System 4.1 General Table 3. Flow Rate The boiler is for use only with sealed central heating systems. MODEL MINIMUM FLOW RATE The safety valve is an integral part of the boiler and it cannot be adjusted. 24 cxi 774 litres/hr. -
Page 15: Heating System 4
4 Heating System BOILER DOMESTIC WATER Filling device FILLING LOOP REDUCED ADDITIONAL EXPANSION PRESSURE FILLING LOOP TAP VESSEL ZONE VALVE EXTENSION (if required) Diagram 4.2 * BYPASS (if required) RETURN 4.5 Filling the Sealed System HEATING The boiler has a built in filling loop, see diagram 4.2. To ease CIRCUIT access to the filling loop tap, push on the tap extension piece, supplied in loose items pack, see diagram 4.2. -
Page 16: Domestic Hot Water System
Refer to the manufacturer’s instructions or consult the local water company for additional advice. 5.3 Domestic Water Flow Rate The water flow rate is restricted to a maximum 10 l/min (24cxi) 12 l/min (30cxi) and15.5 l/min (38cxi) by a restrictor fitted during boiler installation, see diagram 8.2. -
Page 17: Installation Preparation
6 Installation Preparation For extended side flues, the flue hole centre should be 6.1 Unpacking of Boiler determined by extending the dashed inclined line on the template IMPORTANT: With regards to the Manual Handling Operations, to the side wall. This dashed line is drawn at 35mm/metre (2.5 1992 Regulations, the following lift operation exceeds the rise from the boiler. -
Page 18: Installation Preparation 6
Do not route any pipes behind the boiler, unless a vertical piping kit is used. For vertical plumbing of the central heating or DHW pipes it is preferable to use the Glow-worm vertical plumbing kits, see section 1.7. INNER LOCATING... -
Page 19: Flue Preparation
7 Flue Preparation 7.1 Flue Length All dimensions are in mm. For rear or side flue, measure the distance from the outside wall to the butt joint of the flue elbow fitted on top of the boiler. A standard flue system will be suitable if the length measured ‘Y’ DRILL AND is less than 633mm, see diagrams 7.1 and 7.2. - Page 20 7 Flue Preparation instructions given in sections 7.1-7.2 the rubber sealing collar 7.4 Flue Attachment To Boiler should fit flush with the outside wall, check this. Refer to section 8 and fix the boiler in position prior to completing Position securing collar centrally over joint, tighten securing the flue installation.
-
Page 21: Gas/Water Connections And Boiler Fixing
8 Gas/Water Connections and Boiler Fixing 8.1 Gas Connection Before connection check supply of local gas. The gas supply can be connected from below or through the wall at the rear of the boiler, the position is shown on the wall template. -
Page 22: Safety Valve Discharge And Condensate Connections
8 Gas/Water Connections and Boiler Fixing IMPORTANT: With regards to the Manual Handling Operations, COLD WATER 1992 Regulations, the following lift operation exceeds the UNION NUT recommended weight for a one man lift. INLET RESTRICTOR Having previously secured the wall mounting jig and hanging bracket to the wall, lift the boiler into position in the following manner. -
Page 23: Electrical Connections
Any fault arising from incorrect wiring cannot be put right under the terms of the Glow-worm guarantee. All system components must be of an approved type. Electrical components have been tested to meet the equivalent requirements of the BEAB. -
Page 24: System Controls
10 Electrical Connections 10.3 Mains Voltage System Controls CABLE WARNING: UNDER NO CIRCUMSTANCES MUST ANY MAINS VOLTAGE BE APPLIED TO ANY OF THE TERMINALS EXIT ON THE VOLTAGE FREE HEATING CONTROLS CONNECTION PLUG. MAINS Remove the MAINS VOLTAGE HEATING CONTROLS CABLE CONNECTION PLUG from the fittings pack and install on the control interface PCB as follows. -
Page 25: Commissioning
The water flow rate is restricted to a maximum 10 l/min (24cxi) 12 l/min (30cxi) and15.5 l/min (38cxi) by a restrictor fitted during boiler installation, see diagram 8.2. - Page 26 This will also occur during normal The approximate gas rates: 24cxi : 2.24m /h (79ft operating if there is no domestic or central heating demand for 30cxi : 2.8m...
-
Page 27: Servicing
12 Servicing 12.1 General FLUE Refer to Table 2 Section 1 General Information. Measurement ELBOW of the products of combustion can be achieved by connection of a probe to the combustion analyser test point, see diagram 12.1. COMBUSTION Before commencing with a service or replacement of parts the ANALYSER boiler should be isolated from the electrical supply and the gas TEST POINT... - Page 28 12 Servicing Clean the burner with a soft brush taking great care not to damage the front insulation. DO NOT use wire or sharp instruments to clean the holes of the burner. GAS CONTROL Inspect the burner for any signs of damage. VALVE Inspect the sealing rings and replace if necessary.
- Page 29 In the fully clockwise position the display should be indicating the maximum fan speed of the appliance, in central heating mode this should be 39 for 24cxi, 45 for 30cxi and 45 for 38cxi. With domestic hot water max. demand this should be 51 for 24cxi, 57 for 30cxi and 57 for 38cxi.
- Page 30 12 Servicing 12.7 Domestic Cold Water Inlet Filter If the water flow rate through the appliance has reduced it may be necessary to clean or replace the water inlet filter. Turn off the electrical supply to the boiler. Refer to section 12.10 and drain the domestic hot water circuit. Slide out the securing clip, which holds the filter in its housing to the left of the pump, remove the filter to clean or renew if necessary, see diagram 12.9.
- Page 31 12 Servicing 12.9 Draining of Boiler Heating Circuit RETAINING CLIP MOUNTING JIG Drain down the Heating Circuit of the boiler only, by closing the heating flow and return isolating valves on the wall mounting jig, see diagram 8.1. Attach a length of hose to the drain point and open the drain valve, see diagram 12.11.
-
Page 32: Fault Finding
13 Fault Finding MAINS VOLTAGE HEATING CONTROLS PLUG REMOVE VOLTAGE FREE LINK 230V SWITCHED LIVE FROM OPTIONAL FROST STAT. 230V SWITCHED LIVE FROM HEATING CONTROLS. CONTROLS VOLTAGE FREE INTERFACE HEATING CONTROLS PLUG LINK REMOVE THE LINK IF FITTING VOLTAGE FREE OR 230V SYSTEM CONTROLS. - Page 33 13 Fault Finding Before trying to operate the boiler make sure that : NOTE: If the DHW control is set for pre-heat the boiler will start as soon as power is supplied to it, if there is no heating demand. •...
-
Page 34: Replacement Of Parts
14 Replacement of Parts 14.1 General 14.5 DC Fan supply Replacement of parts must be carried out by a competent For access, refer to section 14.1. person. Refer to diagram 14.2. Before replacing any parts the boiler should be isolated from the Unplug white plastic plug from the DC fan supply. - Page 35 SCREW (3) Diagram 14.5 For access, refer to section 14.1. Refer to section 12.3 for removal of the fan, gas valve and 24cxi Illustrated burner assembly. Remove the gas control valve as described in the relevant parts of section 14.6.
-
Page 36: Diagram 14.8
14 Replacement of Parts 14.11 Viewing Window 14.9 Front Insulation For access, refer to section 14.1. For access, refer to section 14.1. Refer to section 12.3 for removal of the fan, gas valve and burner Refer to diagram 14.9. assembly. Remove circlip. -
Page 37: Securing Screw
14 Replacement of Parts CAUTION: There will be water in the heat exchanger. 14.13 Heat Exchanger Remove condense pipe connector from bottom of heat For access, refer to section 14.1. exchanger. Refer to section 12.3 for removal of the fan, gas valve and Carefully ease heat exchanger out. - Page 38 14 Replacement of Parts 14.17 Safety Discharge Valve CAP HEAD SCREW (4) For access, refer to section 14.1. Refer to section 12.9 and drain the boiler heating circuit. Refer to diagram 14.15. Undo the safety discharge valve union and remove from the pipework.
- Page 39 14 Replacement of Parts 14.22 Automatic Air Vent 14.26 Filling Loop Tube For access, refer to section 14.1. For access, refer to section 14.1. Refer to section 12.9 and drain the boiler heating circuit. Refer to section 12.10 and drain the boiler hot water circuit. Refer to diagram 14.18.
- Page 40 14 Replacement of Parts FLOW RETAINING RETAINING SENSOR CLIP CLIPS RETAINING CLIP FILLING LOOP FILLING LOOP VALVE TUBE Diagram 14.19 Diagram 14.22 14.27 Filling Loop Valve. ELECTRICAL For access, refer to section 14.1. LEAD AND PLUG Refer to section 12.10 and drain the boiler hot water circuit. Refer to diagram 14.22.
- Page 41 14 Replacement of Parts Lift it up to remove it from the hydroblock with the washer and rotate it forward and out of the way. Using a TORX screwdriver remove the two screws securing the plate-to-plate heat exchanger to the hydroblock. Remove the plate-to-plate heat exchanger by lifting it up and over the top of the left hand hydroblock.
- Page 42 14 Replacement of Parts OUTLET FLOW PIPE PLATE TO PLATE HEAT HYDROBLOCK CONNECTOR CONNECTOR EXCHANGER SECURING SCREW SAFETY DISCHARGE VALVE PLATE TO PLATE HEAT SECURING SECURING HYDROBLOCK EXCHANGER SECURING CLIP 2 CLIP 3 SCREW SECURING SECURING CLIP 1 CLIP 4 Diagram 14.26 14.36 Hydroblock Assembly Left-Hand Remove left hand hydroblock from plate-to-plate heat exchanger...
- Page 43 14 Replacement of Parts 14.39 Access to Switches, User Interface and 14.38 Hydroblock Assembly Right-Hand Timer For access, refer to section 14.1. For access, refer to section 14.1. Refer to section 12.9 to drain the boiler heating circuit. Release the front of the fascia by carefully prising up the two Refer to section 12.10 and drain the boiler hot water circuit.
- Page 44 14 Replacement of Parts 14.42 Mains/Reset Knob Refer to section 14.39 for access. Remove actuator by springing back retaining clips, see diagram 14.29. Spring back knob retaining clips and push knob out from the RETAINING back. SLOTS 14.43 User Interface/Display Unit PCB TORX Refer to section 14.39 for access.
-
Page 45: Spare Parts
15 Spare Parts Please quote the name of the appliance and serial number, to When ordering spare parts, contact Heatcall (Glow-worm's own be found on the data label, see diagram 14.30. service organisation) using the telephone number on the inside front cover of this booklet. - Page 46 15 Spare Parts Diagram 15.1 2000225065A...
- Page 47 Because of our constant endeavour for improvement, details may vary slightly from those shown in these instructions. 2000225065A...
Need help?
Do you have a question about the 24cxi and is the answer not in the manual?
Questions and answers