
Related Manuals for iWeld MIG 5200 SYNERGIC


Summary of Contents for iWeld MIG 5200 SYNERGIC
- Page 1 CUTTING EDGE WELDING HASZNÁLATI ÚTMUTATÓ MIG 5200 SYNERGIC MIG 3800 SYNERGIC Szinergikus vezérlésű MIG/MAG hegesztő áramforrások...
- Page 2 Bevezető Köszönjük, hogy egy iWELD hegesztő vagy plazmavágó gépet választott és használ! Célunk, hogy a legkorszerűbb és legmegbízhatóbb eszközökkel támogassuk az Ön munkáját, legyen az otthoni barkácsolás, kisipari vagy ipari feladat. Eszközeinket, gé- peinket ennek szellemében fejlesztjük és gyártjuk. Minden hegesztőgépünk alapja a fejlett inverter technológia melynek előnye, hogy nagymértékben csökken a fő...
- Page 3 FIGYELEM! A hegesztés és vágás veszélyes üzem! Ha nem körültekintően dolgoznak könnyen bal- esetet, sérülést okozhat a kezelőnek illetve a környezetében tartózkodóknak. Ezért a műveleteket csakis a biztonsági intézkedések szigorú betartásával végezzék! Olvassa el fi gyelmesen jelen útmutatót a gép beüzemelése és működtetése előtt! •...
-
Page 4: Technikai Paraméterek
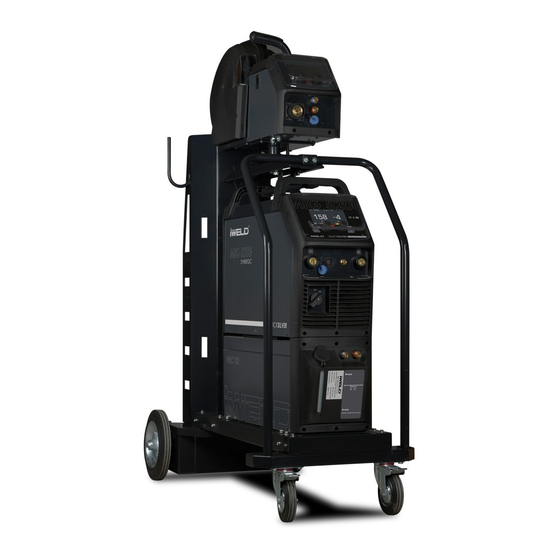
Technikai paraméterek MIG 5200 MIG 3800 SYNERGIC SYNERGIC 800MIG5200 800MIG3800 IGBT IGBT Felépítés Vízhűtés OLED OLED Digitális kijelző Programhelyek száma Szinergikus vezérlés Impulzus MIG/MAG Dupla impulzus MIG/MAG Polaritásváltás - FCAW ... - Page 5 1.1 A gép elrendezésének leírása 1.1.1 A hegesztőgép elülső és hátsó paneljének elrendezése TIG hegesztőpisztoly vezérlő csatlakozó. Kimeneti csatlakozó: MIG módban azt a pólust kell összekötni a mun- kadarabbal. Gázkimenet: Csatlakoztassa ide a TIG hegesztőpisztoly bemenetét. Kimeneti csatlakozó: TIG módban azt a pólust kell összekötni a mun- kadarabbal.
- Page 6 1.1.2 A vízhűtő egység elülső és hátsó paneljének elrendezése (csak vízhűtéses modelleknél) Hátsó vízbevezetés TIG-hez (piros). * Vízkivezetés TIG számára (kék). * Töltő nyílás: itt töltheti a fagyálló hűtőfolyadékot a tartályba. Vízszint ellenőrzési ablak. * Hátsó vízbevezetés MIG-hez (piros). * Vízkimenet a MIG számára (kék).
- Page 7 MIG víz-bemenet (5) és kimenet (6) A betöltő nyílás (3) felőli oldalon található két csatlakozó MIG hegesztőpisz- toly csatlakoztatására szolgál. A kék csatlakozó a kimenet: hideg vizet szállít a tartályból; a piros a hűtővíz bemeneti nyílása: forró vizet szállít a tartályba hűtés céljából.
- Page 8 1.1.4 Huzaladagoló (kompakt modellekhez) Huzaldob tartó. Görgő leszorító kar (2x). Huzalnyomó görgő(2x). Huzaladagoló bemeneti vezetője. Huzaltoló görgő (2x). Hajtó görgő...
- Page 9 Az előlapi funkciók és leírások 1.2.1 MMA kezelőfelület MENU Hegesztési mód gomb: Nyomja meg az MMA hegesztési módba történő belépéshez. L paraméter gomb: Forgassa el a hegesztőáram beállításához. R paraméter gomb: Nyomja meg a Hot Start vagy az Arc Force kiválasz- tásához, majd forgassa el az értékek beállításához.
- Page 10 1.2.2 Lift TIG kezelőfelület MENU Hegesztési mód gomb: Nyomja meg a Lift TIG hegesztési módba törté- nő belépéshez. L paraméter gomb: Forgassa el a hegesztőáram beállításához. A funk- ció felületén forgassa el a paraméterek kiválasztásához, mint például a kapcsolási mód és az utánáramlási idő. R paraméter gomb: forgassa el a TIG funkció...
- Page 11 2T (2 ütem) kezelési mód: Ez a funkció a kezdő- és a kráteráram beállítása nélkül alkalmazható szaka- szos hegesztéshez, tranziens hegesztéshez, vékony lemez hegesztéshez stb. Magyarázat az ábrához: ● 0: Nyomja meg és tartsa nyomva a hegesztőpisztoly kapcsolóját. Az elektromágneses kapcsoló bekapcsol. A gázáramlás elindul. ●...
- Page 12 4T (4 ütem) kezelési mód: Állítsa be a kezdő- és kráterfeltöltő áramerősséget. Ez a funkció megakadá- lyozza a hegesztés elején és végén előforduló kráter kialakulását. A 4T módot hosszabb varratok hegesztéséhez célszerű használni. Magyarázat az ábrához: ● 0: Nyomja meg és tartsa nyomva a hegesztőpisztoly kapcsolóját. Az elektromágneses kapcsoló...
- Page 13 1.2.3 MIG Manuális beállítások kezelőfelülete MENU Hegesztési mód gomb: Nyomja meg a MIG kézi hegesztési módba történő belépéshez. L paraméter gomb: Forgassa el a huzaladagolás sebességének beállí- tásához. A funkció interfészen forgassa el a paraméterek kiválasztásá- hoz. R paraméter gomb: forgassa el az induktivitás vagy más paraméterek beállításához.
- Page 14 Funkció interfész: Mód: kapcsolási mód: 2T / 4T / Ponthegesztés. Előáramlási idő: 0 ~ 10 s. Utánáramlási idő: 0 ~ 10 s. Burnback: 0 ~ 10. Lassú adagolási idő: 0 ~ 10 s. Huzaldobos hegesztő pisztoly: be / ki. Huzalvisszaégés A visszaégés vezérlés beállítja a huzal mennyiségét „visszaégésre”, miután elengedte a hegesztőpisztoly kapcsolóját, megakadályozva ezzel a huzal megragadását a varratban.
- Page 15 1.2.5 Szinergikus MIG kezelőfelület A kezelő egyszerűen beállítja a hegesztési áramot a MIG hegesztéshez és a gép kiszámítja az optimális feszültséget a felhasznált anyag típusához, huzaltípusához és méretéhez, valamint védőgázhoz. Nyilvánvaló, hogy más változók, például a hegesztési kötés típusa és vastagsága, a levegő hőmér- séklete befolyásolja az optimális feszültség- és huzalelőtolás sebességet, így a program feszültség finomhangolási funkciót biztosít a kiválasztott szinergi- kus programhoz.
- Page 16 Funkciók interfész: Mód: 2T / 4T / S4T / ponthegesztés. Huzal anyaga: SS tömör / Fe tömör / Fe portöltésű / Al-Mg tömör / CuSi. Huzal átmérője: 0,6 ~ 1,6 mm. A gáz típusa: CO2 és Ar + CO2 20%. Előfolyási idő: 0 ~ 10 s.
- Page 17 1.2.7 Rendszerbeállítások képernyő Nyomja meg és tartsa lenyomva 3 másodpercig a MENU gombot, hogy belépjen a rendszer interfészébe. Itt állíthatja be a nyelvet, az egységet és a fényerő beállítását az L paramétergomb és az R paramétergomb segítségé- vel.
-
Page 18: Telepítés És Üzemeltetés
2. Telepítés és üzemeltetés 2.1 Telepítés az MMA hegesztéshez Kimeneti kábelek csatlakoztatása 1. Két aljzat áll rendelkezésre ezen a hegesztőgépen. Az MMA hegesztéshez az elektródatartó a pozitív aljzathoz van csatlakoztatva, míg a földelő vezeték (munkadarab) a negatív aljzathoz van csatlakoztatva, ez DCEP néven ismert. - Page 19 2.2 Telepítés és üzemeltetés - TIG hegesztés 2.2.1 Telepítés a TIG hegesztéshez...
- Page 20 Csatlakoztassa a földelőkábel dugóját a gép elején lévő pozitív aljzatba és húzza meg. Dugja be a hegesztőpisztolyt az előlap negatív aljzatába és húzza meg. Csatlakoztassa a TIG hegesztőpisztoly gázvezetékét a gép elején lévő kimeneti gázcsatlakozóhoz. Ellenőrizze a szivárgást! Csatlakoztassa a hegesztőpisztoly kapcsoló vezérlő kábelét a 9 tűs csat- lakozóaljzathoz a gép elején.
- Page 21 LIFT ARC DC TIG működés A Lift Arc gyújtás lehetővé teszi az ív könnyű elindítását DC TIG-ben, egysze- rűen érintse a volfrámot a munkadarabhoz és emelje fel az ív elindítá- sához. Ez megakadályozza, hogy a volfrám csúcsa tapadjon a mun- kadarabhoz és ne szakítsa el a csúcsot a volfrám elektródától.
- Page 22 2.3 Telepítés és üzemeltetés - MIG hegesztés 2.3.1 Telepítés a MIG hegesztéshez...
- Page 23 Helyezze a földelő kábel csatlakozóját a gép elülső oldalán található negatív (-) aljzatba és húzza meg. Csatlakoztassa a hegesztőpisztolyt a huzaladagoló elülső paneljén lévő MIG-hegesztőpisztoly EURO csatlakozóaljzatába és húzza meg. FONTOS: A hegesztőpisztoly csatlakoztatásakor feltétlenül húzza meg a csatlakozást. A laza csatlakozás azt eredményezheti, hogy a csatlakozó túlmelegszik és megsérülhet a gép és a hegesztőpisztoly csatlakozója.
- Page 24 18. Válassza ki a hegesztőpisztoly kapcsolási módját: 2T vagy 4T. 19. Válassza ki a vízhűtési módot. Válassza ki a kívánt hegesztési paramétereket a gombok és gombok segítségével. Telepítés MIG hegesztéshez (kompakt modellekhez) 1. Helyezze a földelő kábel csatlakozóját a negatív (-) aljzatba és csavarja rá 2.
- Page 25 8. Helyezze a huzalt az huzaltartóra - (a huzaldob rögzítőanyája a balmene- tes) Vezesse a huzalt a bemeneti vezetőcsövön keresztül a meghajtó hengerre. 9. Fűzze be a hegesztőhuzalt a huzaltoló görgőkön keresztül a kimeneti veze- tőcsőbe és vezesse át a hegesztőpisztoly csatlakozásáig.. 10.
- Page 26 2.3.2 Huzaladagoló görgő kiválasztása A MIG hegesztés során a sima, egyenletes huzaladagolás fontosságát nem lehet eléggé hangsúlyozni. Minél simább a huzaladagolás, annál jobb lesz a hegesztési varrat. A toló és vezető görgők a huzal mechanikus előtolására szolgálnak. Az ada- gológörgőket bizonyos típusú hegesztési huzalokhoz tervezték és különböző típusú...
- Page 27 2.3.3 Huzal telepítési és beállítási útmutató A MIG hegesztés kapcsán nem lehet eléggé hangsúlyozni a sima, egyenle- tes huzaladagolás fontosságát. A huzaldob és a huzal helyes behelyezése a huzaladagoló egységbe kritikus fontosságú az egyenletes és következetes huzaltovábbítás eléréséhez. A MIG hegesztőkkel kapcsolatos hibák nagy szá- zaléka a huzal rossz behelyezéséből származik a huzaladagolóba.
- Page 28 5. Vezesse be a a meghajtó 6. Zárja le a felső nyomóhengert huzalt görgőkön keresztül a huzalveze- és húzza meg a nyomóerő beállí- tőbe tó gombjával. 7. Ellenőrizze, hogy a huzal a középponton halad e át. Ha szükséges lazítsa meg a rögzítőcsavart, majd lazítsa meg a kimeneti a vezetőcső...
- Page 29 Huzaldobos hegesztőpisztoly telepítése...
- Page 30 1. Csatlakoztassa a földelő kábel csatlakozóját a gép elülső részén talál- ható negatív aljzathoz és húzza meg. 2. Csatlakoztassa a huzaldobos pisztolyt a huzaladagoló elülső paneljén lévő MIG pisztolyt csatlakozóaljzathoz és húzza meg. FONTOS: A hegesztőpisztoly csatlakoztatásakor feltétlenül húzza meg a csatlakozást.
- Page 31 2.4.1 Huzaldobos hegesztő pisztoly telepítése (kompakt modellekhez) 1. Helyezze a földelő kábel csatlakozóját a negatív (-) aljzatba a gép elején és húzza meg erősen. 2. Csatlakoztassa az huzaldobos pisztolyt az elülső panelen található euro csatlakozóaljzathoz és húzza meg. FONTOS: A pisztoly csatlakoztatásakor feltétlenül húzza meg teljesen az adapter anyáját.
- Page 32 6. Csatlakoztassa a gáztömlőt a hátsó panel gázcsatlakozójához. 7. Csatlakoztassa a hegesztőgép tápkábelét az áramforráshoz 8. Távolítsa el az huzaldob fedelet a gomb megnyomásával és a fedél leemelésével. 9. Helyezzen egy huzaltekercset a tartóba. 10. Vezesse át a huzalt a meghajtó hengereken és a bemeneti vezető- csőbe.
- Page 33 1. Helyezze a földelő kábel csatlakozóját a negatív (-) aljzatba a gép elején és húzza meg erősen. 2. Csatlakoztassa a Pull MIG pisztolyt az elülső panelen található Euro csatla- kozóaljzathoz és húzza meg. FONTOS: A pisztoly csatlakoztatásakor feltétlenül húzza meg teljesen az adapter anyáját.
- Page 34 Hegesztési paraméterek Referencia értékek alacsony széntartalmú acélhoz, tömör hegesztő huzallal tompahegesztéséhez. Anyag- Hézag Huzal- Áram- Huzal Gázáram Feszültség vastaság átmérő erősség sebesség (L/min) (mm) (mm) (mm) (cm/min) 60~70 16~16.5 50~60 75~85 17~17.5 50~60 10~15 80~90 17~18 50~60 10~15 0~0.5 1.0/1.2 110~120 19~19.5 45~50...
- Page 35 2.6 Működési környezet ● Tengerszint feletti magasság ≤1000m. ● Működési hőmérséklet-tartomány: -10 ~ 40 ° C. ● A levegő relatív páratartalma 90% (20 ° C) alatt legyen. ● Lejtős helyen, a maximális dőlésszög ne haladja meg a 15°-ot. ● Óvja a gépet heves esőzések és közvetlen napsütés ellen. ●...
- Page 36 Óvintézkedések Munkaterület 1. A hegesztőkészüléket pormentes, korróziót okozó gáz, gyúlékony anyagoktól mentes, maxi- mum 90% nedvességtartalmú helyiségben használja! 2. A szabadban kerülje a hegesztést, hacsak nem védett a napfénytől, esőtől, hótól. A munkaterület hőmérséklete -10°C és +40°C között legyen! 3. Faltól a készüléket legalább 30 cm-re helyezze el! 4.
- Page 37 MIG 5200 SYNERGIC MIG 3800 SYNERGIC Szinergikus vezérlésű MIG/MAG hegesztő áramfor- rások...
- Page 39 MANUALE D’UTILIZZO MIG 5200 SYNERGIC MIG 3800 SYNERGIC...
- Page 40 Boiler, Pressure Vessel, etc… Grazie per aver scelto i nostri prodotti, e per trasmetterci le vostre impressioni e sugge- rimenti al fi ne di migliorare i nostri generatori ed il servizio. IWELD Kft. 2314 Halásztelek II. Rákóczi Ferenc út 90/B Tel: +36 24 532 625 info@iweld.hu...
- Page 41 ATTENZIONE! La saldatura è un processo pericoloso. L’operatore e le altre persone presenti nell’area di lavoro devono seguire le seguenti regole di sicurezza e sono obbli- gate ad indossare gli idonei dispositivi di sicurezza individuali. • Lo spegnimento dell’apparecchio durante la fase di lavo- ro può...
- Page 42 Principali parametri MIG 5200 MIG 3800 SYNERGIC SYNERGIC 800MIG5200 800MIG3800 Traina filo separato Tipo trainafilo Gruppo di raffreddamento OLED Display digitale Numero di programmi Controllo sinergico MIG/MAG Pulsato MIG/MAG D/Pulse Polarità inversa- FCAW 2T/4T ...
- Page 43 1.1 Descrizione del generatore 1.1.1 Pannello frontale e pannello posteriore Connettore di comando torcia TIG Polo negativo - In modalità MIG collegare il cavo massa a questo connettore Uscita Gas: in modalità TIG collegare iltubo gas della torcia Polo positivo - In modalità TIG collegare il cavo di massa a questo connettore Interruttore di alimentazione: accendere l'alimentatore in senso orario e spegnere l’alimentatore in senso antiorario.
- Page 44 1.1.2 Pannelli anteriore e posteriore dell’unità di raffreddamento ad acqua (solo per i modelli raffreddati ad acqua) Connettore Ritorno femmina H2O TIG (rosso)* Connettore mandata femmina H2O TIG (blu)* Tappo serbatoio liquido refrigerante Finestra di ispezione livello liquido refrigerante* Connettore ritorno femmina H2O MIG (rosso)* Connettore mandata femmina H2O MIG (blu)* Connettore collegamento gruppo di raffreddamento* Le parole contrassegnate da * sono spiegate in dettaglio di seguito.
- Page 45 Ingresso (5) e uscita (6) per MIG I due connettori sul lato posteriore sono utilizzati per il funzionamento MIG e possono essere collegati agli attacchi rapidi del trainafilo. Il blu corrisponde all’uscita: l’acqua fredda viene erogata dal serbatoio; il rosso corrisponde all’ingresso dell’acqua di riflusso: l’acqua calda viene fatta fluire nel serbato- io per il raffreddamento.
- Page 46 1.1.4 Trainafilo (per modelli compatti) Aspo porta bobina Manopola registro pressione rulli (2x) Braccio tensionatore(2x) Canula ingresso filo Rullo trainafilo (2x). Rullo motore...
- Page 47 Funzioni e descrizioni del pannello frontale 1.2.1 Pannello di controllo MMA MENU Pulsante modalità di saldatura: premere per selezionare MMA Manopola parametro L: ruotarla per impostare la corrente di saldatura. Manopola parametro R: premerla per selezionare Hot Start o Arc Force e ruotarla per regolare i valori.
- Page 48 1.2.2 Pannello di contrLoifltlo TIG MENU Pulsante modalità di saldatura: premere per selezionare TIG Lift Manopola parametro L: ruotarla per regolare la corrente di saldatura. Nell’interfaccia delle funzioni, ruotala per selezionare i parametri, come la modalità di trigger e il tempo di post-flusso. Manopola parametro R: ruotarla per regolare i parametri dell’interfaccia della funzione TIG.
- Page 49 Modalità 2T Il pulsante torcia viene premuto e mantenuto premuto per innescare l’arco di saldatura, al rilascio del pulsante il processo si arresta. Introduzione: 0: Premere il pulsante torcia e mantenere premuto. Si ha l’innesco dell’arco e l’avvio della saldatura. 0-t1: Tempo di Pre-gas (0.1~2.0S) t1-t2: L’arco è...
- Page 50 Modalità 4T Il pulsante viene premuto una volta e rilasciato per attivare il circuito di saldatura, tirato e rilasciato nuovamente per arrestare il circuito di saldatura. Questa funzione è utile per saldature più lunghe poiché non è necessario tenere premuto il pulsante in modo continuo. La serie di saldatrici TIG ha anche più...
- Page 51 1.2.3 Pannello di controllo MIG Manuale MENU Pulsante modalità di saldatura: premere per selezionare MIG Manual. Manopola parametro L: ruotarla per regolare la velocità del filo. Nell’interfaccia funzioni, ruotarlo per selezionare i parametri. Manopola parametro R: regola l’induttanza o altri parametri. Pulsante funzione: premere per accedere all’interfaccia delle funzioni.
- Page 52 Interfaccia funzioni: Mode: Funzione pulsante torcia - 2T/4T/ Spot Tempo di pre-gas: 0~10s. Tempo di post-gas: 0~10s. Burnback (bruciatura del filo a fine saldatura): 0~10. Tempo di alimentazione lento (Soft start): 0~10s. Torcia per saldatura a bobina: On/OFF. Burnback Il controllo Burnback imposta la quantità di filo da „bruciare” dopo aver rilasciato il pulsante della torcia.
- Page 53 1.2.5 Pannello di controllo MIG SYN (Sinergico) L’operatore imposta semplicemente la corrente di saldatura come la salda- tura MIG e la macchina calcola la tensione ottimale per il tipo di materiale, il tipo e le dimensioni del filo e il gas di protezione utilizzato. Il programma forni- sce una funzione di regolazione fine della tensione per il programma sinergi- co selezionato.
- Page 54 Interfaccia funzioni: Mode: Funzione pulsante torcia - 2T/4T/ Spot Scelta materiale: SS solid-cored/ Fe solid-cored/ Fe fl ux-cored/ Al-Mg solid-cored/ CuSi Diametro filo: 0.6~1.6mm Tipo di gas: CO2 or Ar+CO2 20% Tempo di Pre-gas: 0~10s Tempo diPost-gas: 0~10s Burnback (bruciatura del filo a fine saldatura): 0~10 Tempo di alimentazione lento (Soft start): 0~10s...
- Page 55 1.2.7 Pannello delle impostazioni di sistema Premere il tasto MODE e tenerlo premuto per 3 secondi per accedere all’in- terfaccia del sistema. Qui puoi regolare la lingua, l’unità e l’impostazione della luminosità tramite la manopola parametro L e la manopola parametro...
-
Page 56: Installazione E Funzionamento
2. Installazione e funzionamento 2.1 Installazione per saldatura MMA Collegamento dei cavi di saldatura Su questa saldatrice sono disponibili due prese. Per la saldatura MMA il porta elettrodo è mostrato collegato alla presa positiva, mentre il cavo di massa (pezzo da lavorare) è collegato alla presa negativa, questa è nota come DCEP. - Page 57 2.2 Installazione e funzionamento per saldatura TIG 2.2.1 Installazione per saldatura TIG...
- Page 58 Inserire il connettore del cavo di massa nella presa positiva sulla parte anteriore della macchina e serrarla. Collegare la torcia per saldatura alla presa negativa sul pannello ante- riore e serrarla. Collegare il tubo del gas di protezione sul pannello frontale Verificare la presenza di perdite! Collegare il cavo di controllo del pulsante torcia alla presa a 9 pin sulla parte anteriore della macchina.
- Page 59 Modalità LIFT ARC DC TIG L’accensione Lift Arc consente di avviare facilmente l’arco in DC TIG semplicemente toccando il tungsteno sul pezzo da lavorare e sollevandolo per avviare l’arco. Ciò impedisce alla punta di tungsteno di attaccarsi al pezzo da lavorare e di rompere la punta dall’elettrodo di tungsteno. Selezionare la corrente di saldatura e il tempo di rampa come richiesto sul pannello frontale.
- Page 60 2.3 Installazione e funzionamento per la saldatura MIG 2.3.1 Installazione per saldatura MIG...
- Page 61 Inserire la spina del cavo massa nel connettore negativo (-) sulla parte anteriore della macchina e serrarla. Inserire la torcia per saldatura nella presa di collegamento torcia MIG sul pannello anteriore del trainafilo e serrarla. IMPORTANTE: quando si collega la torcia, assicurarsi di serrare correttamente. un collegamento errato o poco serrato può...
- Page 62 18. Selezionare il funzionamento pulsante torcia: 2T o 4T. 19. Selezionare metodo di raffreddamento della torcia 20. Selezionare i parametri di saldatura richiesti utilizzando le manopole e i pulsanti. Installazione per saldatura MIG (per modelli compatti) Inserire la spina del cavo di massa nella presa negativa (-) e serrare Collegare la torcia all’attacco Euro MIG sul pannello anteriore e serrare saldamente il dado di bloccaggio.
- Page 63 Posizionare la bobina sull’aspo - (il dado di fissaggio ha filettatura sini- stra) Far passare il filo attraverso attraverso la canula fino al traino Far passare il filo attraverso i rulli traino fino al tubo guida di uscita, spin- gere il filo circa 150 mm al fascio cavi della torcia. 10.
- Page 64 2.3.2 Wire Feed Roller Selection L’importanza di un’alimentazione regolare e uniforme del filo durante la saldatura MIG è fondamentale. In poche parole, più agevole è l’avanza- mento del filo, migliore sarà la saldatura. I rulli di alimentazione sono proget- tati per essere utilizzati per alcuni tipi di filo di saldatura e hanno diversi tipi di scanalature lavorate al loro interno per accogliere i diversi tipi di filo.
- Page 65 2.3.3 Guida all’installazione e alla configurazione del filo Ancora una volta l’importanza di un avanzamento del filo uniforme durante la saldatura MIG viene evidenziata. La corretta installazione della bobina del filo nell’unità trainafilo è fondamentale per ottenere un’alimentazione unifor- me e costante. Un’alta percentuale di guasti con le saldatrici MIG deriva da una cattiva impostazione del filo nel traino.
- Page 66 5. Spingere il filo all’interno del 6. Serrare i bracci di pressione e gruppo traina filo fino all’estremità sollevare i pressori di registro. opposta Applicare una leggera pressione ruotando la ghiera 7. Assicurarsi che il capo del filo sia corret- tamente inserito nella canula guidafilo in uscita dal traino verso la torcia.
- Page 67 Installazione per torcia di saldatura a bobina...
- Page 68 Inserire la spina del cavo di massa nella presa negativa sulla par- te-anteriore della macchina e serrarla. Collegare la torcia per saldatura a bobina alla presa di collega- mento della torcia MIG sul pannello anteriore. IMPORTANTE: Quando si collega la torcia, assicurarsi di stringere il col- legamento.
- Page 69 2.4.1 Installazione per torcia di saldatura a bobina (modelli compatti) Inserire la spina del cavo di massa nella presa negativa sulla parte ante- riore della macchina e serrarla. Collegare la torcia per saldatura a bobina alla presa di collegamento della torcia MIG sul pannello anteriore. IMPORTANTE: Quando si collega la torcia, assicurarsi di stringere la ghiera.
- Page 70 Collegare la linea del gas al connettore del gas sul pannello posteriore. Collegare il riduttore di pressione del gas alla bombola esettare la corretta portata Collegare il cavo di alimentazione della saldatrice al quadro elettrico. Rimuovere il coperchio della bobina premendo il pulsante e solle- vandolo.
- Page 71 Configurazione dell’installazione per la pistola Pull MIG Inserire la spina del cavo di massa mella presa negativa sulla parte an- teriore della macchina e serraria Collegare la torcia per saldatura a bobina alla presa di collegamento della torcia MIG sul pannello anteriore. IMPORTANT: Quando si collega la torcia, assicurarsi di stringere la ghiera.Una connessione allentata può...
- Page 72 Parametri di saldatura Riferimento di processo per la saldatura di testa con gas CO2 e filo di saldatura pieno - acciaio a basso tenore di carbonio Material Root Wire di- Welding Welding Welding Gas-fl ow thickness gap G ameter current voltage speed rate...
- Page 73 2.6 Ambiente operativo ● Altezza sul livello del mare ≤1000 M. ● Intervallo di temperatura di funzionamento: -10 ~ 40 ° C. ● L’umidità relativa dell’aria è inferiore al 90% (20 ° C). ● Proteggere la macchina dalla pioggia battente e dalla luce solare diretta.
- Page 74 PRECAUZIONI Postazione di lavoro 1. Mantenere l’impianto pulito e libero da polveri metalliche al suo interno. 2. Nel caso venga utilizzato all’aperto, assicurarsi non venga colpito da raggi solari diretti, pioggia o neve. La temperatura nell’ambiente di lavoro non deve uscire dal range -10°C - +40°C.
- Page 75 CERTIFICATE OF EUROPEAN STANDARD Manufacturer: IWELD Ltd. 2314 Halásztelek II. Rákóczi Ferenc street 90/B Tel: +36 24 532-625 info@iweld.hu www.iweld.hu MIG 5200 SYNERGIC Item: MIG 3800 SYNERGIC Synergic control MIG/MAG Welding Power Source Applied Rules (1): EN 60204-1:2005 EN 60974-10:2014, EN 60974-1:2018 (1) References to laws, rules and regulations are to be understood as related to laws, rules and regulations in force at present.
- Page 77 CUTTING EDGE WELDING USER’S MANUAL MIG 5200 SYNERGIC MIG 3800 SYNERGIC Synergic control MIG/MAG Welding Power Source...
- Page 78 Introduction First of all, thank you for choosing an IWELD welding or cutting machine! Our mission is to support your work with the most up-to-date and reliable tools both for DIY and industrial application. We develop and manufacture our tools and machines in this spirit.
- Page 79 WARNING! Welding is a dangerous process! The operator and other persons in the working area must follow the safety instructions and are obliged to wear proper Personal Protection Items. Always follow the local safety regulations! Please read and understand this instruction manual carefully before the installation and operation! •...
- Page 80 The main parameters MIG 5200 MIG 3800 SYNERGIC SYNERGIC 800MIG5200 800MIG3800 Layout IGBT IGBT Water Cooling System OLED OLED Digital Display Number of Programs Synergic Control Pulse MIG/MAG Double Pulse MIG/MAG Reverse Polarity - FCAW ...
-
Page 81: Machine Layout Description
Machine Layout Description 1.1.1 Front and rear panel layout of welding machine TIG welding gun control connector. Negative output: When MIG mode, this polarity must connect the work piece. Gas outlet: Connect the inlet of TIG welding gun. Positive output: When TIG mode, this polarity must connect the work piece. - Page 82 1.1.2 Front and rear panel layout of water cooling unit (for water-cooled models only) Backwater inlet for TIG (red).* Water outlet for TIG (blue).* Refill open: here, can be loaded the water or antifreeze coolant to tank Water level inspection window.* Backwater inlet for MIG (red).* Water outlet for MIG (blue).* Water cooling control connector.*...
- Page 83 Inlet (5) and outlet (6) for MIG The two nozzles on the back side are used for MIG operation and can be connected to the nozzles on the wire feeder. Blue corresponds to the out- let: cold water is delivered from the tank; red corresponds to the backwater inlet: hot water is flowed into the tank for cooling.
- Page 84 1.1.4 Wire Feeder (for compact models) Spool holder. Wire feed tension adjustment (2x). Wire feed tension arm (2x). Wire feeder inlet guide. Wire feeder roller (2x). Wire drive roller...
- Page 85 Front Panel Functions and Descriptions 1.2.1 MMA control panel 1. Welding mode button: Press it to enter MMA welding mode. 2. L parameter knob: Rotate it to welding current. 3. R parameter knob: Press it to select Hot Start or Arc Force and rotate it to adjust values.
- Page 86 1.2.2 Lift TIG control panel Welding mode button: Press it to enter Lift TIG welding mode. L parameter knob: Rotate it to adjust welding current. In function inter- face, rotate it to select parameters, such as trigger mode and Post Flow time.
- Page 87 ● 2T Mode The trigger is pulled and held on to activate the welding circuit, when the trigger is released, the welding circuit stops. This function without the adjustment of start current and crater current is suit- able for the Re-tack welding (transient welding) thin plate welding and so on. Introduction: 0: Press the welding gun switch and hold it.
- Page 88 ● 4T Mode This is known as ’latching’ mode. The trigger is pulled once and released to activate the welding circuit, pulled and released again to stops the welding circuit. This function is useful to longer welds as the trigger is not required to be held on continuously.
- Page 89 1.2.3 MIG Manual control panel Welding mode button: Press it to enter MIG Manual welding mode. L parameter knob: Rotate it to adjust wire feeding speed. In function interface, rotate it to select parameters. R parameter knob: rotate it to adjust Inductance or other parameters. Function button: Press it to enter the function interface.
- Page 90 Function interface: Mode: Trigger mode: 2T/4T/ Spot weld. Pre flow time: 0~10s. Post flow time: 0~10s. Burnback: 0~10. Slow feed time: 0~10s. Spool welding gun: On/OFF. Burnback Burnback control sets the amount of wire to ‘burn back’ after you release the trigger of torch.
- Page 91 1.2.5 MIG SYN control panel The operator simply sets the welding current like MIG welding and the ma- chine calculates the optimal voltage for the material type, wire type and size and shielding gas being used. Obviously other variables such as welding joint type and thickness, air temperature affect the optimal voltage and wire feed setting, so the program provides a voltage fine tuning function for the syner- gic program selected.
- Page 92 Function interface: Mode: 2T/4T/ S4T/ Spot weld. Wire material: SS solid-cored/Fe solid-cored/Fe flux-cored/ Al-Mg solid- cored/ CuSi. Wire diameter: 0.6~1.6mm. Type of gas: CO2 and Ar+CO2 20%. Pre flow time: 0~10s. Post flow time: 0~10s. Burnback: 0~10. Slow feed time: 0~10s.
- Page 93 1.2.7 System setting panel Press the functional parameter key and hold it for 3s to enter the system inter- face. Here you can adjust the language, the unit and the brightness setting by L parameter knob and R parameter knob.
- Page 94 Installation & Operation Installation for MMA Welding Connection of Output Cables Two sockets are available on this welding machine. For MMA welding the electrode holder is shown be connected to the positive socket, while the earth lead (work piece) is connected to the negative socket, this is known as DCEP.
- Page 95 Installation & Operation for TIG Welding 2.2.1 Installation for TIG Welding...
- Page 96 Insert the earth cable plug into the positive socket on the front of the machine and tighten it. Plug the welding torch into the negative socket on the front panel, and tighten it. Connect the gas line of TIG Welding gun to outlet gas connector on the front of the machine.
- Page 97 LIFT ARC DC TIG Operation Lift Arc ignition allows the arc to be started easily in DC TIG by simply touch- ing the tungsten to the work piece and lifting it up to start the arc. This prevents the tungsten tip sticking to the work piece and breaking the tip from the tungsten electrode.
- Page 98 Installation & Operation for MIG Welding 2.3.1 Installation for MIG Welding...
- Page 99 Insert the earth cable plug into the negative (-) socket on the front of the machine and tighten it. Plug the welding torch into the MIG torch connection socket on the front panel of the wire feeder, and tighten it. IMPORTANT: When connecting the torch be sure to tighten the connection.
- Page 100 Installation for MIG Welding (for compact models) Insert the earth cable plug into the negative (-) socket and twist to Plug the MIG welding gun into MIG torch euro connector on the front panel and tighten locking nut securely. Connect the water inlet and outlet pipe of MIG G un to the water inlet and outlet connectors on the front of the cooling water.
- Page 101 Place wire onto spool holder (spool retaining nut is left hand thread) feed wire through the inlet guide tube on to the drive roller. Carefully feed the wire over the drive roller into the outlet guide tube, feed through about ½” (150mm) into the torch receptacle. 10.
- Page 102 2.3.2 Wire Feed Roller Selection The importance of smooth consistent wire feeding during MIG welding can- not be emphasized enough. Simply put the smoother the wire feed then the better the welding will be. Feed rollers or drive rollers are used to feed the wire mechanically along the length of the welding welding gun.
- Page 103 2.3.3 Wire Installation and Set Up Guide Again the importance of smooth consistent wire feeding during MIG welding cannot be emphasized enough. The correct installation of the wire spool and the wire into the wire feed unit is critical to achieving an even and consistent wire feed.
- Page 105 Installation for Spool Welding Gun...
- Page 106 Insert the earth cable plug into the Negative socket on the front of the machine and tighten it. Connect the Spool Welding gun to the MIG torch connection socket on the front panel of the wire feeder, and tighten it. IMPORTANT: When connecting the torch be sure to tighten the connec- tion.
- Page 107 Installation for Spool Welding Gun (for compact models) Insert the earth cable plug into the negative (--) socket on the front of the machine and twist to tighten. Plug the Spool Gun into the euro connect socket on the front panel and tighten.
- Page 108 Connect the gas line to gas connector on the rear panel. Connect the power cord of welding machine with the outlet on electrical box. Remove the spool cover by pressing button and lifting off the cover. Place a spool of wire inside the spool holder on post. 10.
- Page 109 Set Up Installation for Pull MIG Gun Insert the earth cable plug into the negative ( (--) socket on the front of the machine and twist to tighten. Plug the Pull MIG Gun into the euro connect socket on the front panel and tighten.
-
Page 110: Welding Parameters
Welding parameters Process reference for CO2 butt welding of low carbon steel solid welding wire Material Root Wire di- Welding Welding Welding Gas-flow thickness ameter current voltage speed rate (mm) (mm) (cm/ (L/min) (mm) min) 60~70 16~16.5 50~60 75~85 17~17.5 50~60 10~15 80~90... -
Page 111: Operation Environment
2.6 Operation environment ● Height above sea level ≤1000 M. ● Operation temperature range: -10~40°C. ● Air relative humidity is below 90% (20°C). ● Preferable site the machine some angles above the floor level, the maximum angle does not exceed 15°C. ●... -
Page 112: Maintenance
Precautions Workspace 1. Welding equipment free of dust, corrosive gas, non-fl ammable materials, up to 90% humidity for use! 2. Avoid welding outdoors unless protected from direct sunlight, rain, snow, work area tempera- ture must be between -10 °C and +40°C. 3. - Page 113 CERTIFICATE OF EUROPEAN STANDARD Manufacturer: IWELD Ltd. 2314 Halásztelek II. Rákóczi Ferenc street 90/B Tel: +36 24 532-625 info@iweld.hu www.iweld.hu MIG 5200 SYNERGIC Item: MIG 3800 SYNERGIC Synergic control MIG/MAG Welding Power Source Applied Rules (1): EN 60204-1:2005 EN 60974-10:2014, EN 60974-1:2018 (1) References to laws, rules and regulations are to be understood as related to laws, rules and regulations in force at present.
- Page 115 érvényesíthetőek. A fogyasztó jótállási igényét a vállalkozásnál érvényesítheti. 2. Kiterjesztett garancia Az IWELD Kft. a Forgalmazókkal együttműködve, az 1 éves kellékszavatossági kötelezettségét +1 évvel kiterjeszti (2 évre) a követ- kezőkben felsorolt hegesztőgépekre az alábbi feltételekkel: minden GORILLA hegesztőgép, ARC 160 MINI, HEAVY DUTY 250 IGBT, HEAVY DUTY 315 IGBT...
-
Page 116: Jótállási Jegy
Forgalmazó: JÓTÁLLÁSI JEGY IWELD KFT. 2314 Halásztelek II. Rákóczi Ferenc út 90/B Tel: +36 24 532-625 Fax: +36 24 532-626 Sorszám: ........típusú............gyári számú ..................termékre a vásárlástól számított 12 hónapig kötelező jótállást vállalunk a jogszabály szerint. A jótállás lejárta után 3 évig bizto- sítjuk az alkatrész utánpótlást. -
Page 117: Certifi Cat De Garanţie
Certifi cat de garanţie Distribuitor: IWELD KFT. 2314 Halásztelek Str. II.Rákóczi Ferenc 90/B Ungaria Tel: +36 24 532-625 Fax: +36 24 532-626 Număr: ........tipul............număr de serie ..................necesare sunt garantate timp de 12 luni de la data de produse de cumpărare, în conformitate cu legea. La trei ani după... -
Page 118: Záručný List
Distribútor: ZÁRUČNÝ LIST IWELD KFT. 2314 Halásztelek II. Rákóczi Ferenc út 90/B Tel: +36 24 532-625 Fax: +36 24 532-626 Poradové číslo: Výrobok: ..........Typ: ............. Výrobné číslo: .......... Na tento výrobok platí záruka 12 mesiacov od kúpy podľa platnej legislatívy. Na uplatnenie záruky je nutné predložiť originál- ny nákupný...
Need help?
Do you have a question about the MIG 5200 SYNERGIC and is the answer not in the manual?
Questions and answers