Advertisement
Quick Links
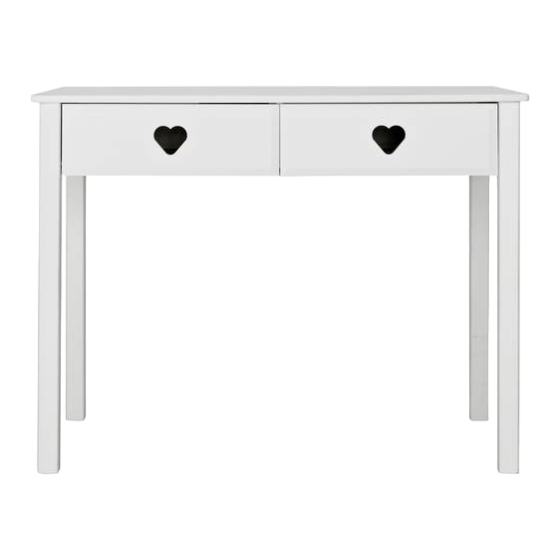
Mia Workdesk
Assembly Instructions -
Dimensions
:
Width
124.5 cm
Depth
:
55.0 cm
:
76.0 cm
Height
Assembly Instructions -
If you need help or have damaged or missing parts, call the Argos Customer Helpline: 0845 640 30 30
350271
Please keep for future reference
Please keep for future reference
White 2261490
Issue 1 - 25-05-2014
Advertisement

Related Manuals for Argos Home Mia 2261490


Summary of Contents for Argos Home Mia 2261490
- Page 1 Mia Workdesk Assembly Instructions - White 2261490 Please keep for future reference Dimensions Width 124.5 cm Depth 55.0 cm 76.0 cm Height Assembly Instructions - Please keep for future reference If you need help or have damaged or missing parts, call the Argos Customer Helpline: 0845 640 30 30 Issue 1 - 25-05-2014 350271...
- Page 2 ! Safety and Care Advice Important - Please read these instructions fully before starting assembly • Check you have all the • Do not stand or put weight on components and tools listed on the product, this could cause pages 2 and 3. damage.
- Page 3 Components - Panels If you have damaged or missing components, call the Argos Customer Helpline: 0845 640 30 30 Please check you have all the panels listed below (124,5 cm x 55 cm) Side, right (15,5 cm x 45,6 cm) Side, left (15,5 cm x 45,6 cm) Leg, right...
- Page 4 Components - Fittings Please check you have all the panels listed below Note: The quantities below are the correct amount to complete the assembly. In some cases more fittings may be supplied than are required. ø8 x 40mm Wooden dowel x ø6 x 30mm Wooden dowel x 8 ø3 x 35mm Screw x ø15 x 10.5mm Cam x 24...
- Page 5 Assembly Instructions Step 1 Assembly of the desk. Step 1.1 Knock the dowels ø8 x 40mm Wooden dowel x into the holes indicated on the sides using a small hammer. Step 1.2 Screw the bolts into ø5 x 11, cc34mm Bolt x 8 the holes indicated on the legs Step 1.3...
- Page 6 Assembly Instructions Step 1.4 Screw the bolts into ø5 x 11, cc34mm Bolt x 6 the holes indicated on the sides Step 1.5 Slide the top of the ø10 x 9mm Spacer x ø5.8 x 19mm Screw x drawer runners backwards.
- Page 7 Assembly Instructions Step 1.6 Slide the top of the draw- ø5.8 x 19mm Screw x ø10 x 9mm Spacer x er runners forwards. Place the Spacers as shown, and fix the back end of the drawer runners to the sides using screws through the holes indicated.
- Page 8 Assembly Instructions Step 1.8 Slide the top of the drawer ø5.8 x 8mm Screw x 2 245 x 17 x 10mm Drawer runner x runner backwards. Identify the front end of the drawer runner by the two M4 holes. Front end Fix the front end of the Hole no.
- Page 9 Assembly Instructions Step 1.12 Screw the bolts into ø5 x 11, cc34mm Bolt x 6 the holes indicated on the Step 1.13 Place the divider onto ø15 x 10.5mm Cam x 2 the top Push cams into the holes indicated on the divider .
- Page 10 Assembly Instructions Step 1.15 Place the sides ø15 x 10.5mm Cam x 4 onto the top Push cams into the holes indicated on the sides Arrows pointing towards the top Turn the cams to the right to fix the top Step 1.16 Fix the back rail ø5 x 38mm Screw x...
- Page 11 Assembly Instructions Step 2 Assembly of the drawers. Step 2.1 Fix the drawer sides ø3 x 35mm Screw x to the drawer back shown, using screws Step 2.2 Knock the dowels ø6 x 30mm Wooden dowel x 12 into the holes indicated on the drawer sides using a smal hammer.
- Page 12 Assembly Instructions Step 2.5 Push the drawer front ø15 x 10.5mm Cam x 4 onto the drawer sides Place cams into the holes indicated. Arrow pointing towards the front. Turn the cams to the right to fix the front. Step 2.6 Important! Back fitting w.
Need help?
Do you have a question about the Mia 2261490 and is the answer not in the manual?
Questions and answers