Table of Contents
Advertisement
Advertisement
Table of Contents

Related Manuals for Newland NLS-HR1250-70


Summary of Contents for Newland NLS-HR1250-70
- Page 1 NLS-HR1250-70 1D Handheld Barcode Scanner User Guide...
- Page 2 Do not disassemble the device or remove the seal label from the device. Otherwise, Fujian Newland Auto-ID Tech. Co., Ltd. does not assume responsibility for the warranty or replacement.
-
Page 3: Revision History
Revision History Version Description Date V1.0 Initial release. May 9, 2014... - Page 4 Table of Contents Revision History ............................. - 3 - Preface ................................ 1 Introduction ............................1 Chapter Description ..........................1 Chapter 1 Getting Started .......................... 2 Introduction ............................2 Unpacking .............................. 2 HR12 Scanner ............................2 Connect HR12 to a Host ......................... 3 Power on, Power off, Sleep, Reboot .......................
- Page 5 Command Trigger Mode ........................49 Security Level ............................50 Good Read Beep...........................51 Good Read Beep Frequency ......................52 Good Read Beep Duration ......................52 Decode Result Notification ........................53 Other Settings ............................54 Silent Mode .............................54 Illumination ............................54 Chapter 3 Communication Settings ......................55 Introduction ............................55 USB HID-KBW ............................55 Standard Keyboard .........................56 Emulate ALT+Keypad ........................56...
- Page 6 Custom Suffix ............................76 Enable/Disable Custom Suffix ......................76 Set Custom Suffix ..........................77 Terminating Character Suffix .........................78 Enable/Disable Terminating Character Suffix ...................78 Set Terminating Character Suffix .....................79 Chapter 5 Symbologies ..........................80 Introduction ............................80 Global Settings ............................80 Enable/Disable All Symbologies ......................80 Code 128 ..............................81 Restore Factory Defaults .........................81 Enable/Disable Code 128 ........................81 Set Length Range for Code 128 ......................82...
- Page 7 Restore Factory Defaults .........................93 Enable/Disable ISSN ........................93 ISBN ..............................94 Restore Factory Defaults .........................94 Enable/Disable ISBN ........................94 Set ISBN Format ..........................95 UPC-E ..............................96 Restore Factory Defaults .........................96 Enable/Disable UPC-E ........................96 Transmit Check Digit ........................96 Add-On Code ..........................97 Add-On Code Required ........................98 Transmit System Character ......................98 UPC-E Extension ..........................99 UPC-A ..............................
- Page 8 Enable/Disable Deutsche 12 ......................110 Matrix 2 of 5 (European Matrix 2 of 5) ....................111 Restore Factory Defaults ....................... 111 Enable/Disable Matrix 2 of 5 ......................111 Check Digit Verification ........................112 Set Length Range for Matrix 2 of 5 ....................113 Industrial 25 ............................
- Page 9 Check Digit Verification ........................132 Set Length Range for Code 11 ...................... 133 Plessey ............................... 134 Restore Factory Defaults ....................... 134 Enable/Disable Plessey ......................... 134 Check Digit Verification ........................135 Set Length Range for Plessey ....................... 136 MSI-Plessey ............................137 Restore Factory Defaults .......................
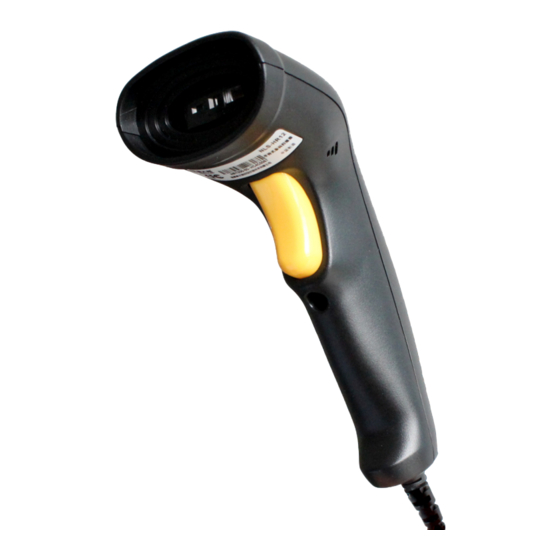
- Page 11 Preface Introduction This manual provides detailed instructions for setting up and using the NLS-HR1250-70 handheld barcode scanner (hereinafter referred to as “HR12 scanner” or “the scanner”). Chapter Description Chapter 1, Getting Started : This chapter gives a general description of HR12 scanner including its technical parameters.
-
Page 12: Chapter 1 Getting Started
HR12 scanner is a 1D barcode scanner with excellent performance. Based on the technology independently developed by Newland, HR12 scanner is able to deliver rapid image acquisition and accurate decoding; it can provide customers with best services. HR12 scanner boasts the ergonomical design that ensures easy and comfortable operation. -
Page 13: Connect Hr12 To A Host
Connect HR12 to a Host HR12 scanner must be connected to a host device in actual application, such as PC, POS or any intelligent terminal with USB interface. Fig. 1-2... -
Page 14: Power On, Power Off, Sleep, Reboot
Power on, Power off, Sleep, Reboot Power on the scanner Connect the scanner to a host device. Then the scanner will be turned on and automatically go into sleep mode. Power off the scanner Disconnect the scanner from the host. Enter the sleep mode If no operation is performed on the scanner for some time, the scanner will automatically enter the sleep state. -
Page 15: Dimensions (Unit: Mm)
Dimensions (unit: mm) Left View Fig. 1-3 Front View Fig. 1-4 Top View Fig. 1-5... -
Page 16: Scanning Instructions
Scanning Instructions When the HR12 scanner is in the Manual mode (default), you can follow the steps below to scan a barcode: 1. Hold down the trigger. Then the scanner will project a red aiming beam. 2. Aim the red beam across the center of barcode, as shown in Fig.1-6. Release the trigger when the red beam goes off. - Page 17 Scan Angle The scanner is designed to function within a certain range of scan angles. Any unreasonable deviation may cause decoding failure. Scan angles of the scanner: Pitch : ±60° , 0° Roll and 0° Skew (Fig. 1-7) Roll : ±30° , 0° Pitch and 0° Skew (Fig. 1-8) Skew: ±60°...
-
Page 18: Chapter 2 System Settings
** Enter Setup Chapter 2 System Settings Introduction There are two ways to configure the scanner: barcode programming and command programming. Barcode Programming The scanner can be configured by scanning programming barcodes. All user programmable features/options are described along with their programming barcodes/commands in the following sections. - Page 19 ** Enter Setup Read Register The read register command is used to read the contents of 1 to 256 contiguous registers in the scanner. Syntax: {Prefix1} {Types} {Lens} {Address} {Datas} {FCS} Prefix1 : 0x7E 0x00 (2 bytes) Types : 0x07 (1 byte) Lens : 0x01 (1 byte).
- Page 20 ** Enter Setup Reply: {Prefix2} {Types} {Lens} {Datas} {FCS} 1) Success message: Prefix2 : 0x02 0x00 Types : 0x00 (success) Lens : Byte count of Datas returned. If Lens=0x00, that means values of 256 contiguous registers are returned. Datas : 0x00~0xFF, data that are returned. : CRC-CCITT checksum.
Need help?
Do you have a question about the NLS-HR1250-70 and is the answer not in the manual?
Questions and answers