Table of Contents
Advertisement
Quick Links
Advertisement
Table of Contents

Related Manuals for ADURO H3 LUX


Summary of Contents for ADURO H3 LUX
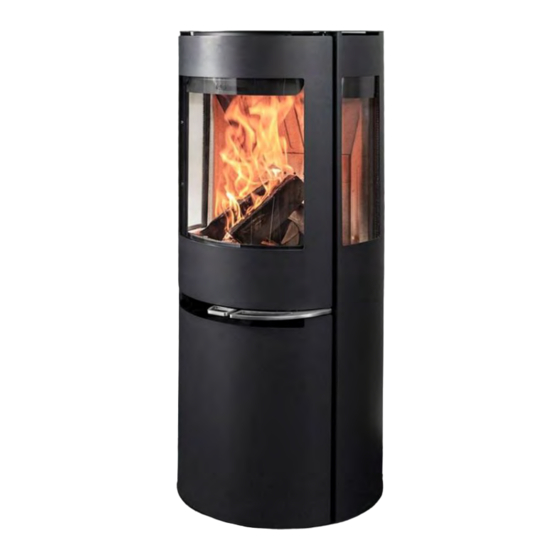
- Page 1 Brugsvejledning DA/NO (2-25) Bedienungsanleitun DE (26-49) User Manual EN (50-72) Eldningsinstruktion SE (73-94) Aduro H1 & H3 LUX EN13240 - EN14785 - NS3058 - Ecodesign 2022 aduro.dk / aduro.no / adurofire.de adurofire.com / adurofire.se Version 4...
- Page 2 Congratulations on your new Aduro H1 & H3 LUX Stove! To get the best possible experience and benefit from your new Aduro H1 & H3 LUX, it is important that you read the user manual thoroughly before you install your Aduro H1 & H3 LUX and start using it. Errors or incorrect settings can cause hazardous conditions and/or poor operation.
-
Page 3: Warnings And Safety Precautions
1. General 1.1 Compliance Aduro H1 & H3 LUX complies with the EN13240 and EN14785 European standards as well as the NS3058 Norwegian standard and is thereby approved for installation and use in Europe. At the same time, the manufacturing process is subject to external quality control. DoP (Declaration of Performance) can be downloaded at www.adurofire.com/download. -
Page 4: Technical Data
Any flammable objects must be kept at a safe distance from the product due to fire hazard in • accordance to the product manual. Use only the fuel recommended by Aduro A/S. It is forbidden to use any liquid fuels and bioethanol • fluids for lighting/ rekindle charcoal or pellets. - Page 5 2.1 Position of the hybrid stove/distance requirements The new Aduro H1 & H3 LUX must be installed in a suitable and physically possible position. You need to be sure that the position complies with local regulations. Distance requirements will only apply if the Aduro H1 &...
-
Page 6: Pipe Connection
If the Aduro H1 & H3 LUX is to be placed close to flammable material such as a wooden floor or carpet it must be placed on a non-flammable base. The floor plate should extend for at least 30 cm in front of the Aduro H1 &... -
Page 7: Supply Of Combustion Air
Aduro stoves. Aduro H1 & H3 LUX is tested and approved for use with an uninsulated fluepipe of minimum 100 cm. 2.3 Connection to a brick chimney If the stove is being connected to a brick chimney, the rear outlet should be used, or a curved flue pipe via the top outlet. - Page 8 2. Through the app Aduro Hybrid and the Wi-Fi module “Aduro” in the near of the stove 3. Through the app Aduro Hybrid when the Wi-Fi module is connected to the router and connected to Aduro Cloud. When your stove is connected to Aduro Cloud, it can be controlled remotely.
- Page 9 App features The app has several features to choose from; heat level, desired room temperature, and timer/week program. The timer/week program makes it possible to plan, how the stove should run during the week. The frontpage of the app shows: 1.
-
Page 10: Electrical Connection
2.6 Electrical connection Aduro H1 & H3 LUX comes with approx. 1.5 meter of cord with an Euro-plug, that should be connected to a 230V / 50Hz outlet. Power consumption during operation is approx. 33 watts. The cord must be positioned so it is not in contact with hot surfaces or pointed objects. - Page 11 2-3 minutes. If the wood does not ignite, add some ignition products and ignite them manually. In the event of a chimney fire: Close all the dampers on the Aduro H1 & H3 LUX and call the fire- •...
- Page 12 If you overload the Aduro H1 & H3 LUX and burn more than approx. 3,1 kg wood per hour, there is a risk that the lacquered surface of the stove will become discolored and eventually fall off.
- Page 13 It is also important not to let the fire burn too fiercely the first 2-3 times, so that the Aduro H1 & H3 LUX has time to expand slowly. You should also be aware that the stove may make clicking sounds as it heats up and cools down –...
- Page 14 The control handle will get warm when the Aduro H1 & H3 LUX is in use. Please use the glove provided when you operate the Aduro H1 & H3 LUX.
- Page 15 If you use the function "Heat Level" on the app and want the stove to restart automatically on pellets when the wood has burned out, you can set the Aduro Hybrid on standby mode with just 1 click on the button (see illustration). The stove will now be in standby mode and await a smoke temperature below 100 degrees before it starts the pellet combustion and ignites again.
- Page 16 ON mode automatically. 3.4 How should I use my Aduro H1 & H3 LUX? The Aduro H1 & H3 LUX is intended for intermittent combustion. This means that each stoking should burn down to embers before new logs are added.
- Page 17 Burning varnished wood, impregnated wood, chipboard, paper and other waste is strictly forbidden. Burning these materials will damage the environment, the Aduro H1 & H3 LUX and your own health. Fossil fuels must not be used. The brazier must not be removed during use with either wood nor pellets (doesn’t apply when conducting a fast cleaning under the brazier to clean out...
- Page 18 For further information, go to www.adurofire.com. Aduro Hybrid has certain standard settings when it comes to the speed of the auger and the fan, and in order to achieve the most efficient / clean pellet combustion, it may sometimes be necessary for the user to adjust...
- Page 19 from the outside etc. If you're interested in knowing more about the app's features/functions, calibration, and various FAQ’s, then you can read more about it on our website www.adurofire.com. Below 3 examples of pellet combustion, depending on the draft level: Optimum flame Flame generates high quantity of ”sparkles”...
- Page 20 The development within phones and electronics continuously provides new possibilities and demands for updates and developments of the app. When you buy an Aduro Hybrid stove, updates of the app and control system are included 5 years after purchase. After this, charges may apply for updates.
-
Page 21: Maintenance Of The Stove
When you add pellets, you should brush the brazier free from of ashes and cinders. Open the door to the combustion chamber and lift the front of the brazier (the black cast iron cone with the Aduro logo). Brush the ashes and the cinders through the grate to the ash pan. -
Page 22: Yearly Maintenance
How do I remove the Bauart spring? All Aduro stoves are fitted with a “Bauart” safety spring. The mechanism ensures that the door of the stove closes automatically. The “Bauart” spring is only a law requirement in Germany. How to remove it: If you wish to remove or replace the spring with a new one it is possible to cut the spring using a •... - Page 23 The upper fireproof tile (the exhaust deflector) can be removed. To allow free access to the top of the Aduro H1 & H3 LUX and the flue pipe, remove the exhaust deflector in steel. Cleaning of the inside of the Aduro H1 & H3 LUX and the flue pipe should be undertaken at least once a year, or more frequently if necessary, depending on how often the Aduro H1 &...
-
Page 24: Right Of Complaint
Aduro AS and service partners can monitor and adjust stoves on the Aduro cloud. However, it is only possible if the stove is connected to the cloud via Wi-Fi. Aduro AS can therefore not treat complaints regarding function and combustion if the stove is not online.
Need help?
Do you have a question about the H3 LUX and is the answer not in the manual?
Questions and answers