Advertisement
Making British gardens great
Thank you for purchasing your shed from Forest Garden. No matter what size garden, a shed is the most practical
of garden structures. Simply follow these step by step instructions and our top tips and you'll be enjoying your
shed for many years to come. If you have any questions or need advice, our friendly team is here to help.
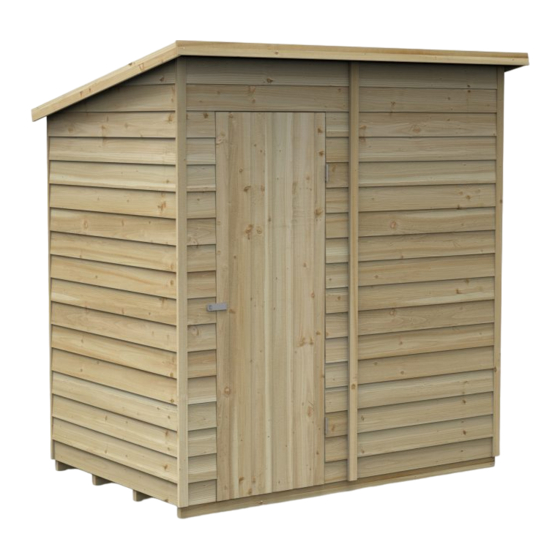
SHED
PENT SHEDS
FIXING PACK CONTAINS:
FIXING PACK CODE: MSFP2
3 x 16mm Screws QTY: 2
Forest Badge QTY: 1
Missing something or need more information?
Call our aftersales team on
0333 321 3142
Forest Garden, Oak Drive, Hartlebury Trading Estate, Hartlebury, Worcestershire, DY10 4JB
EU Authorised Representative: Authorised Representative Service, 77 Camden Street Lower Dublin, D02 XE80, Ireland
INSTRUCTIONS
(6x4, 7x5, 8x6, 10x6)
Flush Hinges
QTY: 2
Hasp & Staple
QTY: 1
Visit our website for spare instructions and
more information
www.forestgarden.co.uk
B
ISSUE: 0223
Felt Tacks
QTY: 154
Z-Brackets (45mm)
QTY: 4
Advertisement
Table of Contents

Subscribe to Our Youtube Channel
Related Manuals for Forest garden OPP64NWM


Summary of Contents for Forest garden OPP64NWM
- Page 1 Making British gardens great Thank you for purchasing your shed from Forest Garden. No matter what size garden, a shed is the most practical of garden structures. Simply follow these step by step instructions and our top tips and you’ll be enjoying your shed for many years to come.
-
Page 2: Before You Start
BEFORE YOU START Please read through these instructions to familiarise yourself with your shed. We recommend that you check all the components using the lists found on the front and back pages before you start to build. All of our sheds are constructed in the same way. They simply come with different components depending on the type of shed you have. - Page 3 CARE & ATTENTION To help you get the most out of our products it is useful to know a little more about the properties of timber, what is normal and how your shed may behave as the seasons change. Wood is an extremely durable material for construction but as a natural product when used outdoors it is susceptible to changes in the environment.
-
Page 4: Health And Safety
HEALTH & SAFETY We strongly recommend that PPE (Personal Protective Equipment) is used throughout your build to ensure you are protected from any potential health and safety risks. Do not exempt yourself from wearing PPE. Cut-Resistant Protective Glasses Protective Boots Protective Mask Working At Gloves... - Page 5 (With & without windows) Indicates the panel orientation during construction. This will apply to all of the corners for your chosen shed. 6’ 7’ 8’ 4’ PENT 5’ OPP64M, OPP64NWM, PENT 6’ PENT SDP64M, SDP64NWM OPP75M, OPP75NWM, OPP86M, OPP86NWM, SDP75M, SDP75NWM SDP86M, SDP86NWM 10’...
- Page 6 CONSTRUCTION PRE-DRILL FLOORS & SIDES WITH 2MM BIT FOR ALL STEPS BELOW. Position the floor in your desired location. The 6x4 shed will Layout the panels around your shed base. We recommend to start in a back only have one floor. For the 7x5, 8x6 and 10x6 sheds, butt the corner then work from the back panels adjoining bearers together.
- Page 7 WINDOWS PRE-DRILL WITH 2MM BIT FOR ALL STEPS BELOW. Secure windows by screwing through the window cover strips and window into the panel frame (30mm screws). Screw into the top and bottom of the window and into the interior sill to keep secure (25mm screws). Make sure the window is centralised for all window frames as shown below.
- Page 8 Place the OSB roof sheets, one at Before screwing the OSB roof sheets onto the roof, Once the roof support strips are screwed a time onto the shed frame and screw the roof support strips to the OSB roof onto the front and back of the OSB roof beams.
- Page 9 PRESSURE TREATED OVERLAP PENT SHEDS CHECK YOU HAVE ALL YOUR PARTS PRIOR TO ASSEMBLY. Overlap Pent 6' x 4' - No Windows (OPP64NWM) Overlap Pent 6' x 4' - 2 Windows (OPP64M) Overlap Pent 7' x 5' - No Windows (OPP75NWM)
- Page 10 DIP TREATED SHIPLAP PENT SHEDS CHECK YOU HAVE ALL YOUR PARTS PRIOR TO ASSEMBLY. Shiplap Pent 6' x 4' - No Windows (SDP64NWM) Shiplap Pent 7' x 5' - No Windows (SDP75NWM) Shiplap Pent 6' x 4' - 2 Windows (SDP64M) Part Code Part Code Part Code...
Need help?
Do you have a question about the OPP64NWM and is the answer not in the manual?
Questions and answers