Advertisement
Quick Links
Delta UPS – Agilon Family
VX Series, Line-interactive
600-1500 VA
Installation & Operation Quick Guide
ENGLISH
1
Package Inspection
No.
Item
1
UPS
2
Quick Guide
3
Output Power Cord (10A)
4
USB Cable
5
AC Power Cord
Remove the UPS from its package and inspect it for damage that may
have occurred during shipping. If any damage is discovered, re-pack
the unit and return it to the place of purchase.
2
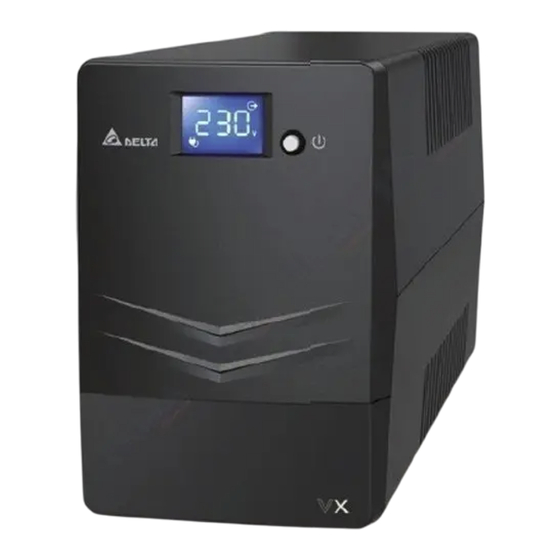
Front Panel & Rear Panel
600VA
(Front Panel)
1
6
2
4
5
1000VA
(Front Panel)
1
2
3
www.deltapowersolutions.com
1500VA
1
No.
LCD Touch Panel
1
Q'ty
2
ON/ OFF Button
1 PC
3
Output Socket
1 PC
AC Input
4
1 PC
Fuse
5
1 PC
USB Port
6
1 PC
Cooling Fan (Only For 1500VA Model)
7
3
Operation
y y
Connect to Utility Power
Connect the AC power cord to the utility power. Then, the UPS will
start to charge its inside battery (batteries). For best result, charge the
battery (batteries) for 6 hours prior to initial use. It is not recommended
to connect the UPS's AC power cord to any generator.
(Rear Panel)
y y
Plug in Equipment
Plug your equipment to the Output Socket on the rear panel of the
UPS.
3
(Rear Panel)
y y
Connect to USB Port and Install Software
Connect one end of the supplied USB cable to your PC and the other
to the USB port located at the rear of the UPS. Download the latest
6
version of ViewPower software (http://www.deltapowersolutions.com/
en/mcis/600va-1500va-single-phase-ups-vx-series-software-download.
php) to your hard drive. Follow on-screen instructions to complete the
software installation.
y y
Turn On/ Off the UPS
When the UPS is OFF, press the ON/ OFF Button to turn on the UPS
and the LCD will be on. When the UPS is ON, press the ON/ OFF
4
Button to turn off the UPS and the LCD will shut off.
5
y y
Fuse Replacement
When the UPS always runs in battery mode, it might be because the
fuse is damaged. If yes, please follow the following procedures to
replace the fuse.
(Front Panel)
(Rear Panel)
2
7
3
Item
NOTE:
Make sure that the UPS is powered on to protect all important
devices from data loss during power failure.
WARNING:
NEVER connect a laser printer or scanner to the Output
Socket of the UPS. The equipment may draw significant
power to overload the UPS.
1
Remove the fuse cover from the rear panel.
(Rear Panel)
6
(Fuse Cover)
4
5
2
Replace the original fuse
1
(Take Out)
3
Replace the fuse cover back to the rear panel.
4
LCD Display
y y
Operation Display:
UPS Mode
LCD Touch Panel
UPS
Power On
AC Mode
When AVR is functioning,
icon will flash every
second.
Overload
In AC
Mode
icon will flash.
Battery
Mode
When battery level is low,
icon will flash.
Overload
In Battery
Mode
icon will flash.
NOTE:
If backlight shuts off, you can activate it by touching the screen.
Continue to the Next Page
Original Fuse
(Provided)
Backup Fuse
(Pull)
(Provided)
with the provided backup fuse
.
1
2
2
(Install)
Description
When the UPS is powered
on, it will enter this mode
for 4 seconds.
LCD information will be
displayed in the following
order when the LCD
is touched.
1. Output voltage
2. Input voltage
3. Load level
4. Battery capacity
When overload occurs,
alarm will beep every 0.5
second.
Alarm will beep every
10 seconds and LCD
information will be
displayed in the following
order when the LCD
is touched.
1. Output voltage
2. Input voltage
3. Load level
4. Battery capacity
When overload occurs,
alarm will beep every 0.5
second.
Advertisement

Related Manuals for Delta VX Series


Summary of Contents for Delta VX Series
- Page 1 Delta UPS – Agilon Family 1500VA Remove the fuse cover from the rear panel. (Front Panel) (Rear Panel) (Rear Panel) Original Fuse (Provided) VX Series, Line-interactive 600-1500 VA Installation & Operation Quick Guide Backup Fuse (Pull) (Provided) (Fuse Cover) ENGLISH...
- Page 2 UPS capability Copyright © 2016 by Delta Electronics Inc. All Rights Reserved. This to the UPS. specified in the specs. Quick Guide is subject to change without prior notice.
Need help?
Do you have a question about the VX Series and is the answer not in the manual?
Questions and answers