Table of Contents
Advertisement
Quick Links
Advertisement
Table of Contents

Related Manuals for IFM OGD25 Series


Summary of Contents for IFM OGD25 Series
- Page 1 Operating instructions Photoelectric distance sensor OGD25x OGD55x...
-
Page 2: Table Of Contents
OGD25x OGD55x Photoelectric distance sensor Contents Preliminary note ............. Symbols used . - Page 3 Photoelectric distance sensor OGD25x OGD55x 11.2.2.1 Parameter setting via the device keys ....... 27 11.2.2.2 Parameter setting via IO-Link .
-
Page 4: Preliminary Note
OGD25x OGD55x Photoelectric distance sensor 1 Preliminary note You will find instructions, technical data, approvals and further information using the QR code on the device / packaging or at documentation.ifm.com. 1.1 Symbols used Requirement Instructions Reaction, result [...] Designation of keys, buttons or indications... -
Page 5: Safety Instructions
Photoelectric distance sensor OGD25x OGD55x 2 Safety instructions • The device described is a subcomponent for integration into a system. – The system architect is responsible for the safety of the system. – The system architect undertakes to perform a risk assessment and to create documentation in accordance with legal and normative requirements to be provided to the operator and user of the system. -
Page 6: Intended Use
OGD25x OGD55x Photoelectric distance sensor 3 Intended use 3.1 General notices The device is used as a photoelectric distance sensor. The device continuously detects the distance to the object and the reflectivity of the object and generates output signals according to the parameter settings. •... -
Page 7: Function
Photoelectric distance sensor OGD25x OGD55x 4 Function The device shows the currently measured object distance or alternatively the object reflectivity in the display. It generates output signals according to the parameter setting. Moreover, it provides the process data via IO-Link. The device is designed for fully bidirectional communication. So the following options are possible: •... -
Page 8: Hysteresis Function - Reflectivity
OGD25x OGD55x Photoelectric distance sensor Set point Reset point The object is detected if the switch point (distance) is not reached. Switching status of the outputs Output function Object distance (D) Switching status [Hno] D < [SPx] Closed D > [SPx] + hysteresis Open [Hnc] D <... -
Page 9: Dynamic Hysteresis
Photoelectric distance sensor OGD25x OGD55x Switching status of the outputs Output function Object reflectivity (R) Switching status [Hno] R < [SPx] - hysteresis Open R > [SPx] Closed [Hnc] R < [SPx] - hysteresis Closed R > [SPx] Open 4.2.3 Dynamic hysteresis The measured values detected by the sensor vary depending on the situation. -
Page 10: Window Function - Reflectivity
OGD25x OGD55x Photoelectric distance sensor Switches off when the object is detected ([OUx] = [Fnc]) [nSPx] [FSPx] [Fnc] [nSPx]: Switch point "near" [FSPx]: Switch point "far" Window If the measured value is between the switch point "near” [nSPx] and the switch point "far" [FSPx], the output is switched off (if [OUx] = [Fnc]). -
Page 11: Analogue Output
Photoelectric distance sensor OGD25x OGD55x Switches off when the object is detected ([OUx] = [Fnc]) If the measured value is between the switch point “bright” [bSPx] and the switch point “dark" [dSPx], the output is switched off (if [OUx] = [Fnc]). The parameters [bSPx] and [dSPx] can also be set via the teach function. -
Page 12: Voltage Output 0
IO-Link is a communication system for connecting intelligent sensors and actuators to automation systems. IO-Link is standardised in the IEC 61131-9 standard. General information on IO-Link at io-link.ifm Input Output Device Description (IODD) with all parameters, process data and detailed descriptions of the device at documentation.ifm.com... - Page 13 Photoelectric distance sensor OGD25x OGD55x • Parameter setting in the running process or presetting outside the application • Parameters for identifying the connected devices in the system • Additional parameters and diagnostic functions • Automatic backup and restore of parameter sets in case of device replacement (data storage) •...
-
Page 14: Installation
2x metal lock nuts E10027 OGD25x 2x plastic lock nuts E10026 Suitable mounting accessories can be found at www.ifm.com. 5.3 Installation instructions 5.3.1 Avoidance of soiling and ambient light Preferably align photoelectric sensors with the front lens facing downwards or parallel to the earth’s surface. - Page 15 Photoelectric distance sensor OGD25x OGD55x...
-
Page 16: Electrical Connection
OGD25x OGD55x Photoelectric distance sensor 6 Electrical connection The device must be connected by a qualified electrician. u Observe the national and international regulations for the installation of electrical equipment. u Ensure voltage supply according to SELV, PELV. OGD25x / OGD55x: cULus, Supply Class 2 u Disconnect power. -
Page 17: Operation With Io-Link Master
Photoelectric distance sensor OGD25x OGD55x 6.2 Operation with IO-Link master The unit is compatible with IO-Link master port class A (type A). For operation with IO-Link master port class B (type B) observe the following: As a standard, the unit is not compatible with master port class B (type B). Pin 2 and pin 5 are used for manufacturer-specific functions. -
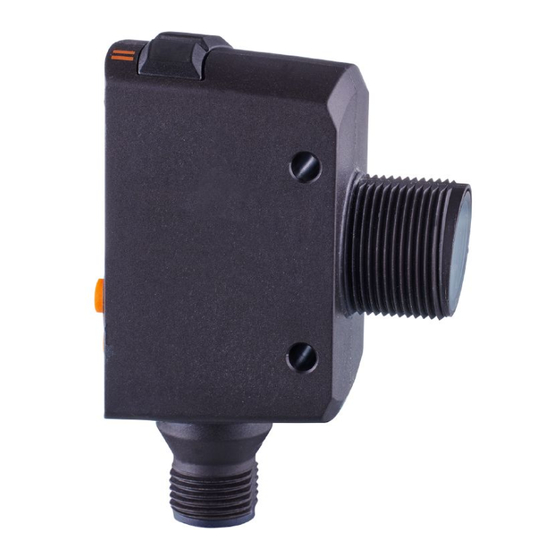
Page 18: Operating And Display Elements
OGD25x OGD55x Photoelectric distance sensor 7 Operating and display elements 2x green LED Status LED = set display unit (cm, mm, refl) 1x green LED Status LED = power 1x yellow LED Switching status [OUT1] 1x yellow LED Switching status [OUT2] 1x red LED Status LED = display of faults Programming button [●]... -
Page 19: Set-Up
Photoelectric distance sensor OGD25x OGD55x 8 Set-up u After installation, electrical connection and programming, check whether the device operates correctly. w If the device has been correctly set up, the object distance or the object reflectivity is indicated. The settings made last are internally stored by the sensor. -
Page 20: Menu
OGD25x OGD55x Photoelectric distance sensor 9 Menu Pressing the [▲] + [▼] buttons at the same time will lead to a return in the menu navigation. 9.1 Hysteresis function (distance and reflectivity) Runmode bAck OFF bAck dist SEL1 refl dist bAck SEL2 refl bAck 1000 / r10... -
Page 21: Window Function (Distance And Reflectivity)
Photoelectric distance sensor OGD25x OGD55x 9.2 Window function (distance and reflectivity) Runmode bAck bAck dist SEL2 refl bAck dist SEL1 refl 1800 / r20 tn2 / bAck 255 / r25 bAck 900 / r40 tn1 / 2000 / r20 tF2 / 255 / r25 255 / r25 bAck... -
Page 22: Analogue Output For Out2 (Distance And Reflectivity)
OGD25x OGD55x Photoelectric distance sensor Current measured value Setting value *) Only for analogue devices 9.3 Analogue output for OUT2 (distance and reflectivity) Runmode 0 / r0 tASP 1 / r1 bAck 2000 / r100 tAEP 1999 / r99 bAck bAck 0 / r0 1 / r1 dist... -
Page 23: Extended Functions - Ef
Photoelectric distance sensor OGD25x OGD55x 9.4 Extended functions – EF Runmode FinE OPEr Auto S-1...S-5 FASt bAck bAck 0,00...5,00 diS.b bAck bAck 0,00...5,00 G-12 coLr bAck r-12 G1ou G2ou 0,00...5,00 r1ou bAck r2ou GrEn 0,00...5,00 bAck bAck x.x.x InFo 0,00...5,00 bAck bAck APPL bAck... -
Page 24: Operating Modes
OGD25x OGD55x Photoelectric distance sensor 10 Operating modes 10.1 Run mode Run mode is the normal operating mode. After power-on the device is in the Run mode. It carries out its monitoring function and generates output signals according to the set parameters. The display indicates the current distance or the object reflectivity, the yellow LEDs signal the switching status of the outputs. -
Page 25: Parameter Setting
Photoelectric distance sensor OGD25x OGD55x 11 Parameter setting Internally, the device remains in the operating mode during parameter setting. It continues its monitoring function with the existing parameters until the change has been completed. For [SPx], [nSPx], [FSPx], [dSPx], [bSPx], [ASP], [AEP], the current and yet unconfirmed value is used for the evaluation. -
Page 26: Parameter Setting Via The Device Keys
OGD25x OGD55x Photoelectric distance sensor 11.1.3.1 Parameter setting via the device keys Locking Make sure that the device is in the normal operating mode. u Keep [▲] + [▼] pressed (approx. 10 s) until [Lo] is displayed. w The device is locked. [Lo] is displayed briefly if you try to change parameter values on the locked device during operation. -
Page 27: Parameter Setting Via Io-Link
Photoelectric distance sensor OGD25x OGD55x 11.2.1.2 Parameter setting via IO-Link u Call up [Parameter] > [Output configuration]. u Select the output configuration under [OU1] / [OU2]. 11.2.2 Measured parameter For each output, the measured parameter, i.e. distance or reflectivity, can be set. •... -
Page 28: Teach - Switch Point For Window Function
OGD25x OGD55x Photoelectric distance sensor w The current measured value is displayed. The measured value depends on the current situation. u Confirm by clicking on [●]. w The new measured value flashes once. w The taught value is stored in [SPx]. The sensor is aligned to the object. -
Page 29: Teaching Via Io-Link
Photoelectric distance sensor OGD25x OGD55x u Select [tFx] for distance or [tdx] for reflectivity. w The parameter value for [FSPx] / [dSPx] is displayed. u Keep [▲] or [▼] pressed for at least 3 s. w The current measured value is displayed. The measured value depends on the current situation. u Confirm by clicking on [●]. -
Page 30: Teaching Via Io-Link
OGD25x OGD55x Photoelectric distance sensor u Use [▲/▼] to select the output configuration [Fno] or [Fnc]. u Confirm by clicking on [●]. u Select [SEL1] / [SEL2]. u Confirm by clicking on [●]. u Use [▲/▼] to select the measured parameter [diSt] (distance) / [rEFL] (reflectivity). u Confirm by clicking on [●]. -
Page 31: Parameter Setting Via The Device Keys
Photoelectric distance sensor OGD25x OGD55x • [Fast]: is optimised with regard to measuring speed (“measuring rate / switching rate") and addresses highly dynamic applications. The max. range with dark objects is lower than with “Fine” and “Standard”. Operating mode Velocity Repeatability Max. -
Page 32: Parameter Setting Via Io-Link
OGD25x OGD55x Photoelectric distance sensor u Confirm by clicking on [●]. w The setting is confirmed. 11.3.2.2 Parameter setting via IO-Link u Call up [Parameter] > [Digital Output 1 / Digital Output 2]. u Select [dS1 / dS2] for a switch-on delay and [dr1 / dr2] for a switch-off delay. u Set a delay time between 0...5 s. -
Page 33: Sequence Modulation - Mutual Interference
Photoelectric distance sensor OGD25x OGD55x u Keep [▲] or [▼] pressed for at least 3 s. u Set the parameter value using [▲/▼]. u Confirm by clicking on [●]. w The setting is confirmed. 11.3.4.2 Parameter setting via IO-Link u Call up [Parameter] > [Basic settings]. u Select [P-n]. -
Page 34: Setting The Display
OGD25x OGD55x Photoelectric distance sensor u Select [Sequence modulation] . u Set one of the options. 11.3.6 Setting the display 2 settings can be selected: • [On] = the measured value display is activated in the Run mode. • [OFF] = the measured value display is deactivated in the Run mode. When one button is pressed, the current measured value is displayed for 30 s. -
Page 35: Parameter Setting Via Io-Link
Photoelectric distance sensor OGD25x OGD55x u Set the parameter value using [▲/▼]. u Confirm by clicking on [●]. w The setting is confirmed. 11.3.7.2 Parameter setting via IO-Link u Call up [Parameter] > [Setting of the sensor display]. u Select [coLr]. u Set one of the options. -
Page 36: Additional Parameter Settings Via Io-Link
OGD25x OGD55x Photoelectric distance sensor The two system commands reset the device in a different way. [Reset application]: The parameters of the technology-specific application are set to default values. The identification parameters remain unchanged. An upload to the data memory of the master is carried out, if activated in the port configuration of the master. -
Page 37: Display
Photoelectric distance sensor OGD25x OGD55x 12 Display 12.1 Devices with switching output Switching outputs [SELx] = [dist] Switching outputs [SELx] = [rEFL] Indica- Possible cause tion [Hno] [Hnc] [Fno] [Fnc] [Hno] [Hnc] [Fno] [Fnc] [otE] ambient temperature too high [utE] ambient temperature too low, laser is switched off [nEAr] object to be measured out-... - Page 38 OGD25x OGD55x Photoelectric distance sensor Analogue outputs [SELx] = [dist] Analogue outputs [SELx] = [rEFL] Indica- Possible cause [I] / [U] [I] / [U] [I] / [U] [I] / [U] tion [ASP] < [AEP] [ASP] > [AEP] [ASP] < [AEP] [ASP] >...
-
Page 39: Maintenance, Repair And Disposal
Photoelectric distance sensor OGD25x OGD55x 13 Maintenance, repair and disposal Faulty sensors must only be repaired by the manufacturer. u Keep the front lens of the sensor clean. u After use dispose of the unit in an environmentally friendly way in accordance with the applicable national regulations. -
Page 40: Factory Setting
OGD25x OGD55x Photoelectric distance sensor 14 Factory setting The factory settings of the parameters are available at documentation.ifm.com (PDF – IO-Link interface description).
Need help?
Do you have a question about the OGD25 Series and is the answer not in the manual?
Questions and answers