Table of Contents
Advertisement
Quick Links
DIGITAL
LUXMETER
Your purchase of this Digital Luxmeter
marks a step forward for you into the field of
precision measurements. Although this
Luxmeter is a complex and delicate
instrument, its ruggedness will allow many
years. Of use if proper operating techniques
are developed. Please read the following
instructions carefully and always keep this
manual within easy reach.
Digital Luxmeter
1. FEATURES .......................................... 3
2. FRONT PANEL DESCRIPTION................. 4
3.SPECIFICATIONS................................... 5
3-1 Technical Specifications...................... 5
3-2 General Specifications......................... 6
3-3 Correction Factor............................... 7
4. SPECTRUM FOR PHOTO DETECTOR...... 7
5. MEASURING PROCEDURE.................... 8
6. MAINTENANCE..................................... 9
6-1 General maintenance........................... 9
6-2 Battery Replacement........................... 9
7. RECOMMENDED ILLUMINATION............. 10
1
2
USER'S MANUAL
CONTENTS
Digital Luxmeter
Advertisement
Table of Contents

Related Manuals for Di-LOG DL7030


Summary of Contents for Di-LOG DL7030
-
Page 1: Table Of Contents
USER'S MANUAL DIGITAL CONTENTS LUXMETER 1. FEATURES …………………………………… 3 2. FRONT PANEL DESCRIPTION…….………. 4 3.SPECIFICATIONS…………………………….. 5 Your purchase of this Digital Luxmeter 3-1 Technical Specifications…………………. 5 marks a step forward for you into the field of 3-2 General Specifications…….……………… 6 precision measurements. -
Page 2: Features
1. FEATURES 2. FRONT PANEL DESCRIPTION * Precise and easy readout. * High accuracy and wide measurement range. * LSI-circuit use provides high reliability and durability. * In build LOW BATTERY indicator. * LCD display allows clear read out even at bright places. -
Page 3: Specifications
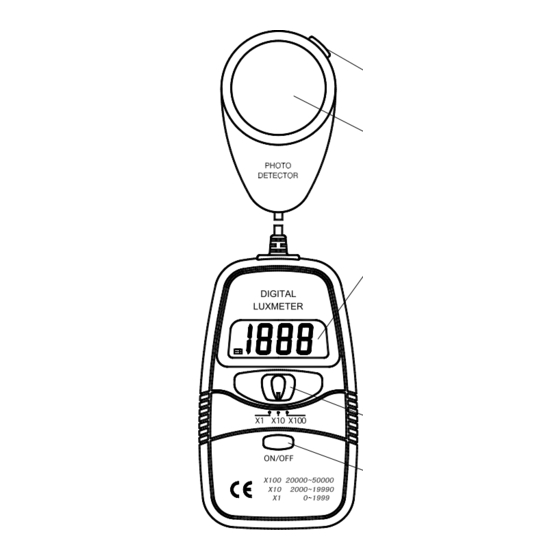
① HOLD key ∞ Low Battery Indicator: ② Photo Detector The " " is displayed when the battery is under ③ LCD display the proper operation range. ④ Function switch ∞ Photo Detector Lead Length: 150cm(approx.) ⑤ POWER key ∞ Photo Detector Size: 83×52×20.5mm ∞... -
Page 4: Correction Factor
5. MEASURING PROCEDURE 3-3 Correction Factor Mercury Lamp …………………………..…. x 1.1 ∞ Power-up: Press the POWER key to turn the Fluorescent Lamp…………………..……… x 1.0 meter on. Incandescent Light………………………… x 1.0 ∞ Selecting the LUX scale: Set the Function switch Daylight……………………………………… x 1.0 to desired LUX range. -
Page 5: Maintenance
6. MAINTENANCE 7. RECOMMENDED ILLUMINATION 6-1 General maintenance LOCATIONS ∞ To keep the instrument clean, wipe the case with ∞ OFFICE a dry cloth and detergent, do not use abrasives or Conference, Reception room. ~ 750 solvents. Clerical work ~ 1500 ∞... - Page 6 LOCATIONS ∞ HOSPITAL Sickroom, Warehouse ~ 200 Medical Examination room ~ 750 Operating room ~ 1500 Emergency Treatment ~ 1500 ∞ SCHOOL Auditorium, Indoor Gymnasium ~ 300 Class room ~ 750 Laboratory, Library, Drafting room ~ 1500 Digital Luxmeter...
Need help?
Do you have a question about the DL7030 and is the answer not in the manual?
Questions and answers