Table of Contents
Advertisement
Quick Links
PRONAR Sp. z o.o.
17-210 NAREW, UL. MICKIEWICZA 101A, PODLASKIE PROVINCE, POLAND
PHONE: +48 085 681 63 29
+48 085 681 63 81
FAX:
+48 085 681 63 83
OPERATOR MANUAL
PRONAR ZKP900D
TRANSLATION OF THE ORIGINAL COPY OF THE MANUAL
KEEP FOR FUTURE REFERENCE
PUBLICATION NO.: 578.01.UM.1B.PL
ROTARY RAKE
EDITION: 1B
12-2021
+48 085 681 64 29
+48 085 681 63 82
+48 085 682 71 10
www.pronar.pl
EN
Advertisement
Table of Contents

Related Manuals for PRONAR ZKP900D


Summary of Contents for PRONAR ZKP900D
- Page 1 PRONAR Sp. z o.o. 17-210 NAREW, UL. MICKIEWICZA 101A, PODLASKIE PROVINCE, POLAND PHONE: +48 085 681 63 29 +48 085 681 64 29 +48 085 681 63 81 +48 085 681 63 82 FAX: +48 085 681 63 83 +48 085 682 71 10 www.pronar.pl...
- Page 3 INTRODUCTION...
-
Page 4: Introduction
The Operator Manual is intended for the end user. For this reason, some required maintenance activities are listed in the inspection tables but the procedure is not described in this Operator Manual. To perform these steps, call the manufacturer's authorized service centre. U.01.2.EN PRONAR ZKP900D... -
Page 5: Introduction
Manual describe useful advice for the ma- chine operation and are marked with the sign TIP. In order to focus the user's attention on the need to perform maintenance, the rel- evant section of the Operator Manual is marked with the clock pictogram. U.02.2.EN PRONAR ZKP900D... -
Page 6: Directions Used In This Operator Manual
(the operator is chine's forward travel. facing the mechanism). Figure 1.1 Directions used with reference to the machine (A) front, - (B) rear, - (C) left side, - (D) right side U.03.1.EN PRONAR ZKP900D... -
Page 7: Inspect The Machine Upon Delivery
• Check technical condition of covers hydraulic oil. and protection devices. Discovered defects should be notified di- • Check condition of paint coating; rectly to the seller in order to remove them. check the machine for traces of U.11.3.EN PRONAR ZKP900D... -
Page 8: First Start-Up Of The Machine
• Check oil level in bevel gears. PTO shaft can be still slid when • Check technical condition of PTO the smallest angle is set (while shafts, their shields and securing turning), make sure that the PRONAR ZKP900D... - Page 9 • Start tractor PTO slowly (starting the shown below. drive of the raking assembly gears) • Hitch the machine to tractor. and leave it for a few minutes. PRONAR ZKP900D...
- Page 10 If a fault cannot be rectified or the repair sounds originating from the rubbing could void the warranty, please contact of moving elements, retailer for additional clarifications or to • hydraulic oil leak, perform the repair. U.12.4.EN PRONAR ZKP900D...
-
Page 13: Table Of Contents
Contents INTRODUCTION INTRODUCTION ______________________________________________________________________________________ 2 SYMBOLS APPEARING IN THIS OPERATOR MANUAL _____________________________________________________ 3 DIRECTIONS USED IN THIS OPERATOR MANUAL ________________________________________________________ 4 INSPECT THE MACHINE UPON DELIVERY _______________________________________________________________ 5 FIRST START-UP OF THE MACHINE_____________________________________________________________________ 6 BASIC INFORMATION IDENTIFICATION __________________________________________________________________________ 1.2 INTENDED USE ___________________________________________________________________________ 1.3 EQUIPMENT ______________________________________________________________________________ 1.5 TERMS &... - Page 14 INSPECTION OF CONNECTION PLUGS AND SOCKETS ________________________________________ 5.10 INSPECTION OF PROTECTIVE SHIELDS _____________________________________________________ 5.11 OPERATE TRANSMISSION _________________________________________________________________ 5.12 CHECK AND REPLACE SPRINGTINES _______________________________________________________ 5.14 MAINTENANCE OF ELECTRICAL SYSTEM AND WARNING ELEMENTS __________________________ 5.15 5.10 HYDRAULIC SYSTEM MAINTENANCE _______________________________________________________ 5.16 5.11 REPLACE HYDRAULIC LINES ______________________________________________________________ 5.18 5.12 LUBRICATION ____________________________________________________________________________ 5.19...
-
Page 17: Basic Information
BASIC INFORMATION... -
Page 18: Identification
B - machine type/symbol C - year of manufacture, D - gross weight [kg], E - serial number, F - Quality Control stamp, G - axle load [kg], H - hitch load [kg]. 578-E.01-1 Figure 1.1 Location of the nameplate. E.1.7.578.01.1.EN PRONAR ZKP900D... -
Page 19: Intended Use
• have the required authorisation to and correctly, drive the vehicle and are familiar • adhere to the established mainte- with the road traffic regulations and nance and adjustment plans, transport regulations. • comply with general safety regulations PRONAR ZKP900D... - Page 20 Minimum carrying vehicle power kW / KM 59 / 80 demand – use of other oil is permitted, on condition that it may be mixed with the existing oil. Detailed information can be found on the product information card. E.1.7.578.02.1.EN PRONAR ZKP900D...
-
Page 21: Equipment
Wide-angle shaft for connecting the rotary rake with tractor ● Reflective warning triangle ● Document holder ● Raking springtines safeguards ● Wide tread tyres 340/55-16 ● Recommended wide-angle shaft for connecting the rotary rake with tractor: 7G4R081CEWR7007A B&P E.1.7.578.03.1.EN PRONAR ZKP900D... -
Page 22: Terms & Conditions Of Warranty
• use of damaged machine, or refund. • repairs carried out by unauthorised PRONAR Sp. z o.o. Narew guarantees the persons, repairs carried reliable operation of the machine when it is... -
Page 23: Transport
Persons oper- cially designed for this purpose (Figure ating reloading equipment must have the 1.3). Securing point is marked with infor- qualifications required to operate these mation decal. 4340 578-E.02-1 Figure 1.2 Machine’s centre of gravity PRONAR ZKP900D... - Page 24 During loading, rotary rake should be placed in trans- When lifting the machine take special care port position. to avoid tipping over the machine and the PRONAR ZKP900D...
- Page 25 The tare weight of the rotary rake in rake to prevent it from rolling. The chocks condition ready for travel is given in table must be fixed to the platform of the vehicle. (3.1). E.1.7.578.05.1.EN PRONAR ZKP900D...
-
Page 26: Environmental Risk
Detailed information on hydraulic Oil which has been used up or is un- oils can be found in the Material Safety suitable for further use owing to loss of its Data Sheets. E.1.7.578.06.1.EN 1.10 PRONAR ZKP900D... -
Page 27: Withdrawal From Use
Section 5. elements should be taken to the appro- When spare parts are changed, worn priate facilities dealing with the recycling out or damaged parts should be taken to of this type of waste. E.1.7.578.07.1.EN PRONAR ZKP900D 1.11... - Page 28 Section 1 Basic information 1.12 PRONAR ZKP900D...
-
Page 29: Safety Advice
SAFETY ADVICE... -
Page 30: Safe Use
• The machine must not be used for to health which may arise as a result. purposes other than those for which F.1.7.578.01.1.EN PRONAR ZKP900D... -
Page 31: Safety When Hitching The Machine
• Be especially careful when hitching • The machine disconnected from the and unhitching the machine. carrying vehicle must be secured • When hitching, there must be nobody against unauthorized use by means between the machine and the carrier of safety devices. F.1.7.578.02.1.EN PRONAR ZKP900D... -
Page 32: Safety Rules When Maintaining Hydraulic System
• Repair and replacement of hydraulic • In the event of injuries being caused system elements should be entrusted by pressurised hydraulic oil, contact to the appropriately qualified persons. F.1.7.578.03.1.EN PRONAR ZKP900D... -
Page 33: Safety During Transport Travel
• Do not exceed the maximum speed damaged or overturned. F.1.7.578.04.1.EN PRONAR ZKP900D... -
Page 34: Safety During Maintenance Work
• Regularly perform service inspec- also damage the machine and inval- tions of machine as recommended by idate the warranty. PRONAR ZKP900D... - Page 35 CO the machine must be kept in a clean foam extinguisher. condition. • Regularly check technical condition Observe the rules contained in and mounting of all guards and chapter “Cleaning the machine”. F.1.7.578.05.1.EN PRONAR ZKP900D...
-
Page 36: Safety During Machine Operation
• Do NOT approach the machine until • Before starting work, always check the rotating parts come to a complete condition and correct attachment of stop. springtines on raking arms. F.1.7.578.06.1.EN PRONAR ZKP900D... -
Page 37: Safe Operation Of The Pto Shaft
• The drive shaft must be equipped • Disconnected PTO shaft should be with a cover. Do NOT use the shaft PRONAR ZKP900D... - Page 38 • Before connecting PTO shaft, make • Do NOT go over and under the shaft certain that the PTO rotation direction or stand on it equally during work as is correct. also when the machine is parked. F.1.7.578.07.1.EN 2.10 PRONAR ZKP900D...
-
Page 39: Residual Risk
Safety advice Section 2 2.8 RESIDUAL RISK Pronar Sp. z o. o. in Narew has made checks when carrier vehicle (agricul- every effort to eliminate the risk of acci- tural tractor) is connected and engine dents. There is, however, a certain residual is running. -
Page 40: Information And Warning Decals
Before beginning servicing or repair work, turn off the tractor engine and remove the key from the ignition. 178N-00000002 Do not reach into crushing space because elements may move. Danger of crushing hands or fingers. 178N-00000005 2.12 PRONAR ZKP900D... - Page 41 Maximum allowable PTO shaft rotation speed is 540 rpm. 185N-00000004 Risk of injury when machine is being ar- ranged in transport or working position. 185N-00000007 Do not stand directly behind the tractor while operating the rear hitch. 185N-00000008 PRONAR ZKP900D 2.13...
- Page 42 Section 2 Safety advice Item Decal Meaning Keep a safe distance from electric power lines. 185N-00000009 Grease the machine according to the lubri- cation schedule in the Operator Manual. 185N-00000011 Machine model ZKP900D. 578N-00000001 Manufacturer 578N-00000003 2.14 PRONAR ZKP900D...
- Page 43 Safety advice Section 2 578-F.01-1 Figure 2.1 Locations of information and warning decals. F.1.7.578.09.1.EN PRONAR ZKP900D 2.15...
- Page 44 Section 2 Safety advice 2.16 PRONAR ZKP900D...
-
Page 45: Design And Operation
DESIGN AND OPERATION... -
Page 46: Technical Specification
Raking assembly wheels and suspension configuration dry (lubricated with grease) Type of rotor transmissions Backstop and overload clutch Overload protection WPT 900Nm Minimum power demand KM / kW 80 / 59 Maximum PTO speed Tare weight 2,820 Axle load 1505 PRONAR ZKP900D... - Page 47 Speed index (min.) Raking assembly tyres Tyre 16 x 6.5 – 8 (6PR) Air pressure in the tyres Other information Electrical system voltage Adjustment of raking width hydraulic Raising the rotors to transport position hydraulic - synchronized G.1.7.578.01.1.EN PRONAR ZKP900D...
-
Page 48: General Design
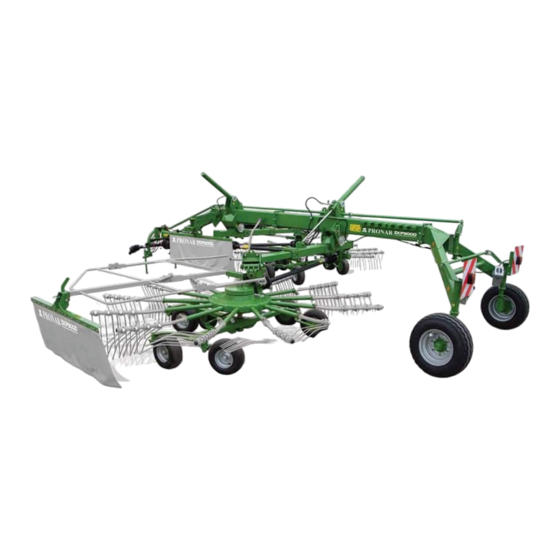
Section 3 Design and operation 3.2 GENERAL DESIGN 578-G.01-1 Figure 3.1 ZKP900D rotary rake design (1) main frame (2) right raking assembly (3) left raking assembly (4) load bearing suspension (5) axle system (6) drive system (7) forming shield (8) protection guard Rotary rake design is shown in figure (3.1). - Page 49 Design and operation Section 3 to which the swath is not scattered but formed into a regular windrow. G.1.7.578.02.1.EN PRONAR ZKP900D...
-
Page 50: Suspension System And Wheels
(8) with system enables the rotary rake to accu- lower pins for connection to the tractor rately follow the tractor track even at high three point linkage. driving speeds. The three point linkage frame is connected G.1.7.578.03.1.EN PRONAR ZKP900D... -
Page 51: Raking Assembly
The height of raking arm tating. Depending on the rotation direction setting above the surface is regulated by of the raking assembly, there are right the adjustment screw (5) and secured by and left raking arms. The raking arms are the interlock. PRONAR ZKP900D... - Page 52 The raked swath springtine. Broken springtine in the swath is retained by the forming shield, due to may damage other agricultural machines which it is formed into an even windrow. In operating in the field. G.1.7.578.04.1.EN PRONAR ZKP900D...
-
Page 53: Drive Transmission
Torque is transmitted from the tractor PTO PTO shafts with overload protection clutch through a wide-angle PTO shaft (1) to the (4). The rotor transmissions rotate in the driving shaft (2). Next, torque is transferred direction indicated by arrows in the figure. G.1.7.578.05.1.EN PRONAR ZKP900D... -
Page 54: Hydraulic System
In such configuration the pistons plied from the tractor external hydraulic of both lifting/lowering hydraulic cylinders system through hydraulic quick couplers. can move freely. Consequently, the raking Quick couplers for controlling the lifting assemblies can adjust to uneven terrain. 3.10 PRONAR ZKP900D... - Page 55 (2) and locking valves (4) and (5). Quick dictable overload. The valve is adjusted couplers (7) should be connected to one using a knob with the possibility of se- double acting section in the tractor. curing the settings with a lock nut. G.1.7.578.06.1.EN PRONAR ZKP900D 3.11...
-
Page 56: Lighting System
Symbol Function of the electrical system with the tractor 7-pin socket, front should be made through an appropriate Rear right lamp assembly connection lead that is part of the ma- Rear left lamp assembly chine's standard equipment. 3.12 PRONAR ZKP900D... - Page 57 White Left indicator (yellow) Black 2/54 unused 3/31 Ground (white) Blue Right indicator (green) Orange Rear right parking light 5/58R Green (brown) 6/54 STOP light (red) Black and green Rear left parking light Brown (black) Yellow G.1.7.578.07.1.EN PRONAR ZKP900D 3.13...
- Page 58 Section 3 Design and operation 3.14 PRONAR ZKP900D...
-
Page 59: Correct Use
CORRECT USE... -
Page 60: Connect The Machine To The Carrier Vehicle
DANGER DANGER When connecting the hydraulic lines to the tractor, make sure that the tractor and rotary rake hydraulic Use only genuine pins and safeguards to hitch the system are not under pressure. machine to the carrier vehicle. PRONAR ZKP900D... - Page 61 Before connecting to the carrier vehicle, check tech- lighting system power cable. nical condition of shaft guards as well as complete- ness and condition of protecting chains. • Connect the articulated telescopic shaft (3) to the PTO of the carrier PRONAR ZKP900D...
- Page 62 Hydraulic and electric lines should be routed in such a way that they do not get caught in the moving parts of the machine and the carrier and are not exposed to kinking or cutting during turning. H.1.7.578.01.1.EN PRONAR ZKP900D...
-
Page 63: Transporting The Machine
For transport to place of work and back, DANGER set the rotary rake in transport position. Only transport the machine with the telescopic shaft In order to set the machine from working disconnected. PRONAR ZKP900D... - Page 64 (I) take the cotter pin out (3), In order to disassemble the then fold protective cover to (2) raking arm (1), take out securing 578-H.04-1 Figure 4.4 Install the raking arms (1) raking arm (2) - securing cotter pin (3) main frame PRONAR ZKP900D...
- Page 65 (A) swath forming shield in working position, (B) swath forming shield in transport position (1)(2) swath forming shield (3) forming shield handle (4) forming shield pin (5) arm of the swath forming shield lock mechanism (6) pin of the swath forming shield lock mechanism PRONAR ZKP900D...
- Page 66 578-H.06-1 Figure 4.6 Setting the rotary rake in transport position (1) cylinder lock cable, (2) beam catch (3) hitch pin (4) locking valve of lifting/lowering hydraulic cylinders, (5), (6) locking valves of the working width adjusting hydraulic cylinders PRONAR ZKP900D...
- Page 67 Correct use Section 4 raking assembly in vertical position. • Close valve (4) by switching it to „0” position. • Prior to moving off, check the lights. H.1.7.578.02.1.EN PRONAR ZKP900D...
-
Page 68: Machine Operation
Lower • Turn off tractor engine and remove the swath forming shield (1) the key from the ignition switch, and lock it in working position 4.10 PRONAR ZKP900D... - Page 69 Figure 4.8 Setting the rotary rake width (1) lifting/lowering hydraulic cylinder (2) support frame (3) working width adjusting hydraulic cylinder (4) locking valve of lifting/lowering hydraulic cylinders (5),(6) locking valves of the working width adjusting hydraulic cylinders PRONAR ZKP900D 4.11...
- Page 70 • Tighten lock nut (2). Set the height of the tractor 578-H.09-1 Figure 4.9 Set the raking height (A) raising of the raking assembly (B) lowering of the raking assembly (1) crank (2) lock nut 4.12 PRONAR ZKP900D...
- Page 71 Height selection should be checked one may commence work. frequently during raking and if necessary Selective control valve lever of the tractor the setting should be corrected external hydraulic system used for con- trolling operation of the lifting/lowering PRONAR ZKP900D 4.13...
- Page 72 During turning or reversing, PTO shaft the rotary rake. During machine operation drive should be disengaged and the lifting the linkage system shall be set in position arms of raking assemblies should be adjustment work mode. raised slightly above the ground. H.1.7.578.03.1.EN 4.14 PRONAR ZKP900D...
-
Page 73: Unhitch The Machine From The Carrier Vehicle
(5) fully rest on the shaft is not taken off, is essential to the ground. remember not to engage the PTO drive of • Place chocks under rotary rake the tractor during transport travel. wheel. PRONAR ZKP900D 4.15... - Page 74 578-H.10-2 Figure 4.11 Disconnecting the rotary rake (1) PTO shaft for connection with tractor (2) shaft bracket (3) hydraulic lines (4) line bracket (5) support (6) pin with cotter pin (7) electric wire (8) safety device H.1.7.578.04.1.EN 4.16 PRONAR ZKP900D...
-
Page 75: Proper Use And Maintenance Of Tyres
• When machine is operated all day, section 5. MAINTENANCE. check temperature of tyres. • Regularly check and maintain the • Avoid potholes, sudden manoeuvres correct pressure in tires in accordance or high speeds when turning. with the instructions (especially if not H.1.7.578.05.1.EN PRONAR ZKP900D 4.17... -
Page 76: Clean The Machine
As a result of long-term • For cleaning maintenance reaction of some substances, the of plastic coated surfaces it is ageing process may be accelerated 4.18 PRONAR ZKP900D... - Page 77 Remove excess oil or previous thorough washing. grease with a dry cloth. H.1.7.578.06.1.EN PRONAR ZKP900D 4.19...
-
Page 78: Storage
The machine should be very carefully increased to an appropriate value. washed and dried. • PTO shafts should be stored in hori- • Corroded places should be cleaned of zontal position. rust, degreased and protected using H.1.7.578.07.1.EN 4.20 PRONAR ZKP900D... - Page 79 MAINTENANCE...
-
Page 80: Basic Information
Authorised After the warranty period, we recom- Points of Sale and Service (APSS). mended that these inspections should be The warranty will be void if you attempt un- performed by specialised workshops. authorized repairs, modify factory settings I.1.7.578.01.1.EN PRONAR ZKP900D... -
Page 81: Periodic Maintenance Schedule
12 months, whichever comes first. Before Maintenance Operator starting work, also perform all inspection steps inspection every 250 hours of operation. Maintenance Inspection carried out every 4 years of the ma- Service inspection chine use (1) - post-warranty service PRONAR ZKP900D... - Page 82 See section: “Inspection of nut Inspection of nut and bolt connections and bolt connections” (1) in accordance with the PTO shaft’s Operator Manual (2) after the first month of use, every 6 months of use (3) first change I.1.7.578.02.1.EN PRONAR ZKP900D...
-
Page 83: Half Axle Maintenance
Ensure that machine will in the place indicated by the not move during inspection. arrow in figure (5.1). Lifting jack • Raise the wheel (opposite to the side must be suitable for machine where chocks are placed). weight. PRONAR ZKP900D... - Page 84 The nut must In such an event the bearing, together not be excessively tightened. Do with sealing ring, should be replaced with not apply excessive pressure new parts, or cleaned and greased again because working conditions of PRONAR ZKP900D...
- Page 85 The wheel should turn smoothly without jamming and detectable resistance. Only adjust bearings, when the machine is hitched to a tractor. 578-I.07-1 Figure 5.2 adjustment of road wheel axle bearings (1) hub cover (2) castellated nut (3) - securing cotter pin I.1.7.578.03.1.EN PRONAR ZKP900D...
-
Page 86: Wheel Maintenance
• In case of mechanical damage sequence shown in figure - Sequence consult the nearest tyre service and of nut tightening check whether the tyre or wheel • Place lifting jack and lift rotary rake. defect requires replacement. • Dismount wheel. PRONAR ZKP900D... - Page 87 • at regular intervals (50 h). a torque spanner. Before commencing The inspection should be repeated individ- work, ensure that correct tightening torque ually if a wheel has been removed from value is set. the wheel axle. I.1.7.578.04.1.EN PRONAR ZKP900D...
-
Page 88: Inspection Of Connection Plugs And Sockets
Figure 5.5 Machine’s connections (2) electrical plug (3) hydraulic plug elements). Each time before hitching the machine, in- spect technical condition and cleanness of connectors and sockets in tractor. If nec- essary, clean or repair tractor sockets. I.1.7.578.05.1.EN 5.10 PRONAR ZKP900D... -
Page 89: Inspection Of Protective Shields
PTO shafts and their shields. • If necessary, tighten the bolt connec- PROCEDURE • Check the protective shields for com- tions fixing the shields. pleteness and correct mounting. • Visually inspect technical I.1.7.578.06.1.EN PRONAR ZKP900D 5.11... -
Page 90: Operate Transmission
(2). CHECK OIL LEVEL • If necessary unscrew plug (1) and • Set the machine on a hard and level add oil to the required level. Tighten surface. the plug • Unscrew inspection plug (2). 5.12 PRONAR ZKP900D... - Page 91 Figure 5.7 Rotor transmission (1) adjusting bolt grease nipple (2) working mode change lever grease nipple Lubricate the rake’s bevel gears with gear oil SAE 90 EP (API GL-5 SAE 80W/90) adding 1.1 litres for each one. I.1.7.578.07.1.EN PRONAR ZKP900D 5.13...
-
Page 92: Check And Replace Springtines
• Install bolt, raking spring safeguard and angle section. Tighten the nuts using the correct tightening torque according to table Tightening torque for nut and bolt connections. Table 5.3. Springtine Name Part number Quantity Springtine 178N-02010300 I.1.7.578.08.1.EN 5.14 PRONAR ZKP900D... -
Page 93: Maintenance Of Electrical System And Warning Elements
All electrical system • Check completeness of all reflectors. repairs must be performed only by suitably qualified personnel. • Before driving on to public road, check that the tractor is equipped with a warning reflective triangle. I.1.7.578.09.1.EN PRONAR ZKP900D 5.15... -
Page 94: Hydraulic System Maintenance
"droplets" stop using the ma- atomised (oil vapour), or in the case of fire chine until faults are remedied. during which toxic compounds may be If an oil leak is found on hydraulic con- released. nections, tighten the connections. If this 5.16 PRONAR ZKP900D... - Page 95 10 (3/8”) 50÷70 M22x1,5 | M24x1,5 | M26x1,5 13 (1/2”) 50÷70 M26x1,5 | M27x1,5 | M27x2 16 (5/8”) 70÷100 M30x1,5 | M30x2 | M33x1,5 20 (3/4”) 70÷100 M38x1,5 | M36x2 25 (1”) 100÷150 M45x1,5 32 (1.1/4”) 150÷200 I.1.7.578.10.1.EN PRONAR ZKP900D 5.17...
-
Page 96: Replace Hydraulic Lines
4 years regardless of their technical Flexible hydraulic lines must be replaced every 4 years due to their working characteristics and mate- condition. This should be done in spe- rial (ageing, high pressure, variable loads). cialised workshops. I.1.7.578.11.1.EN 5.18 PRONAR ZKP900D... -
Page 97: Lubrication
After careful washing and inspection, mount lubricated elements. If necessary, bearing and seals should be replaced with new parts. Lubri- cation of half axle bearings shall be per- formed at least once in 2 years or every PRONAR ZKP900D 5.19... - Page 98 Extendible arms slide surface Extension cylinder pin 120H Load-bearing cylinder pin Connector and forming shield arm pin Adjustment bolt (threaded) Axle system guide sleeve Adjustment bolt (operating mode change lever) Hitch pin Bearing assembly PTO shafts * 5.20 PRONAR ZKP900D...
- Page 99 Item Symbol Description machine general-purpose grease (lithium, alkaline), Grease for heavily loaded elements with addition of MoS or graphite anticorrosion preparation in aerosol ordinary machine oil, silicon grease in aerosol SAE 90EP (80W90 GL-5) transmission oil . PRONAR ZKP900D 5.21...
- Page 100 Section 5 Maintenance 578-I.08-1 Figure 5.9 Rotary rake lubrication points 5.22 PRONAR ZKP900D...
- Page 101 Maintenance Section 5 578-I.09-1 Figure 5.10 Rotary rake lubrication points I.1.7.578.12.1.EN PRONAR ZKP900D 5.23...
-
Page 102: Tightening Bolt Connections
569-I.09-1 Figure 5.11 Bolt with metric thread (1) resistance class (d) thread diameter Table 5.8. Tightening torque for nut and bolt connections 10.9 THREAD MARKING [mm] TIGHTENING TORQUE [Nm] 1,050 1,150 1,650 1,450 2,100 1,450 2,100 I.1.7.578.13.1.EN 5.24 PRONAR ZKP900D... -
Page 103: Troubleshooting
Install springtines or replace worn springtines Incorrect raking height Set raking height according to sec- tion Setting raking height Damaged spring- Raking assemblies arms hight Set raking height according to sec- tines set to low tion Setting raking height I.1.7.578.14.1.EN PRONAR ZKP900D 5.25... - Page 104 Section 5 Maintenance 5.26 PRONAR ZKP900D...
-
Page 105: First Assembly Manual
FIRST ASSEMBLY MANUAL... -
Page 106: Preparation
First assembly manual PREPARATION Due to its large overall dimensions, IMPORTANT Pronar ZKP900D rotary rake is partially Do NOT perform assembly work under raised and dismantled for shipment and transport on unsupported machine. Exercise due caution while assembling the machine. -
Page 107: Turning The Wheels
180° - (B), screw (4) and washer (5). • attach drawbar (6) to axle steering 578-Z1.01-1 Figure A.1 Turning the wheels (1) axle steering knuckle (2) axle lock (3) link pin (4) bolt (5)- spring washer (6) drawbar Z1.1.7.578.02.1.EN PRONAR ZKP900D... -
Page 108: Installing The Warning Boards
(4)- spring washer For shipment and transport on a motor ve- hicle, the warning boards are turned and bolted to axle system bracket. Dismantle the boards, turn them outwards by 180° and attach according to figure (A.2). Z1.1.7.578.03.1.EN PRONAR ZKP900D... -
Page 109: Installing The Raking Assemblies
578-Z1.03-1 Figure A.3 Installing the raking assembly (1) bolt (2) self locking nut (3) washer (4)- spring washer (5) shaft with overload clutch (6) raking assembly gear shaft (7) band clip (8) overload clutch Z1.1.7.578.04.1.EN PRONAR ZKP900D... - Page 110 Annex A First assembly manual PRONAR ZKP900D...
Need help?
Do you have a question about the ZKP900D and is the answer not in the manual?
Questions and answers