Table of Contents
Advertisement
Quick Links
PRONAR SP. Z O.O.
17-210 NAREW, UL. MICKIEWICZA 101A, WOJ. PODLASKIE
TEL.:
+48 085 681 63 29
+48 085 681 63 81
FAX:
+48 085 681 63 83
USER MANUAL
AGRICULTURAL TRAILER
PRONAR T185/1
ENGLISH VERSION OF THE ORIGINAL USER MANUAL
PUBLICATION NO: 622.00.UM.1A.EN
ISSUE: 1A
03-2020
+48 085 681 64 29
+48 085 681 63 82
+48 085 682 71 10
www.pronar.pl
EN
Advertisement
Table of Contents

Related Manuals for PRONAR T185/1


Summary of Contents for PRONAR T185/1
- Page 1 PRONAR SP. Z O.O. 17-210 NAREW, UL. MICKIEWICZA 101A, WOJ. PODLASKIE TEL.: +48 085 681 63 29 +48 085 681 64 29 +48 085 681 63 81 +48 085 681 63 82 FAX: +48 085 681 63 83 +48 085 682 71 10 www.pronar.pl...
- Page 3 INTRODUCTION...
-
Page 4: Introduction
The User Manual are intended for the end user. For this reason, some required maintenance is listed in the inspection tables but the procedure is not described in this publication. To perform them, call the manufacturer’s authorized service centre.. U.10.1.EN PRONAR T185/1... -
Page 5: Introduction
ADVICE Additional instructions contained in the ADVICE manual describe useful information on the operation of the machine and are marked with a frame with the word ADVICE U.02.1.EN PRONAR T185/1... -
Page 6: Determination Of Directions In The Manual
(operator facing the mechanism). Right side - the side on the right hand of Turn left - turn the mechanism counter cloc- the observer facing the machine in the kwise (operator facing the mechanism). U.03.1.EN PRONAR T185/1... -
Page 7: Control Of The Machine After Delivery
In case of any irregularities found, report • Check the condition of the tires on them directly to the seller to remove the the road wheels and the air pressure defects. in the tires. U.11.2 EN PRONAR T185/1... -
Page 8: First Use Of The Machine
• Connect the brake, electrical and hy- • Make sure that the pneumatic, hy- draulic system lines. draulic and electrical connections on • Connect the control panel. the agricultural tractor comply with • Raise support transport PRONAR T185/1... - Page 9 • excessive noise and unnatural noises the repair. from moving parts rubbing, After completing the test drive, check the • leakage and pressure drop in the tightness of the wheel nuts. U.12.3.EN PRONAR T185/1...
- Page 10 Introduction PRONAR T185/1...
-
Page 13: Table Of Contents
Table of contents INTRODUCTION INTRODUCTION _______________________________________________________________________________________ 2 SYMBOLS USED IN THE MANUAL _______________________________________________________________________ 3 DETERMINATION OF DIRECTIONS IN THE MANUAL ________________________________________________________ 4 CONTROL OF THE MACHINE AFTER DELIVERY ____________________________________________________________ 5 FIRST USE OF THE MACHINE ___________________________________________________________________________ 6 GENERAL INFORMATION IDENTIFICATION ___________________________________________________________________________ 1.2 IDENTIFICATION OF THE AXLE ______________________________________________________________ 1.3 INTENDED USE ___________________________________________________________________________ 1.4 REQUIREMENTS __________________________________________________________________________ 1.7... - Page 14 4.11 CLEANING OF THE TRAILER ________________________________________________________________ 4.33 4.12 STORAGE ________________________________________________________________________________ 4.35 PERIODIC INSPECTIONS GENERAL INFORMATION ___________________________________________________________________ 5.2 SCHEDULE OF PERIODIC INSPECTIONS ______________________________________________________ 5.3 PREPARATION OF TRAILER _________________________________________________________________ 5.6 THE WHEEL PRESSURE INSPECTION ________________________________________________________ 5.7 AIR TANK DRAINAGE ______________________________________________________________________ 5.8 PLUGS AND CONNECTION SOCKETS INSPECTION _____________________________________________ 5.9 GUARDS INSPECTION ______________________________________________________________________ 5.10 CHECKING THE TRAILER BEFORE DRIVING ___________________________________________________ 5.11 MEASUREMENT OF AIR PRESSURE, TIRES AND RIMS CHECK ___________________________________ 5.12...
-
Page 17: General Information
GENERAL INFORMATION... -
Page 18: Identification
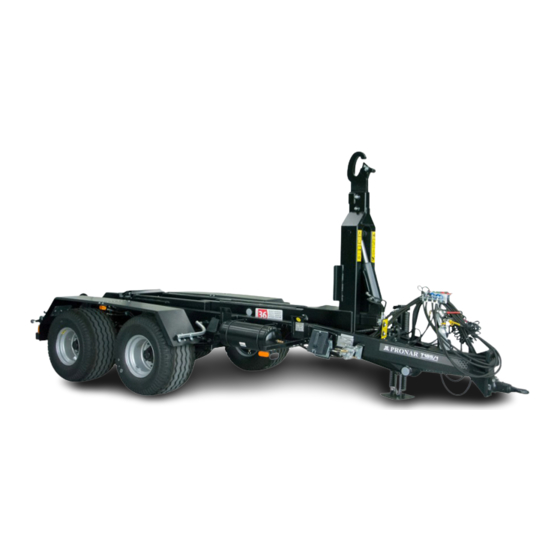
Chapter 1 General information 1.1 IDENTIFICATION S Z B 1 8 5 1 X X The PRONAR T185/1 agricultural trailer has been marked with a name plate (1) lo- SZB1851XXL1X00010 cated on the side surface of the container socket and the serial number (2) stamped on the right drawbar longitudinal member. -
Page 19: Identification Of The Axle
11800 11000 10000 ID2- 3013P BLH07213B BLH07313B UTAC25 UTAC40 12900 12000 11000 ID3- 7848 PRONAR ID4- 10600 10000 9000 120252-19-TAC Sp. z o.o. 622-E.02-1 Figure 1.2 Axis identification (1) Driving axle (2) Name plate (3) Axle serial number E.3.4.622.02.1.EN PRONAR T185/1... -
Page 20: Intended Use
The type of cargo carried depends on the Maximum overall length 4 900 intended use of the container. Maximum overall width W 2 550 Using the trailer in a different way than Maximum overall height H 2 000 Figure 1.3 Container size PRONAR T185/1... - Page 21 • to carry loads that affect uneven country in which the trailer is used, loads axle load and overload, • become acquainted with the contents • to transport unloaded loads that can PRONAR T185/1...
- Page 22 Chapter 1 General information change their position in the container comply with manufacturer’s while driving, requirements. • connecting containers that do not E.3.4.622.03.1.EN PRONAR T185/1...
-
Page 23: Requirements
Oil demand Electrical system Electrical system voltage Connection socket 7-poles, ISO 1724 Connection socket 3-poles Tractor hitches Type Lower transport hitch Minimum vertical load capacity of the hitch 2 000 Other requirements Minimal tractor power requirement kW/KM 57.3/78 E.3.4.622.04.1.EN PRONAR T185/1... -
Page 24: Equipement
Rear pull out manually ● Metal mudguards ● Aluminium mudguards ● Plastic mudguards ● Hydraulic swing system with manual hook lift / tipper ● Suspension lock hydraulic system ● Hydraulic installation of the hook frame ● Mechanical container lock ● PRONAR T185/1... - Page 25 Some standard equipment items that are listed in the table may not be included in the trailer supplied. This is due to the possibility of ordering a new machine with a different set - optional equipment, re- placing the standard equipment. Tire information is provided at the end of the publication in ANNEX A. E.3.4.622.05.1.EN PRONAR T185/1...
-
Page 26: Warranty Conditions
• making arbitrary changes in the ma PRONAR Sp. z o.o. in Narew guarantees the chine design, smooth operation of the machine when used the user loses the warranty. The user is ob-... -
Page 27: Transport
The machine should be mounted firmly on Chocks or other components without the platform of the vehicle using straps, sharp edges should be placed under the PRONAR T185/1 1.11... - Page 28 The fastening means must be selected ac- cording to the manufacturer’s instructions. DANGER When transporting independently, the operator sho- uld read the contents of these User Manual and ob- serve the recommendations contained therein. E.3.4.622.07.1.EN PRONAR T185/1 1.12...
-
Page 29: Environmental Hazard
The trailer’s hydraulic system is filled with L-HL 32 Oil which has been used up or is unsuitable Lotos oil. for further use due to the loss of its properties is recommended to be stored E.3.4.622.08.1.EN PRONAR T185/1 1.13... -
Page 30: Withdrawal
Avoid oil contact with skin. Do not allow oil to leak. In the event of parts being replaced, worn or damaged parts should be taken E.3.4.622.09.1.EN PRONAR T185/1 1.14... -
Page 31: Safety Of Use
SAFETY OF USE... -
Page 32: Basic Safety Rulse
• Before starting the trailer, make sure trailer. that it is properly prepared for work, first • Before starting work, become familiar of all in terms of safety. F.3.4.622.01.1EN PRONAR T185/1... -
Page 33: Safety During Machine Aggregation
• Take special care when connecting when the suspension lock cylinders the machine. are extended. • No one may be between the trailer F.3.4.622.02.1.EN PRONAR T185/1... -
Page 34: Pulling In And Removing The Container
Otherwise, the container side tachable containers. members may not fit in the rollers • Use extreme caution when working of the trailer. When pulling the near power lines. F.3.4.622.03.1.EN PRONAR T185/1... -
Page 35: Loading And Unloading Of The Container
• It is forbidden to jerk the trailer forward only be carried out when the trailer is in the event that the volumetric load placed on level and hard ground. The or hard-pouring load has not been tractor and trailer must be placed for unloaded. PRONAR T185/1... - Page 36 Chapter 2 Safety of use • Do not lift the container if there is any container is empty. danger of the trailer swing over. • Do not drive with the container raised. • After unloading, make sure the F.3.4.622.04.1.EN PRONAR T185/1...
-
Page 37: Safety Rules For Operation Of Hydraulic And Pneumatic Systems
• Rubber hydraulic conduits must be a doctor immediately. Hydraulic oil replaced every 4 years regardless of can penetrate the skin and cause in- their technical condition. fection. In the event of contact of oil F.3.4.622.05.1.EN PRONAR T185/1... -
Page 38: Rules For Safe Technical Service
• Repair, maintenance and cleaning • Any modification of the trailer re- work should only be carried out with leases PRONAR Narew from any lia- the tractor engine switched off and bility for resulting damage or injury. the ignition key removed. Tractor and •... - Page 39 Manufacturer. plastic). If there is a risk of ignition or • The trailer may only be towed if the damage, they must be removed or chassis, lighting and braking systems covered with non-flammable material are functional. F.3.4.622.06.1.EN PRONAR T185/1...
-
Page 40: Rules For Move On Public Roads
If the journey is carried drawbar eye affects the steering of the out with a container, the sign indicating agricultural tractor. slow moving vehicles should be placed • When transporting the container, the on the rear wall of the container. PRONAR T185/1 2.10... - Page 41 • When moving the trailer on public roads, • Exceeding the carrying capacity may the rear protective beam may not be lead to damage to the machine, loss hidden deeper than 375mm under the of stability and cause a hazard while container. F.3.4.622.07.1.EN PRONAR T185/1 2.11...
-
Page 42: Tires
Each time, repeat all opera- increases due to temperature. tions if the wheel was disassembled. • Tire valves should be protected with Wheel nuts should be tightened in ac- suitable caps to avoid penetration of cordance with the recommendations dirt. F.3.4.622.08.1.EN PRONAR T185/1 2.12... -
Page 43: Working With Pto Shaft
The tractor must be secured against respect to each other. rolling away with the parking brake. PRONAR T185/1 2.13... - Page 44 PTO shaft can cause • Telescopic pipes must overlap at serious injury. least 1/3 of their length during shaft • It is forbidden to walk over and under operation. F.3.4.622.09.1.EN PRONAR T185/1 2.14...
-
Page 45: Description Of Residual Risk
Safety of use Chapter 2 2.10 DESCRIPTION OF RESIDUAL RISK Pronar Sp. z o. o. o. in Narew made every position. effort to eliminate the risk of an accident. • Residual risk can be reduced to However, there is some residual risk that... -
Page 46: Information And Warning Stickers
When cle- aning the screen, do not use solvents that may damage the label coating and do not direct a strong water jet. Other information stickers on the system connection cables are presented in chapter 4. PRONAR T185/1 2.16... - Page 47 Information sticker. Unlocking the middle frame. Position II. 104N-00000008 Container disconnection/attachment. Cable function sticker 622N-03000001 Information sticker. Information about the currently set trailer function: 385N-03000002 - „hook” - „trailer”. 622N-00000001 (L) „Machine type” sticker (left and right). 622N-00000002 (R) PRONAR T185/1 2.17...
- Page 48 Keep a safe distance from power lines when swing or connec- 58RPN-00.00.020 ting and/or disconnecting the container. Tire pressure.* Warning sticker. Danger due to rotating PTO shaft. 78RPN-00.00.00.05 Permitted PTO shaft speed 75RPN-00.00.00.04 * the pressure depends on the used tires PRONAR T185/1 2.18...
- Page 49 Safety of use Chapter 2 Figure 2.2 Arrangement of information and warning stickers F.3.4.622.11.1.EN PRONAR T185/1 2.19...
- Page 50 Chapter 2 Safety of use PRONAR T185/1 2.20...
-
Page 51: Construction And Operation
CONSTRUCTION AND OPERATION... -
Page 52: Technical Features
Permissible vertical load on the drawbar eye 2 000 Oil demand Nominal pressure of the installation Electrical system voltage Minimal tractor power requirement kW/KM 57.3/78 Tire information is provided at the end of the publication in APPENDIX A. G.3.4.622.01.1.EN PRONAR T185/1... -
Page 53: General Construction
(3) straight hydraulic support (4) handbrake mechanism (5) side underrun protection (6) tool box (7) wheel chock (8) tandem suspension (9) road axle (10) rear beam (11) beam bolt (12) lighting set (13) mudguard (14) swing axle (15) guide roller PRONAR T185/1... - Page 54 (11). bystanders. About this threat is indicated by a sticker placed on the hook frame - figure (3.3) Complete lighting beams (12) were mo- unted on both sides. The combined lamps PRONAR T185/1...
- Page 55 The hook Drawings describing the construction of the trailer frame is controlled irrespective of the lever show an example equipment configuration. Deta- iled information on all options can be found in the position (1). Equipment chapter. PRONAR T185/1...
- Page 56 Rozdział 3 Construction and operation 622-G.04-1 Figure 3.5 Raising of the central frame (1) locking lever (2) information sticker 622-G.03-1 Figure 3.4 Raising of the swing frame (1) locking lever (2) information sticker G.3.4.622.02.1.EN PRONAR T185/1...
-
Page 57: Main Break
(C) ‘FULL LOAD’ Position (2) used in pneumatic systems adjusts the braking force depending on the setting. Switching to the appropriate operating mode is done manually by the machine operator before starting the journey using the lever (4). PRONAR T185/1... - Page 58 Rozdział 3 Construction and operation 622-G.05-1 Figure 3.7 Diagram of a 2-wire pneumatic braking system 622-G.06-1 Figure 3.8 Diagram of the ALB 2-wire pneumatic braking system 622-G.07-1 Figure 3.9 Hydraulic braking system diagram G.3.4.622.03.1.EN PRONAR T185/1...
-
Page 59: Parking Brake
The steel cable (3) run when parked. through the rollers (5) is connected to the G.3.4.622.04.1.EN PRONAR T185/1... -
Page 60: Hydraulic System
622-G.10-1 Figure 3.11 Hydraulic tipping system diagram, suspension lock and hook frame (1) tipping cylinder (2) suspension lock cylinders (3) hook frame cylinder (4) mechanism for work functions switching PRONAR T185/1 3.10... - Page 61 Figure 3.13 Diagram of a hydraulic system with a PTO drive with its own oil tank (1) tipping cylinder (2) suspension lock cylinders (3) hook frame cylinder (4) container lock cylinder (5) oil tank (6) pump (7) limit valve (8) sensor - limit switch Figure 3.14 Remote control PRONAR T185/1 3.11...
- Page 62 A pair of hydraulic outlets on the tractor are needed for operation. 622-G.16-1 Figure 3.15 Hydraulic outlets on the hook (1) quick release coupling - socket, (2) hydraulic hose G.3.4.622.05.1.EN PRONAR T185/1 3.12...
-
Page 63: Electric Lighting System
Rozdział 3 3.6 ELECTRIC LIGHTING SYSTEM 622-G.13-1 Figure 3.16 Arrangement of lighting system elements (1) front position lamp (2) rear position lamp (3) side position lamp (4) rear combination lamp (5) license plate lamp (6) seven-pole socket PRONAR T185/1 3.13... - Page 64 The arrangement of electrical components necting the hook trailer’s electrical system of the lighting system in the standard to the tractor should be done with a suitable version is shown in Figure (3.16). connecting cable, which is included in the PRONAR T185/1 3.14...
- Page 65 Rozdział 3 Biały - White Czarny - Black Czerwony - Red Żółty - Yellow Żółty Czarny Czerwony Czarny Biały Czarny Biały Żółty 622-G.15-1 Figure 3.18 Flashlights (1) warning lamp (2) warning lamp harness (3) seven-pole socket G.3.4.622.06.1.EN PRONAR T185/1 3.15...
- Page 66 Rozdział 3 Construction and operation PRONAR T185/1 3.16...
-
Page 67: Terms Of Use
TERMS OF USE... -
Page 68: Handling Of Equipment/Components
• Insert and secure the bolt on the other side of the trailer. CAUTION Check the security of the pins before each trip. 622-H.01-1 Figure 4.1 Rear protection (1) pin holder (2) pin (3) socket plate (4) beam holder PRONAR T185/1... - Page 69 (7). (7) a holder • Insert the pin and secure it. Remember! The pin bolt must LOWERING be between the plate and the • Hold the support foot by the handle telescope. (7) and remove the bolt (6). PRONAR T185/1...
- Page 70 • Turn the crank clockwise to lower the support foot to contact the ground. • Shift the support gear to a lower gear. To do this, move the crank in the direction (A). • Set the support at the desired height. PRONAR T185/1...
- Page 71 - open. • Using the tractor’s external hydraulic lever set the support to the desired height. • Turn the shut-off valve to the Z po- sition - closed. 622-H.03-1 Figure 4.3 Hydraulic support (1) support (2) shut-off valve PRONAR T185/1...
- Page 72 Remember! The spring bolt of the pin must be between the metal plate and the body. LOWERING When lowering the support, proceed in the reverse order to that described above. 622-H.04-1 Figure 4.4 Telescopic support (1) Support foot (2) bolt (3) handle PRONAR T185/1...
- Page 73 (A) shield in transport position wered and locked in the down position. (B) shield in the raised position If this is not necessary, do not leave the covers in the (C) hole for shield lock pin raised position. H.3.4.622.01.1.EN PRONAR T185/1...
-
Page 74: Connecting And Disconnecting Of The Trailer
- Figure (4.6). 622-H.07-1 • Make sure that blocking wedges Figure 4.7 Locking wedges are placed under one trailer wheel - Figure (4.7). • Position agricultural tractor directly in front of the drawbar eye. PRONAR T185/1... - Page 75 CONNECTING THE TRAILER TO THE TRACTOR HITCH • everse the tractor and connect the trailer to the appropriate hitch. • If the trailer is equipped with a tele- scopic support, the machine may only be aggregated with a tractor PRONAR T185/1...
- Page 76 (applies to trailer version with sockets. hydraulic braking system). The connecting cables have been marked with red plugs Return line with check valve should be connected to the tractor’s drain connection „Free sink”. If the tractor has no sink PRONAR T185/1 4.10...
- Page 77 If the tractor does not have such or the sockets are of a different type then assembly should be carried out by a qualified person in accordance with the recommendations of the tractor manufacturer. PRONAR T185/1 4.11...
- Page 78 • Immobilize the trailer with parking (1) - Figure (4.12). brake. • Release the drawbar eye, start the • Place blocking wedges under one tractor and drive away with the tractor. wheel of the trailer, one in the rear H.3.4.622.02.1.EN PRONAR T185/1 4.12...
-
Page 79: How To Connect And Disconnect The Second Trailer
• Immobilize tractor and trailers with the second trailer so that the ma- parking brake. chines can be coupled. • Switch off the tractor engine. • When reversing the tractor drive the • Close the tractor cabin and secure it PRONAR T185/1 4.13... - Page 80 • Unlock the coupling bolt on the first gine running. trailer. Remove the bolt and drive the tractor away. H.3.4.622.03.1.EN PRONAR T185/1 4.14...
-
Page 81: Hydraulic System Operation
• For remote control, turn the switch (1) control this circuit - compare Figure (4.13). to the ON position. and then control the trailer operation by means of PRONAR T185/1 4.15... - Page 82 Rozdział 4 Terms of use 622-H.13-1 Figure 4.13 Remote control of trailer operation (1) power switch (2) suspension lock control (3) container lock control (4) hook frame control (5) tipper frame control (6) plug (7) distributor sticker H.3.4.622.04.1.EN PRONAR T185/1 4.16...
-
Page 83: Pulling In The Container
• Make sure the container lock is After moving the lever to position (II) make sure that the locking pin (2) correctly secures the lever against retracted. uncontrolled movement. • Place the tractor and trailer in front of PRONAR T185/1 4.17... - Page 84 Figure 4.17 Container pulling are above the rollers, the middle frame folding can be resumed frame. • After folding the middle frame to its • Insert suspension interlock original position, fully fold the hook cylinders. PRONAR T185/1 4.18...
- Page 85 Tractor short container, make sure that the container rollers retraction and retraction of the container do not come in front of the trailer rollers (fenders can be damaged). should be performed at the same time with H.3.4.622.05.1.EN PRONAR T185/1 4.19...
-
Page 86: Removing The Container
• Lock the suspension using the su- spension interlock system cylinders. • Fold the hook frame out completely 622-H.14-1 Figure 4.19 Setting the trailer’s operating mode by moving the container backwards. (1) lever (2) interlocking • Swing the central frame backwards PRONAR T185/1 4.20... - Page 87 • Insert suspension interlock not stick to the trailer rollers. If cylinders. so, stop swinging the middle • Fit the slow-moving vehicle warning frame and move the hook frame sign. forward, thus lifting the front of H.3.4.622.06.1.EN PRONAR T185/1 4.21...
-
Page 88: Container Loading
(4.1). Therefore, pay special attention not to overload the trailer. Regardless of the type of transported load, the user is obliged to secure it in such a way that the load cannot move freely and cause contamination of the road. PRONAR T185/1 4.22... - Page 89 1 350 – 1 650 wet sand 1 700 – 2 050 solid bricks 1 500 – 2 100 brick blocks 1 000 – 1 200 stone 1 500 – 2 200 soft wood 300 - 450 hardwood 500 - 600 PRONAR T185/1 4.23...
- Page 90 110 - 150 cereal mass cut on a volume trailer 35 - 75 grain mass on a collecting trailer 60 - 100 green forage 28 - 35 green fodder cut on a volume trailer 150 - 400 PRONAR T185/1 4.24...
- Page 91 750 - 850 mustard 600 - 700 650 - 750 lentil 750 - 860 bean 780 - 870 barley 600 - 750 Clover 700 - 800 grass 360 - 500 maize 700 - 850 wheat 720 - 830 PRONAR T185/1 4.25...
- Page 92 640 - 760 Other: dry soil 1 300 – 1 400 wet soil 1 900 – 2 100 fresh peat 700 - 850 gardening land 250 - 350 Source: „Technologia prac maszynowych w rolnictwie”, PWN, Warsaw 1985 H.3.4.622.07.1.EN PRONAR T185/1 4.26...
-
Page 93: Transport Of Load
„tipper” function in order to block lizing it with the parking brake and the container. placing it under the wheel chocks. • When transporting the container, the Leaving an unsecured trailer is container lock must be locked which prohibited. PRONAR T185/1 4.27... - Page 94 Figure 4.22 Braking force regulator the center of gravity of the laden (1) regulator (2) NO LOAD position trailer adversely affects driving safety. (3) HALF-LOAD position Driving near the edges of ditches (4) FULL LOAD position or channels is dangerous because PRONAR T185/1 4.28...
- Page 95 - Figure (4.22). of the lighting beam profiles with star • When driving the trailer on roads nuts. H.3.4.622.08.1.EN PRONAR T185/1 4.29...
-
Page 96: Unloading
(1) in position (I) „tipper” - Figure container lock). (4.23). In a system with manual hook • Raise the swing frame with the con- lift/tipper switch, pull back the tainer and unload the container. PRONAR T185/1 4.30... - Page 97 • Close and secure rear wall of container to the bumper does not container. exceed 375mm. • Slide hydraulic cylinder suspension • Secure the container with the con- blocks maximally upwards. tainer lock. • Extend and lock the rear beam so H.3.4.622.09.1.EN PRONAR T185/1 4.31...
-
Page 98: Rules Of The Tires Using
MAINTENANCE chapter. what comes first. • Regularly check and maintain proper • Avoid damaged surfaces, sudden and pressure in tires as recommended in variable maneuvers, and high speeds the instructions (especially after a long when turning. H.3.4.622.10.1.EN PRONAR T185/1 4.32... -
Page 99: Cleaning Of The Trailer
Refer to the instructions for using cleaning deter- formation and warning decals, rating gents and preservatives. plate, connectors conduits, trailer When washing with detergents, wear suitable pro- tective clothing and eye protection. lubrication points, etc. High pressure PRONAR T185/1 4.33... - Page 100 • After washing, wait for the trailer to creases. Elements made of rubber are dry and then grease all control points recommended to be maintained with as recommended. Wipe off excess the help of specialized preparations grease or oil with a dry cloth. H.3.4.622.11.1.EN PRONAR T185/1 4.34...
-
Page 101: Storage
• PTO shafts should be stored in a ho- • In the event of a longer stop, it is rizontal position. H.3.4.622.12.1.EN PRONAR T185/1 4.35... - Page 102 Rozdział 4 Terms of use PRONAR T185/1 4.36...
-
Page 103: Periodic Inspections
PERIODIC INSPECTIONS... -
Page 104: General Information
Service Points (APSiO). After the warranty expires, it is recom- In the event of unauthorized repairs, mended that inspections be carried out by changes to factory settings or activities specialized repair workshops. which were not considered to be possible I.3.4.622.01.1.EN PRONAR T185/1... -
Page 105: Schedule Of Periodic Inspections
Each time before carrying out this inspection, Maintenance Operator a daily inspection, inspection every 1 month of trailer use and inspection every 3 months should be performed. Maintenance Serwis Inspection carried out every 4 years of trailer use (1) - post-warranty service PRONAR T185/1... - Page 106 Pneumatic system control • 5.20 See table: Trailer lubrication schedu- Lubrication 5.25 See chapter: Checking screw con- Checking screw connections 5.21 nections • Replacement of hydraulic hoses 5.30 Replacement of limit valves and limit swit- • 5.32 ches PRONAR T185/1...
- Page 107 Piston rod stroke in pneumatic and hydraulic systems 25 - 45 mm Minimum brake lining thickness 5 mm With the brake de- Angle between the spreader axis and the fork pressed Parking brake Permitted parking brake cable clearance 20 mm I.3.4.622.02.1.EN PRONAR T185/1...
-
Page 108: Preparation Of Trailer
Make sure the trailer will not roll measuring the play of the axle be- during the inspection. arings. Take special care then • W If the wheel needs to be raised during the inspection, place the I.3.4.622.03.1.EN PRONAR T185/1... -
Page 109: The Wheel Pressure Inspection
622-I.02-1 Incorrect tire pressure is also a reason for faster tire Figure 5.2 Trailer wheel wear. (1) sticker (2) valve I.3.4.622.04.1.EN PRONAR T185/1... -
Page 110: Air Tank Drainage
• If the valve stem does not want to 622-I.03-1 return to its position, wait until the Figure 5.3 Air tank (1) drain valve (2) air tank tank is empty. Then unscrew and clean or replace the valve with a new one. I.3.4.622.05.1.EN PRONAR T185/1... -
Page 111: Plugs And Connection Sockets Inspection
Each time before connecting the machine, check the technical condition and degree of cleanliness of connections and sockets on the agricultural tractor. In case of ne- cessity clean or repair tractor sockets. 622-I.04-1 Figure 5.4 Examples of trailer connections I.3.4.622.06.1.EN PRONAR T185/1... -
Page 112: Guards Inspection
• If necessary, tighten the screw con- Figure 5.5 Trailer guards (1) side guard (2) axle mudguards nections of the mudguards. (3) steel guard (4) plastic guard (5) rear beam (6) beam bolt (7) rear light cover I.3.4.622.07.1.EN PRONAR T185/1 5.10... -
Page 113: Checking The Trailer Before Driving
In winter, it may be necessary to trailer air tank is required. thaw the actuator and remove ac- • Regularly check the correct operation of cumulated water through the vent other systems during trailer operation. holes. If any damage is found, I.3.4.622.08.1.EN PRONAR T185/1 5.11... -
Page 114: Measurement Of Air Pressure, Tires And Rims Check
Incorrect tire pressure is also a reason for faster tire replacement. wear. rims should checked I.3.4.622.09.1.EN PRONAR T185/1 5.12... -
Page 115: Cleaning Of The Air Filters
Installation should • Wash the filter element and body be in reverse order. I.3.4.622.10.1.EN PRONAR T185/1 5.13... -
Page 116: Kontrola Zużycia Okładzin Szczęk Hamulcowych
• The brake shoes should be replaced Gmin 5mm if the thickness of the brake lining is less than 5 mm. • Check the remaining linings for wear. 526-I.09-1 Figure 5.9 Checking the brake lining thickness (1) plug (2) brake lining I.3.4.622.11.1.EN PRONAR T185/1 5.14... -
Page 117: Inspection Of Wheel Axle Bearings
(e.g. play on the or cleaned and regreased. spring pins, etc.). • When checking bearings, make • Check the technical condition of the sure that any perceptible looseness hub cover, replace if necessary. I.3.4.622.12.1.EN PRONAR T185/1 5.15... -
Page 118: Mechanical Brakes Inspection
• Measure the distance Y with the piston rod stroke exceed the range tractor brake pedal pressed. given in table (5.3), the brake should • Calculate the difference in distance be adjusted. X-Y (piston rod stroke). I.3.4.622.13.1.EN PRONAR T185/1 5.16... -
Page 119: Cleaning Of The Drainage Valve
• Clean the valve, blow with com- pressed air. • Replace the gasket. • Screw in the valve, fill the tank with air, check the tank for leaks. 622-I.07-1 Figure 5.12 Air tank (1) drainage valve (2) tank I.3.4.622.14.1.EN PRONAR T185/1 5.17... -
Page 120: The Parking Brake Cable Inspection
• Tighten the cable (1) and tighten the If it is necessary to replace the brake cable, nuts (4) of the clamps. refer to the section Replacing the parking • Apply the parking brake and release brake cable. I.3.4.622.15.1.EN PRONAR T185/1 5.18... -
Page 121: Hydraulic System Inspection
• After completing the inspection, put with a damaged installation until the defect all cylinders to the rest position. is removed. If visible moisture appears on the cable I.3.4.622.16.1.EN PRONAR T185/1 5.19... -
Page 122: Pneumatic System Inspection
If air still connections and brake cylinders. leaks, replace the connector components • Repeat the system check with the or seals with new ones. tractor brake pedal depressed. The help of another person is required. I.3.4.622.17.1.EN PRONAR T185/1 5.20... -
Page 123: Inspection Of Screw Connections
1 650 During the daily inspection of the trailer 1 450 2 100 pay attention to loose connections and ti- ghten the connector if necessary. Replace lost items with new ones. D.3-1 Figure 5.14 Metric thread screw. PRONAR T185/1 5.21... - Page 124 The wheels should be tightened according steps should be repeated. to the following scheme: • after using the trailer for the first time (one-time inspection), • every 2-3 hours of driving during the first month of use, PRONAR T185/1 5.22...
- Page 125 Periodic inspections Chapter 5 HSCHEDULE OF SCREW CONNECTIONS TIGHTENING 622-I.10-1 Figure 5.16 Screw connection checkpoints PRONAR T185/1 5.23...
- Page 126 Suspension lock cylinder Brake cylinders Tool box bracket Bracket for underrun protection, mudguards. Hook Pin security Air tank mounting element Fastening the control valve, hydraulic distributor Regulator mounting element Frequency: H - hours, M - months I.3.4.622.18.1.EN PRONAR T185/1 5.24...
-
Page 127: Lubrication
D - working day (8 hours of trailer work), M - month After finishing washing wait until trailer is dry and then grease all inspection points according to re- commendations. Remove excess oil or grease with a dry cloth. PRONAR T185/1 5.25... - Page 128 Chapter 5 Periodic inspections Table 5.7. Trailer lubrication schedule Name Hub bearing (2 pieces in each hub) Expander shaft bushing Expander arm Spring leaves Sliding surface of the springs Spring pin Control arm pin PRONAR T185/1 5.26...
- Page 129 Periodic inspections Chapter 5 Name 8a Drawbar eye 8b Rotary drawbar 9a Hook latch pin The working surface of the front 10 Parking brake mechanism 11 Telescopic support with gear PRONAR T185/1 5.27...
- Page 130 Chapter 5 Periodic inspections Name Cylinder bearing (hook frame, mid- dle frame) 13 Guide roller left / right 14 Tipping axis 15 Hook frame rotation pin 16 Middle frame rotation pin PRONAR T185/1 5.28...
- Page 131 Periodic inspections Chapter 5 Name 17 Parking brake guide pins 18 Container lock actuator pin 19 Side slide I.3.4.622.19.1.EN PRONAR T185/1 5.29...
-
Page 132: Replacement Of Hydraulic Hoses
Chapter 5 Periodic inspections 5.20 REPLACEMENT OF HYDRAULIC HOSES Rubber hydraulic hoses should be re- technical condition. This activity should be placed every 4 years regardless of their entrusted to specialized workshops. I.3.4.622.20.1.EN PRONAR T185/1 5.30... -
Page 133: Inspection Of Signaling And Safety System
(2) turns high. Function switching is not on and the blockade retracts. possible. Movements of the hook frame • Switch the trailer to the „hooklift” and main cylinder are possible. function and check whether the I.3.4.622.21.1.EN PRONAR T185/1 5.31... -
Page 134: Replacement Of End Valves And Limit Switches
Periodic inspections 5.22 REPLACEMENT OF END VALVES AND LIMIT SWITCHES Limit valves and limit switches (sensors) operation should be entrusted to specia- should be replaced every 4 years, regar- lized services. dless of their technical condition. This I.3.4.622.22.1.EN PRONAR T185/1 5.32... -
Page 135: Technical Service
TECHNICAL SERVICE... -
Page 136: Mounting And Dismounting Of The Wheel
If necessary, the hub. degrease the thread. • Lower the trailer, tighten the nuts ac- Do not lubricate the threads of cording to the recommended torque the nut and stud. and the order given. J.3.4.622.01.1.EN PRONAR T185/1... -
Page 137: The Hook Position Adjusting
(2) screw connection of the hook • Move the hook to the desired position. (3) container seating plane • Install the screws. • Tighten the nuts with the correct torque screw connections Tightening according to the chapter Checking torques for screw connections. J.3.4.622.02.1.EN PRONAR T185/1... -
Page 138: Parking Brake Cable Replacing
• Install pins and new securing pins. the thimble. • Adjust the parking brake cable tension. of the cables, make adjustments if • After the first brake application, check necessary. the tension and the end condition J.3.4.622.03.1.EN PRONAR T185/1... -
Page 139: Radjustment Of Axle Bearing Clearance
Figure 6.4 The rule for bearing clearance adjustment (1) hub cap (2) cotter pin (3) nut (4) tapered roller bearing CAUTION Adjustment of bearing looseness may be performed only when the trailer (without load) is connected to the tractor.. J.3.4.622.04.1.EN PRONAR T185/1... -
Page 140: Brakes Adjustment
(A) mark on piston rod in uninhibited position ground stroke is outside the correct (B) mark on piston rod in braked position (C) arm position in the uninhibited position working range - Table (5.3), adjust (D) arm position in full braking position the expander lever. PRONAR T185/1... - Page 141 • If any drum is too hot, adjust the brake • Turn the adjusting screw (4) cloc- and re-adjust, conduct a test drive. kwise to make one or two clicks in the adjuster mechanism of the expander J.3.4.622.05.1.EN PRONAR T185/1...
-
Page 142: Adjusting The Drawbar Hitch Position
(1) front plate (2) cable (3) screw connection ment, the drawbar should be in a horizontal position. Take special care during adjustment due to the si- gnificant weight of the drawbar and the possibility of crushing limbs. J.3.4.622.06.1.EN PRONAR T185/1... -
Page 143: Operation Of Electrical Installation And Warning Elements
The light source in the lamps are LEDs in the event tractor, connect the lines supplying of damage are replaced only as a complete lamp without the possibility of repair or regeneration. the lighting electrical system and the hydraulic system control system. J.3.4.622.07.1.EN PRONAR T185/1... -
Page 144: Adjustment Of Limit Valves And Limit Switches
Connect the terminals of the signaling system and must be pressed in. the container lock so that the signal lamps indicate • After adjustment, secure the screw the proper function. (7) against loosening with the counter PRONAR T185/1 6.10... - Page 145 (6) sensor - limit switch (7) screw (8) locking slider (9) counter nut (10) suspension lock actuators (11) sensor - limit switch (12) bumper (13) mounting limit switch (14) screw (15) nut (16) lever for switching work functions (17) signaling lamps J.3.4.622.08.1.PL PRONAR T185/1 6.11...
-
Page 146: Consumables
Oil should be quenched with Table 6.1. L-HL 32 Oil properties Name Unit Viscosity classification according to ISO 3448VG Kinematic viscosity at 400°C 28.8 – 35.2 Qualitative classification according to ISO 6743/99 Quality classification according to DIN 51502 Flash-point PRONAR T185/1 6.12... - Page 147 Table 6.2. Lubricants LP. Symbol Opis smar stały maszynowy ogólnego przeznaczenia (litowy, wapniowy), smar stały do elementów mocno obciążonych z dodatkiem MoS lub grafitu preparat antykorozyjny w aerozolu olej maszynowy zwykły, smar silikonowy w aerozolu J.3.4.622.09.1.EN PRONAR T185/1 6.13...
-
Page 148: Troubleshooting
System leakage. Check installations for leaks. Low efficiency of the braking system. Tractor air compressor defec- Repair or replace. tive. Defective braking valve on the Repair or replace. tractor. PRONAR T185/1 6.14... - Page 149 The individual functions correctly. operating instructions. of the machine do not Check the connection and connect work.. Trailer control electrical system the wires in accordance with the not connected. operating instructions. PRONAR T185/1 6.15...
- Page 150 Repla- Damaged braking system, bra- ce damaged or worn parts. Tread wear ke locking, incorrectly adjusted Check the braking system for braking system. Too frequent malfunctions. Adjust the spreader and sudden braking levers. PRONAR T185/1 6.16...
- Page 151 Check brake system. Control dening and cracking Too frequent braking too frequ- braking technique. Damage arises around the rim), tire ent. due to excessive heating of the crumbling Damaged braking system. hub and the resulting wheel rim. J.3.4.622.10.1.EN PRONAR T185/1 6.17...
- Page 152 Rozdział 6 Technical service PRONAR T185/1 6.18...
- Page 153 225.1175.109 385/55 R22.5 160F Farmer 11.75x22.5 ET-30 550 kPa G&H EF15 catalog number 225.1175.109 520/50-17 159A8 Rib Trailer 306 TL 16.00x17” 360 kPa TRELLEBORG catalog number 17.16.33 520/50-17 159A8 ST-156 TL 16.00x17” 400 kPa STARCO catalog number 17.16.33 PRONAR T185/1...
- Page 154 225.1175.109 16.00x17” 500/50R17 146D (155A8) 381 Flotmaster Alliance 400 kPa catalog number 17.16.33 500/50R17 149D (159A8) IMP Multiservice Con- 16.00x17” 490 kPa tinental catalog number 17.16.33 16.00x17” 500/50R17 145D (155A8) ELS Nokian 400 kPa catalog number 17.16.33 PRONAR T185/1...
Need help?
Do you have a question about the T185/1 and is the answer not in the manual?
Questions and answers