Table of Contents
Advertisement
Quick Links
TRANSLATION OF THE ORIGINAL COPY OF THE MANUAL
EDITION 1A-06-2017
PRONAR Sp. z o.o.
17-210 NAREW, UL. MICKIEWICZA 101A, PODLASKIE PROVINCE
phone:
fax:
OPERATOR`S MANUAL
ROTARY TEDDER
PRONAR PWP900
+48 085 681 63 29
+48 085 681 63 81
+48 085 681 63 83
PUBLICATION NO. 547N-00000000-UM
+48 085 681 64 29
+48 085 681 63 82
+48 085 682 71 10
www.pronar.pl
Advertisement
Table of Contents

Related Manuals for PRONAR PWP900


Summary of Contents for PRONAR PWP900
- Page 1 PRONAR Sp. z o.o. 17-210 NAREW, UL. MICKIEWICZA 101A, PODLASKIE PROVINCE phone: +48 085 681 63 29 +48 085 681 64 29 +48 085 681 63 81 +48 085 681 63 82 fax: +48 085 681 63 83 +48 085 682 71 10 www.pronar.pl...
- Page 3 ROTARY TEDDER PRONAR PWP900 MACHINE IDENTIFICATION SYMBOL /TYPE: SERIAL NUMBER:...
- Page 4 The machine is designed to meet obligatory standards, documents and legal regulations currently in force. The manual describes the basic safety rules and operation of PWP900 rotary tedder. If the information stated in the Operator's Manual needs clarification then the user should refer for assistance to the sale point where the machine was purchased or to the Manufacturer.
- Page 5 SYMBOLS APPEARING IN THIS OPERATOR'S MANUAL Information, descriptions of danger and precautions and also recommendations and prohibitions associated with user safety instructions are marked: and also preceded by the word "DANGER”. Failure to observe the instructions may endanger the machine operator's or other person's health or life. Particularly important information and instructions, the observance of which is essential, are distinguished in the text by the sign: and also preceded by the word "ATTENTION".
-
Page 9: Table Of Contents
TABLE OF CONTENTS BASIC INFORMATION 1.1 IDENTIFICATION 1.2 PURPOSE 1.3 EQUIPMENT 1.4 WARRANTY TERMS 1.5 TRANSPORT 1.6 ENVIRONMENTAL HAZARDS 1.10 1.7 WITHDRAWAL FROM USE 1.10 SAFETY ADVICE 2.1 BASIC SAFETY RULES 2.1.1 USE OF MACHINE 2.1.2 HITCHING AND UNHITCHING FROM CARRYING VEHICLE 2.1.3 HYDRAULIC SYSTEM 2.1.4... - Page 10 CORRECT USE 4.1 PREPARING FOR WORK 4.2 HITCHING THE ROTARY TEDDER TO AGRICULTURAL TRACTOR 4.3 TRANSPORTING THE MACHINE 4.4 SETTING THE TEDDER IN WORKING POSITION AND OPERATION 4.11 4.4.1 SETTING THE TEDDER IN WORKING POSITION 4.11 4.4.2 WORKING POSITION ADJUSTMENT 4.14 4.4.3 TEDDER OPERATION...
-
Page 11: Basic Information
SECTION BASIC INFORMATION... -
Page 12: Identification
FIGURE 1.1 Location of the data plate. PWP900 rotary tedder is marked with a data plate placed on the right side of machine's carrying frame (FIGURE 1.1). When buying the machine check that the serial numbers on the machine agree with the number written in the WARRANTY BOOK, in the sales documents and in the OPERATOR'S MANUAL. -
Page 13: Purpose
SECTION 1 PRONAR PWP900 1.2 PURPOSE PRONAR PWP900 rotary tedder is designed according to current safety requirements and engineering standards. Rotary tedder is designed for agricultural work: tedding cut swaths (straw, grass, hay) on stone-free grassland with a level surface. Do NOT use the machine for any other purpose. - Page 14 PRONAR PWP900 SECTION 1 TABLE 1.1 Requirements for agricultural tractor CONTENTS UNIT REQUIREMENTS Rear three-point linkage of category I Tractor's three-point linkage or II according to ISO 730-1 standard Rear power take-off shaft (PTO) Type Type 1 (1 3/8”) acc. to ISO 730-1...
-
Page 15: Equipment
T401310ENC12U44 Comer. 1.4 WARRANTY TERMS PRONAR Sp. z o.o. Narew guarantees the reliable operation of the machine when it is used according to its intended purpose as described in the OPERATOR'S MANUAL. Defects discovered during the warranty period will be removed by the Warranty Service. The repair period is specified in the Warranty Book. -
Page 16: Transport
PRONAR PWP900 SECTION 1 • inappropriate use, adjustment or maintenance, use of the machine for purposes other than those for which it is intended, • use of damaged machine, • repairs carried out by unauthorised persons, repairs carried out improperly, •... - Page 17 SECTION 1 PRONAR PWP900 principles of connection and transport of the tedder on public roads. Do NOT drive the tractor with the rotary tedder connected when visibility is limited. When loading and unloading the tedder, comply with the general principles of workplace health and safety for reloading work.
- Page 18 PRONAR PWP900 SECTION 1 FIGURE 1.2 Working position and attachment points of the rotary tedder during loading.
- Page 19 SECTION 1 PRONAR PWP900 (1)- right modules of the rotary tedder; (2)- left modules of the rotary tedder; (3)- supports; (4)- transport lug; (5)- central connection fixing pin. The machine should be firmly fastened on the transportation platform with strips or chains equipped with a tensioning mechanism.
-
Page 20: Environmental Hazards
PRONAR PWP900 SECTION 1 1.6 ENVIRONMENTAL HAZARDS A hydraulic oil leak constitutes a direct threat to the natural environment owing to its limited biodegradability. While carrying out maintenance and repair work which involves the risk of an oil leak, this work should take place on an oil resistant floor or surface. In the event of oil leaking into the environment, first of all contain the source of the leak, and then collect the leaked oil using available means. -
Page 21: Safety Advice
SECTION SAFETY ADVICE... -
Page 22: Basic Safety Rules
PRONAR PWP900 SECTION 2 2.1 BASIC SAFETY RULES 2.1.1 USE OF MACHINE • Before using the machine, the user must carefully read this Operator's Manual and the WARRANTY BOOK. When operating the machine, the operator must comply with all recommendations contained in the Operator's Manual. -
Page 23: Hitching And Unhitching From Carrying Vehicle
SECTION 2 PRONAR PWP900 2.1.2 HITCHING AND UNHITCHING FROM CARRYING VEHICLE • Before hitching the machine to the tractor, check the technical condition of the hitching system of the machine and the tractor. • Do not hitch the machine to the tractor when the linkage systems of the machine and the tractor are not compatible. -
Page 24: Transporting The Machine
PRONAR PWP900 SECTION 2 • In the event of injuries being caused by pressurised hydraulic oil, contact a doctor immediately. Hydraulic oil may find its way under the skin and cause infections. In the event of contact of oil with eye, rinse with large quantity of water and in the event of the occurrence of irritation consult a doctor. -
Page 25: Maintenance
SECTION 2 PRONAR PWP900 • Before using the machine always check its technical condition, especially in terms of safety. In particular, check the technical condition of the linkage and connection elements of the hydraulic system. • Do NOT leave tractor driver's seat when the tractor is moving. -
Page 26: Rotary Tedder Operation
PRONAR PWP900 SECTION 2 parking brake. Ensure that unauthorised persons do not have access to the tractor cab. • Should it be necessary to change individual parts, use only original parts. Non- adherence to these requirements may put the user and other people's health and life at risk, and also damage the machine and invalidate the warranty. -
Page 27: Operation Of Pto Shaft
SECTION 2 PRONAR PWP900 • The machine must not be used when not in working order. • Set the tedder in working position before starting the tedder's drive. • During tedding use the correct working position. • When tedding on the edges of streets, public roads, on stony ground there is a risk that thrown out stones and foreign bodies may pose a risk to bystanders and other vehicle passing by. - Page 28 PRONAR PWP900 SECTION 2 • The chains preventing the shaft cover from turning while the shaft is working, shall be secured to a fixed element of tedder structure. • Do NOT use the securing chains to support the shaft while machine is parked or when transporting the machine.
-
Page 29: Residual Risk
PRONAR PWP900 2.2 RESIDUAL RISK Pronar Sp. z o. o. in Narew has made every effort to eliminate the risk of accidents. There is, however, a certain residual risk, which could lead to an accident, and this is connected mainly with the actions described below: •... -
Page 30: Information And Warning Decals
Safety decals are available from your PRONAR dealer or directly from PRONAR customer service. New assemblies, changed during repair, must be labelled once again with the appropriate safety signs. During machine cleaning do not use solvents which may damage the coating of information label stickers and do not subject them to strong water jets. - Page 31 SECTION 2 PRONAR PWP900 TABLE 2.1 Information and warning decals ITEM DECAL MEANING Before starting work, carefully read the Operator's Manual. Before beginning servicing or repairs, turn off engine and remove key from ignition Danger associated with the rotating PTO shaft.
- Page 32 PRONAR PWP900 SECTION 2 ITEM DECAL MEANING Do not reach into crushing space because elements may move. Danger of crushing hands or fingers Danger of being struck by rotating elements of the machine. Keep a safe distance from raking assembly.
-
Page 33: Design And Operation
SECTION DESIGN AND OPERATION... -
Page 34: Technical Specification
PRONAR PWP900 SECTION 3 3.1 TECHNICAL SPECIFICATION TABLE 3.1 BASIC TECHNICAL DATA Unit PWP900 Dimensions Total length 2400 Width in working setting 9450 Width in transport setting 2995 Height in working setting 1720 Height in transport setting 3900* Technical specification Number of rotors szt. -
Page 35: Design And Operation
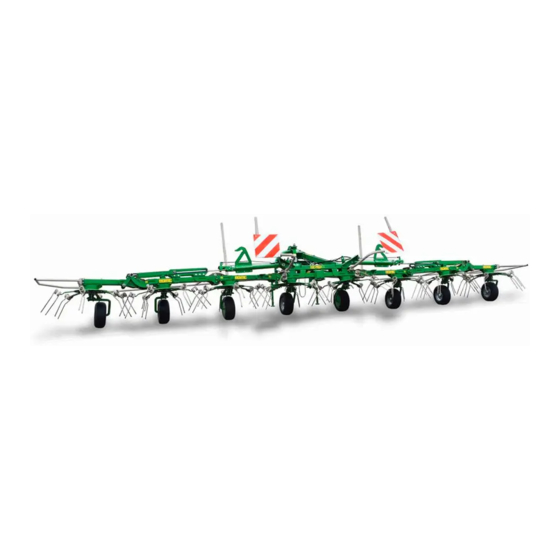
SECTION 3 PRONAR PWP900 3.2 DESIGN AND OPERATION FIGURE 3.1 General design... -
Page 36: Hitching System
PRONAR PWP900 SECTION 3 (1) bearing frame, (2) releasing cable, (3) linkage system, (4) shock absorbers, (5) support, (6), vertical protection arm (7) hydraulic tipping cylinder, (8) rotor transmission, (9) wheel, (10) main transmission, (11) rotor working arm, (12) spring tines, (13) horizontal protection arm, (14) bearing frame tipping modules, (15) mechanical lock, (16) tipping cylinders hydraulic locking valve. - Page 37 SECTION 3 PRONAR PWP900 profiled socket. Frame vibrations are absorbed by spring absorbers located on both left and right side of the rotary tedder. FIGURE 3.2 Hitching system (1), (2) lower securing pins (three point linkage – category II), (3), (4) lower securing pins (three point linkage –...
-
Page 38: Operating Principle
PRONAR PWP900 SECTION 3 3.4 OPERATING PRINCIPLE The rotary tedder is equipped with main transmission (2) (FIGURE 3.3) driven by the tractor PTO through PTO shaft (1). Torque is transferred through the transfer shafts placed on the frame to individual tedder rotors (3) placed along the bearing frame. The rotor design assures backward rotation of individual rotors, which enables the rotation of neighbouring arms without interference and even spread of the tedded material. -
Page 39: Correct Use
SECTION CORRECT USE... -
Page 40: Preparing For Work
PRONAR PWP900 SECTION 4 4.1 PREPARING FOR WORK The manufacturer guarantees that the machine is fully operational and has been checked according to quality control procedures and is ready for use. This does not release the user from an obligation to check the machine's condition after delivery and before first use. The machine is delivered to the user completely assembled. - Page 41 SECTION 4 PRONAR PWP900 If all the above checks have been performed and there is no doubt as to the machine's good technical condition, it can be hitched to tractor. Start the tractor's engine, check all systems and perform a test run before beginning work. In order to inspect: •...
-
Page 42: Hitching The Rotary Tedder To Agricultural
PRONAR PWP900 SECTION 4 4.2 HITCHING THE ROTARY TEDDER TO AGRICULTURAL TRACTOR FIGURE 4.1 Hitching the rotary tedder to tractor (1), (2) lower three point linkage pins, (3) upper securing pin, (4) support, (5) locking cotter pin, (6) tipping cylinders hydraulic conduits, (7) tractor quick couplers, (8) PTO shaft, (A), (B) - Page 43 SECTION 4 PRONAR PWP900 In order to hitch the rotary tedder to the tractor's rear three-point linkage, adhere to the following guidelines (FIGURE 4.1): • While reversing the tractor, bring the lower links (A) and (B) of the tractor's three-point linkage close to lower pins (1) and (2) of the tedder.
- Page 44 PRONAR PWP900 SECTION 4 • Connect the tedder's hydraulic conduits (6) to quick couplers (7) of the tractor's double acting hydraulic circuit. DANGER Prior to connecting hydraulic system line the user must carefully read the tractor operator's manual and observe all recommendations of the Manufacturer.
- Page 45 SECTION 4 PRONAR PWP900 contained in it. Before connecting the PTO shaft, check technical condition of shaft guards, completeness and condition of protecting chains and general technical condition of PTO shaft. Multisplined ends are appropriately marked, so it is clear which end should be connected...
-
Page 46: Transporting The Machine
PRONAR PWP900 SECTION 4 4.3 TRANSPORTING THE MACHINE ATTENTION Before driving on public roads in order to transport the tedder to the work site and back, the tedder must be folded to its transport position. When driving on public roads, comply with the road traffic regulations in force in the country in which the machine is used. - Page 47 SECTION 4 PRONAR PWP900 In order to set the tedder in the transport position, proceed as follows (FIGURE 4.4): • Park the tractor and lower tedder onto the jockey wheels. • Immobilise tractor with parking brake. FIGURE 4.4 Setting the tedder in the transport position.
- Page 48 PRONAR PWP900 SECTION 4 • Raise the tedder's right and left modules until the cylinders are locked by the mechanical interlock (2). • Set the tractor's hydraulic manifold lever for controlling the tipping cylinders in NEUTRAL position. • Set the valve (1) of cylinders for tipping the tedder's modules in "CLOSED"...
-
Page 49: Setting The Tedder In Working Position And Operation
SECTION 4 PRONAR PWP900 4.4 SETTING THE TEDDER IN WORKING POSITION AND OPERATION The tedder after transport to the field must be set in correct working position. Preparing of the machine for work must only take place exclusively where the tedder shall work. Do NOT drive on public roads with extended side rotors. - Page 50 PRONAR PWP900 SECTION 4 FIGURE 4.6 Set tedder in working position. (1) valve of tipping cylinders, (A) OPENED position, (B) CLOSED position, (2) cylinders lock release cable, (3) cylinders mechanical lock • Set the valve (1) of cylinders for tipping the tedder's modules in "OPENED"...
- Page 51 SECTION 4 PRONAR PWP900 • Lower the tipping modules of the rotors until the wheels touch the ground and release the cylinder lock cable. • Rods of hydraulic cylinders of left and right rotors arms should be maximally extended. FIGURE 4.7 Set vibration absorber in working position.
-
Page 52: Working Position Adjustment
PRONAR PWP900 SECTION 4 4.4.2 WORKING POSITION ADJUSTMENT The correct working position of the tender has a decisive influence on the quality of the tedding and on working comfort. One of the basic factors deciding the correctness of machine setting is the correct height adjustment of the lower three-point linkage tractor lift arms. - Page 53 SECTION 4 PRONAR PWP900 Adjustment of working position is performed after lowering the machine to the ground. Working position of tedder is adjusted by performing the following actions: • park tractor and tedder on flat level ground, • set rear three point linkage in position adjustment mode, •...
-
Page 54: Tedder Operation
PRONAR PWP900 SECTION 4 4.4.3 TEDDER OPERATION DANGER The rotary tedder may only be started when all the safety guards and frames are properly mounted and the tedder is set in working position. Before engaging PTO drive, make sure that there are no bystanders, especially children, near the tedder. - Page 55 SECTION 4 PRONAR PWP900 FIGURE 4.9 Tedder operation – tedding along the field edge (1) wheel tilt adjustment bracket; (2) locking pin; (3) cotter pin; (A) tedding to the centre, (B) tedding right side edge, (C) tedding left side edge...
- Page 56 PRONAR PWP900 SECTION 4 When tedding along the field edge, the tilt of all the wheels should be properly set (FIGURE 4.9). When tedding along the right side field edge, all the wheels should be tilted to the right (B), when tedding along the left side field edge, all the wheels should be tilted to the left (C).
-
Page 57: Unhitching The Rotary Tedder From The Tractor
SECTION 4 PRONAR PWP900 4.5 UNHITCHING THE ROTARY TEDDER FROM THE TRACTOR DANGER Unhitching the rotary tedder from the tractor should be performed only on a flat and stable surface. In order to unhitch the tedder from the tractor proceed as follows (FIGURE 4.1): •... - Page 58 PRONAR PWP900 SECTION 4 4.20...
-
Page 59: Maintenance
SECTION MAINTENANCE... -
Page 60: Technical Inspection
PRONAR PWP900 SECTION 5 5.1 TECHNICAL INSPECTION When preparing the tedder for normal use, check its individual components according to guidelines presented in Table 5.1. TABLE 5.1 TECHNICAL INSPECTION SCHEDULE DESCRIPTION MAINTENANCE ACTIVITIES FREQUENCY Check if the tedder is correctly mounted on the... -
Page 61: Checking And Replacement Of Springtines
SECTION 5 PRONAR PWP900 5.2 CHECKING AND REPLACEMENT OF SPRINGTINES DANGER Before beginning preparation work turn off tractor engine and remove the key from the ignition and engage tractor parking brake. Ensure that unauthorised persons do not have access to the tractor. -
Page 62: Operation Of Main Transmission
PRONAR PWP900 SECTION 5 ATTENTION When mounting springtines check the rotation direction (R) of rotor. Springtines and their mounting should be checked while working with tedder. Damaged elements should be replaced. It is not possible to repair springtines. Each day check condition of springtine connections to arms and connections of arms to rotors. - Page 63 SECTION 5 PRONAR PWP900 • unscrew inspection-drain plug (2) on the rear of the reduction gear, • drain oil into oil-resistant tight container, container capacity should be about 3 litres, • level the machine • pour oil into filler opening (1) until oil flows out of inspection-drain opening (2), •...
-
Page 64: Hydraulic System Operation
PRONAR PWP900 SECTION 5 5.4 HYDRAULIC SYSTEM OPERATION DANGER Before commencing whatever work on hydraulic system reduce the pressure in the system. DANGER During work on hydraulic system, use the appropriate personal protection equipment i.e. protective clothing, footwear, gloves and eye protection. Avoid contact of skin with oil. - Page 65 SECTION 5 PRONAR PWP900 occurrence of irritation consult a doctor. Hydraulic oil in normal conditions is not harmful to the respiratory tract. A hazard only occurs when oil is strongly atomised (oil vapour), or in the case of fire during which toxic compounds may be released. Oil fires should be quenched with the use of carbon dioxide (CO ), foam or extinguisher steam.
-
Page 66: Lubrication
PRONAR PWP900 SECTION 5 5.5 LUBRICATION When using the machine the user is obliged to observe lubrication instructions according to attached schedule. Excess lubrication substance causes depositing additional contaminants in places requiring lubrication, therefore it is essential to keep individual machine elements clean. - Page 67 SECTION 5 PRONAR PWP900 FIGURE 5.3 Positions of the tedder's lubrication points.
- Page 68 PRONAR PWP900 SECTION 5 TABLE 5.2 LUBRICATION POINTS NUMBER TYPE OF LUBRICATION NAME LUBRICATI GREASE FREQUENCY ON POINTS Turntable ring PERMANENT 8 hours Frame suspension ball-and- 8 hours socket joint Vibration absorber ball-and- 8 hours socket joint Tipping cylinder eye...
-
Page 69: Tightening Bolt Connections
SECTION 5 PRONAR PWP900 5.6 TIGHTENING BOLT CONNECTIONS Before each use of the machine and during maintenance and repair work, confirm that all bolt connections are properly tightened. If any clearances in bolt connections are found, tighten bolt connections using appropriate tightening torque (TABLE 5.3), unless other tightening parameters are given. -
Page 70: Storage
PRONAR PWP900 SECTION 5 5.7 STORAGE After completing work the tedder should be carefully cleaned and washed with water jet. While washing do not direct a strong water or steam jet at information and warning decals or bearings. Nozzle of pressure or steam washer should be kept at a distance of not less than 30 cm from cleaned surface. -
Page 71: Troubleshooting
SECTION 5 PRONAR PWP900 5.8 TROUBLESHOOTING TABLE 5.4 TROUBLESHOOTING TYPE OF FAULT CAUSE REMEDY Incorrectly connected or Check quick couplers and It is impossible to set damaged quick coupler manner of their connection the tedder in working position using the... - Page 72 PRONAR PWP900 SECTION 5 5.14...
- Page 73 NOTES …………………………………………………………………………………………………………… …………………………………………………………………………………………………………… …………………………………………………………………………………………………………… …………………………………………………………………………………………………………… …………………………………………………………………………………………………………… …………………………………………………………………………………………………………… …………………………………………………………………………………………………………… …………………………………………………………………………………………………………… …………………………………………………………………………………………………………… …………………………………………………………………………………………………………… …………………………………………………………………………………………………………… …………………………………………………………………………………………………………… …………………………………………………………………………………………………………… …………………………………………………………………………………………………………… …………………………………………………………………………………………………………… …………………………………………………………………………………………………………… …………………………………………………………………………………………………………… …………………………………………………………………………………………………………… …………………………………………………………………………………………………………… …………………………………………………………………………………………………………… …………………………………………………………………………………………………………… …………………………………………………………………………………………………………… …………………………………………………………………………………………………………… …………………………………………………………………………………………………………… …………………………………………………………………………………………………………… ……………………………………………………………………………………………………………...
Need help?
Do you have a question about the PWP900 and is the answer not in the manual?
Questions and answers