
Subscribe to Our Youtube Channel
Related Manuals for Vacmaster VSD1801


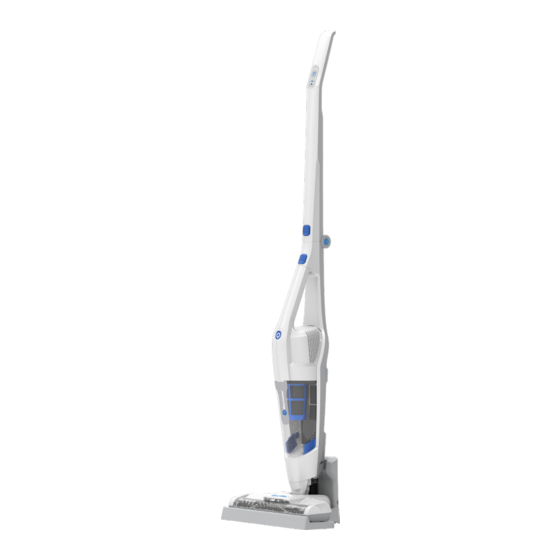
Summary of Contents for Vacmaster VSD1801
- Page 1 Use & Care Guide 18V 2-in-1 Cordless Stick Vacuum MODEL NO. VSD1801 www.vacmaster.com Cleva North America, Inc. Greenville, SC 29607 (866) 384-8432 Made in China...
-
Page 2: Table Of Contents
Operating Instructions........................11-13 Maintaining Your Vacuum........................ 14-17 Troubleshooting..........................18-19 Thank you for purchasing this Vacmaster® vacuum cleaner. With it you are obtaining a high quality product that is engineered for optimal performance. FOR YOUR SAFETY Read and understand this manual before use. -
Page 3: Important Safety Instructions
IMPORTANT SAFETY INSTRUCTIONS When using an electrical appliance, basic precautions should always be followed, including the following: READ ALL INSTRUCTIONS BEFORE USING THIS VACUUM CLEANER. and/or serious injury. WARNING - • Do not use outdoors or on wet surfaces. • Do not allow to be used as a toy. Close attention is necessary when used by or near children, pets or plants. - Page 4 another battery pack. • Under abusive conditions, liquid may be ejected from the battery; avoid contact. eyes, additionally seek medical help. Liquid ejected from the battery may cause irritation or burns. explosion or risk of injury. • Follow all charging instructions and do not charge the battery pack or appliance replacement parts.
- Page 5 WARNING responsible for compliance could void the user’s authority to operate the equipment. This equipment has been tested and found to comply with the limits for a Class B digital device, pursuant to Part 15 of the FCC Rules. These limits are designed to provide reasonable protection against harmful interference in a residential installation.
-
Page 6: Warranty
WITH PROOF OF SALE, a defective appliance will be replaced free of charge. For warranty coverage details to obtain free replacement, visit the web page: www.vacmaster.com or call (866) 384-8432. can wear out from normal use within the warranty period. -
Page 7: Getting To Know Your Vacuum
Combination Tool Storage Charging Base Motorized Brush Powerhead Charging Adapter 2-In-1 Combination Tool REPLACEMENT PARTS Item Part No. Filter 561042108 Charging base 561042109 Combination Tool 561042111 Charging Adapter 561005107 Filter Basket 561042107 Brushroll 561042104 Available online at www.vacmaster.com or call (866) 384-8432. -
Page 8: General Assembly Instructions
GENERAL ASSEMBLY INSTRUCTIONS 1. Unfold the vacuum folding handle. Put the vacuum folding handle upward, until there is a click from the folding handle button. Click 2. Fit the end of the main body onto the neck of the motorized powerhead and click into place. - Page 9 3. Insert the hand vacuum into the slot on the bottom of main body, then press the handle into locked slot and click into place. 4. Insert the top of the charging base into the bottom of the charging base and lock into place.
- Page 10 6. Plug the adapter into a wall outlet. Use only the charger supplied with your cleaner to recharge. 7. Insert the 2-in-1 combination tool into the slot on the charging base for convenient storage. 1. Before charging, make sure the cordless vacuum is turned OFF. With the hand vacuum installed in the stick vacuum, insert the vacuum cleaner onto the charger base as shown.
-
Page 11: Operating Instructions
2. The Hand vacuum on/off button will show the progress of the charge. While the fully charged, the indicator will be off. On/Off Button & Battery Indicator Status Flashing light Charging No light Fully charged 3. For improved battery performance, keep the vacuum cleaner on the charging base while not in use. - Page 12 2. To switch the speed to LOW, press the speed control button. Press the speed control button again to switch back to HIGH speed. 3. To stop the vacuum, press the power button. 1. To remove the hand vacuum, press the hand vacuum button and detach from the main body.
- Page 13 4. The combination tool can be used as a crevice tool or dusting brush. To transition from crevice to dusting brush, depress the latch on the tool and slide the part to the top of the tool. 1. Fold handle by pressing handle release button and pulling handle backward. 2.
-
Page 14: Maintaining Your Vacuum
MAINTAINING YOUR VACUUM CAUTION To reduce the risk of shock, remove vacuum cleaner from the charging base, and turn off before performing any service or maintenance. 1. Remove the hand vacuum from the main body by pressing the hand vacuum release button. - Page 15 Hand wash in lukewarm water. After washing, set aside and allow to air dry for 24 hours. Filter 24hrs Filter Basket reconnect the dust cup to the hand vacuum. WARNING -15-...
- Page 16 debris can wrap around the brush and diminish its ability to clean effectively. 1. Make sure the vacuum cleaner is turned OFF then remove the hand vacuum and set aside. 2. Turn the unit over to access the brush roll. As shown below,push and slide the tab to the right to unlock, then lift the brush roll out of housing.
-
Page 17: Troubleshooting
TROUBLESHOOTING 2. Carefully remove any debris or blockage from the inside of the powerhead. 3. Reattach the powerhead onto the vacuum body. Do not damage pins; do not use scissors or other sharp objects to remove a blockage from the powerhead as these may damage the powerhead. Pins -17-... - Page 18 TROUBLESHOOTING Should you have any problem(s) with your vacuum cleaner, review the table below for solutions to minor performance issues. WARNING Disconnect electrical supply before performing maintenance to the vacuum cleaner. Failure to do so could result in electrical shock or personal injury. PROBLEM POSSIBLE CAUSE SOLUTION...
- Page 19 Dust cup is full. Empty dust cup. Filter needs cleaning. Vacuum not Filter needs to be To purchase online at www.vacmaster.com or picking up or replaced. call (866) 384-8432. suction power is weak. Battery may be depleted. Charge the battery as instructed.
- Page 20 Guía de uso y cuidado Aspiradora de varilla inalámbrica de 18 V 2-en-1 MODELO N.O VSD1801 www.vacmaster.com Cleva North America, Inc. Greenville, SC 29607 (866) 384-8432 Made in China...
- Page 21 Instrucciones de uso.........................11-13 Mantenimiento para su aspiradora....................14-17 Resolución de problemas........................17-19 Gracias por comprar la aspiradora Vacmaster®. Con ella obtendrá un producto de alta calidad diseñado para un rendimiento óptimo. POR SU SEGURIDAD Lea y comprenda este manual antes de usar el producto.
-
Page 22: Instrucciones De Seguridad Importantes
INSTRUCCIONES DE SEGURIDAD IMPORTANTES incluyendo las siguientes: LEA TODAS LAS INSTRUCCIONES ANTES DE UTILIZAR ESTA ASPIRADORA. El incumplimiento de las instrucciones indicadas a continuación puede producir ADVERTENCIA - para reducir el riesgo de incendio, explosión o lesión: • No permita que se utilice como un juguete. Se debe prestar estricta atención cuando es usado por niños o cuando se use cerca de ellos, de mascotas o de plantas. - Page 23 antes de conectarlo a la aspiradora de mano, recoger o llevar el aparato. Cargar el aparato teniendo el dedo en el interruptor podría propiciar accidentes. que es adecuado para un tipo de paquete de batería puede crear riesgo de incendio si se utiliza con otro paquete de batería diferente. •...
- Page 24 Advertencia aprobada por la parte responsable del cumplimiento podría anular la autoridad del usuario para utilizar el equipo. NOTA: Este equipo ha sido probado por cuanto a su cumplimiento con los límites de un dispositivo digital Clase B, según el inciso 15 de las Regulaciones FCC.
-
Page 25: Garantía
PRUEBA DE VENTA. Para conocer la cobertura de la garantía y obtener un reemplazo gratuito, visite el sitio web www. vacmaster.com o en el (866) 384-8432. que pueden desgastarse debido al uso normal dentro del periodo de garantía. -
Page 26: Conozca Su Aspiradora
Herramienta combinada 2 en 1 PIEZAS DE REPUESTO Artículo N° de pieza Filtro 561042108 Base de carga 561042109 Herramientas combinadas 561042111 Adaptador de carga 561005107 561042107 Rodillo de cepillo 561042104 Disponible en línea en www.vacmaster.com o llamando al (866) 384-8432. -
Page 27: Instrucciones De Ensamblaje Generales
INSTRUCCIONES DE ENSAMBLAJE GENERALES Instrucciones de montaje 1. Despliegue el asa plegable de la aspiradora. Coloque el asa plegable de la aspiradora hacia arriba, hasta que oiga un clic en el botón del asa plegable. Clic 2. Coloque el extremo del cuerpo principal en el cuello del cabezal motorizado hasta que haga clic en su lugar. - Page 28 3. Inserte la aspiradora de mano en la ranura en la parte inferior del cuerpo principal, luego presione el asa en la ranura bloqueada hasta que haga clic en su lugar. 4. Inserte la parte superior de la base de carga en la parte inferior de la base de carga y afírmela en su lugar.
- Page 29 6. Enchufe el adaptador a una toma de pared. Nota: Solo use el cargador suministrado con su aspiradora. 7. Para guardar inserte la herramienta de combinación 2 en 1 en la ranura de la base de carga. Instrucciones de carga Con la aspiradora de mano instalada en la aspiradora de varilla, inserte la aspiradora en la base del cargador como se muestra.
-
Page 30: Instrucciones De Uso
de la carga. Mientras se carga la aspiradora, el indicador de carga de la apagará. Indicador de la indicador de la batería Estado batería Luz parpadeante Cargando No iluminada Completamente cargada 3. Para un mejor rendimiento de la batería, coloque la aspiradora en la base de base de carga. - Page 31 2. Para cambiar la velocidad a BAJA, presione el botón de cambio de velocidad. Presione el botón de cambio de velocidad nuevamente para volver a la velocidad ALTA. 3. Para parar el funcionamiento de la aspiradora, presione el botón de Encendido. Usar su aspiradora de mano 1.
- Page 32 4. La herramienta de combinación puede ser la herramienta para aspirar grietas o un cepillo para quitar el polvo. Para cambiar entre una herramienta para grietas a un cepillo, presione el pestillo de la herramienta y deslice la pieza hacia la parte superior de la herramienta. Cómo almacenar su aspiradora 1.
-
Page 33: Mantenimiento Para Su Aspiradora
MANTENIMIENTO PARA SU ASPIRADORA PRECAUCIÓN base de carga y apáguela antes de realizar cualquier trabajo de servicio o mantenimiento. 1. Retire la aspiradora de mano del cuerpo principal presionando el botón de Liberación de la aspiradora manual. 2. Sujete la unidad sobre un contenedor de basura y con una mano presione los dos botones de liberación de la taza para polvo para separarla del cuerpo de la aspiradora de mano. - Page 34 secar al aire durante 24 horas. Filtro 24hrs IMPORTANTE: antes de volver a usarlos. polvo y vuelva a conectar el recipiente para el polvo a la aspiradora de mano. ADVERTENCIA -15-...
- Page 35 Limpieza del cabezal motorizado y bloqueos de sedimentos puede enrollarse en el cepillo y reducir su capacidad de limpiar efectivamente. Quitar el rodillo de cepillo para la limpieza manual: de mano y póngala a un lado. 2. Voltee la unidad para acceder al rodillo del cepillo. Como se muestra a continuación, empuje y deslice la pestaña hacia la derecha para desbloquearla, levante el rodillo del cepillo de la carcasa.
-
Page 36: Resolución De Problemas
TROUBLESHOOTING 2. Quite con cuidado cualquier escombro o suciedad del interior del cabezal motorizado. 3. Vuelva a conectar el cabezal motorizado con el cuerpo de la aspiradora. Nota: eliminar un bloqueo en el cabezal motorizado ya que podrían causar daños a la pieza. - Page 37 PROBLEMA POSIBLE CAUSA SOLUCIÓN Recargue la batería de acuerdo a las La batería puede estar agotada. instrucciones. Está usando el cargador Asegúrese de usar solo el cargador incorrecto. incluido con su producto. Retire la aspiradora de mano y vuelva La aspiradora de mano no está La aspiradora no instalada correctamente.
- Page 38 Vacíe la taza para polvo. Siga las instrucciones de limpieza del La aspiradora Puede comprar en línea en www. no succiona o lo vacmaster.com o llamando al (866) 384- hace con muy 8432. poca fuerza. Recargue la batería de acuerdo a las La batería puede estar agotada.
Need help?
Do you have a question about the VSD1801 and is the answer not in the manual?
Questions and answers