
Related Manuals for Vacmaster VSG2101


Summary of Contents for Vacmaster VSG2101
- Page 1 Use & Care Guide 21.6V 2-IN-1 CORDLESS VACUUM MODEL NO. VSG2101 www.vacmaster.com Cleva North America, Inc. Greenville, SC 29607 (866) 384-8432 Made in China...
-
Page 2: Table Of Contents
Operating Instructions........................11-13 Maintaining Your Vacuum........................ 13-18 Troubleshooting..........................19-21 ® Thank you for purchasing this Vacmaster vacuum cleaner. With it you are obtaining a high quality product that is engineered for optimal performance. FOR YOUR SAFETY Read and understand this manual before use. -
Page 3: Important Safety Instructions
IMPORTANT SAFETY INSTRUCTIONS When using an electrical appliance, basic precautions should always be followed, including the following: READ ALL INSTRUCTIONS BEFORE USING THIS VACUUM CLEANER. Failure to follow the warnings and instructions may result in electric shock, fire and/or serious injury. WARNING - To reduce the risk of fire, electric shock, or injury: •... -
Page 4: Save These Instructions
• Recharge only with the charger specified by the manufacturer. A charger that is suitable for one type of battery pack may create a risk of fire when used with another battery pack. • Under abusive conditions, liquid may be ejected from the battery; avoid contact. If contact accidentally occurs, flush affected area with water. - Page 5 WARNING Any changes or modifications to this unit not expressly approved by the party responsible for compliance could void the user’s authority to operate the equipment. NOTE: This equipment has been tested and found to comply with the limits for a Class B digital device, pursuant to Part 15 of the FCC Rules. These limits are designed to provide reasonable protection against harmful interference in a residential installation.
-
Page 6: Warranty
WITH PROOF OF SALE, a defective appliance will be replaced free of charge. For warranty coverage details to obtain free replacement, visit the web page: www.vacmaster.com or call (866) 384-8432. • This warranty does not cover filters, which are expendable parts that can wear out from normal use within the warranty period. -
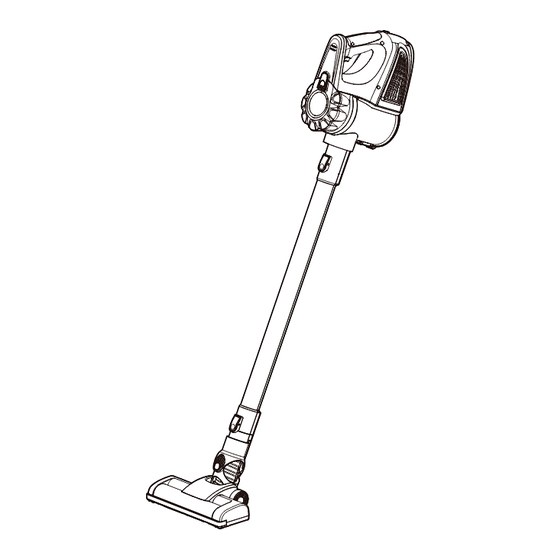
Page 7: Getting To Know Your Vacuum
Adapter Combination Tool Bracket REPLACEMENT PARTS Item Part No. Filter (2) 561045114 Brush Roll 561045174 Charging Adapter 561045194 Wall Mounting Bracket 561045196 Screw (2) 561045197 Crevice Tool 561045198 2-in-1 Combination Tool 561045195 Available online at www.vacmaster.com or call (866) 384-8432. -
Page 8: General Assembly Instructions
GENERAL ASSEMBLY INSTRUCTIONS Assembly Instructions 1. Align and insert the top of the wand into the hand vacuum until you hear a click. Note: Make sure it fits firmly. To remove the wand, press the wand release button and separate. 2. - Page 9 4. To store, hang the hand vacuum on the wall mount. Align the slot on the bottom of the hand vacuum with the protrusion on the wall mount as shown in the picture below. 5. Insert the 2-in-1 combination tool into the right slot on top of the wall mounting bracket for convenient storage.
- Page 10 Charging Instructions 1. Before charging, make sure the cordless vacuum is turned OFF. Insert the charging connector into the charging port of the hand vacuum. Then insert the charging plug into a wall outlet. 2. The LED indicators will show the progress of the charge. While the vacuum is being charged, the LED indicators will be flashing blue alternately.
-
Page 11: Operating Instructions
OPERATING INSTRUCTIONS CAUTION Operate appliance at room temperature between 39.2°F (4°C) and 104°F (40°C) in order to ensure its safety and normal function. Using Your Vacuum Cleaner Note: When vacuum cleaner is fully charged, unplug the charging adapter. Make sure the vacuum cleaner is completely assembled and the dust cup is empty before using. - Page 12 2. To switch the speed to LOW, press the on/off button again. The LED indicators will indicate the LOW speed with one LED illuminated. 3. To stop the vacuum, press and hold the on/off button for 1 second for a third time.
-
Page 13: Maintaining Your Vacuum
2. Insert the motorized nozzle or accessory tools into the end of the hand vacuum until you hear a click. 3. When finished cleaning, turn the vacuum cleaner off and press the wand release button to remove the motorized nozzle or accessory tools. MAINTAINING YOUR VACUUM CAUTION To reduce the risk of shock, remove vacuum cleaner from the charging adapter,... -
Page 14: Cleaning The Filters
1. Position dust cup area of vacuum over a waste receptacle. Press down on the dust release latch to open dust cup lid and allow contents to drop into waste receptacle. Dust Release Latch 2. If necessary, clean off hair and other debris wrapped around the pre-filter. After repeated use, it is necessary to wash the non-woven filter and the foam filter clean of accumulated dust. - Page 15 2. To separate the top from the dust cup, hold the top of the dust cup and rotate counterclockwise. Then lift the top and filter from the dust cup. Chamber Pre-filter Foam Filter Non-woven Filter 3. Brush loose debris from filters then rinse with warm water. Rinse and gently squeeze dry the foam filter.
- Page 16 5. Place the filters back onto the pre-filter. With the dust cup release button facing away from the wand connection on the dust cup, lock the top into place by rotating clockwise. 6. To reassemble the dust cup to the hand vacuum, align the slot in the dust cup to the hand vacuum.
- Page 17 Cleaning the Motorized Nozzle & Blockages The brush roll may accumulate debris such as strings, hair and fibers. This type of debris can wrap around the brush and diminish its ability to clean effectively. To Remove Brush Roll for Manual Cleaning: 1.
-
Page 18: Troubleshooting
TROUBLESHOOTING Hose Blockage Removal 1. To clean out the hose, press the release button on the wand and separate the nozzle from the wand. 2. Carefully remove any debris or blockage from the inside of the nozzle neck. 3. Once the blockage is removed, reattach the wand and hand vacuum to the nozzle. - Page 19 TROUBLESHOOTING Should you have any problem(s) with your vacuum cleaner, review the table below for solutions to minor performance issues. WARNING Disconnect electrical supply before performing maintenance to the vacuum cleaner. Failure to do so could result in electrical shock or personal injury. PROBLEM POSSIBLE CAUSE SOLUTION...
- Page 20 Dust cup is full. Empty dust cup. Filter needs cleaning. Follow filter cleaning instructions. Vacuum not Purchase online at www.vacmaster.com Filter needs to be replaced. picking up or or call (866) 384-8432. suction power is Charge the battery as instructed on weak.
- Page 21 Charge the battery as instructed on Battery may be depleted. page 10. Let the battery cool down to reach a The battery is overheated. normal temperature, charge the battery. Vacuum turns off Brush roll in the motorized With the unit turned off, remove on its own.
Need help?
Do you have a question about the VSG2101 and is the answer not in the manual?
Questions and answers