Table of Contents
Advertisement
Quick Links
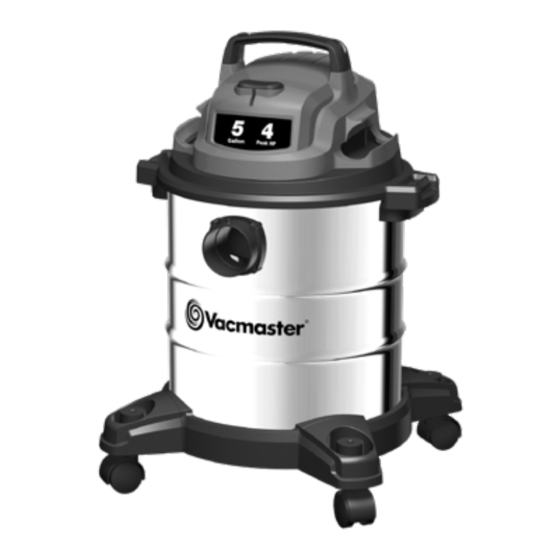
Wet/Dry Vacuum
Operator's Manual
5 Gallon
Model No.
VOC508S 1101
FOR YOUR SAFETY
Read and understand this manual before use.
Keep this manual for future reference.
Replacement Filters &
Suzhou Cleva Electric Appliance Co., Ltd.
Accessories available at:
NO.8 Ting Rong Street 215122 Suzhou, China
Vacmaster.com
Advertisement
Table of Contents

Subscribe to Our Youtube Channel
Summary of Contents for Vacmaster VOC508S 1101
- Page 1 Wet/Dry Vacuum Operator’s Manual 5 Gallon Model No. VOC508S 1101 FOR YOUR SAFETY Read and understand this manual before use. Keep this manual for future reference. Replacement Filters & Suzhou Cleva Electric Appliance Co., Ltd. Accessories available at: NO.8 Ting Rong Street 215122 Suzhou, China...
-
Page 2: Table Of Contents
FOR YOUR SAFETY: CAREFULLY READ AND UNDERSTAND ALL INSTRUCTIONS. WARRANTY ® We take pride in producing a high quality, durable product. This Vacmaster product carries a limited two (2) year warranty against defects in workmanship and materials from date of purchase under normal household use. -
Page 3: Important Safety Instructions
IMPORTANT SAFETY INSTRUCTIONS READ AND UNDERSTAND ALL INSTRUCTIONS BEFORE USING THIS VACUUM. Read and understand this operator’s manual and all labels on the Wet/Dry Vacuum cleaner before operating. Safety is a combination of common sense, staying alert and knowing how your vacuum works. -
Page 4: Double Insulation Instructions
WARNING: To reduce the risk of electric shock - Unplug before cleaning or servicing. When using as blower: • Direct air discharge only at work area. • Do not use Wet/Dry Vacuum as a sprayer. • Do not direct air at bystanders. •... -
Page 5: Extension Cords
EXTENSION CORDS When using an extension cord with your Wet/Dry Vacuum refer to the following table to determine the required A.W.G. wire size. Before using the cleaner make sure the power cord and extension cord are in good working condition. Make repairs or replacements before using the vacuum cleaner. -
Page 6: Unpacking & Checking Carton Contents
UNPACKING & CHECKING CARTON CONTENTS Remove all contents from the box. Remove the power head and take out any contents inside the collection tank. Check each item against the carton contents list. Carton Contents List Description........Qty. Vac Assembly........1 Handle ..........1 Hose..........1 Cartridge Filter.......1 Filter Retainer........1... -
Page 7: General Assembly Instructions
GENERAL ASSEMBLY INSTRUCTIONS A Philips head screw driver is required. WARNING: DO NOT PLUG THE POWER CORD INTO A POWER OUTLET. MAKE SURE THE PLUG IS DISCONNECTED BEFORE ASSEMBLING THE WET/DRY VACUUM. TO REDUCE THE RISK OF ELECTRIC SHOCK, DO NOT EXPOSE TO RAIN. UNPACKING YOUR WET/DRY VACUUM &... -
Page 8: Dry Vacuum Operation
POLARIZED PLUG To reduce the risk of electrical shock, this appliance has a polarized plug (one blade wider than the other). This plug will fit in a polarized outlet only one way. If the plug does not fit fully in the outlet, reverse the plug. -
Page 9: Liquid Vacuum Operation
1. Verify that the power cord is disconnected from the outlet (Fig. 1). 2. In order to prepare your vacuum for dry vacuuming, make sure the cartridge filter completely covers the filter cage against the power head. Your wet/dry vacuum comes with the cartridge filter pre-installed. - Page 10 WARNING: DO NOT PLUG THE POWER CORD INTO A POWER OUTLET. MAKE SURE THE PLUG IS DISCONNECTED BEFORE CHANGING THE FILTERS. 1. Verify that the power cord is disconnected from the outlet. Make sure that the collection tank is clean and free of dust and dirt (Fig. 1). 2.
-
Page 11: Blower Operation
BLOWER OPERATION This Wet/Dry Vacuum has blowing capabilities. To use the blower feature follow the instructions listed. WARNING: ALWAYS WEAR SAFETY GOGGLES COMPLYING WITH ANSI Z87.1 (OR IN CANADA, CSAZ94.3) BEFORE USING BLOWER. WARNING: KEEP BYSTANDERS CLEAR FROM BLOWING DEBRIS. WARNING: WEAR A DUST MASK IF BLOWING CREATES DUST THAT MIGHT BE INHALED. -
Page 12: Maintenance
MAINTENANCE EMPTYING THE COLLECTION TANK WARNING: ALWAYS DISCONNECT THE PLUG FROM THE POWER OUTLET BEFORE REMOVING THE POWER HEAD FROM COLLECTION TANK. 1. Verify that the power cord is disconnected from the outlet (Fig. 1). 2. Disconnect the hose from the vacuum (Fig. 2). 3. -
Page 13: Installing & Cleaning Cartridge Filter
INSTALLING & CLEANING CARTRIDGE FILTER INSTALLING CARTRIDGE FILTER 1. Verify that the power cord is disconnected from the outlet (Fig. 1). 2. Remove the power head and place in upside down position. 3. Install the cartridge filter over the filter cage making sure the cage is completely covered (Fig. 2 &... -
Page 14: Installing & Cleaning Foam Wet Filter
INSTALLING & CLEANING FOAM WET FILTER INSTALLING FOAM WET FILTER 1. Verify that the power cord is disconnected from the outlet (Fig. 1). 2. Remove the power head and place in an upside down position. Follow instructions to remove the cartridge filter on page 13. 3. -
Page 15: Troubleshooting
TROUBLESHOOTING WARNING: TO REDUCE THE RISK OF ELECTRIC SHOCK, UNPLUG BEFORE TROUBLESHOOTING. For assistance with your product, call Customer Service at 1-866-384-8432. PROBLEM POSSIBLE CAUSE SOLUTION Check power supply, cord, No power supply. breakers and fuses.. Unplug and check the power Faulty power cord. -
Page 16: Exploded View
EXPLODED VIEW... -
Page 17: Parts List
PARTS LIST Part Drawing Number Description Quantity 551058101 Handle Assembly Power Head Assembly 551416106 Float 551437105 Filter Cage 551086101 Latch Assembly Collection Tank 551016105 Vacuum Port Assembly 551114104 Deck 551070105 Caster Foot Assembly 551021121 Anti-static Chain Assembly 551003108 Hose 551003111 Floor Brush/Squeegee Nozzle 551003109 Extension Wand...


Need help?
Do you have a question about the VOC508S 1101 and is the answer not in the manual?
Questions and answers