Advertisement
Technical Parameters
 | Class II |
 | Direct current |
 | Alternating current |
 | For indoor use. |
 | Before charging, read the instructions. |
| Product Model | CS-RH2-MGA2 |
| Battery Capacity | 4000mAh |
| Working Voltage | 21.6V  |
| Fully Charged for One Time | 5±0.5h |
| Recharge Duration (Auto Mode) | ≈40min |
| Rating Power | 200W |
| Clean Water Bucket Capacity | 850mL |
| Dirty Water Bucket Capacity | 750mL |
| Working Temperature | 5~40°C, 10%~90%RH |
| Net Weight | ≈4.55kg |
| Dimension (Device) | 270* 257 *1160mm |
| Manufacture | Hangzhou Ezviz Software Co., Ltd. |
| Charging Base Model | CS-RH2-MGA2-D |
| Charging Base Rated Input Power | 200-240V~, 50/60Hz |
| Charging Base Rated Power Input | 210W |
| Charging Base Rated Charging Output | 26V  1A 1A |
| Charging Base Manufacture | Hangzhou Ezviz Software Co., Ltd. |
Legal Disclaimer
TO THE MAXIMUM EXTENT PERMITTED BY APPLICABLE LAW, THE PRODUCT DESCRIBED, WITH ITS HARDWARE, SOFTWARE AND FIRMWARE, IS PROVIDED "AS IS", WITH ALL FAULTS AND ERRORS, AND EZVIZ MAKES NO WARRANTIES, EXPRESS OR IMPLIED, INCLUDING WITHOUT LIMITATION, MERCHANTABILITY, SATISFACTORY QUALITY, FITNESS FOR A PARTICULAR PURPOSE, AND NON-INFRINGEMENT OF THIRD PARTY. IN NO EVENT WILL EZVIZ, ITS DIRECTORS, OFFICERS, EMPLOYEES, OR AGENTS BE LIABLE TO YOU FOR ANY SPECIAL, CONSEQUENTIAL, INCIDENTAL, OR INDIRECT DAMAGES, INCLUDING, AMONG OTHERS, DAMAGES FOR LOSS OF BUSINESS PROFITS, BUSINESS INTERRUPTION, OR LOSS OF DATA OR DOCUMENTATION, IN CONNECTION WITH THE USE OF THIS PRODUCT, EVEN IF EZVIZ HAS BEEN ADVISED OF THE POSSIBILITY OF SUCH DAMAGES.
TO THE MAXIMUM EXTENT PERMITTED BY APPLICABLE LAW, IN NO EVENT SHALL EZVIZ'S TOTAL LIABILITY FOR ALL DAMAGES EXCEED THE ORIGINAL PURCHASE PRICE OF THE PRODUCT.
EZVIZ DOES NOT UNDERTAKE ANY LIABILITY FOR PERSONAL INJURY OR PROPERTY DAMAGE AS THE RESULT OF PRODUCT INTERRUPTION OR SERVICE TERMINATION CAUSED BY: A) IMPROPER INSTALLATION OR USAGE OTHER THAN AS REQUESTED; B) THE PROTECTION OF NATIONAL OR PUBLIC INTERESTS; C) FORCE MAJEURE; D) YOURSELF OR THE THIRD PARTY, INCLUDING WITHOUT LIMITATION, USING ANY THIRD PARTY'S PRODUCTS, SOFTWARE, APPLICATIONS, AND AMONG OTHERS.
REGARDING TO THE PRODUCT WITH INTERNET ACCESS, THE USE OF PRODUCT SHALL BE WHOLLY AT YOUR OWN RISKS. EZVIZ SHALL NOT TAKE ANY RESPONSIBILITES FOR ABNORMAL OPERATION, PRIVACY LEAKAGE OR OTHER DAMAGES RESULTING FROM CYBER ATTACK, HACKER ATTACK, VIRUS INSPECTION, OR OTHER INTERNET SECURITY RISKS; HOWEVER, EZVIZ WILL PROVIDE TIMELY TECHNICAL SUPPORT IF REQUIRED. SURVEILLANCE LAWS AND DATA PROTECTION LAWS VARY BY JURISDICTION. PLEASE CHECK ALL RELEVANT LAWS IN YOUR JURISDICTION BEFORE USING THIS PRODUCT IN ORDER TO ENSURE THAT YOUR USE CONFORMS TO THE APPLICABLE LAW. EZVIZ SHALL NOT BE LIABLE IN THE EVENT THAT THIS PRODUCT IS USED WITH ILLEGITIMATE PURPOSES.
IN THE EVENT OF ANY CONFLICTS BETWEEN THE ABOVE AND THE APPLICABLE LAW, THE LATTER PREVAILS.
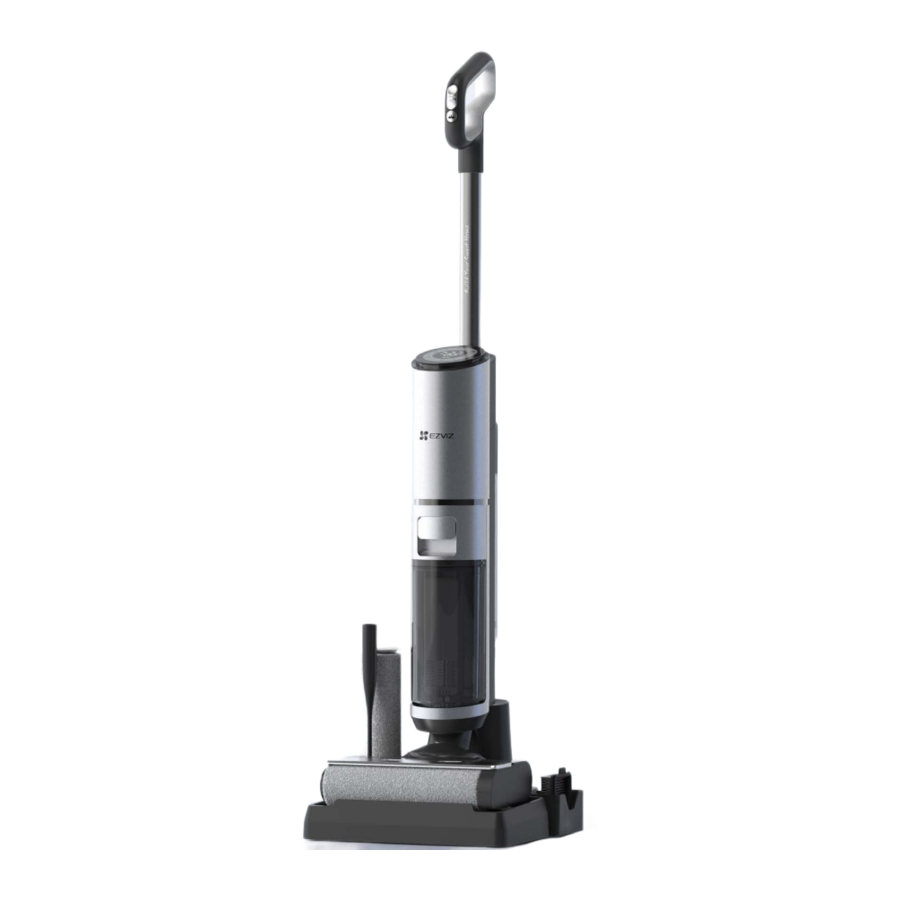
Overview
Package Contents

 The appearance of charging base's plug is subject to the one you have bought.
Basics

Vacuum Cleaner
| Name | Description |
| Power Button | Press once to power on/off. |
| Mode Button |
|
| Self-cleaning Button |
|

Charging Base
The appearance of charging base's plug is subject to the one you have bought.
 Display Screen
| Name | Description |
| Battery Storage | When the battery is too low or dead, the battery storage display icon is displayed as 'Lo'. |
Quick Start Guide
Install the Handle
Insert the end of the handle vertically into the port of the device till you hear 'click' sound. Make sure the handle is tight and firm so that the installation can be successful.

Charge
Before first use and after daily use, please align the charging interface at the bottom of the device with the power adapter interface of the charging base, then connect the plug to the socket.

- Put away the charging base when not charging.
- Please do not spray the charging base with water.
- When charging, keep the device upright and in the corner to avoid tripping and other injuries.
- A full charge takes approximately 5±0.5 hours.
- If the device is not used for a long time after purchase, please use the charging base offered by us to charge the device for 3 hours every 3 months (without full charge).
- When the battery is too low or dead, the battery storage display icon is displayed as 'Lo', which is a normal phenomenon.
Change Language
When charging, press and hold the Mode Button for 3 seconds to enter language setting mode (Language order: English, German, French, Italian, Spanish, Portuguese, Russian, Chinese, Japanese, Thai). Please press and hold the Mode Button for 3 seconds to exit. The default language is English.

Add Clean Water
The water temperature should be lower than 60°C (140°F).
- Turn to the back of the device, press the clean water bucket button with your finger, and then pull it outward to take out the clean water bucket and put it aside.
![]()
- Open the cover and add clean water to the water level. If deep cleaning is required, add half a bottle cap of cleaning solution (about 3.5mL) of cleaning solution.
![]()
- Install the clean water bucket back into the body, the installation is successful when you hear "click" sound.
![]()


Install the Fragrance Card (optional)
- Turn to the back of the device, press the clean water bucket button with your finger, and then pull it outward to take out the clean water bucket and put it aside.
![]()
- Pinch the cover of the fragrance card slot and rotate it 45° counterclockwise to
![]() , then remove it as shown in the picture.
, then remove it as shown in the picture.

- Put in the fragrance card and then screw the cover back on.

- Install the clean water bucket back into the body, the installation is successful when you hear "click" sound.
![]()

 , then remove it as shown in the picture.


Start Cleaning
Detach the device from the charging base and gently step on the brush heads after placing it on the ground, and then tilt the device backward. Press Power Button once to power on/off.
- Please check whether the device is powered before use. If not, please charge it in time.
- Do not use on foam liquid. Power mode is recommended to be used in heavily soiled environments.
- This device comes with a vertical switch. When working, please lean it before you use it. The tilt angle cannot exceed 140 degrees in case of water leaking.
- When the device is working, the LED dust detection light automatically turns on.


Switch Mode
The default working mode is intelligent mode. When working, press Mode Button to switch to the standard mode, power mode or suction mode (visible on the display) according to the actual use needs.

When the device is in intelligent mode, the icon of intelligent mode will display different colors according to the dirt on the ground:
- White: slightly dirty
- Yellow: moderately dirty
- Purple: Severe dirt
Self-cleaning
Please put the device back into the charging base in time after use, you can enable the self-cleaning function according to the dirty degree of the rolling brush.
- After self-cleaning is finished, the device starts to charge and automatically starts the rolling brush hot air dry and antibacterial function.
- If there is any remaining dirty marks on the charging base, please clean it in time.
- During the self-cleaning process, press Self-cleaning Button to exit.
Pour Dirty Water
- Pull the handle of the dirty water bucket outward to remove the dirty water bucket.
![]()
- Hold the dirty water bucket with one hand, gently press the unlocking button with the other hand, and pull out the cover upwards.
![]()
- To avoid clogging the pool with dirt, please pour the dirty water into the pool after being filtered by the buoy carrier.
![]()
- Put them back and install the bucket back to the device, you can hear 'click' sound.
![]()


Rolling Brush Hot Air Dry Introduction
After self-cleaning, the device will automatically turn on the rolling brush hot air dry mode. During this process, the rolling brush will be rotated every 2 minutes.
- The rolling brush air dry mode runs automatically for about 45 minutes.
- The ozone sterilization function is automatically turned on when the rolling brush hot air dry mode is turned on.
- Press Mode Button during charging to turn on/off the rolling brush hot air dry mode.


Product disassembly
Disassembly of Handle
- Use the complimentary screwdriver to strip the soft robber on the back of the device.
- Use the complimentary screwdriver to press it into the hole, and pull the handle up in the meantime.
![]()

Handling Method For Waste Battery
- The battery installed in the device contains harmful substances to the environment. Before abandon the device, must take out the battery from the device; when taking out the battery, must power off the device.
- Please handle the waste batteries properly and safely, do not put into fire, water or soil.
- When your skin or clothing touches the leaked liquid of the waste battery, please washed with clean water to avoid a skin irritation, and then go to hospital for treatment rapidly.
- Pry off the screen with a screwdriver and remove the wire connecting the screen.
![]()
- Use a screwdriver to remove three screws in the figure above, remove the cover and the connected wires, and then take out the battery box in the tube.
![]()
- Pry the grooves on both sides of the battery box with a screwdriver and remove the cover.
![]()
- Take out the battery.
![]()


Routine Maintenance
In order not to affect the device performance, it is recommended to maintain the components regularly.
Product Maintenance-clean the Main Device Body
- Before cleaning, please let the device stop to work.
- Wipe and wash with water or neutral detergent, and be sure that wring out the cleaning cloth before wipe the device. (Please prevent water from entering the interior of the device electrical elements.)


Clean the Dirt Degree Sensor
- The dirt degree sensor may be covered by the dirt when there is no obvious dirt on the ground however the icon of intelligent mode is yellow or purple.
- Before using, please detach the dirty water bucket and wipe the dirt degree sensor in channel with wet rag or clean the dirt within the channel with provided cleaning tools.


Clean the Dirty Water Bucket/ Buoy Carrier/ HEPA
- The device will stop working automatically and remind you through display screen and voice prompt when dirty water bucket is full.
- Please clean the dirty mark directly with small cleaning tool when you find any stubborn dirty marks on inner wall of the dirty water bucket.
- Always hold the bucket. If you hold the cover, the body may drop.
- After cleaning is finished, please close the dirty water bucket cover and install it back to device body. The installation is successful when you hear 'click' sound.
- Dry the HEPA thoroughly and then install it back into the dirty water bucket, otherwise the device performance will be affected.
- It is recommended to replace a new HEPA once every 2~3 months.
- Take out the dirty water bucket, and then take out the HEPA, wash it with clean water, and dry it thoroughly.

- Hold the dirty water bucket with one hand, gently press the unlocking button with the other hand, and pull out the cover upwards.
![]()
- Clean the buoy carrier and dirty water bucket with a cleaning brush and wash them with clean water.

- Install the cover and the HEPA back in turn, and install the dirty water bucket back into the device.


Clean the Rolling Brush and the Rolling Brush Cover
It is recommended to clean the rolling brush and the rolling brush cover after daily use.
If you want to clean the residual stains on the suction nozzle, please clean it with wet rag. Rinsing it with water is forbidden.
- Put your finger on the position as shown in the figure, press the release buttons on both ends of your thumb and index finger, and lift them up, then take out the rolling brush cover.
![]()
- Pull out the rolling brush handle at the right end of the device with your index finger, pull out the rolling brush handle with your hand, pull it outward, and take out the rolling brush.
![caution]()
- Use the other end of the provided cleaning brush to remove the hair or debris on the rolling brush, and then rinse the rolling brush with clean water.
![]()
- Clean the rolling brush cover with the cleaning brush.
![]()
- Please use the cleaning brush to clean the suction nozzle, and use a wet rag to wipe the dirt on the suction nozzle (do not rinse it with water).

- After cleaning, insert the handle-free end of the rolling brush into the corresponding drive cone, and then snap the end with the handle into the slot on the right side to absorb it, place the rolling brush cover back, and complete the installation.


If there is water leakage or no water out of the rolling brush, please check the water-spraying channel and the suction nozzle then clean the waste and dirty marks.
FAQ
| Problem | Cause | Solution |
| No obvious dirt on the floor while color of the icon of intelligent mode is changing. | Dirty sensor is covered by dirt. | Restart the device after clean the blockage in tubes of the suction nozzle. |
The device is not working | No power or low device battery. | Please fully charge the device before use. |
| Rolling brush is wounded by the objects like hair. | Clean the rolling brush. | |
| Dirty water in the dirty water bucket has reached to designated capacity. | Take out the dirty water bucket and dump the dirty water for reuse. | |
| Rolling brush and the dirty water bucket are not installing properly. | Reinstall them. | |
The suction power is weakening | Rolling brush is wounded by the objects like hair. | Clean the rolling brush. |
| Suction nozzle is blocked. | Clean the foreign matters in the suction nozzle. | |
| The upper part of buoy carrier is blocked. | Clean the buoy carrier before use. | |
| Low device battery. | Please fully charge the device before use. | |
| The HEPA is dirty. | Clean the HEPA and dry it thoroughly before use. | |
Abnormal sound for motor | Suction nozzle blocked. | Clean the foreign matters in the suction nozzle. |
| Dirty water in the dirty water bucket has reached to designated capacity. | Take out the dirty water bucket and dump the dirty water for reuse. | |
| The HEPA is dirty. | Clean the HEPA and dry it thoroughly before use. | |
Failed to be charged | The main device body and the charger interface are not well connected. | Please check and connect it well. |
No water comes out of the rolling brush | Clean water bucket has no water. | Add water to clean water bucket. |
| Clean water bucket is not installed properly. | Reinstall the clean water bucket. | |
Water leakage in air outlet | HEPA is not installed. | Install the HEPA properly. |
| The HEPA not dry after wash and use. | Before reuse, dry the HEPA thoroughly after wash and use. | |
| Dirty water in the dirty water bucket has reached to designated capacity. | Take out the dirty water bucket and dump the dirty water for reuse. |
For additional information about the device, please refer to www.ezviz.com/eu.
Battery Information
Rechargeable Lithium ion Battery
- The battery type of the device: Portable battery.
- The battery of this device is non-removable, which is risky to remove.
| Chemical Composition | Hazardous Ingredients (Chemical Name) | CAS No | Chemical Formula |
| Anode | Lithium Nickel Oxide | 12325-84-7 | LiNiO2 |
| Cathode | Graphite | 7782-42-5 | C |
| Nickel | 7440-02-0 | Ni | |
| AL-foil | Aluminium | 7429-90-5 | Al |
| Cu-foil | Copper | 7440-50-8 | Cu |
| Electrolyte | Lithium | 21324-40-3 | LiFP6 |
| Hexafluorophosphate | |||
| Lithium | 554-13-2 | Li2CO3 | |
| Carbonate(EC) | |||
| Separator | Polyethlyene(PE) | 9002-88-4 | (C2H4)n |
| Cell case | Iron | 7439-89-6 | Iron |
| others | others | N/A | N/A |
About this Manual
The Manual includes instructions for using and managing the product. Pictures, charts, images and all other information hereinafter are for description and explanation only. The information contained in the Manual is subject to change, without notice, due to firmware updates or other reasons. Please find the latest version in the ![]() ™ website (http://www.ezvizlife.com).
™ website (http://www.ezvizlife.com).
Revision Record
New release – January 2022
Trademarks Acknowledgement
 ™,
™,  and other EZVIZ's trademarks and logos are the properties of EZVIZ in various jurisdictions. Other trademarks and logos mentioned below are the properties of their respective owners.
COPYRIGHT © Hangzhou EZVIZ Software Co., Ltd. ALL RIGHTS RESERVED.
Any and all information, including, among others, wordings, pictures, graphs are the properties of Hangzhou EZVIZ Software Co., Ltd. (hereinafter referred to as "EZVIZ"). This user manual (hereinafter referred to as "the Manual") cannot be reproduced, changed, translated, or distributed, partially or wholly, by any means, without the prior written permission of EZVIZ. Unless otherwise stipulated, EZVIZ does not make any warranties, guarantees or representations, express or implied, regarding to the Manual.

Documents / Resources
References
Download manual
Here you can download full pdf version of manual, it may contain additional safety instructions, warranty information, FCC rules, etc.
Download EZVIZ RH2 - Smart Cordless Wet & Dry Vacuum Cleaner Manual
Advertisement


Need help?
Do you have a question about the RH2 and is the answer not in the manual?
Questions and answers