Table of Contents
Advertisement
Advertisement
Table of Contents

Subscribe to Our Youtube Channel
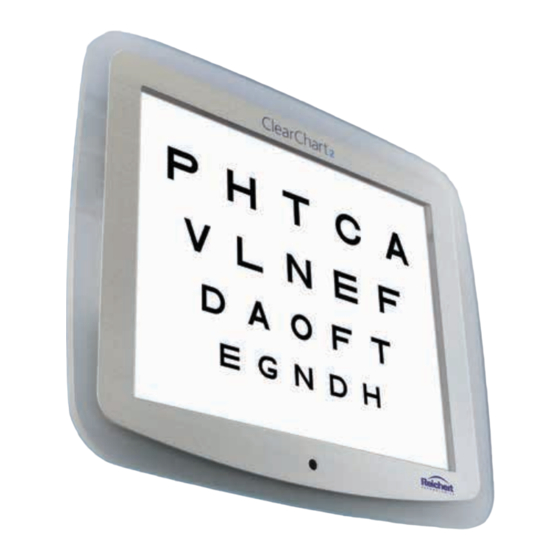
Related Manuals for Ametek Reichert ClearChart2


Summary of Contents for Ametek Reichert ClearChart2
- Page 1 Digital Acuity System User’s Guide...
- Page 2 Reichert, Reichert Technologies, Auto Phoroptor RS, Phoroptor and ClearChart are registered trademarks of Reichert, Inc. AMETEK is a registered trademark of AMETEK, Inc. All other trademarks are property of their respective owners. The information contained in this document was accurate at time of publication. Specifications subject to change without notice.
-
Page 3: Table Of Contents
Contents Warnings and Cautions ..................4 Symbol Information ....................6 Introduction ......................7 Indications for Use ..................7 Contraindications ..................7 Unpacking and Contents..................7 Installation, Features, & Functions .................8 Wall Mounting Instructions .................8 Application of Input Power ................9 Disconnection of Input Power..............9 Communication Ports .................9 Connection with the Auto Phoroptor RS Auto Refraction System ..10 ®... -
Page 4: Warnings And Cautions
Warnings & Cautions Reichert, Inc. (Reichert) is not responsible for the safety and reliability of this instrument when: • Assembly, disassembly, repair, or modification is made by unauthorized dealers or persons. • Instrument is not used in accordance with this User’s Guide. WARNING: AN INSTRUCTION THAT DRAWS ATTENTION TO RISK OF INJURY OR DEATH. WARNING: UNITED STATES FEDERAL LAW AND EUROPEAN REGULATIONS REQUIRE THAT THIS DEVICE BE PURCHASED ONLY BY A PHYSICIAN OR A PERSON ACTING ON BEHALF OF A PHYSICIAN. - Page 5 Warnings & Cautions (continued) WARNING: DO NOT RECHARGE THE BATTERIES. THE BATTERY IS NOT DESIGNED TO BE CHARGED BY ANY ELECTRICAL SOURCE. CHARGING COULD GENERATE GAS AND INTERNAL SHORT-CIRCUITING, LEADING TO DISTORTION, LEAKAGE, OVERHEATING, EXPLOSION OR FIRE. WARNING: DO NOT EXPOSE THE BATTERIES TO TEMPERATURES ABOVE 140ºF, DISASSEMBLE THE BATTERIES, OR DAMAGE TO THIS UNIT AND/OR SERIOUS PERSONAL INJURY MAY RESULT.
-
Page 6: Symbol Information
Symbol Information The following symbols appear on the instrument: Caution symbol indicating important operating and maintenance instructions that are included in this User’s Guide Alternating Current Power Protective Earth Connection ON / OFF Catalog Number Serial Number Date of Manufacture 2013 Waste of Electrical and Electronic Equipment Compliance to Medical Device Directive 93/42/EEC... -
Page 7: Introduction
ClearChart 2, contact your local authorized Reichert dealer or contact our Customer Service department directly at: Tel: 716-686-4500 Fax: 716-686-4555 E-mail: reichert.information@ametek.com Indications for Use The indications for use include visual acuity for determining patient objective refraction. Contraindications None. -
Page 8: Installation, Features, & Functions
Installation, Features, & Functions Wall Mounting Instructions WARNING: IT IS IMPORTANT TO SAFELY SECURE THE EQUIPMENT. UNSECURED EQUIPMENT COULD POSSIBLY BECOME DISLODGED AND FALL, CAUSING INJURY TO EITHER THE PATIENT OR EXAMINER. WARNING: CARE MUST BE TAKEN TO ARRANGE THE CABLES FOR THE ACCESSORIES SUCH THAT THEY DO NOT PRESENT A TRIPPING HAZARD TO THE EXAMINER OR A DANGER TO THE PATIENT. -
Page 9: Application Of Input Power
Installation, Features, & Functions (continued) Application of Input Power 1. Using the provided power cord, insert the female end into the power input recep- tacle located at the bottom of the instrument. 2. Plug the male end of the power cord into a wall outlet of the appropriate voltage. Input voltage must not exceed the range specified on the ClearChart 2 data plate. -
Page 10: Connection With The Auto Phoroptor Rs Auto Refraction System
Installation, Features, & Functions (continued) Connection with the Auto Phoroptor RS Auto Refraction System The ClearChart 2 can be configured for bi-directional communication with the Auto Phoroptor RS automated refraction system. This can be achieved with a hardwired serial connection or with wireless communication accessories. Wired Connection Wired communication between the ClearChart 2 and the Auto Phoroptor RS requires connection of a NULL modem serial cable with 9 pin male connector on one end and 9... - Page 11 Installation, Features, & Functions (continued) Connection with the Auto Phoroptor RS Auto Refraction System (continued) The second serial adapter should be connected to the Projector serial port on the Auto Phoroptor RS Central Unit and powered with an adapter plugged into an outlet. Note: Follow the instructions provided by the manufacturer of the wireless serial adapters to set the devices for the serial port configuration. Instructions are provided with Reichert Bluetooth Kits.
-
Page 12: Remote Control Power
Installation, Features, & Functions (continued) Remote Control Power 1. Remove the back of the remote control by sliding it in the direction of the arrow. 2. Put in two AAA batteries in the position shown on the remote control. Remote Control Layout The remote control will operate all the screens on your ClearChart 2. - Page 13 Installation, Features, & Functions (continued) ClearChart 2 Digital Acuity System User’s Guide 13760-101 Rev. H...
-
Page 14: Configuring The Clearchart 2
Installation, Features, & Functions (continued) Configuring the ClearChart 2 Press the ON/OFF switch located on the side of the instrument. The ClearChart 2 will boot-up. When the ClearChart 2 welcome screen appears, press the MENU button on the remote to enter the configuration mode. Use the UP and DOWN arrows to navigate through different options. ROOM Using the LEFT/RIGHT arrows on your remote, select DIRECT THROW or MIRRORED based on the configuration of your office. When you are finished, press... - Page 15 Installation, Features, & Functions (continued) ACUITY NOTATION Using the LEFT/RIGHT arrows on your remote, select SNELLEN, METRIC, or DECIMAL for your acuity notation. When you are finished, press the DOWN arrow. • Snellen - displayed as distance in feet / size in mm • Metric - displayed as distance in meters / size in mm •...
- Page 16 Installation, Features, & Functions (continued) PROGRESSION Using the LEFT/RIGHT arrows on your remote, select standard or logmar for the default size progression you would like the ClearChart 2 to display. Note: You will be able to change size progression while using the ClearChart 2. When you are finished, press the DOWN arrow.
-
Page 17: Optotypes
Installation, Features, & Functions (continued) Optotypes All of the optotypes contained within the ClearChart 2 conform to the American National Standard Institute guidelines for general purpose clinical visual acuity charts. The optotypes are constructed on a 5 x 5 matrix such that their stroke width is one-fifth of their overall size. Letter optotypes are of Letter Gothic typeface. -
Page 18: Size Progressions
Installation, Features, & Functions (continued) Size Progressions When multiple lines of descending size are in use, the line size display is that of the smallest line. The standard progression has the following visual acuity sizes expressed as Snellen fractions: Snellen Snellen(metric) Snellen (decimal) 20/10... -
Page 19: Remote Control Functions
Installation, Features, & Functions (continued) Remote Control Functions 1. This button will present lines of the same size of optotypes. Multiple presses of this button will change the number of lines presented on the screen from 1 to 4. Note: At larger optotype sizes, there will be a limit of how many lines can be displayed. - Page 20 Installation, Features, & Functions (continued) Remote Control Functions (continued) 8. This is the LEFT arrow button. Pressing the LEFT arrow button will randomize the optotypes on the screen. The LEFT arrow button is also used to select options during the initial setup of the ClearChart 2, as well as making selections in the menu screen.
- Page 21 Installation, Features, & Functions (continued) Remote Control Functions (continued) Menu Item Options 1. NOTATION Snellen, Metric, Decimal 2. DEFAULT OPTOTYPE 17 Letter Set, 8 Letter Set, Sloan, Tumbling E, Landolt C, O Landolt C, HOTV, Numbers, Children’s Shape Symbols (Set 1), Children’s Shape Symbols (Set 2), Allen Symbols 3.
- Page 22 Installation, Features, & Functions (continued) Remote Control Functions (continued) 16. Press the Contrast MIN button to decreases the contrast of the opto character or the sine gratings in the contrast sensitivity mode. Note: RED/GREEN tests do not function when less than full contrast is selected. LIGHT 17.
- Page 23 Installation, Features, & Functions (continued) Remote Control Functions (continued) 34. Pressing the MOVIE button will run an animated MOVIE movie for pediatric focusing. Use the UP/DOWN arrows to adjust the volume. Press the MOVIE button a second time to exit the movie. XCYL 35.
- Page 24 Installation, Features, & Functions (continued) Remote Control Functions (continued) Pressing the FIX button a second time will present a second fixation target. Pressing the FIX button a third time exits the Fixation mode. 39. Pressing the SUPP button will initiate Color SUPP Suppression mode. Use the UP and DOWN arrow buttons to change the size of the optotype.
- Page 25 Installation, Features, & Functions (continued) Remote Control Functions (continued) 41. Pressing the VDISP button will present a vertical VDISP disparity test. Press the VDISP button a second time for a VDISP second type of vertical disparity test. Use the UP and DOWN arrow buttons to move the fixation line.
-
Page 26: Video And Image File Feature
Installation, Features, & Functions (continued) Video and Image File Feature The ClearChart 2 Digital Acuity System currently displays seventeen different edu- cational slides and one children’s video with audio for fixation. Additional video and image files of certain formats and file sizes can be imported into the device and dis- played on the screen. -
Page 27: Organizing Video Files
Installation, Features, & Functions (continued) Videos (continued) Organizing Video Files The “MAX” and “MIN” buttons on the remote can be used to move the position of a video file in the Video List. Pressing the MAX button will move a video file up in the list and the MIN button will move the video file down the list. -
Page 28: Organizing Image Files
Installation, Features, & Functions (continued) Images (continued) Importing and Accessing Image Files (continued) Use the up/down arrows to highlight the image file you wish to display. Press the EDU button to select or deselect an image. An asterisk will appear next to the name of the image files that have been selected for display. -
Page 29: Restoring The Default Screen Saver
Installation, Features, & Functions (continued) Images (continued) Changing the Screen Saver (continued) Use the Right arrow button to scroll to the “New” option. The following message will be displayed: “Press down arrow to read logo file from USB device”. Press the down arrow and the new logo image file will be copied to the hard drive of the ClearChart 2. -
Page 30: Clearchart 2 And Auto Phoroptor Rs ® Communication
Installation, Features, & Functions (continued) ClearChart 2 and Auto Phoroptor RS Communication ® Setup Communication between the ClearChart 2 and Auto Phoroptor RS is bi-directional, allowing for the use of either the ClearChart 2 remote or the scroll wheel on the Auto Phoroptor RS Controller to change the charts presented to the patient. -
Page 31: Optotype Selection
Installation, Features, & Functions (continued) ClearChart 2 and Auto Phoroptor RS Communication ® (continued) Optotype Selection The Auto Phoroptor RS interface includes optotype selections for letters, numbers, tumbling “Es”, Landolt “Cs”, and Children’s Charts. The optotypes can be changed using the scroll wheel on the Auto Phoroptor RS controller or the ClearChart 2 remote. The Auto Phoroptor RS will accommodate either Snellen or Decimal optotype notation and different letter sets including the 17 letter set, 8 letter set, Sloan, and HOTV by changing the default optotype settings in the ClearChart 2 menu using the remote... -
Page 32: Special Test Charts
Installation, Features, & Functions (continued) ClearChart 2 and Auto Phoroptor RS Communication ® (continued) Special Test Charts Most of the special test charts can be accessed on the Auto Phoroptor RS Controller interface. Exceptions are Contrast Sensitivity, Suppression Testing, Crowding Bars, and the Blank Screen. -
Page 33: Cleaning And Maintenance
Cleaning & Maintenance Cleaning ClearChart 2 Use a lint-free, soft cloth lightly damped with 90% Isopropyl Alcohol to clean the ClearChart 2 screen and the unit. Cleaning of the ClearChart 2 should be performed when the screen is has contaminants on it or when visually, there is dust accumulation on the instrument. -
Page 34: Troubleshooting
Troubleshooting Troubleshooting The following is a chart of common errors with the ClearChart 2 and how to resolve them. If the following does not solve an issue with the ClearChart 2, the unit may require servicing. Problem Probable Cause Possible Solution Not plugged into an Plug unit into a properly outlet with power. -
Page 35: Specifications
Specifications Catalog Number 13760 Physical Dimensions Size: Weight, unpacked: 10.00 lbs. (4.5 Kg) Height: 16.91 in. (42.95 cm) Width: 19.88 in. (50.49 cm) Depth: 3.25 in. (68.26 cm) Electrical Voltage: 100 - 240 volts AC 50/60 Hz Input Power: 70-95 VA Fuses: Time-Lag (3.15A, 250V), 5 x 20mm, RoHS Operational Conditions 50°C... -
Page 36: Classifications
Specifications (continued) Classifications The ClearChart 2 is classified as Class I equipment. Class I equipment provides additional protection against electrical shock beyond basic insulation. Type B equipment provides an adequate degree of protection against electrical shock, particularly regarding allowable leakage currents and reliability of the protective earth connection. -
Page 37: Guidance And Manufacturer's Declarations
Guidance & Manufacturer’s Declarations Table 201 – Guidance and Manufacturer’s Declaration Electromagnetic Emissions All Equipment and Systems Guidance and Manufacturer’s Declaration – Electromagnetic Emissions The ClearChart 2 is intended for use in the electromagnetic environment specified below. The customer or user of the ClearChart 2 should ensure that it is used in such an environment. Electromagnetic Environment Emissions Test Compliance... - Page 38 Guidance & Manufacturer’s Declarations (continued) Table 202 – Guidance and Manufacturer’s Declaration Electromagnetic Immunity All Equipment and Systems Guidance and Manufacturer’s Declaration – Electromagnetic Immunity The ClearChart 2 is suitable for use in all establishments and is intended for use in the electromagnetic environment specified below. The customer or user of the ClearChart 2 should ensure that it is used in such an environment.
- Page 39 Guidance & Manufacturer’s Declarations (continued) Table 204 – Guidance and Manufacturer’s Declaration Electromagnetic Immunity Equipment and Systems that are NOT Life-supporting Guidance and Manufacturer’s Declaration – Electromagnetic Immunity is intended for use in the electromagnetic environment specified below. The ClearChart 2 customer or user of the should ensure that it is used in such an environment. ClearChart 2 Immunity IEC 60601...
- Page 40 Guidance & Manufacturer’s Declarations (continued) Table 206 – Recommended Separation Distances between Portable and Mobile RF Communications Equipment and the ClearChart 2 for ME Equipment and ME Systems that are NOT Life-supporting. Guidance and Manufacturer’s Declaration - Electromagnetic Immunity Recommended Separation Distances for between Portable and Mobile RF Communications Equipment and the ClearChart 2 The ClearChart 2 is intended for use in the electromagnetic environment in which radi-...
-
Page 41: Warranty
Warranty This product is warranted by Reichert Technologies (herein after referred to as Reichert) against defective material and workmanship under normal use for a period of three years from the date of invoice to the original purchaser. (An authorized dealer shall not be considered an original purchaser.) Under this warranty, Reichert’s sole obligation is to repair or replace the defective part or product at Reichert’s discretion. - Page 42 Notes ClearChart 2 Digital Acuity System User’s Guide 13760-101 Rev. H...
-
Page 43: Notes
Notes ClearChart 2 Digital Acuity System User’s Guide 13760-101 Rev. H... - Page 44 Reichert Technologies 3362 Walden Ave Depew, NY 14043 Toll Free: 888-849-8955 Phone: 716-686-4500 Fax: 716-686-4555 Email: reichert.information@ametek.com www.reichert.com AMETEK GmbH Business Unit Reichert Carl-von-Linde-Strasse 42 85716 Unterschleissheim/Munich Germany Email: info.reichert-de@ametek.com Tel. +49 (89) 315 891 10 Fax. +49 (89) 315 891 99 ISO-9001/13485 Registered 13760-101 Rev.
Need help?
Do you have a question about the Reichert ClearChart2 and is the answer not in the manual?
Questions and answers