Infineon TRAVEO T2G Getting Started
Hide thumbs
Also See for TRAVEO T2G:
- Technical reference manual (1825 pages) ,
- Configuration and setup (97 pages) ,
- User manual (76 pages)
Table of Contents
Advertisement
Quick Links
Getting started with TRAVEO™ T2G entry family
starter kit
About this document
Scope and purpose
This document explains how to set up and use TRAVEO™ T2G body entry family starter kit. The document also
explains how to debug with a single core and dual core environment in IAR embedded workbench for Arm®
(EWARM). The document uses the TRAVEO™ T2G body entry starter kit board with the sample driver library
(SDL).
Intended audience
This document is intended for software and hardware engineers integrating TRAVEO™ T2G body entry device
into their application.
Abbreviations and definitions
Table 1
Abbreviations
Abbreviations
CM0+
CM4
SDL
SK
USB
EWARM
C-SPY
Reference documents
[1]
KitProg3 user guide
[2]
TRAVEO™ T2G starter kit user guide
User Guide
www.infineon.com
Description
Arm® Cortex®-M0 plus
Arm® Cortex®-M4
sample driver library
starter kit
universal serial bus
embedded workbench for Arm®
high level debugger language for embedded system
Please read the Important Notice and Warnings at the end of this document
page 1 of 25
002-32910 Rev. *A
2021-09-29
Advertisement
Table of Contents

Related Manuals for Infineon TRAVEO T2G


Summary of Contents for Infineon TRAVEO T2G
-
Page 1: About This Document
Reference documents KitProg3 user guide TRAVEO™ T2G starter kit user guide User Guide Please read the Important Notice and Warnings at the end of this document 002-32910 Rev. *A www.infineon.com page 1 of 25 2021-09-29... -
Page 2: Table Of Contents
Getting started with TRAVEO™ T2G entry family starter kit Table of contents Table of contents About this document ........................1 Table of contents ..........................2 Getting started ........................3 Connection setup ............................ 3 Power up ..............................3 Installing kit driver ..........................4 SDL and IAR EWARM setup ....................... -
Page 3: Getting Started
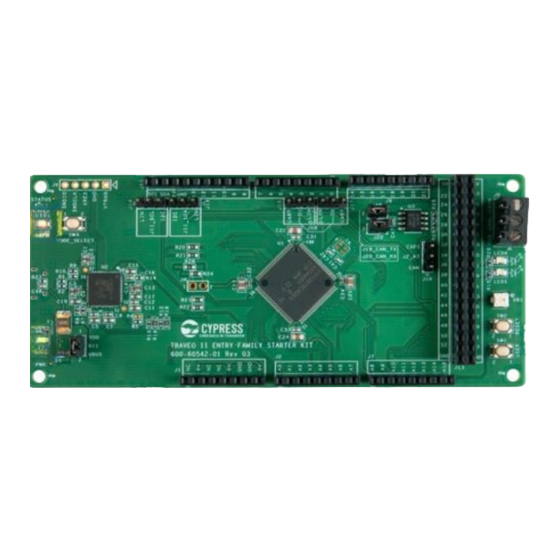
Getting started with TRAVEO™ T2G entry family starter kit Getting started Getting started This section explains the hardware setup. Table 2 lists the prerequisites for the setup. Table 2 Prerequisites Quantity Description Remarks CYTVII-B-E-1M-SK TRAVEO™ T2G body entry series starter kit Micro USB cable For power and communication With USB port... -
Page 4: Installing Kit Driver
Getting started with TRAVEO™ T2G entry family starter kit Getting started Note: To indicate that the starter kit is powered ON and the USB controller is starting in the correct mode, the amber-colored status LED3 must be permanently ON. But, LED3 does not indicate a successful USB driver installation. - Page 5 Getting started with TRAVEO™ T2G entry family starter kit Getting started Note: Do not press SW3. Pressing SW3 changes the mode of the USB controller. This is necessary only for upgrading the USB driver firmware and other activities. For more details, see the KitProg3 user guide [1].
-
Page 6: Sdl And Iar Ewarm Setup
Getting started with TRAVEO™ T2G entry family starter kit SDL and IAR EWARM setup SDL and IAR EWARM setup This section explains how to run an example from the SDL on the TRAVEO™ T2G starter kit using the IAR C-SPY debugger. -
Page 7: Verify Installation By Quick Hands-On
Getting started with TRAVEO™ T2G entry family starter kit SDL and IAR EWARM setup Figure 5 Registering IAR for evaluation (based on v. 8.42) Verify installation by quick hands-on The starter kit is now ready to use after a successful environment setup (USB driver installation, SDL installation, and IAR installation). - Page 8 Getting started with TRAVEO™ T2G entry family starter kit SDL and IAR EWARM setup Figure 6 Build a workspace in IAR Figure 7 Check debugger and kit connection in IAR User Guide 8 of 25 002-32910 Rev. *A 2021-09-29...
-
Page 9: Download And Debug With Starter Kit
Getting started with TRAVEO™ T2G entry family starter kit Download and debug with starter kit Download and debug with starter kit There are two debugging methods with IAR EWARM: Debugging with code downloaded on to RAM • Debugging with code downloaded on to the flash memory (described in this document) •... -
Page 10: Debugging With Single Core Cm0+ Workspace
Getting started with TRAVEO™ T2G entry family starter kit Download and debug with starter kit Debugging with single core CM0+ workspace 1. Start IAR EWARM and open the SDL template workspace file: tviibe1m\tools\iar\flash\tviibe1m_flash_cm0plus_template Figure 8 Selecting CM0+ single core template 2. - Page 11 Getting started with TRAVEO™ T2G entry family starter kit Download and debug with starter kit Figure 9 Selecting workspace revision 3. For the build, right-click cm0plus – starter_kit and select Rebuild All. Figure 10 Rebuilding workspace revision User Guide 11 of 25 002-32910 Rev.
- Page 12 Getting started with TRAVEO™ T2G entry family starter kit Download and debug with starter kit 4. The rebuild process starts. Check for errors and warnings in the Build log. Figure 11 Checking build status in build log 5. To load the program to the flash region of CM0+ core, click the green Download and Debug icon. Figure 12 Downloading and debugging User Guide...
- Page 13 Getting started with TRAVEO™ T2G entry family starter kit Download and debug with starter kit 6. Now, click the Go icon to start execution. Note: You can also use the function keys in the Debug window: Go (F5), F10 (Step Over), F11 (Step into), Ctrl+D (Download and Debug).
-
Page 14: Debugging With Single Core Cm4 Workspace
Getting started with TRAVEO™ T2G entry family starter kit Download and debug with starter kit Debugging with single core CM4 workspace 1. Start IAR EWARM and open the SDL template workspace file: tviibe1m\tools\iar\flash\tviibe1m_flash_cm4_mc_template Figure 15 Selecting CM4 single core template 2. - Page 15 Getting started with TRAVEO™ T2G entry family starter kit Download and debug with starter kit Figure 16 Selecting workspace revision 3. For the build, right-click cm4 – starter_kit and select Rebuild All. Figure 17 Rebuilding workspace revision User Guide 15 of 25 002-32910 Rev.
- Page 16 Getting started with TRAVEO™ T2G entry family starter kit Download and debug with starter kit 4. The rebuild process starts. Check for errors and warnings in the Build log. Figure 18 Checking build status in build log 5. To load the program to the flash region of CM0+ core, click the green Download and Debug icon. Figure 19 Downloading and debugging User Guide...
- Page 17 Getting started with TRAVEO™ T2G entry family starter kit Download and debug with starter kit 6. Now, click the Go icon to start execution. Figure 20 Debugging with CM4 core LED4 should start blinking. Figure 21 Blinking LED4 User Guide 17 of 25 002-32910 Rev.
-
Page 18: Debugging With Dual Core Cm0+ And Cm4 Workspaces
Getting started with TRAVEO™ T2G entry family starter kit Download and debug with starter kit Debugging with dual core CM0+ and CM4 workspaces 1. Start IAR EWARM and open the SDL template workspace file: tviibe1m\tools\iar\flash\tviibe1m_flash_cm0plus_cm4 _template Figure 22 Selecting CM0+ and CM4 dual core template User Guide 18 of 25 002-32910 Rev. - Page 19 Getting started with TRAVEO™ T2G entry family starter kit Download and debug with starter kit 2. Select the workspace revision starter_kit from the drop-down list under Workspace, as shown in Figure Figure 23 Selecting workspace revision 3. For the build, right-click cm0plus – starter_kit and select Rebuild All. Figure 24 Rebuilding workspace revision User Guide...
- Page 20 Getting started with TRAVEO™ T2G entry family starter kit Download and debug with starter kit 4. The rebuild process starts. Check for errors and warnings in the Build log. Figure 25 Checking build status in build log 5. To load the program to the flash region of CM0+ and CM4 cores, click the green Download and Debug icon. This will automatically open the CM4 multicore client workspace, and the corresponding code will be downloaded into the flash region of respective cores.
- Page 21 Getting started with TRAVEO™ T2G entry family starter kit Download and debug with starter kit 6. Place a break point in the API in the CM4 core workspace. CM4 core will start executing after SystemInit() being enabled by CM0+ core. You can debug both cores simultaneously. Note: To place a breakpoint at the target instruction, click the white space between the editor window (left pane) and the workspace window (center pane).
- Page 22 Getting started with TRAVEO™ T2G entry family starter kit Download and debug with starter kit Figure 28 Debugging with CM0+ and CM4 cores LED1 and LED4 should start blinking once both the cores are running. Figure 29 Blinking LED1 and LED4 User Guide 22 of 25 002-32910 Rev.
-
Page 23: Troubleshooting
Getting started with TRAVEO™ T2G entry family starter kit Troubleshooting Troubleshooting This section explains possible issues and the workarounds. Connection troubleshooting Error: Starter kit is not detected on the target system. Connect the USB cable that comes with the starter kit. Other USB cables may not connect data lines •... -
Page 24: Revision History
Getting started with TRAVEO™ T2G entry family starter kit Revision history Revision history Document Date of release Description of changes version 2021-04-08 Initial release 2021-09-29 Added instruction to install KitPro3 USB-UART driver manually in section 1.3 Moved “Download and Debug with Starter Kit” to section 3. Added “Verify installation by quick hands-on”... - Page 25 With respect to any examples, hints or any typical values stated herein and/or any information 81726 Munich, Germany WARNINGS regarding the application of the product, Infineon Technologies hereby disclaims any and all Due to technical requirements products may contain warranties and liabilities of any kind, including dangerous substances.
Need help?
Do you have a question about the TRAVEO T2G and is the answer not in the manual?
Questions and answers