Table of Contents
Advertisement
Quick Links
Distributed by:
Liberty
TM
10045 S. Federal Highway
Port St. Lucie, FL 34952
Manufactured by:
AgaMatrix, Inc.
10 Manor Parkway
Salem, NH 03079
Liberty™ Customer Service Toll Free: 1 (877) 542-3610
© 2004 – 2006 AgaMatrix, Inc.
Meter Firmware © 2004 AgaMatrix, Inc.
US and International Patents Pending
All trademarks are the properties of their respective owners.
Advertisement
Table of Contents

Related Manuals for AgaMatrix Liberty


Summary of Contents for AgaMatrix Liberty
- Page 1 Manufactured by: AgaMatrix, Inc. 10 Manor Parkway Salem, NH 03079 Liberty™ Customer Service Toll Free: 1 (877) 542-3610 © 2004 – 2006 AgaMatrix, Inc. Meter Firmware © 2004 AgaMatrix, Inc. US and International Patents Pending All trademarks are the properties of their respective owners.
- Page 2 Liberty Blood Glucose Monitoring System Liberty™ Blood Glucose Monitoring System...
-
Page 3: Table Of Contents
Testing on Your Palm ............... Specifi cations ................14, 30 and 90 Day Averages ..........Symbols ..................Time-of-Day Averages and Individual Test Results ..Index ....................Display Messages ..............My Liberty™ Meter and Target Ranges ......2 Table of Contents Table of Contents... -
Page 4: Important Information About Your Liberty™ System
fi ngertips or the palm (at the base of the thumb). With Liberty™ Test Strips and Liberty™ Control Solution only. Using other brands of test strips and control solu- tion with this meter may produce inaccurate results. - Page 5 Owner’s Booklet and practice the testing procedures these sites. Diff erences in glucose concentrations may before using the Liberty™ Blood Glucose Monitoring be observed after eating, taking insulin medication, or System. Blood glucose monitoring should be done under exercise.
-
Page 6: Important Health-Related Information
If you are experiencing symptoms that are not consistent Lancing Device Lancets with your blood glucose test and you have followed all Control Solutions instructions described in the Liberty™ Owner’s Booklet, The test strips, lancing device, follow your physician’s recommendations. lancets and control solution must be purchased separately. - Page 7 The Liberty™ Test Strip Important Test Strip Information: Store the Liberty™ Test Strip vial in a cool, dry place at With your Liberty™ System, you can test your blood 46° F to 86° F (8° C to 30° C). glucose on your fi ngertips or the palm (at the base of the Use Liberty™...
- Page 8 RIGHT Arrow Button: Use the RIGHT arrow button to scroll forward through options. Strip Port: Insert the Liberty™ Test Strip, with the contact bars facing up, into the strip port. LEFT Arrow Button: Use the LEFT arrow button to scroll backward through options.
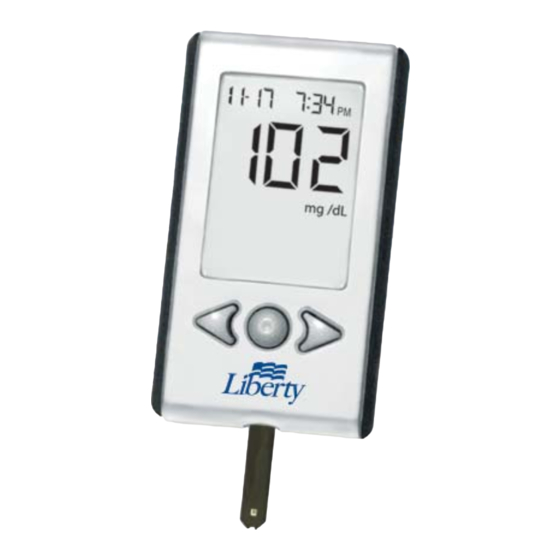
- Page 9 The Liberty™ Meter Display Segments Date and Time: The date and time will appear here. Glucose Test Results: Your glucose test results will appear here. Low Battery: The low battery symbol appears when the batteries in your meter are running low.
- Page 10 1,2,3 Countdown: The 1, 2 and 3 symbols will appear during a test. Graphing Area: Areas of the dot matrix will appear dur- ing a test and when displaying graphical averages. 16 About the Liberty™ System About the Liberty™ System...
- Page 11 The Liberty™ Lancing System Cocking Handle: Cocks the device so it is ready to lance. Depth Adjustment Dial: Adjusts how deep the lancet will lance the skin. Depth Indicator: Displays the depth setting of the lancing device. Release Button: Fires the lancet.
-
Page 12: Getting Started
[2] Setting Time and Date Once in SET Mode, press the CENTER button to move past the Volume Settings. Unpack your Liberty™ System Kit. Dispose of the packing Press CENTER button again to move past material properly. the Backlight Settings and into the Time Format, Time and Date Settings. -
Page 13: Performing A Control Solution Test
fi rst. Count forward 90 days from the date you open a new bottle of The Liberty™ system has 2 levels of control solution; Normal Liberty™ Control Solution. This is your discard date. Write and High. - Page 14 [1] Inserting a Liberty™ Test Strip [2] Adjusting Code Number Gently insert a new Liberty™ Test Strip into the meter. Once the system check is completed, The meter will power ON. the Liberty™ Meter will display a test strip code number for 2 seconds. If this...
- Page 15 The word “control” will also appear on Solution tests continue to fall outside of the specifi ed the display. range, do not use the Liberty™ System to test your blood glucose. Contact Liberty™ Customer Service Toll Free: 1 (877) 542-3610.
-
Page 16: How To Test Your Blood Glucose Levels
Diluted Control Solution. with warm, soapy water and dry before every test. Make Code number on Liberty™ Test Strip vial does not match sure there is no grease, oil, or lotion on the test site. Inter- the code number set in the meter. - Page 17 Insert a Liberty™ Test Strip to twist off the lancet cover. Do not Insert a new Liberty™ Test Strip into the discard it. It should be used when meter. Make sure you insert the test strip discarding your used lancet.
- Page 18 • Note: You can still change the code number as long as size: you have not applied blood to the Liberty™ Test Strip by pressing the LEFT and RIGHT arrow buttons. 32 How to Test Your Blood Glucose Level How to Test Your Blood Glucose Level...
- Page 19 Introduce the blood sample in the IMPORTANT: orientation shown. The test strip Do not press the Liberty™ Test Strip against the test site. fi lls from the tip. Avoid introducing Do not scrape blood onto the Liberty™ Test Strip. blood on the top surface of the test strip.
- Page 20 Remove the used Liberty™ moving dot bar indicates that you can remove your fi nger Test Strip and discard prop- from the Liberty™ Test Strip. erly. The Liberty™ Meter will automatically turn off . As the meter is calculating your results, the 1-2-3 symbol and the graphing area will progressively appear until your results are displayed.
-
Page 21: Testing On Your Palm
Testing on Your Palm Remove the Lancet Testing glucose levels with blood obtained from the palm When you have fi nished testing, (at the base of the thumb) may reduce the pain of testing. unscrew the cap and remove it from The technique for testing on the palm is slightly diff... - Page 22 IMPORTANT: When testing on the palm (at the base of [3] Viewing MEMORY Test results the thumb), you may require 28 gauge (0.3 mm) Liberty™ Lancets in order to obtain enough blood to perform a test. The Liberty™ Meter stores the last 300 glucose test results Consult your physician for a recommendation.
- Page 23 MENU Mode options (see page 61). To It will display the number of glucose test results saved within the last 30 turn OFF the Liberty™ Meter at any time, press and hold the CENTER button for 2 seconds. days in the top right corner.
-
Page 24: And 90 Day Averages
Press the RIGHT or LEFT arrow buttons to view your 30 day trend graph. The 14, 30, and 90 Day Trend Graphs: You can move from the 30 day trend graph to the 30 day numerical aver- age by pressing the RIGHT or LEFT arrow buttons. - Page 25 Press CENTER button to view your 14, 30, and 90 day average comparison Navigation Summary of Memory: graph. The display shows an overview with three trend bars comparing the 14, 30, and 90 days averages. One dot represents 20 mg/dL (1.1 mmol/L). Comparison Graph: Press CENTER button to return to MENU Mode or press and hold the CENTER button for 2 seconds to turn the meter OFF.
-
Page 26: Time-Of-Day Averages And Individual Test Results
/dL The Liberty™ Meter stores the last 300 test results with time and date. If the memory is full, the oldest test result will be deleted and a new test result will be stored in its place. The Liberty™... - Page 27 /dL Note: At any point, press CENTER button to return to the most recent test result. To turn OFF the Liberty™ Meter, press and hold the CENTER button for 2 seconds. Note: To move to between viewing the diff erent Time-of- Day Averages, press the LEFT or RIGHT buttons.
-
Page 28: Display Messages
If you get a Lo glucose test result but have no symptoms of low blood glucose, then retest with a new Liberty™ Test Strip. If you still get a Lo test result, follow your physician’s recommendations. Display Messages... - Page 29 (if volume is enabled in SET Options) If you get a Hi glucose test result but have no symptoms of high blood glucose, then retest with a new Liberty™ MEANING: The result of the glucose test is higher than Test Strip. If you still get a Hi glucose test result, you 240 mg/dL (13.3 mmol/L).
-
Page 30: Alarms
(usually 10-20 minutes) and retest. When alarms are activated: LOW BATTERY MESSAGE If an alarm is set and the Liberty™ Meter is turned OFF, the alarm will turn the meter ON. “AL1” through “AL6” Flashing message (depending on which alarm is set) is displayed. The dis- play backlight fl... - Page 31 CAUTION: Follow your physician’s recommendations on [3] Turning Alarms ON or OFF when and how often to test your glucose. Note: When setting an alarm, your [1] Entering MENU Mode selections will be highlighted by a blinking symbol. Press and hold any button for 2 seconds to enter the MENU mode.
- Page 32 Set (minutes) by using the RIGHT [6] Setting Multiple Alarms or LEFT arrow buttons. Accelerated change is possible by holding down To set other alarms, press the RIGHT or LEFT arrow buttons the arrow buttons. Press the CENTER until the alarm you want to set (AL1 to AL6) is displayed. button to confi...
-
Page 33: Settings
Settings [2] Entering SET Option The main steps covered in this section are: [1] Entering MENU Mode The MEM symbol will appear. If [2] Entering SET Option display backlight is enabled in [3] Setting Meter Volume SET Options, it will remain ON [4] Setting Backlight Option until timing out. - Page 34 Select the preferred volume setting [5] Setting Time with the RIGHT or LEFT arrow buttons. Your selection will be highlighted by the How to Get to the Time Menu: blinking of the symbol. Press the CENTER Press and Hold any button to reach the menu mode. button to confi...
- Page 35 Set the hour (fl ashing) with the Set the year (fl ashing) with the Hour: Year: RIGHT or LEFT arrow buttons. Press RIGHT or LEFT arrow buttons. the CENTER button to confi rm and Press the CENTER button to con- continue on to set the minute.
- Page 36 [7] Setting Your Hypoglycemic Warning Alarm [8] Setting Your Hyperglycemic Warning Alarm The Hypoglycemic Warning Alarm alerts you when your The Hyperglycemic Warning Alarm alerts you when your glucose test results are below the hypoglycemic limit that glucose test results are above the hyperglycemic limit that you have set.
-
Page 37: Error Messages And Troubleshooting
On rare occasions, the meter will display an to test strip use. error message instead of a glucose result. The Liberty If this message appears the moment the test strip is in- system is able to detect specifi c problems which may serted, the test strip may be wet or damaged. - Page 38 Error 3 Error 5 The meter has detected that the The meter was unable to produce a test strip is in poor condition. reliable result. The test strip may have been improperly stored (e.g. hot, This may be caused by a non-blood sample, or a combi- humid conditions) or may be expired.
- Page 39 CAUSE #1: Defective test strip. ACTION: Replace the batteries, set time and date, and test. ACTION: Repeat the test with a new Liberty™ Test Strip. If this does not work, call customer service. CAUSE #2: The batteries are installed incorrectly or there are no batteries in the meter.
-
Page 40: Batteries
Batteries Replacing the Batteries Your Liberty™ Meter comes with two pre-installed, Open Battery Door CR2032, 3 volt, lithium batteries. Make sure the meter is powered OFF. Used Turn the meter so you are looking at the If your batteries run low, the battery symbol fl ashes until battery door. -
Page 41: Caring For Your Meter And Lancing Device
Caring For Your Meter and Lancing Device Specifi cations When using your meter, avoid getting dirt, dust, blood, con- Assay Method: Electrochemistry trol solution, water, or any other liquid into the strip port. Altitude: 10,000 ft Calibration: Plasma equivalent Clean the outside of the meter or the lancing device Sample: Whole blood, capillary using a cloth dampened with mild detergent or mild soap. -
Page 42: Index
Symbols Index Alarms 57-69 The following symbols may appear on the equipment packages or in the documents: Hypo/Hyper warning alarms 54-55, 62-69 Test reminder alarms 57-61 Alternate site testing 5-6, 39-40 Arrow buttons 12-13 Averages 41-52 14, 30 and 90 day averages comparison graph 41-47 Storage In Vitro Diagnostic... - Page 43 Coding the meter 24-25 Lancets 18-19, 29-31, 38 Clean meter, how to Proper disposal of Contact bars 10, 12-13 Proper use of 29-31 Control solution 4, 11, 14-15, 22-28 Lancing 5-6, 18-19, 29-31, 33, 39-40 Control solution range Fingertip Customer service Palm 5-6, 39-40 Expiration date...
- Page 44 Volume 62-64 Operating range 14, 56, 79 Year 62-67 Testing blood glucose, How to 29-40 Owner’s booklet Test Strips, Liberty™ 10-11, 22-28, 31, 34-35, 79 Pharmacist Warnings 10-11 How to code Quick start guide 22-28 Reference guide How to Use...
-
Page 45: My Liberty™ Meter And Target Ranges
My Liberty™ Meter and Target Ranges Meter Serial Number: Software Version: Time of Day Glucose Ranges Your Target for People Without Ranges (mg/dL) Diabetes (mg/dL) Before Meals 70 – 110 1 Hour After Meals Less than 160 2 Hours After Meals...
Need help?
Do you have a question about the Liberty and is the answer not in the manual?
Questions and answers