Table of Contents
Advertisement
Quick Links
UM_2205_PL38_2206_121720
Quick-start
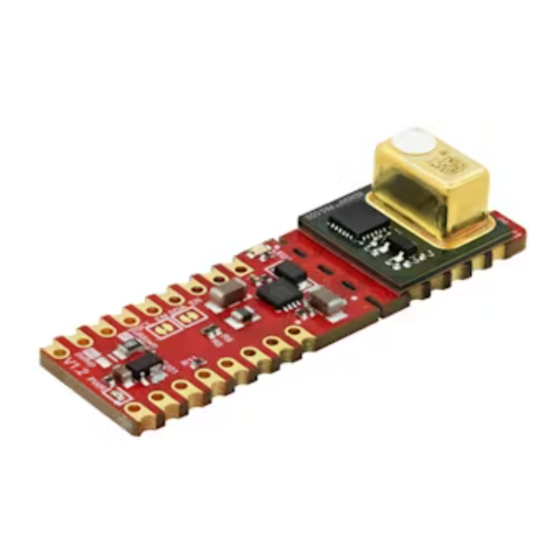
Shield2Go
About this document
Scope and purpose
This user manual serves as a starting guide and will focus on the setup and communication of the XENSIV
CO2 Shield2Go. Main focus will be the hardware along with a quick example of how to set up communication and
start basic measurement with the provided software library using the XMC 2Go, the Arduino Due and the Arduino
Uno in combination with the my IoT adapter.
Intended audience
Application engineers, system engineers and makers.
Order information
Sales Name: SHIELD_PASCO2_SENSOR
SP-No: SP005569590
Opn: SHIELDPASCO2SENSORTOBO1
Table of contents
About this document ....................................................................................................................... 1
Table of contents ............................................................................................................................ 1
1
Introduction .......................................................................................................................... 2
1.1
Shield2Go platform ................................................................................................................................. 3
1.2
2
Software and library integration .............................................................................................. 8
2.1
Setting up Arduino IDE ............................................................................................................................ 8
2.2
Library overview ...................................................................................................................................... 8
3
Quick start with XMC 2Go ....................................................................................................... 10
3.1
Step by step CO2 concentration readout example .............................................................................. 11
4
Quick start with Arduino Due .................................................................................................. 18
5
Quick start with Arduino Uno and My IoT adapter ..................................................................... 20
6
Appendix .............................................................................................................................. 21
Revision history............................................................................................................................. 22
User Manual
www.infineon.com
guide
PAS CO2 Shield2Go .................................................................................................................. 4
Please read the Important Notice and Warnings at the end of this document
for
XENSIV
page 1 of 23
PAS
CO2
TM
2022-08-15
PAS
TM
V 1.2
Advertisement
Table of Contents

Related Manuals for Infineon XENSIV PAS CO2 Shield2Go


Summary of Contents for Infineon XENSIV PAS CO2 Shield2Go
-
Page 1: Table Of Contents
Quick start with Arduino Uno and My IoT adapter ..............20 Appendix ..........................21 Revision history..........................22 User Manual Please read the Important Notice and Warnings at the end of this document V 1.2 www.infineon.com page 1 of 23 2022-08-15... -
Page 2: Introduction
All the components are developed and designed in-house in accordance with Infineon’s high-quality guidelines. The sensor therefore benefits from Infineon’s illustrious record of accomplishments in MEMS design and acoustic capabilities, resulting in it being best-in-class for price/performance. The XENSIV PAS CO2 sensor is ideal for smart-home and building automation as well as various indoor air quality IoT devices such as air purifiers, thermostats, weather stations and personal assistants. -
Page 3: Shield2Go Platform
Introduction Shield2Go platform Infineon’s Shield2Go boards are equipped with one featured Infineon IC and provide a standardized form factor and pin layout for fast orientation. All boards come with solderless connectors allowing designers to stack the boards instead of soldering them. This makes the Shield2Go boards simple, reusable and flexible. In addition, each Shield2Go comes with a dedicated and free software library for Arduino. -
Page 4: Xensiv Tm Pas Co2 Shield2Go
XENSIV PAS CO2 to the other PCBs. PWM and INT functionality is also covered in both cases. Please refer to the programming guide and register map for full detailed description and examples. https://www.infineon.com/dgdl/Infineon-programming_guide_PAS_CO2_evaluationkit-ApplicationNotes- v02_00-EN.pdf?fileId=5546d4627600a6bc0176041139e77780 https://www.infineon.com/dgdl/Infineon-Registermap_description_PASCO2_MA2-ApplicationNotes-v02_00- EN.pdf?fileId=5546d4627600a6bc017604238d967785... - Page 5 Quick-start guide for XENSIV PAS CO2 Shield2Go Introduction Two communication interfaces are available. By default, the I C interface is configured but with a simple rearrangement from the pull-up resistor R5 to pull-down resistor R6 can the UART interface be selected. To fully disable the I C interface and the connected pull-up resistors on the SDA/Tx and SCL lines solder jumpers can be cut and disconnected.
- Page 6 Quick-start guide for XENSIV PAS CO2 Shield2Go Introduction Figure 5 Pinout XENSIV PAS CO2 Shield2Go Table 1 Pin descriptions of body part Symbol Type Function VDD5 Power supply (5 V) 5 V step up to 12 V power supply for the IR emitter Not connected Not connected P11: SDA...
- Page 7 Quick-start guide for XENSIV PAS CO2 Shield2Go Introduction Table 2 Pin descriptions of head part Symbol Type Function Power supply (3.3 V) 3.3 V digital power supply Input UART receiver pin (3.3 V domain) Input/Output C clock pin (3.3 V domain) TX_SDA Input/Output UART transmitter pin/I...
-
Page 8: Software And Library Integration
3. In case of using XMC boards as microcontroller, install board package. The official Arduino boards are already available in the Arduino software, but other third-party boards as the Infineon XMC MCU based need to be explicitly included. Follow the instructions in section 3 “Quick start with XMC 2Go” to add the XMC board family to Arduino. - Page 9 PAS CO2 Shield2Go Software and library integration Full documentation and overview to the driver can be found on the GitHub. https://github.com/Infineon/sensor-xensiv-pasco2 And the documentation with detail explanation for all macros, enumerations and functions can be found here: https://infineon.github.io/sensor-xensiv-pasco2/html/group__group__board__libs.html The Arduino library is using this core C driver with a C++ wrapper to follow the ecosystem design pattern so that Arduino users find in this library what they are used to.
-
Page 10: Quick Start With Xmc 2Go
Quick-start guide for XENSIV PAS CO2 Shield2Go Quick start with XMC 2Go Quick start with XMC 2Go The XMC 2Go is designed to evaluate the capabilities of the XMC1100 Microcontroller and the powerful, free of charge tool chain DAVE . Thanks to the standardized form factor of the XENSIV PAS CO2 Shield2Go it is directly compatible with the XMC 2Go and can be used easily used in combination by plugging the XENSIV PAS CO2... -
Page 11: Step By Step Co2 Concentration Readout Example
Random Number Generator Others 2 User LEDs @ P1.0 and P1.1 More and detailed information can be found on the dedicated XMC 2Go product page. https://www.infineon.com/cms/de/product/evaluation-boards/kit_xmc_2go_xmc1100_v1/ Step by step CO2 concentration readout example Figure 8 XENSIV PAS CO2 Shield2Go I... - Page 12 C interface connection to XMC 2Go In order to use and program the Infineon XMC microcontrollers in the Arduino IDE, SEGGER J-Link must be installed first. Please follow the link to SEGGER J-Link and install the J-Link Software and Documentation Pack for your operating system.
- Page 13 Quick-start guide for XENSIV PAS CO2 Shield2Go Quick start with XMC 2Go Afterwards Infineon's microcontroller boards can be added to the Arduino IDE by pasting the following URL into the 'Additional Boards Manager URLs' input field under File > Preferences. https://github.com/Infineon/Assets/releases/download/current/package_infineon_index.json Figure 10 Adding XMC boards to the Arduino IDE in the ‘Preference’...
- Page 14 Quick-start guide for XENSIV PAS CO2 Shield2Go Quick start with XMC 2Go In the boards list Tools > Board, the XMC microcontroller boards are added and can be used from now on. After that make sure to select the respective board (XMC1100 XMC2Go) and COM port in the Tools dropdown menu. Figure 12 Selecting XMC 2Go board User Manual...
- Page 15 Quick-start guide for XENSIV PAS CO2 Shield2Go Quick start with XMC 2Go With everything ready, one of the library examples can now be opened, uploaded and run. The library examples provided can be opened in File > Examples > pas-co2-sensor. Figure 13 Arduino library examples User Manual...
- Page 16 Quick-start guide for XENSIV PAS CO2 Shield2Go Quick start with XMC 2Go In this case the serial-periodic example is used. The user can configure the I C frequency, measurement period and reference pressure. The sensor supports both standard-mode (100 kHz) and fast-mode (400 kHz). In case of communication issues, it is recommended to lower the frequency to the standard-mode.
- Page 17 Quick-start guide for XENSIV PAS CO2 Shield2Go Quick start with XMC 2Go Remember to connect the 5 V pin prior to starting sensor Ensure J-Link is installed before compiling Figure 15 Serial-periodic CO2 results output User Manual 17 of 23 V 1.2 2022-08-15...
-
Page 18: Quick Start With Arduino Due
Quick-start guide for XENSIV PAS CO2 Shield2Go Quick start with Arduino Due Quick start with Arduino Due Figure 16 XENSIV PAS CO2 Shield2Go I C interface connection to Arduino Due Pinout of Arduino Due from https://content.arduino.cc/assets/Pinout-Due_latest.pdf Table 8 Pin connections Position Symbol Connection to the Arduino Due... - Page 19 Quick-start guide for XENSIV PAS CO2 Shield2Go Quick start with Arduino Due Similar as with the XMC 2Go the Arduino Due board package needs to be installed first. As it is not a third-party board like the XMC 2Go, the right package “Arduino SAM Boards” (32-bit ARM® Cortex-M3) which is including the Arduino Due can be directly added with the board manager.
-
Page 20: Quick Start With Arduino Uno And My Iot Adapter
XMC 2Go. In case of any technical questions please visit our community forum and have a look if similar questions are already posted or create a new one. https://community.infineon.com/t5/CO-sensor/bd-p/CO2Sensors User Manual 20 of 23 V 1.2... -
Page 21: Appendix
Quick-start guide for XENSIV PAS CO2 Shield2Go Appendix Appendix Figure 19 XENSIV PAS CO2 Shield2Go schematic User Manual 21 of 23 V 1.2 2022-08-15... -
Page 22: Revision History
Programming guide for XENSIV PAS CO2 Revision history Revision history Document Date of release Description of changes version V 1.0 01.04.2022 Creation V 1.1 01.07.2022 Update library overview and figures, added example using My IoT adapter V1.2 15.08.2022 Highlighting important notes User Manual 22 of 23 V 1.2... - Page 23 Infineon Technologies hereby disclaims dangerous substances. For information on the types © 2022 Infineon Technologies AG. any and all warranties and liabilities of any kind in question please contact your nearest Infineon All Rights Reserved. (including without limitation warranties of non- Technologies office.
Need help?
Do you have a question about the XENSIV PAS CO2 Shield2Go and is the answer not in the manual?
Questions and answers