Advertisement
- 1 Hair clipper
- 2 Accessories
- 3 Aligning the blade
- 4 Lubricating oil
- 5 Blade displacement lever
- 6 Important safety precautions
- 7 Styling instructions
- 8 Reminder
- 9 Beginning to cut
- 10 Comb attachment
- 11 Step 1
- 12 Step 2
- 13 Step 3: The temples
- 14 Step 4: The front part of the top of the head
- 15 Step 5: Finishing
- 16 Achieving a tapered look
- 17 Cleaning and care lubricating the blades
- 18 Cleaning the clipper
- 19 Technical characteristics
- 20 Guarantee
- 21 Documents / Resources
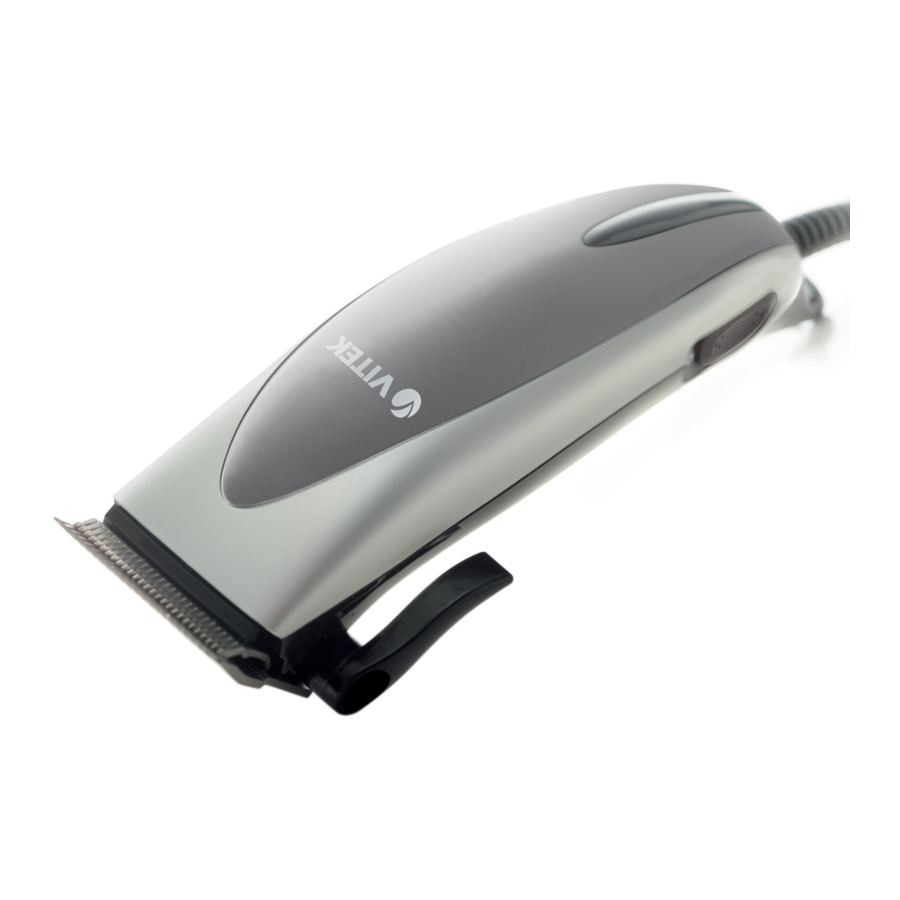
Hair clipper
Carefully read these instructions before using the hair clipper.

- Bottom blade
- Top blade
- Blade displacement lever
- On/off switch (O, I)
Accessories

- Attachment - 3 mm
- Attachment - 6 mm
- Attachment - 9 mm
- Attachment - 12 mm
- Comb
- Scissors
- Lubricating oil
- Brush
Aligning the blade
All of our hair clippers are carefully checked at the factory. The blades are aligned and lubricated with a special oil (included in the original set). If the blades were removed for cleaning or replacement, they must be aligned.
Align the blades in the plane and tighten the retainer screws. The lower blade must come forward relative to the top one by 1-2 mm (see the figure). If you are unable to align the blades, add a few drops of oil to them, turn the clipper on for about 30-40 seconds, then turn off the clipper and remove the plug from the outlet. Loosen the screws that hold the lower blade a little and align the blades. After aligning the blades, don't forget to tighten the retainer screws of the lower blade.
Lubricating oil
To maintain the clipper in good working condition, it is necessary to lubricate the blades after every use. Do not use vegetable oil or oil that contains kerosene or other solvents. Solvents evaporate, and the heavy oil that remains can slow the motion of the blade.
Use only the oil included in the delivery set.
Blade displacement lever
The blade displacement lever is conveniently located under the thumb (if you are right-handed). During use, you can depress the lever to move the blade, thus regulating the length of the cut without using a comb attachment. The top lever position allows the shortest cutting. In the bottom lever position, the length of the cut is the same as when using comb attachment #1 (3 mm). By changing the position of the lever while cutting, you can select the necessary length of the cut.
Changing the position of the blade will extend its life.
If hairs get caught between the blades during use, release them by moving the lever up and down a few times while the clipper is switched on. This will help to free the hair without removing the blade. If the clipper pulls hair, this means that the blades are dull and you must replace them with new ones.
Important safety precautions
To avoid risk of fire, electric shock or health hazard, observe the following recommendations.
- Before turning the clipper on, make sure that the voltage of the outlet matches the clipper's required voltage.
- Do not permit children to play with the clipper. Do not leave a switched-on clipper near children.
- Use the clipper only for its intended purpose. Do not use attachments or accessories not included in the original set.
- Do not use the clipper while taking a bath or shower. Do not put or store the clipper in a place where it can fall into water. Do not immerse the clipper in water or any other liquid.
- Do not touch the clipper if it has fallen into water, or the water itself. Immediately unplug the clipper from the outlet.
- Do not use the clipper if the plug or cord is damaged. Contact an authorized service center to have the cord replaced.
- Keep the power cord away from hot surfaces.
- Before cleaning the clipper, turn it off and unplug it from the outlet.
- Do not wind the power cord around the housing of the clipper.
- Do not allow foreign objects to get inside the housing of the clipper.
- Before use, make sure the blades are aligned correctly. If they are misaligned, align them (see blade alignment).
- Always turn off the clipper before putting it down.
- Never use the clipper with a broken or damaged comb attachment, or damaged blades.
Styling instructions
Before beginning to cut hair, make sure that the clipper works properly and the blades move smoothly. Remove excess lubricating oil from the blades with a dry cloth. Always be aware of the state of the power cord. Do not allow it to twist. If necessary, turn off the clipper and straighten the cord.
The person whose hair is being cut should sit with their head at your eye level, their shoulders covered with a towel. Comb the hair before cutting it.
Reminder
Cut a small amount of hair with each pass. You can always return to the same place later. Best results are obtained when the hair is dry.
Beginning to cut
When cutting for the first time, it is better to leave the hair somewhat long. As you master the use of the clipper, you will be able to style as desired.
Comb attachment
Hair length depends on the attachment used:
| Comb attachment | Hair length (mm) |
| 1 | 3 |
| 2 | 6 |
| 3 | 9 |
| 4 | 12 |
To attach the comb attachment, set the top part of the attachment on the blade and press it until it snaps into place. To remove the comb attachment, press on the clamp and remove the attachment.
To achieve an even cut, move the clipper smoothly along the head. Do not make sudden movements. Cut a small amount of hair with each pass and return to the same spot to cut more if necessary.
Remove cut hair from the blade often.
Comb the hair often to check the evenness of the cut.
Step 1
Attach comb attachment #1 (3 mm) or 2 (6 mm). Hold the appliance with the blade up. Begin cutting from the edge of the hair growth area (fig. 1). Slowly move the clipper upward and away from the head. Cut all the hair in the back of the head and around the ears in this way.

Step 2
Turn the clipper off and attach comb attachment #3 (9mm) or 4 (12 mm) for longer hair and continue to cut the hair closer to the top of the head (figure 2).

Step 3: The temples
Turn the clipper off and attach comb attachment #1 (3 mm) or 2 (6 mm) and cut the hair on the temples. Then attach comb attachment #3 (9 mm) or 4 (12 mm) and continue to cut the hair toward the top of the head.

Step 4: The front part of the top of the head
When using comb attachment #3 (9 mm) or 4 (12 mm), cut the hair on the top of the head from back to front opposite the direction of hair growth (figure 4).

You can also cut hair in the direction of growth, but keep in mind that it will be longer. Use attachment #1 (3 mm) and 2 (6 mm) for very short cutting. To leave the hair longer, use attachment #3 (9 mm) or 4 (12 mm). You can also leave the hair longer by holding some strands between your thumb and middle finger and then cutting them. You can lift some strands with the comb and cut them (figures 5, 6).

Always begin cutting from the back of the head. Comb the hair often to check the evenness of the cut.
Step 5: Finishing
In the last phase, remove the attachment from the clipper and carefully trim the hair on the temples and neck to make it even. Be very careful not to cut the skin (figure 7).

Achieving a tapered look
Attach comb attachment #4 (12 mm) and begin cutting from the back of the head toward the top. Cut the hair against the direction of growth from the front of the head toward the top and from the sides (figure 8).

To make it flat on top, use a comb to lift the hair and cut along the comb. Comb the hair often to check the evenness of the cut.
Cleaning and care lubricating the blades
The blades must be lubricated both before and after using the clipper.
- Turn off the clipper.
- Apply one or two drops of oil to the teeth of the blade and the back of the top blade, turn the clipper on and make sure the blades move smoothly.
- Turn off the clipper and wipe off excess oil with a dry cloth.
 Attention: use ONLY the oil included in the clipper set. DO NOT USE vegetable oil, fat, or any blend of oil that includes solvents. Solvents evaporate, and the thick oil that remains can slow down the blade.
Cleaning the clipper
- Turn off the clipper and unplug it from the power outlet.
- Remove cut hair from the blade with the brush included in the set.
- Wipe the clipper housing and accessories with a damp cloth, then wipe them dry with a dry cloth.
- Never immerse the clipper in water or any other liquid.
- Never use abrasive materials or cleaning products.
- Lubricate the blade with oil.
- Store the clipper in a dry and safe place.
Technical characteristics
Input voltage: 30 V ~ 50 Hz
Required power: 7 W
Do not turn on the clipper for more than 20 minutes at a time
The manufacturer shall reserve the right to change the specification of the appliances without preliminary notice.
The life time of the appliance shall not be less than 3 years
Guarantee
Details regarding guarantee conditions can be obtained from the dealer from whom the appliance was purchased. The bill of sale or receipt must be produced when making any claim under the terms of this guarantee.

This product conforms to the EMC-Requirements as laid down by the Council Directive 89/336/EEC and to the Low Voltage Regulation(73/23 EEC)
A production date of the item is indicated in the serial number on the technical data plate. A serial number is an eleven-unit number, with the first four figures indicating the production date. For example, serial number 0606ххххххх means that the item was manufactured in June (the sixth month) 2006.


Documents / ResourcesDownload manual
Here you can download full pdf version of manual, it may contain additional safety instructions, warranty information, FCC rules, etc.
Advertisement


Need help?
Do you have a question about the VT-1362 GY and is the answer not in the manual?
Questions and answers