Table of Contents
Advertisement
Quick Links
Prime Pro 48 Quick Start Guide
Help and advice is available to support your research.
Bibby Scientific Ltd. Beacon Road, Stone,
Staffordshire, ST15 0SA
Tel: +44 1785 812121
General enquiries: enquiries@bibby-scientific.com
Order enquiries: orders@bibby-scientific.com
Technical Support: technehelp@bibby-scientific.com
Website: www.techne.com
Place on bench
Space Requirements
• 5 cm (2 in.) of unimpeded space at
the front and back for ventilation.
• 7.5 cm (3 in.) above the Pro so that
the lid can be opened safely.
• Easy access to the power switch on
the lower right back corner.
• Two wall outlets (100–240 VAC,
50/60 Hz, 5A) within 2 m (6 ft.)
4
6
Full range of 400 qPCR detection kits
available from www.techne.com
• Human pathogen test kits.
• Veterinary and agricultural.
• Food and water testing.
• Bio-threat detection.
b
Turn on
Turn on the computer, wait for
Microsoft Windows to boot fully,
then turn on the Prime Pro
instrument. The instrument runs a
series of self- tests that take up to
20 minutes. DO NOT OPEN THE
PRIME PRO 48's LID DURING
INITIALISATION.
At any time after turning on the
instrument, double-click the Prime
Pro icon on the desktop to start the
Prime Pro software. Communication
between the computer and the Prime
Pro 48 instrument will be established
within five minutes. When the LED
indicator light on the front panel
stops flashing and remains solid,
b
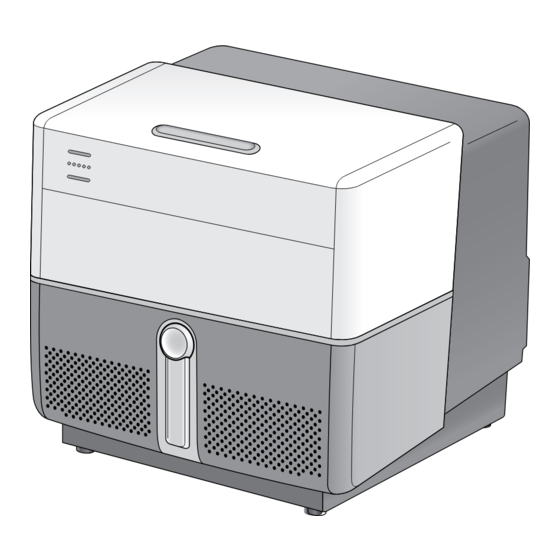
the instrument is ready. Open the
a
Prime Pro by pressing the round
silver button on the front to raise its
handle, while lifting the handle from
the bottom until the Prime Pro 48
pops open.
c
Define thermal
profile
Click on "Thermal Profile" tab.
• To remove a step click inside the
column you want to remove and
drag it to the wastebasket.
• To change temperature drag the
red bar up / down or click on the
actual temperature.
• To change time click the clock, two
arrows will appear allowing you to
change time.
• To add more cycles, click the up/down
arrows beside "Number of Cycles".
• To change from 2 to 3 steps, click
on the yellow arrow (5 steps max).
• To add a stage click on "Add
stage" icon.
• Once defined the system is ready.
No need to define plate layout or
dyes at this stage. The system
collects data using every well, every
filter, every cycle. To begin run click
"Start Run".
1
Unpack
Lift the Prime Pro instrument out of
b
a
c
the crate. Place it on a flat surface
and remove the foam packaging.
Re-order consumables
PROPLATE48
Pack of 50x 48 Real Time PCR Plates
PROSEAL48
Pack of 50x 48 Real Time PCR Plate seals
2
Install software
1. Insert memory stick into PC of
choice
2. Click on Prime Pro setup icon
3. Follow on-screen instructions to
install.
4. Then click on ProStudy setup icon.
b
5. Follow on-screen instructions to
install.
c
Connect
1. Connect Ethernet cable to Prime Pro
and PC.
2. Connect power cable to Prime Pro
then outlet.
3. Connect computer power cord to
the wall outlet. Turn on outlets.
For important PC set-up instructions
check the reverse of this document.
5
Plate layout
Click "A" to adjust Assays
(primers). If testing 2 genes and
1 template, select 2 Assays and 1
Sample using dropdown menus
and up / down arrows. Click "S" to
adjust Samples (template) and adjust
with the and up/down arrows. Click
on 3 to save.
Now highlight wells by selecting
individuals, columns, rows or the
whole plate. Then click on the
small circle beside the desired
assay and sample (once selected
it fills with colour).
Then define the "Role" of that assay
e.g. Unknown, No Template Control
etc. beside each assay. Plate layout
can be defined before or after a run
begins. Once defined, data analysis
can occur.
b
Accompanying
Ethernet cable
literature
Box of 50x Seals
Seals
a
b
c
Power supply
USB Drive
Dock and
Bag of 50x Plates
squeegee
3
b
a
Create or
launch a
protocol
Create : Click on the Prime Pro
control software icon. Click on the
boxes that describe the assay you are
looking to run. These define initial
setup of the system and the mode
of analysis you will use to study the
data. Click on the green tick to
b
define the thermal profile.
Launch: Open templates tab and
double click the desired protocol to
launch.
7
Data analysis
The "Monitor Run" tab on the
left of the screen allows samples
to be monitored as they cycle and
amplification occurs. To analyse
run data, click on the ProStudy
software icon located on the
desktop.
Advertisement
Table of Contents

Related Manuals for Techne Prime Pro 48


Summary of Contents for Techne Prime Pro 48
- Page 1 Open the Prime Pro by pressing the round silver button on the front to raise its handle, while lifting the handle from the bottom until the Prime Pro 48 pops open. Define thermal Plate layout profile Click “A”...
- Page 2 Windows 7, not starter, and in UK or USA English. Either 32 or 64 bit variants are compatible. Once your Prime Pro 48 system is set up and ready to use, register your Prime Pro by going to www.techne.com and •...
Need help?
Do you have a question about the Prime Pro 48 and is the answer not in the manual?
Questions and answers