Table of Contents
Advertisement
Quick Links
Advertisement
Table of Contents

Related Manuals for GTD GTD-470NBSW


Summary of Contents for GTD GTD-470NBSW
- Page 1 GTD-470 N BSW BEAM-SPOT-WASH Moving Head User Manual...
- Page 2 Thank you for choosing GTD-470 N BSW product. The product integrates beam, spot and wash effect in one body, with compact size and light weight. Modular structure design, simple disassembly, easy maintenance, new turbo cooling system ensure the light source works in a good environment.
-
Page 3: Table Of Contents
Guangzhou GTD Culture & Technology Group Co.,Ltd. | 27 Fu Yuan Yi Road, Guangzhou 510805, P.R.China +86-20-61808296 | +86-20-61812282 fax | www.gtd-lighting.com | contact@gtd-lighting.co Table of contents 1.Safety instructions............................1 2.Product introductions...........................3 2.1 Dimensions ..............................3 2.2 Fixture overview ............................4 2.3 Accessories..............................4 3.Packing and shipping..........................5... - Page 4 3.2 Unpacking..............................5 3.3 Packing after use.............................5 4.Installation..............................6 4.1 Clamps installation...........................6 4.2 Device installation............................6 4.3 Lamp fitting and adjustment........................7 5.Power / Control connection........................8 5.1 Power connection...........................8 5.2 Control connection..........................8 5.3 Testing..............................8 6.Control panel.............................9 6.1 Panel instruction.............................9 7.Technical specification..........................10 8.Gobos and colors............................13 8.1 Gobo specification..........................13 8.2 Gobos..............................13 8.3 Colors..............................14...
- Page 5 12.Maintenance and Troubleshooting......................24 12.1 Troubleshooting............................24 12.2 System wiring diagram.........................24 13. Spare parts list............................28...
-
Page 6: Safety Instructions
Before using the fixture, read the latest version of the product user manual, paying particular attention to the safety instructions. Please check www.gtd-lighting.com for the latest revision/update of the user manual. The manufacture of this fixture, are not responsible for damages, resulting from misuse of this fixture, due to the disregard of the information printed in this user manual. - Page 7 General guidelines Never open this fixture while in use. The fixture should be kept clean. DO NOT operate the fixture in extreme heat or dusty environments. Avoid contact with chemical liquid. This fixture is a professional light effect designed for INDOOR / DRY LOCATIONS ONLY on stage, in ...
- Page 8 Broken or damaged cables and light source can only be fixed or changed by certified technicians, certified local distributors or the manufacturer to ensure operational safety. Do not stick filters or other materials onto the lens. Do not modify the fixture or install other than GTD manufactured parts.
-
Page 9: Fixture Overview
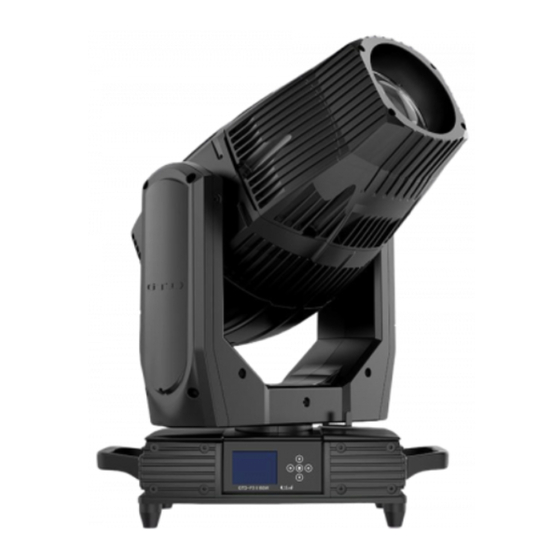
Fixture overview... -
Page 10: Accessories
Head module Color & gobo & CMY wheels module CMY module Light module Pan&tilt scan Base module 2.3 Accessories Item Unit Remark User Manual Safety cable φ5*60cm 7*19pc with hook Material:Steel 3-pins signal line... -
Page 11: Packing And Shipping
3. Packing and shipping 3.1 Protection lock Pan and tilt locks are equipped to ensure safe transportation. PAN: 4 lock positions are located evenly on the Pan. TILT: 5 lock positions are located on left and right side of the Tilt with the third one in the center 垂直保护锁... -
Page 12: Packing After Use
Open the box and take out the whole set of packaging foam which contains both the fixture and its accessories. Remove the foam from the top, put away the accessories, and then take out the fixture wrapped in the plastic bag Notes Check if the pan and tilt are unlocked before connecting the fixture to power. -
Page 13: Lamp Fitting And Adjustment
1. Make sure there is no damage on the clamps or safety cables before installation. 2. The clamp is mounted on the chassis of the fixture. Horizontally insert the clamp into the mounting holes of the chassis. Fasten the clamp tightly by a 1/4 turn clockwise. Fix another clamp in the same way. - Page 14 remove the back cover2 with the same method. Unplug the connected line in bulb, press the top of the bulb down, so that can remove the bulb directly. 3. Install the bulb: Press the bulb into the elastic port, push the light bulb to the hole and plug in the bulb cable, install the back cover1&2.
-
Page 15: Power/ Control Connection
its lifespan. Read the guidelines in the package carefully when fixing the lamp. To avoid any impact on the beam, do not touch the bulb with your bare hands. The lamp must be kept clean with the use of the clean paper contained in its package 5. -
Page 16: Testing
5.3 Testing Connect the fixture to AC power. Check if the lamp is on and the fixture is independently controllable before putting into operation. 6. Control panel 6.1 Using the control panel GTD-470 G BSW GTD-470 N BSW... - Page 17 The control panel features touch-sensitive buttons and LCD digital display for quick and easy setup of address code and functions menu. Press UP or DOWN to view or select the function menu. Press ENTER to choose a function and enter into corresponding sub menu. Each menu represents ...
-
Page 18: Technical Specification
7. Technical specification Optical Light source: SIRIUS HRI 470W XL Expected average lifetime: 1500 h Color temperature correction: 7500K Zoom: BEAM 0° -2.5° / SPOT 3° -40° / WASH 5° -45° CRI:Ra≥85 Focus: High-precision glass lenses, electronic linear HD focus Prism: 1 pc tip 16-facet prism,1 pc Symmetry facet prism, control the effect independently, make double concentric effect when combine two prism Softening effect: 1 pc Softening Mirror,After softening, the light spot is soft and natural... - Page 19 Control channels (DMX) : 27/24/34 Protocol: DMX-512 RDM Display: Graphic LCD backlit Physical / Installation Weight: 30Kg (66lbs.) IP rating: IP20 Material: Aluminum, steel, plastic Mounting points: Four quarter-turn locking points + attachment points for safety wire Dynamic effects ...
- Page 20 GTD-470 N BSW(BEAM) Il l u m i n an ce(LUX) 2.5° 96400 26200 9800 3160 ° Distance(m/ft.) 0 20/65.62 40/131.23 60/196.85 80/262.46 Beam Diameter(m/ft.)(2.5°) Ø0.95/3.12 Ø1.9/6.23 Ø2.85/9.35 Ø3.8/12.47 GTD-470 N BSW(SPOT) Il l u m i n an ce(LUX) 3 °...
- Page 21 which both reduces the impact of power and voltage fluctuations, and removes the restriction of voltage and frequency variations in different countries. Automatic energy saving: when the shutter or CMY is closed, power consumption will be reduced automatically with the photoelectric tracking induction technology. Sleep mode: uses the most advanced technology to remotely activate sleep mode.
-
Page 22: Gobos And Colors
8. Gobos and colors 8.1 Gobo specification All patterns are made onto the metal gobos, and can be customized according to user’s requirement. The customized size is as below: Gobo material Outer dimension Effective dimension Thickness Glass gobo Φ14.4mm Φ9 1.1mm Gobo material:Glass 8.2 Gobos... -
Page 23: Colors
8.3 Colors One color wheel: 12 colors + open, split color, CW/CCW rotation,“Rainbow effect”in both directions... - Page 24 1: Red 2: Orange 3: Blue 4: Green 5: Magenta 6: Yellow 7: Cyan 8: Pink 9: Golden Yellow 10: Dark Green 11: CTB 12:UV...
-
Page 25: Menu Structure
9. Menu structure Level 1 Level 2 Level 3 Level 4 Info 1.Run 1.Address Setting Address: 001~ XXX Setting the DMX address setting 2.Value Display Pan ……,All,Off Display the channel value 3.Auto-Program Master /Slave Run auto program in master or slave 4.IP Setting 192.168.xxx.xxx... - Page 26 Control 2.Automatic La-On Enable/Disable Power on open lamp 3. Lamp On Via Enable/Disable Console open lamp Enable/Disable Console close lamp 4. Lamp Off Via 20~79, 45’C Open lamp below temperature /68~174 , 113’F Close lamp above temperature 5.Lamp On Temp. ~ 139 , 6.Lamp Off Temp.
- Page 27 4.Gobo Reset All gobo motor reset 5.Strobe Reset Strober motor reset 6.Other Reset All other motor reset 6.Channel 1.Test Mode Pan…… Every channel test Adjust 2.Manual Mode Pan =XXX Manual control 3.Adjust Mode Input Password Password=XXX The password of adjust mode Pan=XXX Fixed all begin position 4.Focus Mode...
-
Page 28: Dmx Protocol
End Scene: XX *Settings hightlighted in light grey are default values 10. DMX Protocol Mode/channel Type of Function Basic value control Standard (39) (34) 0-255 Pan movement by 540° or 360° (540°=default angle) proportional Pan fine 0-255 Fine control of pan movement (0=default) proportional Tilt 0-255... - Page 29 Mode/channel Type of Basic Function value control Standard (39) (34) Magenta Magenta from min.saturation-->full magenta 0-255 proportional (0=default) Yellow 0-255 Yellow from min.saturation-->full yellow (0=default) proportional Color wheel Open (0=default) step 8-17 Color 1 step 18-27 Color 2 step 28-37 Color 3 step 38-47...
- Page 30 88-97 Color 9 step 98-107 Color 10 step 108-117 Color 11 step 118-127 Color 12 step 128-187 Forwards color wheel rotation from slow to fast proportional 188-195 Stop step 196-255 Backwards color wheel rotation from slow to fast proportional Color wheel - fine positioning 0-255 Fine positioning (0=default) proportional...
- Page 31 107-114 Gobo 6 shake proportional 115-127 Open step 128-187 Forwards gobo wheel rotation from slow to fast proportional 188-195 Stop step 196-255 Backwards gobo wheel rotation from slow to fast proportional Rotating gobo wheel Open (0=default) step 8-12 Gobo 1 step 13-17 Gobo 2...
- Page 32 68-77 Gobo 3 shake proportional 78-87 Gobo 4 shake proportional 88-97 Gobo 5 shake proportional 98-107 Gobo 6 shake proportional 108-117 Gobo 7 shake proportional 118-127 Gobo 8 shake proportional 128-187 Forwards gobo wheel rotation from slow to fast proportional 188-195 Stop step...
-
Page 33: System Wiring Diagram
Focus 0-255 Continuous adjustment from near to far (0=default) proportional Focus fine 0-255 Fine focusing (0=default) proportional Shutter/ strobe 0-31 Shutter closed (0=default) step 32-63 Shutter open step 64-127 Synchronous strobe-effect from slow to fast proportional 128-159 Shutter open step 160-223 Random strobe-effect from slow to fast proportional... - Page 34 Context of socket...
- Page 35 It is required that the fixture should be kept clean and well maintained to ensure its reliability. Its lifespan mainly depends on the working environment and proper operation. Should you have any questions, please consult a technical engineer of GTD Lighting. Notes Damage resulted from dust, smoke, oil or improper use is not covered by warranty.
- Page 36 fans are operational. If not, call a qualified technician. 12.2 Troubleshooting Problem Possible Cause Suggested Correction Power switch not turned on. Turn on power switch. Locate the blown fuse. Remove the broken Take out the fuse and check if it is blown. fuse.
- Page 37 Problem Possible Cause Suggested Correction system. Choose the channel mode in “Channel Misuse in “Channel setting > Channel setting > Channel Mode” of the fixture as Mode”of the fixture. required by the user Malfunctioning of DMX cannon input/output Troubleshooting the DMX XLR signal plate connectors.
- Page 38 Problem Possible Cause Suggested Correction incorrect and adjustment should be made. Check capacitor wiring,if visibly available, to determine if capacitors are properly wired. Incorrect triggers output. Replace triggers. Should the fixture is not in active use for “standby time”,the sleep mode is enabled automatically to make it more The fixture is in sleep mode stable and safer, sleep time can be...
- Page 39 Problem Possible Cause Suggested Correction time to cool and re-establish optimum starting conditions. Restart time varies with the degree of ventilation built into it, ambient temperature, and draft conditions. The ballast incorporate internal automatic-resetting thermal protection, which deactivates the ballast should it overheat.
- Page 40 Problem Possible Cause Suggested Correction The gobo wheel motor's drive IC on the PCB Replace the drive having the same software version as required. might be out of condition. Calibrate the position of the magnetic tube Dislocated magnetic tube and positioning to the positioning magnet, and replace magnet, or damaged magnetic tube.
- Page 41 Problem Possible Cause Suggested Correction Follow the instructions stated in this user Excessive dusts or smudges on the effect manual to clean the effect assembly, focus assembly, focus module and objective lens. module and objective lens. Damaged or deformed effect assembly, Replace the damaged or deformed components focus module or objective lens.
- Page 42 Problem Possible Cause Suggested Correction objective lens Damaged or deformed focus module or Replace the damaged or deformed focus module or objective lens. objective lens. 13.Spare parts list Name Notes Switch power 1412050059A LP730-220WPF380M-3/730W-3803728 Electronic ballast 1412020024A OSRAM SIRIUS HRI 470W XL Lamp 1306030023A OSRAM SIRIUS HRI 470W XL...
- Page 43 Fan drive board 5809010509A 470 G BSW-601M10 SJB0220C...
- Page 45 Guangzhou GTD Culture & Technology Group Co.,Ltd. Tel: +86-20-61808296 Fax: +86-20-61812282 http://www.gtd-lighting.com...
Need help?
Do you have a question about the GTD-470NBSW and is the answer not in the manual?
Questions and answers