
Related Manuals for Metos Master HOOD-110


Summary of Contents for Metos Master HOOD-110
- Page 1 DISHWASHER Metos Master HOOD-110, HOOD-800 Instructions for Use and Maintenance Manufacturers original documentation COD.: 3050E - Ed. 09 - 09/2022 4552446, 4552446N, 4552445, 4552445N...
- Page 2 Vi ringraziamo per aver acquistato un nostro apparecchio. Le istruzioni per l’installazione e la manutenzione nonché il suo impiego, che troverete sulle pagine che seguono, sono state preparate per assicurare una lunga vita e un perfetto funzionamento del vostro apparecchio. Seguite attentamente queste istruzioni.
-
Page 3: Table Of Contents
TRANSLATION OF THE ORIGINAL INSTRUCTIONS Contents Page WARNINGS 1. MACHINE INSTALLATION 1.1 Dataplate 1.2 Reception of the appliance 1.3 Hydraulic connection 1.3.1 Water supply characteristics 1.4 Electrical connection 1.5 Steam evacuation 1.6 Positioning the machine 2. MACHINE DESCRIPTION 2.1 Machine description 2.2 Machine features 3. -
Page 4: Warnings
WARNINGS This instruction booklet must be kept with the dishwasher for future consultation. If the dishwasher is sold or transferred to another user, make sure the booklet always goes with the appliance so that the new owner can have the necessary information on operation and the relative instructions. - Page 5 • Do not use the appliance or any part of it as a stepladder or means of support as it has been designed exclusively to bear the weight of the dishrack containing dishes to be washed. • Do not open the machine door when operating. In any case, the machine has a special safety device which immediately stops the unit if the door is open, thus preventing water spillage.
- Page 6 • This appliance is designed to work at room temperatures from 5 °C up to a max. 35 °C, in a suitable room. • Do not use water to extinguish fires on electrical parts. • Do not cover the intake or dissipation grids. •...
-
Page 7: Machine Installation
1. MACHINE INSTALLATION 1.1 Dataplate IPXX A Power source B Total power installed C Dynamic Pressure D Envelope protection degree E Total electricity absorption ° ° Model Model DW XXXX ANNO YEAR ANNÉE AÑO JAHR S/N DW X xxxxxxx RoHS IPXX °... -
Page 8: Reception Of The Appliance
1.2 Reception of the appliance Before accepting the machine, verify that all the data on the data-plate corresponds to the required ones and to the ones of the available electrical supply (see paragr. Dataplate). After unpacking, make sure the machine has not been damaged during transportation. If so, do notify the seller immediately about the problem. -
Page 9: Water Supply Characteristics
1.3.1 Water supply characteristics The machine water supply must be potable, in compliance with the legislation in force. The inlet water must also meet the parameters given in the table Tab. 1. Water parameters table Chlorine 2 mg/l Water hardness 8 °f Iron 0,2 mg/l... -
Page 10: Steam Evacuation
1.5 Steam evacuation In accordance with regulations of environmental hygiene, for the proper functioning of the machine and a healthy environment for the operator who working in there, it should be at least 10 air volume changes per hour in the room where the machine is installed. -
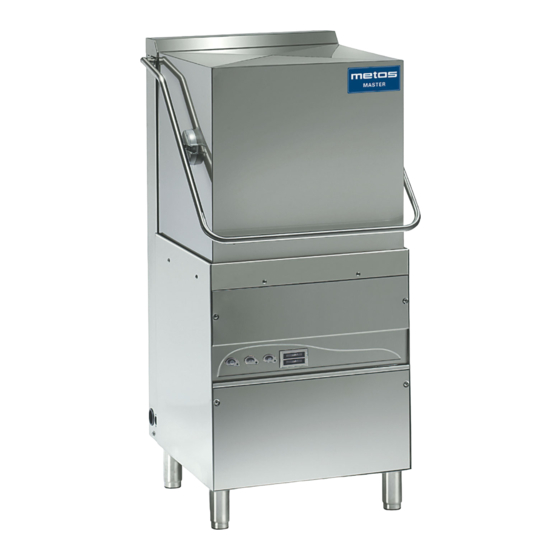
Page 11: Machine Description
2. MACHINE DESCRIPTION 2.1 Machine description Hood Wall-hung main power switch: installation serviceman supply and care, according to local laws Control panel Standard equipment for machine with a 500 mm rack: nr. 2 500x500 mm plates rack nr. 1 500x500 mm glasses rack nr. -
Page 12: Control Panel And Relative Symbols
3. CONTROL PANEL AND RELATIVE SYMBOLS CONTROLS INDICATORS 2) Main switch 0-1 F3) Washing cycle indicator 3) Wash type selector F4) Regeneration cycle indicator 4) Drain pump button F6) Boiler thermometer (if installed) 5) Regeneration START button F7) Tank thermometer (if installed) -
Page 13: Operation
4. OPERATION • Insert the overflow tube in the special seat inside the tub. • Make sure all the filters are properly fitted in their seats. • The filters must be cleaned every 40-50 wash cycles and whenever necessary. • Do not operate the machine without filters, and in particular the pump suction filters. -
Page 14: Cutlery And Crockery Loading
4.1 Cutlery and crockery loading Before cutlery and crockery loading in the machine, coarsely clean them from the leftover food. It isn't necessary to rinse the cutlery an crockery under water. WARNING: Do not wash articles polluted with petrol, paint, chips of steel or iron, ash, sand, wax, lubricant grease. -
Page 15: Use Of Rinse Aid
4.3 Use of rinse aid It is possible to use the rinse aid to get quicker drying and polishing. The machine is equipped with a rinse aid dispenser. The machine automatically draws the rinse aid chemical. The dosing has to be done following the recommendations of the rinse aid manufacturer and in accordance with the water characteristics. -
Page 16: Drain Pump System (Optional)
4.5 Drain pump system (optional) To empty the tank: remove the overflow and leave the hood open, then press the key to start the automatic total emptying time (see chap. 3. CONTROL PANEL AND RELATIVE SYMBOLS). After emptying, the machine goes on standby. At the end of emptying, turn off the switch and the main wall switch. -
Page 17: Maintenance
5. MAINTENANCE WARNING: The machine is not protected against water jets, therefore do not use pressure cleaning systems. Contact your cleaning products retailer for detailed instructions on the methods and products to use for periodic sanitizing of your appliance. DO NOT use bleach or chlorine-based detergents for cleaning the appliance. -
Page 18: Alarms
6. ALARMS Alarms will be displayed by the lighting of LEDs. according to their typology. TYPE OF ALARM CAUSE REMEDIES Verify the full opening of the water inlet valve Missed refill of water in the wash-tank Verify the right positioning of the overflow pipe Switch the machine OFF and ON to reset the alarm Flashing of the Boiler thermostat out of order. -
Page 19: Ecological Aspects
8. ECOLOGICAL ASPECTS 8.1 Recommendations for optimum use of energy, water and additives Dispensing of salt: A pre-set quantity (by the manufacturer) of salt is injected in the resins every regeneration cycle. t is important to observe the number of regeneration cycles recommended in paragraph Regeneration device in order to avoid salt spills or lime deposits.. -
Page 20: Troubleshooting
9. TROUBLESHOOTING Type of Problem Possible Causes Cure The appliance The main switch is turned off Turn on the switch does not start The water tap is closed Open the water tap Clean the rinsing arm nozzles, the pipes and the The appliance The rinsing arm nozzles or the electrovalve filter electrovalve filter. - Page 21 Type of Problem Possible Causes Cure Decrease the amount of rinse aid by turning the Too much rinse aid fine-adjustment screw on the dispenser (see paragraph Rinse aid dispenser) Check the water quality. Water must not exceed 8 The water is too hard °f (5 °d) in hardness Streaks or smears Fill the salt container (coarse salt: 1-2 mm grains)
- Page 22 Metos Oy Ab Ahjonkaarre, FI-04220 Kerava, Finland Tel. +358 204 3913 e-mail: metos.finland@metos.com www.metos.com...
Need help?
Do you have a question about the Master HOOD-110 and is the answer not in the manual?
Questions and answers