
Related Manuals for Metos WD-6


Summary of Contents for Metos WD-6
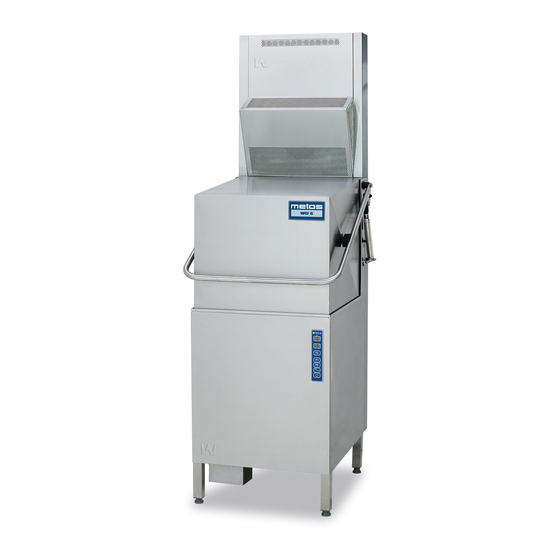
- Page 1 HOOD TYPE DISHWASHER WD-6 (Translation of the original documentation) Read the manual before using the machine! Installation and user manual S/N:(En) Valid from: 202202 Rev.: 7.0...
-
Page 3: Table Of Contents
WD-6 Rev. 7.0 (202202) 1. General instructions ................ 1 1.1 Symbols used ....................2 1.2 Machine rating ....................3 1.3 Checking that the machine and manual correspond ........3 1.4 EU Declaration of Conformity ................4 2. Safety instructions ................5 2.1 General information .................. - Page 4 WD-6 Rev. 7.0 (202202) 3.5 Connections ....................12 3.5.1 Electrical connection ................13 3.5.2 Water connection, regardless of any options .......... 13 3.5.3 Drain/waste pipe ..................14 3.5.4 Ventilation ....................15 3.5.5 Bleeding the hood lifting cylinder (option) ..........15 3.5.6 Detergent and drying agent (possible option) .........
-
Page 5: General Instructions
WD-6 Rev. 7.0 (202202) General instructions 1. General instructions Read the instructions in this manual carefully as they contain important information regarding the correct, effective and safe installation, use and servicing of the machine. Service personnel should have access to all documentation for the machine. -
Page 6: Symbols Used
WD-6 Rev. 7.0 (202202) General instructions 1.1 Symbols used This symbol warns of situations where a safety risk may arise. The instructions given should be followed in order to prevent injury and dangerous situations. This symbol on a machine part warns of electrical equipment. The machine must be entirely non-live during servicing, turn off the power at the power switch and if required, the switch should be locked to prevent unintentional operation. -
Page 7: Machine Rating
WD-6 Rev. 7.0 (202202) General instructions 1.2 Machine rating The machine has two rating plates, one of which is placed at the bottom of one side of the machine and the other in the electrical cabinet. The technical information on the plates is also included on the machine's wiring diagram. The... -
Page 8: Eu Declaration Of Conformity
WD-6 Rev. 7.0 (202202) General instructions 1.4 EU Declaration of Conformity A so-called EU Declaration of Conformity is provided on delivery of the machine. CE_16_2 Contact details of the manufacturer (Wexiödisk AB, Mårdvägen 4, SE- 35245 Växjö, SWEDEN, Tel.: +46 470 771200, Fax: +46 470 23752, E- mail: wexiodisk@wexiodisk.com). -
Page 9: Safety Instructions
WD-6 Rev. 7.0 (202202) Safety instructions 2. Safety instructions Read the chapter GENERAL INSTRUCTIONS carefully before starting work. 2.1 General information The machine is CE marked, which means that it complies with the requirements of the EU Machinery Directive with regard to product safety. Product safety means that the design of the machine will prevent personal injury or damage to property. -
Page 10: Transport
WD-6 Rev. 7.0 (202202) Safety instructions In order to avoid dangerous situations, the following must be followed: • Switch off the machine immediately in the event of failure or malfunction. • Make sure the machine is non-live before removing the cover plate. Turn off the power using the power switch. -
Page 11: Operation
WD-6 Rev. 7.0 (202202) Safety instructions 2.5 Operation Be very careful around the machine when it is in operation. 2.5.1 High temperatures • The temperature of the washing and rinsing water is 60° C and 85°C. Do not open the machine until the washing and rinsing phases have finished. -
Page 12: Installation Instructions
Software version 4.7 or later should be used to connect a WD-PRM 6 to a WD-6. If you are using an earlier software version this should be updated. The level pipe in the dishwasher has been replaced with a bottom filter. -
Page 13: Power Supply
WD-6 Rev. 7.0 (202202) Installation instructions 3.2.3 Power supply Power supply connections are made by qualified personnel in a way that complies with local and national regulations. The machine’s capacity requirements are stipulated in TECHNICAL SPECIFICATIONS. 3.2.4 Water Water connections are made by qualified personnel in a way that complies with local and national regulations. -
Page 14: Transport And Storage
WD-6 Rev. 7.0 (202202) Installation instructions 3.3 Transport and storage Always transport the machine in an upright position. Take care during transport, as there is a risk of tipping. N.B.! The machine must not be transported without a pallet or other support. Some form of support beam must always be used along the sides of the machine during transport. -
Page 15: Installation
WD-6 Rev. 7.0 (202202) Installation instructions 3.4 Installation 3.4.1 Preparing for the installation Check that there is sufficient room for the machine at the installation location. • Check that correct connections are available for water, electricity, drainage and possibly steam at the installation location. See TECHNICAL SPECIFICATIONS. -
Page 16: Connections
WD-6 Rev. 7.0 (202202) Installation instructions 3.5 Connections min.20 (301860_R3) WD67_02_r2 • A= Steam hood with extractor (option) • B= Condensation unit with heat recovery through the heat recovery unit (option) • C= Heat exchanger, heat recovery though the wastewater (option) -
Page 17: Electrical Connection
WD-6 Rev. 7.0 (202202) Installation instructions Electrical connection Water connection Drain/waste pipe connection Plugged hole for detergent hose Bleed for lifting cylinder (on machines with an automatic hood) Water pressure outlet for detergent dosage Alternative water connection from below Drain connection (option) In the following chapter, figures are given in brackets to clarify what needs to be done. -
Page 18: Drain/Waste Pipe
WD-6 Rev. 7.0 (202202) Installation instructions 3.5.3 Drain/waste pipe The waste water system connected to (3) should consist of a 50 mm metal pipe that will withstand mechanical impacts. The drain must run to a floor drain, where its opening must be above the water level. -
Page 19: Ventilation
WD-6 Rev. 7.0 (202202) Installation instructions 3.5.4 Ventilation The machine’s heat load for the room is stipulated in TECHNICAL SPECIFICATIONS. 3.5.5 Bleeding the hood lifting cylinder (option) Close the hood. Loosen the hose connection of the first air cylinder approx. 2-3 turns using a 13 mm box wrench. -
Page 20: Detergent And Drying Agent (Possible Option)
WD-6 Rev. 7.0 (202202) Installation instructions 3.5.6 Detergent and drying agent (possible option) • Check what your machine is equipped with, which depends on the model, machine type and country. • Use the same make and type of detergent and drying agent. - Page 21 WD-6 Rev. 7.0 (202202) Installation instructions When drilling holes, it is important that the following points should be observed: • Use sharp tools so that panels do not become unnecessary hot. Red-hot panels can rust in the future. • Remove all metal shavings carefully both from the machine and tank before refilling with water.
- Page 22 WD-6 Rev. 7.0 (202202) Installation instructions 24V AC or 230V AC power supply for detergent and drying agent dosing via relay 9/J71 and relay 11/J73 The machine is supplied with a 230V closing function between J71-101 and J71- 102. The detergent and drying agent dosage system can take its power from two relays on the data card.
- Page 23 WD-6 Rev. 7.0 (202202) Installation instructions Relay 11/J73. Dead closing function (230V/400V 3-phase machine) To use the closing function without a power supply, follow these instructions: • Contact the equipment to be controlled to contacts J73-103 and J73-104. Relay 11/J73. 230V AC version (400V 3-phase machine) To connect a 230V AC power supply to the contact, follow these instructions: •...
-
Page 24: Adjustment Of Hinged Basket Conveyor
WD-6 Rev. 7.0 (202202) Installation instructions 3.5.7 Adjustment of hinged basket conveyor 47747 • Adjust the machine so that it is level by adjusting all four feet so that they are in full contact with the floor. Use a spirit level. -
Page 25: Condensation Unit With Heat Recovery Through The Heat Recovery Unit (Option)
WD-6 Rev. 7.0 (202202) Installation instructions 3.5.8 Condensation unit with heat recovery through the heat recovery unit (option) Always use cold water connection if the machine has a condensing unit. B= Heat recovery unit... - Page 26 WD-6 Rev. 7.0 (202202) Installation instructions Fitting the condensation unit D337_1 Position of the mounting points for the condensation unit Bracket Screw Cover plate Condensing unit Screw and washer • When the machine is delivered, the condensation unit (5) is folded down on top of the machine.
-
Page 27: Heat Exchanger, Heat Recovery Though The Wastewater (Option)
WD-6 Rev. 7.0 (202202) Installation instructions 3.5.9 Heat exchanger, heat recovery though the wastewater (option) C= Heat exchanger • Always use cold water connection if the machine has a heat exchanger. • Not in combination with drain pump, separate water connection or WD-... -
Page 28: Steam Hood With Extractor (Option)
WD-6 Rev. 7.0 (202202) Installation instructions 3.5.10 Steam hood with extractor (option) 45089 Steam hood with extractor Existing screws Steam hood Bracket Connection for ventilation ø 160 mm • Undo the existing M4 screws at (1). • Replace the existing screws and washers with the longer M4 screws and the larger washers provided. -
Page 29: Installation And Connection Of Auxiliary Equipment And Options
WD-6 Rev. 7.0 (202202) Installation instructions 3.6 Installation and connection of auxiliary equipment and options • Once the machine is in place and has been adjusted horizontally and vertically, the auxiliary equipment can be fitted. • The machine can be equipped with a number of options. Check what your machine is equipped with, which depends on the model, machine type and country. - Page 30 WD-6 Rev. 7.0 (202202) Installation instructions Connection to the left- or right-hand side of the machine 300730_R2b A - A Water connection Electrical connection Floor drain • Attach the sink connection to the machine and then adjust. • Drill two ø 4.5 mm holes through the sink connection and the machine, approx.
- Page 31 WD-6 Rev. 7.0 (202202) Installation instructions Connection to the front of the machine If the machine is to be corner-loaded, there must be at least 300 mm of free space in front of the machine to allow the electrical cabinet and the door of the storage cabinet for detergent and drying agent (option) to be opened.
-
Page 32: Trial Operation
WD-6 Rev. 7.0 (202202) Installation instructions 3.7 Trial operation Prepare the machine for trial operation with the help of OPERATING INSTRUCTIONS. The instructions describe the measures that must be taken to prepare the machine for operation. 3.7.1 Start-up schedule This should be completed when the machine is started up and used. -
Page 33: Documentation
WD-6 Rev. 7.0 (202202) Installation instructions 5. Run a number of washes complete with loads and check: • There are no water leaks • The hood switch functions • The automatic hood functions (option) • Autostart function (option) • The water temperatures are maintained •... -
Page 34: Operating Instructions
WD-6 Rev. 7.0 (202202) Operating instructions 4. Operating instructions Read the chapters GENERAL INSTRUCTIONS and SAFETY INSTRUCTIONS carefully before starting work. This chapter describes what must be done with the machine: • Before washing • How washing should be performed •... -
Page 35: Before Washing
WD-6 Rev. 7.0 (202202) Operating instructions 4.1 Before washing 4.1.1 Machine design... - Page 36 WD-6 Rev. 7.0 (202202) Operating instructions Symbol for washing function. After the machine is started, the symbol lights up when the tank is full. The symbol flashes if the water level in the tank is too low. Display for temperature during operation. When checking and setting reference values, the display shows the number for the relevant reference value, e.g.
-
Page 37: Preparations Before Filling
WD-6 Rev. 7.0 (202202) Operating instructions 4.1.2 Preparations before filling Check and fit: • That the machine and removable parts have been cleaned. If not – clean them! • that no dirt is in the wash arms’ (18) or in the rinse pipes’ (10) nozzles •... -
Page 38: Washing
WD-6 Rev. 7.0 (202202) Operating instructions 4.2 Washing 4.2.1 Positioning of dishware in baskets The machine is supplied with washing baskets depending on the equipment level. The washing baskets are used according to the following: The yellow basket is used for side plates, trays, plates, etc. -
Page 39: Selecting A Programme
WD-6 Rev. 7.0 (202202) Operating instructions The brown basket is used for cutlery during the first wash Cutlery must therefore be placed in designated baskets before the second wash, the baskets above are placed in the blue basket 4.2.2 Selecting a programme The control panel has three programme buttons: P1, P2 and P3. -
Page 40: Changing The Washing Temperature And Washing Time
WD-6 Rev. 7.0 (202202) Operating instructions 4.2.3 Changing the washing temperature and washing time The factory setting for the washing temperature is 60°C. The operator can adjust the temperature to between 55 and 70° C. The chemical washing times for each programme are set on delivery to: •... - Page 41 WD-6 Rev. 7.0 (202202) Operating instructions All the values are laid out in tables, with each table containing a certain number of rows, one for each value. The table containing the values for the washing temperature and washing times for the different programmes is "0.0".
-
Page 42: Washing
WD-6 Rev. 7.0 (202202) Operating instructions 4.2.4 Washing Make sure that the items are in a position where they cannot move out of the washing basket during the washing and rinsing phases. • Remove large pieces of food by rinsing the dishes with a hand shower. The water in the hand shower must not exceed 40°C. - Page 43 WD-6 Rev. 7.0 (202202) Operating instructions Washing with dual machines (option) WD7_04 • A = Button for dual-controlled hood lift • B = Button for controlling the hood lift on each machine The procedure for starting the machine, washing etc. is the same as when using only one machine (see the chapter: Preparations –...
-
Page 44: Checking The Wash Result
WD-6 Rev. 7.0 (202202) Operating instructions 4.2.5 Checking the wash result The dishware should be checked after each wash for: PROBLEM CAUSES & MEASURES Starch spots • Scraping: Important to remove as much food particles as possible before washing. This also means that the water in the machine Misting does not need to be changed as often. -
Page 45: Changing The Water
WD-6 Rev. 7.0 (202202) Operating instructions 4.2.6 Changing the water To achieve the best possible washing results, it is important that the water is changed frequently. For normally soiled items, the water should be changed after around 50 washes. However, always change the water in the event of foam problems in the tank. -
Page 46: After Use - Cleaning
WD-6 Rev. 7.0 (202202) Operating instructions 4.3 After use – Cleaning HACCP is a preventive inspection system to ensure hygiene requirements are met during the washing process and cleaning of the machine. As a result of its design, the machine meets strict hygiene requirements. Regular, thorough cleaning is also important from a hygiene perspective. -
Page 47: Emptying, Internal Machine Rinsing
WD-6 Rev. 7.0 (202202) Operating instructions 4.3.2 Emptying, internal machine rinsing Position of cleaned components after washing Machines without a drain pump When the machine is switched off, the number of baskets washed is displayed for around 5 seconds. Two horizontal dashes "--” are then shown in the display for 3 minutes. At this point the machine is still live and emptying and internal rinse cleaning must take place within this period. -
Page 48: Daily Cleaning
WD-6 Rev. 7.0 (202202) Operating instructions Machines with a drain pump (option) When the machine is switched off, the number of baskets washed is displayed for around 5 seconds. Two horizontal dashes "--” are then shown in the display for 3 minutes. At this point the machine is still live and emptying and internal rinse cleaning must take place within this period. -
Page 49: Cleaning Each Week Or As Required
WD-6 Rev. 7.0 (202202) Operating instructions 4.3.4 Cleaning each week or as required If the information message "IF10" is shown in the display, weekly cleaning needs to be performed. In addition to the daily cleaning measures, clean the machine as per these instructions: •... -
Page 50: Operating Problems
WD-6 Rev. 7.0 (202202) Operating instructions 4.3.6 Operating problems Check: • Has the appliance been used according to the instructions? • Are all the removable parts in their correct place? • Is the main switch in the ON position? •... - Page 51 WD-6 Rev. 7.0 (202202) Operating instructions CODE CAUSE ACTION Er23 The hood does not open when the The alarm can be reset by pressing 0/1 on the panel. automatic hood opener is used. Contact service personnel if the fault recurs.
- Page 52 WD-6 Rev. 7.0 (202202) Operating instructions Troubleshooting The following errors can be dealt with by the operator. If the problem persists, contact authorised service personnel. PROBLEM CAUSE ACTION No indication on the control Power switch off. Switch on the power switch.
- Page 53 WD-6 Rev. 7.0 (202202) Operating instructions PROBLEM CAUSE ACTION The machine is not cleaning The rinse and wash nozzles are Check and clean the nozzles. properly. clogged with dirt. There is too little detergent. Check the amount of detergent. The hose (“thick”) must be submerged in...
-
Page 54: Technical Specifications
WD-6 Rev. 7.0 (202202) Technical specifications 5. Technical specifications The manufacturer reserves the right to make changes to the technical data. TECHNICAL DATA Washing pump (kW) Booster heater (kW) 9 / 12 * Tank heater (kW) Booster pump (kW) * Drain pump (kW) * 0.04... - Page 55 WD-6 Rev. 7.0 (202202) Technical specifications CONNECTION, MACHINE Total connected load (kW) 9.9 / 12.9 * Main fuse 400 V 3N~ (A) ** 16 / 25 * Max. connection area 400V 3N~ (L1-L3, N, PE) Cu (mm²) *** * option...
Need help?
Do you have a question about the WD-6 and is the answer not in the manual?
Questions and answers
What is the dedicated detergent for metos wd6 dishwasher?
The dedicated detergent for the Metos WD-6 dishwasher must be of the same make and type as the drying agent. Specific brand or product name is not provided.
This answer is automatically generated