Metos Master HOOD 130 LUX II Instructions For Use And Maintenance Manual
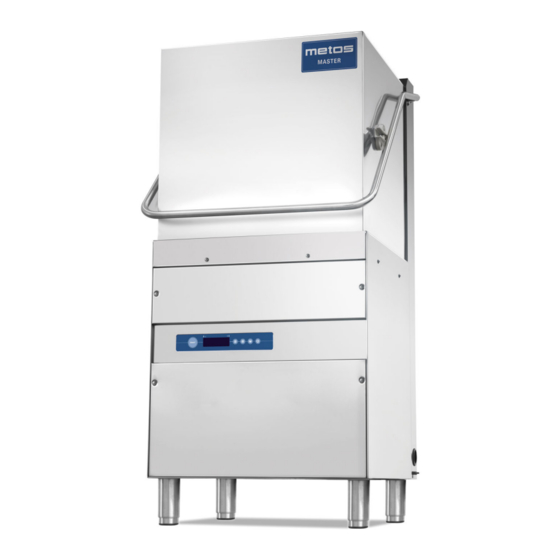
Hood type dish washer
Hide thumbs
Also See for Master HOOD 130 LUX II:
- Instructions for use and maintenance manual (30 pages)

Subscribe to Our Youtube Channel
Related Manuals for Metos Master HOOD 130 LUX II


Summary of Contents for Metos Master HOOD 130 LUX II
- Page 1 HOOD TYPE DISH WASHER Metos Master HOOD 130 LUX II Instructions for Use and Maintenance Manufacturers original documentation COD.: 5350E_U Ed. 00 - 01/2021 4246468, 4246468N, 4246469, 4246469N, 4246470, 4246470MK, 4246470MM, 4246470MN...
- Page 2 Thank you for choosing our machine. The instructions for installation, maintenance and use found on the following pages have been prepared to ensure a long life and perfect operation of your unit. Please, do follow the instructions carefully. We have designed and built this machine using the latest innovative technologies. Now you shall take good care of it.
-
Page 3: Table Of Contents
TRANSLATION OF THE ORIGINAL INSTRUCTION CONTENTS Page WARNINGS 1. MACHINE DESCRIPTION 1.1 Machine Description 1.2 Machine features 1.3 Data plate 2. CONTROL PANEL AND RELATIVE SYMBOLS 2.1 Key 2.2 Display 3. OPERATION 3.1 Machine start-up 3.1.1 Start-up 3.1.2 Start the wash cycle 3.1.3 Switching OFF 3.2 Cutlery and crockery loading 3.3 Detergent use... - Page 4 7.3 Installation 7.3.1 Positioning the machine 7.3.2 Electrical connection 7.3.3 Water connection 7.3.4 Start-up 8. SIGNALS AND ALARMS 8.1 Signals 8.2 Alarms 9. ENVIRONMENTAL ASPECTS 9.1 Packaging 9.2 Disposal 10. TROUBLESHOOTING 11. EU DECLARATION page 32...
-
Page 5: Warnings
WARNINGS This instructions booklet must be kept with the machine for future consultations. If the machine is sold or transferred to other users, make sure the booklet always goes with the unit so that the new owner can have all the necessary information on operations and all relevant instructions. The instructions booklet must be carefully read before installation and before starting the machine. -
Page 6: Machine Description
1. MACHINE DESCRIPTION Hood 1.1 Machine Description Wall-hung main power switch: at installation serviceman supply and care Control panel Standard equipment: nr. 1 glasses rack nr. 2 plates racks (Capacity per plate rack: 12 soup plates or 18 fl at plates) nr. -
Page 7: Machine Features
To operate the machine, 3 connections are needed: • Electrical; • Water supply; • Water drain. This is a cycle machine comprising a 55°C wash cycle with detergent and a rinse cycle with injection of rinse-aid. 50x50 cm racks are used and the machine can be complemented with wash-tables, rinse-showers and dedicated waste collection systems. -
Page 8: Data Plate
1.3 Data plate RoHS A Power source B Total power installed C Dynamic pressure D Envelope protection degree E Total electricity absorption IPXX ° kcal Model FAMIGLIA PRODOTTO FAMILY PRODUCT FAMILLE DU PRODUIT FAMILIA PRODUCTO FAMILIE DES PRODUKTES Model DW XXXX RoHS ANNO N=2017 - 2018... -
Page 9: Control Panel And Relative Symbols
2. CONTROL PANEL AND RELATIVE SYMBOLS 2.1 Key START key to start up cycle / select cycle Regeneration key (option) Disabled Drain key (option) Switching – On / STAND BY key Display 2.2 Display 6 F15 5 F14 4 F13 F7 F8 F9 Totalizer Tank fi... -
Page 10: Operation
3. OPERATION 3.1 Machine start-up 3.1.1 Start-up • Insert the overfl ow pipe in the special seat inside the tank. Make sure all the fi lters are properly fi tted in their seats (see pic. 1). The fi lters must be cleaned every 20 wash cycles and whenever necessary. -
Page 11: Start The Wash Cycle
3.1.2 Start the wash cycle Insert the rack fi lled with dishes to wash (see paragraph 3.2). The plates must be correctly placed in the rack. To select the wash cycle (1, 2, 3, 4) keep pressed the key Start A. -
Page 12: Switching Off
At the end of the cycle the key Start A alternatively fl ashes in blue/green. The display shows the message and the totalizer is completed. Note: It is advisable to change the tank water, by means of another fi lling, at least every 30 washes or twice a day. An alarm fl... -
Page 13: Detergent Use
It is mandatory to repeat the washing cycle if at the end of the cycle the crockery are not well clean or if there are washing residues (glasses, cups, bowls, etc. with liquid inside). 3.3 Detergent use By request the dishwasher can be equipped with an electric detergent dispenser (always recommended). The machine automatically sucks the detergent. -
Page 14: Regeneration Function (Option)
3.6 Regeneration function (option) Should the machine be equipped with a water-softener circuit, this will be fully automatic. When needed, a 120” regeneration cycle will automatically activate (machine ON). During this phase the indicator switches on (steady). If needed the cycle can be activated even during the wash-tank loading. If the activation is made during the wash-cycle, this will be longer. -
Page 15: Door Opening Piston Function (Option)
3.7 Door opening piston function (option) The machine can be equipped with an automatic hood lifting device. The piston operation always performs as follows • The hood lifts for about 3 cm to allow the fi rst dripping and steam exhausting from the wash tank. •... -
Page 16: Ecological Aspects
4. ECOLOGICAL ASPECTS 4.1 Recommendations for optimal use of energy, water and additives Salt dosing: A pre-set (by the manufacturer) quantity of salt is injected in the resins at each regeneration cycle. It is important to observe the number of regeneration cycles recommended in paragraph 3.6 Regeneration device in order to avoid salt spills or lime deposits. -
Page 17: Maintenance
6. MAINTENANCE 6.1 Routine maintenance WARNING: The machine is not protected against pressurized water jets. Do not use pressure cleaning system against the machine. It is recommended to contact seller for cleaning instructions, in order to have detailed indications on methods and products for the correct periodical machine sanitation. -
Page 18: Extraordinary Maintenance
6.2 Extraordinary Maintenance Once or twice per year, the machine should be checked by qualified Service Personnel: 1 Clean the intake fi lter of the solenoid valve. 2 Remove scaling from the heating elements. 3 Check the status and the tightness of all gaskets. 4 Check the perfect state and/or wear of the components. -
Page 19: Machine Installation
7. MACHINE INSTALLATION 7.1 Handling 7.1.1 Handling the product The machines must be handled strictly as shown in pic. 3 regarding the grip points indicated for lifting with a lift truck. Latch the machine in a way that secures no vibration or shocks during transportation. -
Page 20: Water Supply Connection - Characteristics
7.2.3 Water supply connection - Characteristics Fresh water supply features: Water characteristics table Static Pressure 200Kpa 400Kpa Dynamic Pressure 150Kpa 350Kpa Water hardness* 2°f 8°f Cold water-supply temperature** 5°C 50°C Hot water-supply temperature*** 50°C 60°C Table 1 Capacity 10l/min Connect the machine's water supply with an interrupt valve capable of quickly and completely shutting off water intake. *It is compulsory to install a water-softener, in case of water with average hardness above 8°f. -
Page 21: Installation
7.3 Installation 7.3.1 Positioning the machine Remove the packing with care. Lift the machine as described in par. 7.1.1 Handling the product. Position the machine as shown on the installation diagram (lay-out) approved at the time of the off er. Maintain a minimum distance of about 50 mm from the walls, so that motors are ventilated 50 mm (see pic. -
Page 22: Signals And Alarms
8. SIGNALS AND ALARMS 8.1 Signals The signals messages are visualized, based upon their meaning. Machine in stand-by mode: Total regeneration warning (option). When the indicator fl ashes on the display it means that a total regeneration is needed (only on machines equipped with the optional Water Softener). Drain tank warning. -
Page 23: Alarms
Rinse-aid level warning (option). When the indicator fl ashes on the display it means that the rinse-aid is over (only on machines equipped with the optional "Chemicals level Sensor"). Flowmeter failure warning (option). When the symbol appears on the display it means that no passage of water is detected and the inlet water temperature probe is damage or is disconnected (only on machines equipped with the optional “Flowmeter”... - Page 24 B2. BOILER PROBE FAILED: Cause: The circuit board does not detect the boiler sensor. Remedies: Contact Technical Service. B3. BOILER HEATING ALARM: Cause: The factory-set boiler temperature was not achieved in the maximum foreseen time limit. Remedies: Contact Technical Service. B5.
- Page 25 E6. TANK DRAINING FAILED: Cause: The draining of the wash-tank was not completed within the maximum foreseen time limit. Remedies: Contact Technical Service. E8. TANK SAFETY THERMOSTAT Cause: The tank safety thermostat is tripped. Remedies: Contact Technical Service. Z6. TANK LOW LEVEL: Cause: The tank pressure-switch detects a too low level of water in the tank.
-
Page 26: Environmental Aspects
9. ENVIRONMENTAL ASPECTS 9.1 Packaging Packaging is made of the following components: • a wooden pallet; • a nylon sack (LDPE); • a multi-layer carton; • polystyrene (PS) strips; • polypropylene (PP) banding. All above materials, shall be disposed and treated in accordance with the Local Laws in force. 9.2 Disposal The symbol WEEE/RAEE used on this product indicates that it cannot be treated as domestic waste. - Page 27 Type of Problem Possible Causes Cure Wash time insuffi cient for the type Select a longer wash-cycle, if possible, otherwise repeat of dirt. the wash cycle. Wash water is dirty. Drain the tank water, clean the fi lters; refi ll the tank and replace the fi...
-
Page 28: Eu Declaration
11. EU DECLARATION The machine purchased is in compliance with the norms stated in the EU declaration attached to the machine in original. Please fi nd attached below the facsimile of this declaration, with the general data of the machine purchased. For the absorption data refer to the data-plate on the machine.
Need help?
Do you have a question about the Master HOOD 130 LUX II and is the answer not in the manual?
Questions and answers