Advertisement
Advertisement
Table of Contents

Subscribe to Our Youtube Channel
Related Manuals for Zephyr AK2000


Summary of Contents for Zephyr AK2000
- Page 1 AK2000,AK6000,AK9800...
- Page 2 AK2000,AK6000,AK9800...
-
Page 3: Product Overview
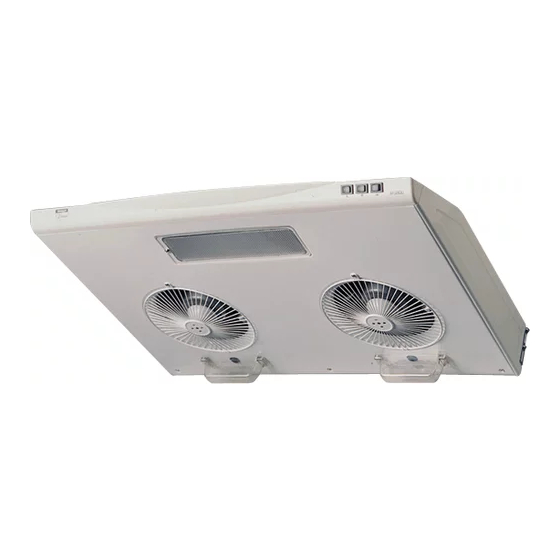
PRODUCT OVERVIEW HURRICANE SERIES Model number: AK2000, 2036 QuattroVent Air Curtain Dual “Thrust-Fore" Self Clean Blowers Digital Touch Pad Controls Clock, Timer, 3 stage Delay Shutoff. CYCLONE SERIES Model number: AK6000, 6036, 6042, 6048 Dual “Thrust-Fore" Self Clean Blowers Independent Rocker Controls w/ High, Low... -
Page 4: Setting Clock
CONTROLS HURRICANE SERIES 12:01 DELAY FAN-L FAN-R ON-OFF Controls Overview Set Time Right Blower: On-High-Low-Off Digital Display Operations: On-Off Set Hours Right Blower Low Speed Indicator Set Minutes Right Blower High Speed Indicator Set Timed Delay Shut Off Left Blower Low Speed Indicator Light On-Off Left Blower High Speed Indicator Left Blower: On-High-Low-Off... -
Page 5: Blower Controls
CONTROLS Blower Controls You can simultaneously turn On the light and press: both blowers on Hi speed by simply pressing to turn light and both ON-OFF "On/Off" once. blowers on Hi During this time, you can select blowers and or turn individual blowers FAN-L FAN-R speed as indicated by pressing the "Fan-L"... - Page 6 CONTROLS Setting Timer (Alarm) Press "hr" and "min" button to set desired timer press: countdown. Once timer is set, countdown will start in 7 1:04 seconds as delay indicator light flashes. DELAY When countdown reaches 0, 10 short beeps will sound.
-
Page 7: Maintenance
MAINTENANCE Self Clean Feature All Zephyr Range Hoods are filter-less and are designed with a self clean feature. The centrifugal blower system automatically liquefies grease accumulated in its internal housing. All systems are equipped with dishwasher safe grease containers for its self clean function. - Page 8 MAINTENANCE With nozzle on ‘spray’, squirt ‘409’ detergent directly onto blower blades 30-35 times. Repeat with second blower. Allow self cleaning to run for 5 minutes before switching off. (If desired, spray water to rinse off detergent after completion of the cleaning cycle and run for another few minutes) Remove residue containers by gently sliding out with both hands.
-
Page 9: Surface Maintenance
MAINTENANCE QuattroVent Channels The QuattroVent Air-Curtain channels are adjoined to its two main blowers and share the same internal housing. No further cleaning is required after the self clean is completed. Clean residue around the channels surface with ‘409’ and a cotton cloth regularly. Surface Maintenance Clean all surface residue with ‘409’... -
Page 10: Installation
INSTALLATION WARNING Installation of this product is intended for qualified installers, service technicians, or persons with similar qualified background. DO NOT attempt to install this appliance yourself. Injury could result form installing the unit due to lack of appropriate electrical knowledge and technical background. - Page 11 INSTALLATION DUCT OPENING Wall 2-1/2” Rear Front 3-1/4 x 10” 4-1/2” 6” Rear 7” Front Wall Cut Out Size (A): Hurricane 10-1/2“ Cyclone 10-1/2” Whirlwind 8-1/2” CLEARANCES Minimum clearance above range should be no less than 18“ from the range surface to the range hood’s base.
- Page 12 INSTALLATION STEP 1 STEP 2 1. Remove all contents from box 1. Locate electrical connection box inside 2. Unscrew and remove bottom grease splash shield 2. Unscrew cover to reveal wiring STEP 3 STEP 4 1. Locate electrical connection box knock out from left 1.
- Page 13 INSTALLATION STEP 7 STEP 8 1. Lift hood to bottom of cabinet 1. Support hood to place, fasten both rear with screws and washers provided. STEP 9 (also refer notes on pg. 16) STEP 10 1. Fasten front of hood. Level all sides and adjust 1.
- Page 14 INSTALLATION STEP 13 STEP 14 1. Reinstall electrical box cover. 1. Reinstall bottom splash shield by first fastening 3 rear screws, (do not tighten all the way). STEP 15 STEP 16 1. Next, fasten the 3 front screws and begin tightening 1.
- Page 15 Cyclone series: AK6000, 6036, 6042, 6048 Zephyr’s Cyclone series are equipped with the option of a 6“ vertical discharge, 3-1/4x10” vertical discharge, or 3- 1/4x10” rear discharge. Additional accessories are provided to convert to either of the above discharge methods.
- Page 16 INSTALLATION 3-1/4 x 10“ Rear Discharge 4. At rear of range hood, remove all screws on pre- 5. Remove top pre-mounted transition piece. Leave mounted rear rectangular cap and remove cap with attached gasket in its original place. gasket. 6. Remove 2 arch blocks through top opening. 7.
- Page 17 INSTALLATION 3-1/4 x 10“ Rear Discharge Option 2: (for flush cabinet base) Mount rectangular cap (previously removed) on top of Mount rectangular transition piece at opening with transition adaptor. gasket as shown.
- Page 18 INSTALLATION INSTALLATION NOTES Step 6: A damper (not included) should be installed to prevent back-draft where needed. A damper might also be required local codes in order to qualify for building inspections. You can purchase dampers from most hardware stores, or call our service line to order.
-
Page 19: Troubleshooting
TROUBLE SHOOTING Upon completion of installation, Check if unit has been plugged in, make sure that all power nothing works. has been turned back on and all electrical wiring are properly connected. Light is on but blowers are not Blower blade unit might have been mounted too low and turning at all or seems to be scraping on scraping the bottom or jammed. - Page 20 Make sure blowers are on high speed for heavy cooking. For other questions and further assistance please call our service department with the product’s registered serial number or write to: ZEPHYR CORPORATION Service Department 1.888.880.VENT (8368) 415.282.1211 1551 Minnesota St., San Francisco, CA 94107...
- Page 21 Product damaged through negligence, misuse, abuse, accident. Improper installation and failure to follow installation instruc- tions. When product is used commercially or other than its intended purpose. Damaged because of improper connection with equipment of other manufacturers. Repaired or modified by anyone other than Zephyr's Authorized Agents. What is Not Covered: Consumable parts such as light bulbs, filters, and fuses.
Need help?
Do you have a question about the AK2000 and is the answer not in the manual?
Questions and answers