Zephyr AK6500 series Use, Care And Installation Manual
Ak6500 series; ak2500 series;
Hide thumbs
Also See for AK6500 series:
- Use, care and installation manual (8 pages) ,
- Use, care and installation manual (17 pages)
Advertisement
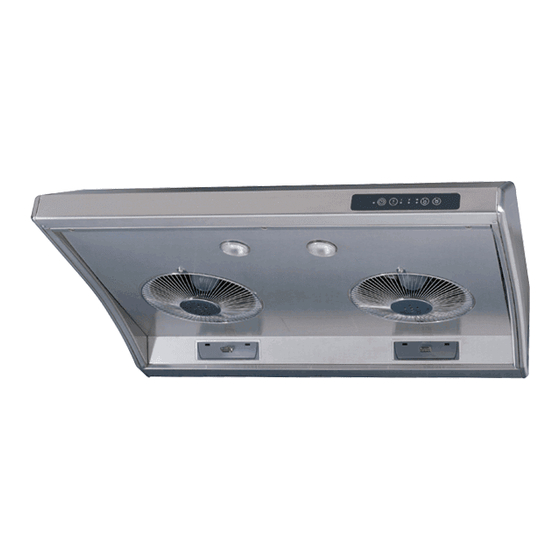
MODEL: AK2500, AK6500 series
READ AND SAVE THESE INSTRUCTIONS
WARNING
TO REDUCE THE RISK OF FIRE OR ELECTRIC SHOCK, DO NOT USE THIS
FAN WITH ANY SOLID-STATE CONTROL DEVICE.
WARNING
TO REDUCE THE RISK OF FIRE ELECTRIC SHOCK, OR INJURY TO
PERSONS, OBSERVE THE FOLLOWING:
a. Use this unit only in the manner intended by the manufacturer, if you have questions,
contact the manufacturer.
b. Before servicing or cleaning unit, switch power off at service panel and lock panel
to prevent power from being switched on accidentally.
When the service disconnecting
means cannot be locked, securely fasten a prominent warning device, such as a tag,
to the service panel.
CAUTION
For general ventilating use only. Do not use to exhaust hazardous or explosive materials
and vapors. Take care when using cleaning agents or detergents.
Suitable for use in household cooking area.
WARNING
TO REDUCE THE RISK OF RANGE TOP GREASE FIRE:
a. Never leave surface units unattended at high settings.
Boilovers cause smoking
and greasy spillovers that may ignite. Heat oils slowly on low or medium settings.
b. Always turn hood ON when cooking at high heat or when flaming food
c. Clean ventilating fans frequently.
Grease should not be allowed to accumulate
on fan or filter.
d. Use proper pan size. Always use cookware appropriate for the size of the surface
element.
e. Keep fan, filters and grease laden surfaces clean.
f. Use high setting on hood only when necessary.
g. Don't leave hood unattended when cooking.
h. Always use cookware and utensils appropriate for the type of and amount of food
being prepared.
WARNING
TO REDUCE THE RISK OF INJURY TO PERSONS IN THE EVENT OF A RANGE TOP
FIRE, OBSERVE THE FOLLOWING:
a.
SMOTHER FLAMES with a close-fitting lid, cookie sheet, or metal tray, then
turn offthe burner. BE CAREFUL TO PREVENT BURNS. If the flames do not go out
immediately, EVACUATE AND CALL THE FIRE DEPARTMENT.
b.
NEVER PICK UP A FLAMING PAN - You may be burned.
c.
DO NOT USE WATER, including wet dishcloths or towels - a violent steam
explosion will result.
Advertisement
Table of Contents

Subscribe to Our Youtube Channel
Related Manuals for Zephyr AK6500 series


Summary of Contents for Zephyr AK6500 series
- Page 1 MODEL: AK2500, AK6500 series READ AND SAVE THESE INSTRUCTIONS WARNING TO REDUCE THE RISK OF FIRE OR ELECTRIC SHOCK, DO NOT USE THIS FAN WITH ANY SOLID-STATE CONTROL DEVICE. WARNING TO REDUCE THE RISK OF FIRE ELECTRIC SHOCK, OR INJURY TO PERSONS, OBSERVE THE FOLLOWING: a.
- Page 2 MODEL: AK2500, AK6500 s eries Use anextinguisher ONLY 1. You know you have a Class ABC extinguisher, and you already know how to operate it. 2. The fire is small and contained in the area where it started. 3. The fire department is being called. 4.
-
Page 4: Installation
INSTALLATION MOUNT HEIGHTS Minimum mount height between range top to hood bottom should be no lessthan 24". Maximum mount height should be no higher than 32". It is important to install the hood at the proper mounting height. Hoods mounted too low could result in heat damage and fire haz- ard;... - Page 5 iNSTALLATiON DUCTING NEVER exhaustair or terminateductwork intospacesbetween wails,crawl spaces, c eiling,attics or garages. A ll exhaustmustbe ductedto the outside. Usemetalductworkonly. Fasten all connections w ith sheetmetalscrewsandtapeall joints w/certified SilverTapeor DuctTape. Some DuctingOptions: ,L_ _J Side NaI cap Side wail cap w/gl _viy damper w/gravity damper Soffit or crawl space...
-
Page 6: Specifications
iNSTALLATiON SPECIFICATIONS ElecK,O, 22-1/4" VIEW REAR VIEW Elec K.O. lo1, Models:AK6500,AK6536,AK6542,AK2500,AK2536 Page3... -
Page 7: Mounting The Rangehood
iNSTALLATiON MOUNTING THE RANGEHOOD ELECTRICAL All Electricalwork must by performedby qualifiedelectricianor personwith similar technical know how and background. Forpersonal s afety,removehousefuseor opencircuitbreakerbeforebeginning installation. Donotuseextension cordor adapterplug with this appliance. FollowNationalelectricalcodesor prevailinglocalcodes and ordinances. Electrical Supply: This appliance requires a 120V 60Hz electrical supply., and connected to an individual, properly grounded branch circuit, protected by a 15 or 20 ampere circuit breaker or time delay fuse.Wiring must be 2 wire w/ground. - Page 8 iNSTALLATiON MOUNTING THE RANGEHOOD 1. This range hood is mounted under a kitchen cabinet unit. 2. Select preferred duct location on rear or top of unit. (See page 6 & 7 for ducting conversion options) 3. Begin installation by temporarily unscrewing and removing the bottom splash panel.
- Page 9 INSTALLATION CONVERTIBLE OPTIONS This range hood is equipped with the option of a 6" vertical discharge, 3 1/4"x10" vertical disch or 3 1/4"x10" rear discharge. Additional accessories are provided to convert to either of the abe discharge methods. Convertible Accesodes Convertible Options Round...
- Page 10 INSTALLATION CONVERTIBLE OPTIONS arge, 3 1/4"x10" Rear Discharge 2. Remove top pre-mounted transition piece. 1. At rear of range hood, remove all screws on pre- mounted rear rectangular cap and remove plate. 3. Remove 2 air diverter blocks throuc n lop 4.
-
Page 11: Controls And Features
CONTROLS & FEATURES CONTROLS & FEATURES (Models AK2500, AK2536) CycleSpeed Selection Q Cycle Lights On/Dim/Off O Blower Onliff DelayOff -- © © © © Delay Off Indication 3 Speed LevelIndication _1 Blower On/Off By pressing@, the bloweris turnedOnandOff. CycleSpeed Selection Cyclethrough3 speedlevelsby pressing(_, thedisplayindicateslevelselected. - Page 12 CLEANING AND MAINTENANCE SELFCLEANFEATURE Using Self Cleaning: Models AK6500,AK6536, AK6542, AK2500, AK2536 hoods are designed with a self cleaning feature. The centrifugal blower system automatically liquefies cooking residue accumulated in its internal housing,and deposits the residue in the cleaning cup. Nevertheless,grease from cooking can also dry and adhere in the internal housing.
-
Page 13: Maintenance
MAINTENANCE LIC4ffS Replacing Light Bulbs Make sure all power is turned offand bulbs are not hoL Remove b/turning bulb counter clockwise. If bulbs are difficult to turn due to prolonged use, firmly attach a glass suc'doncup approx, the diameter of the bulb and turn. -
Page 14: Warranty
Damaged because of improper connection with equipment of other manufacturers. Repaired or modified by anyone other _n Zephyr's Authorized Agents. What is Not Covered: Consumable parts such as light bulbs, filters, and fuses. Services outside of service area and the labor cost incurred in connec'0on with the removal, shipping and reinstallagon cost, nor does it cover any other con'dngent expenses. - Page 15 1-888-880-8368 Haveyour product proofof purchasewith date readyfor warrantyissues. Or write to: Zephyr Corporation Service and Warranty Department 395 IVlendellStreet San Francisco, CA 94124...
Need help?
Do you have a question about the AK6500 series and is the answer not in the manual?
Questions and answers