
Related Manuals for REMKO KF 23


Summary of Contents for REMKO KF 23
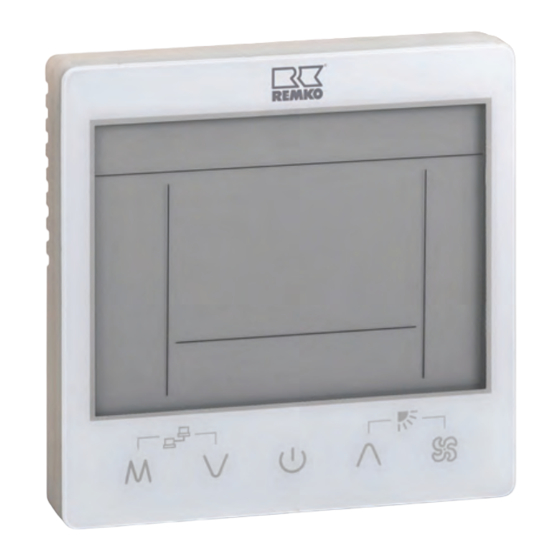
- Page 1 Operating and installation instructions REMKO KF 23 Cabled remote control For KWD 25-100 (EC) (Coanda), WLT 30-90 EC 339-2023-04 Edition 1, en_GB Read the instructions prior to performing any task!
- Page 2 Read these operating instructions carefully before commis- sioning / using this device! These instructions are an integral part of the system and must always be kept near or on the device. Subject to modifications; No liability accepted for errors or mis- prints! Translation of the original...
-
Page 3: Table Of Contents
Table of contents Safety and usage instructions......................4 1.1 General safety notes........................4 1.2 Identification of notes........................4 1.3 Personnel qualifications........................4 1.4 Dangers of failure to observe the safety notes................4 1.5 Safety-conscious working....................... 4 1.6 Safety notes for the operator......................5 1.7 Safety notes for installation, maintenance and inspection.............. -
Page 4: Safety And Usage Instructions
REMKO KF 23 Safety and usage instructions CAUTION! This combination of symbol and signal word 1.1 General safety notes warns of a potentially hazardous situation, which if not avoided may cause injury or mate- Carefully read the operating manual before com- rial and environmental damage. -
Page 5: Safety Notes For The Operator
"certificate of warranty" to conditions stipulated in this manual and comply REMKO GmbH & Co. KG at the time when the with all applicable regional regulations. units are purchased and commissioned. -
Page 6: Transport And Packaging
REMKO KF 23 1.11 Transport and packaging The devices are supplied in a sturdy shipping con- tainer. Please check the equipment immediately upon delivery and note any damage or missing parts on the delivery and inform the shipper and your contractual partner. For later complaints can not be guaranteed. -
Page 7: Technical Data
Technical data Unit data Series KF 23 Cabled remote control for KWD 25-100 EC Operating mode and WLT 30-90 EC Plug-in cable, length 5000 Operating range °C / r.H. +10 to +40 / 30 to 80, non-condensing Temperature range for storage °C / r.H. -
Page 8: Description
REMKO KF 23 Description Operation The cabled remote control is used for external operation of the indoor unit chiller. The cabled remote control must be mounted at the desired location at a height of approx. 1.60 m and a max. distance to the unit of 25 m. - Page 9 Mode key Ioniser This key is used to select the various operating This indicator currently has no function. modes: Sleep mode Automatic: Sleep mode is displayed here. The unit reverts to The unit automatically switches between reduced operation. heating and cooling to keep the room tempera- ACTUAL/setpoint temperature indicator ture constant at the setpoint.
- Page 10 REMKO KF 23 Temperature The arrow up and arrow down keys allow the desired target temperature to be set in 1 °C steps. This setting is not possible in recirculation mode. Fig. 3: Switching the control panel on / off Fig.
- Page 11 FAN key Cooling mode The ventilator speed can be adjusted by pressing In cooling mode, the air in the room is cooled to the FAN key. It can be selected between Silent, the set target temperature. Set the desired room Low, Medium, High, Turbo and Automatic fan temperature by pressing the Up or Down arrow key speed.
- Page 12 REMKO KF 23 Swing Swing mode enables continuous, automatic louvre adjustment. When switched on, the air inside the The switching on and off of the units within the room is distributed better. By pressing the down group must be carried out with the address arrow and fan key at the same time, the ventilation ALL.
- Page 13 F2 Ioniser F7 Time Additional function currently not available This additional function allows the time of the remote control to be set. The hours or minutes can F3 Unit display be set using the arrow down/up keys. Additional function currently not available F4 Electrical heating Additional function currently not available F5 Switch-off timer...
-
Page 14: Assembly Instructions For Qualified Personnel
REMKO KF 23 Assembly instructions Installation for qualified personnel Route the four-wire plug cable between the installation location of the cabled remote con- Check the contents of the packaging for complete- trol and the switch box of the unit. If the 5 m... - Page 15 Connect the plug cable to the socket [A] of the Lock the housing front of the cabled remote cabled remote control. control in the mounting rear panel. There must be no mechanical stress on the circuit board. Route the plug cable and connect the plug in the LCON slot provided for this purpose on the unit board.
- Page 16 REMKO KF 23 Electrical drawings KF 23 for KWD 25-100 SM1 SM2 SM3 SM4 Jp12 Jp11 Jp9 Jp10 Jp7 Jp8 M.H. KF 23 for KWD 25-100 (EC) (Coanda) K1 K2 CON9...
- Page 17 Electrical drawings KF 23 for WLT 30-90 EC FAN 2 FAN 1 AUX 2 AUX 1 Auto ON/OFF 0-10V...
- Page 18 REMKO KF 23 Network electrical drawings KF 23 for KWD 25-100 (EC) (Coanda) and WLT 30-90 EC A: Optional...
-
Page 19: Commissioning
Commissioning Switch the unit on using the cabled remote control. The cabled remote control is active. Check all key functions. The display of the cabled remote control changes accordingly. Mount all removed parts. Familiarise the operator with the functions. Error indication by code The following table provides brief information for coded error displays. -
Page 20: Index
REMKO KF 23 Index Additional functions ..... . 12 Safety Assembly ......14 Dangers of failure to observe the safety notes . - Page 22 REMKO KF 23...
- Page 24 REMKO QUALITY WITH SYSTEMS Air-Conditioning | Heating | New Energies Telephone +49 (0) 5232 606-0 REMKO GmbH & Co. KG Hotline within Germany +49 (0) 5232 606-0 Klima- und Wärmetechnik Telefax +49 (0) 5232 606-260 Im Seelenkamp 12 E-mail info@remko.de...
Need help?
Do you have a question about the KF 23 and is the answer not in the manual?
Questions and answers