Advertisement
Quick Links
Advertisement

Subscribe to Our Youtube Channel
Related Manuals for AudioPressBox APB-124 SB


Summary of Contents for AudioPressBox APB-124 SB
- Page 1 APB-124 SB Press Conference Audio Distribution Amplifier Owner’s manual...
- Page 2 • If the power cord or plug becomes frayed or damaged, or if there is a sudden loss of sound during use of the device, or if any unusual smells or smoke should appear to be caused by it, immediately turn off the power switch, disconnect the electric plug from Do not open • Do not open the device or attempt to disassemble the internal parts or modify them in any the outlet, and have the device inspected by qualified AudioPressBox service personnel. way. The device contains no user-serviceable parts. If it should appear to be malfunctioning, • If this device or the AC power adaptor should be dropped or damaged, immediately turn discontinue use immediately and have it inspected by qualified AudioPressBox service off the power switch, disconnect the electric plug from the outlet, and have the device personnel. inspected by qualified AudioPressBox service personnel. Always follow the basic precautions listed below to avoid the possibility of physical injury to you or others, or damage to the device or other property.
- Page 3 Use only the adaptor included with this Be sure to unplug the adaptor from the outlet To avoid generating unwanted noise, make AudioPressBox. Use of a different adaptor may when not using AudioPressBox, or when there sure there is 50 cm or more between the result in equipment damage, overheating, or fire.
- Page 4 Dear customer, Thank you for purchasing AudioPressBox® APB-448 SB, the most sophisticated press conference distribution amplifier. Signal from four lectern’s microphones or line inputs (i.e. mixing console) is distributed to independent microphone/line outputs used by multiple journalists, TV Camera operators, audio recorders and reporters at the same time. No more hassle with the multiple microphones on the table or disturbing late-coming reporters. With AudioPressBox® you are set in a minute with providing the perfect signal to every reporter! APB-124 SB Unpacking your AudioPressBox® Your AudioPressBox® comes to you packaged in the transfer box with the filling material in used to avoid any damage caused by transport. In the package, you should find: Power supply with mains cable AudioPressBox® This manual Please be careful while unpacking all the components from original packaging. Using your AudioPressBox® Using every AudioPressBox® model is simple and it can be presented in 4 simple steps: Plug your microphone in Set your levels Connect your outputs / extenders Start using your AudioPressBox® by providing perfectly processed signal to every recipient, who connects his device into the output section.
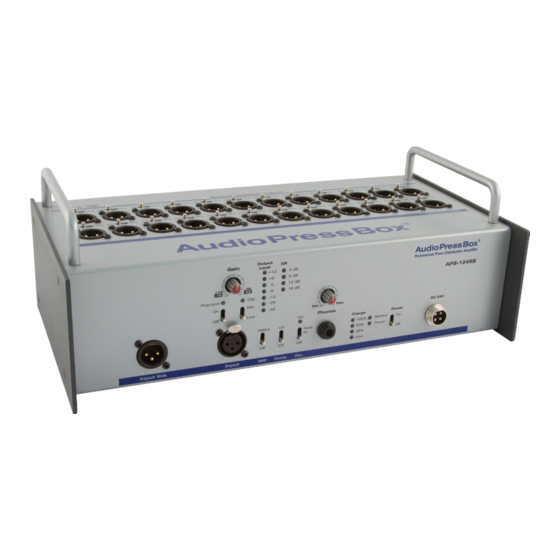
- Page 5 APB-124 SB - Front panel (Input section) Output level APB-124 SB Gain + 12 3 dB 6 dB 12 dB 18 dB Phantom Clip - 24 - 48 Line Phones DC 24V 1A Charge Power 160 Hz 100% Battery Power 80 Hz Input Comp. Osc. Audio Press Box APB-124SB...
- Page 6 Front panel (Input section) rumble like a microphone handling noise or pops. careful when setting the levels, too high monitoring You have 2 possible low-cut frequencies – 80Hz and volumes can damage your hearing ability! 160Hz. The one you choose depends on the sound, Rechargeable battery charging status 1. Input XLR microphone/line connector you want to filter out. You can check the result with indicator bar (* functional with optional rechargeable Input your microphone or line-level source into this your headphones plugged in. battery pack BP 2000 installed) XLR balanced connector. You can connect any type 8. Compressor/Limiter operation switch If the battery pack is installed inside the Audio of condenser either dynamic microphone here.
- Page 7 Line Line Line Line Line Line Line Line AudioPressBox APB-124SB 22) Group A Mic/Line Outputs 1-24 + Group B Mic/ 23) Mic/Line level select switch Line Outputs 1-24 You can set if you want to get Mic (-20dBu) or Line (+6dBu) Mic level output XLR connectors – every output is level from individual output individually transformer isolated.
- Page 8 Get your AudioPressBox® operational: Plug mains cable to connector of the AudioPressBox® (20). Turn AudioPressBox® on by switching Power switch (19) ON. Plug your microphone into input XLR connector (1). If you are using condenser microphone, switch Phantom power (2) ON. Switch Comp (7) ON Speak to the microphones and adjust the Input gain (5) level to get visual confirmation on microphone signal level indicator (9) as you speak, this indicator will light up continuously. Set routing path for each microphone (11) If you want to hear your output signal, plug your headphones (with 6.3mm TRS connector) to headphone connector (16) and adjust monitoring level (17) to listen to the output. Recipients can plug their recording devices to specified outputs in the extenders. 10. You are ready to go! Good to know: What are compressor and limiter? These elements automatically control your signal and provide the best signal condition for every output. You will get perfect signal without clipping or distortion. You can switch this element on or off for each input depending your needs. What is the signal generator for? A signal generator, also called a test signal generator is an electronic device designed to produce sine signal - frequency of 1kHz, which can help to set your levels correctly.
-
Page 9: Specifications
Specifications Audio Press Box APB-124 SB Type 1 in 24 Groups Input section Inputs Input connectors Balanced, XLR Max. input level Limiter ON Limiter OFF Mic: -10/-30dBu Mic: -2/-42dBu Line: +36/-4dBu Line: +24/-16dBu Phantom Voltage Input Impedance Mic: 2,4 kOhm... - Page 10 Jack list Input and Output Jacks Polarities Configurations Pin 1: Ground MIC INPUT Pin 2: Hot (+) Pin 3: Cold (–)
-
Page 11: Block Diagram
Block diagram ... - Page 12 | web: www.audiopressbox.com MediaTech Central Europe, a.s., Drienova 34, 821 02 Bratislava, Slovak Republic (EU) Tel: +421 2 4341 7777 | Fax: +421 2 4342 7777...
Need help?
Do you have a question about the APB-124 SB and is the answer not in the manual?
Questions and answers