Table of Contents
Advertisement
Quick Links
Advertisement
Table of Contents

Related Manuals for Synesso ES.1


Summary of Contents for Synesso ES.1
- Page 1 ES.1 User Manual...
-
Page 2: Table Of Contents
Chapter 6. Software and Firmware Updates..............................27 Chapter 7. Maintenance and Cleaning................................28 ES.1 Machine Cleaning and Maintenance Schedule..........................28 Safe Mode........................................28 Auto Backflush....................................... 29 Preparing the ES.1 For Storage or Shipping............................. 30 Chapter 8. Menus, Settings, and Flowcharts..............................33 Home Screen Menu.......................................33 ES.1 Brewing Process....................................33... - Page 3 Contents | v Programs Menu......................................34 Auto Backflush....................................... 35 User Settings........................................36 Advanced User Settings....................................37...
-
Page 4: Chapter 1. Introduction
Chapter 1. Introduction Congratulations on the purchase of your new Synesso ES.1 Espresso machine. We hope you love the ES.1 as much as we do. Before using the ES.1, please read this User Manual carefully. This manual includes essential information regarding the safety, use, maintenance of the ES.1, and critical warranty information. -
Page 5: In The Box
Included in the package with the ES.1, you will find the following: • User Manual • Electrical Plugs. You will receive an ES.1 with the appropriate cord and plug for your area. The plugs provided are dependent on location • ES.1 Espresso Machine (includes water reservoir) •... -
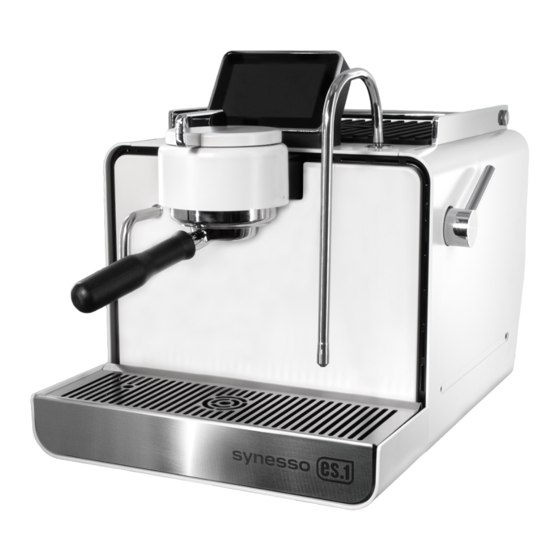
Page 6: 1 Machine Details
ES.1 Machine Details The ES.1 is a robust espresso machine that is small enough to fit onto a home kitchen counter. The ES.1 is made from food- safe materials, is available in 4 standard colors, and has 2 different voltage options that comply with local home and commercial use ordinances depending on region. -
Page 7: Installation
16. Water Fill 18. Drip Tray 17. Drip Tray Cover 19. Water Reservoir Portafilters The ES.1 incldes with 2 portafilters and 3 different baskets: Table 6. Included Portafilter Parts Bottomless Portafilter Large Basket Double Spout Portafilter Blind Basket - for Auto Backflush cleaning process Small Basket Figure 4. -
Page 8: Water Quality
• Use distilled water with the addition of mineral packets made specifically for espresso machines If you plan on plumbing your ES.1 we strongly recommend that you install a water filtration system and to not rely on tap water. Water Quality Water Quality Standards for the ES.1. -
Page 9: Chapter 2. Es.1 Warranty
13 months from the original date of shipment. Synesso will make a good faith effort for prompt correction or other adjustments with respect to any non-wearing part that proves to be defective within the limited warranty period. - Page 10 Warning: Do not operate the ES.1 with a damaged cord or plug or after the appliance malfunctions, or has been damaged in any manner. Return the appliance to the nearest authorized service facility for examination, repair, or adjustment.
-
Page 11: Chapter 3. Water Reservoir, Plumbing, Electrical Specifications, And Requirements
• All water used in the reservoir should meet the specified water quality standards. • If you want to plumb the ES.1, please read the information at the end of this section and talk to a customer service representative or ES.1 service technician. -
Page 12: Chapter 4. Getting Started With Es.1
The ES.1 is quick and easy to set up. Plug in and fill up the water reservoir (or plumb the machine into a water supply), turn the ES.1 on, and follow the touch screen prompts. Soon you will be pulling espresso shots like a pro. -
Page 13: Touch Screen Navigation
8. While you are removing air from the system, the ES.1 will continue to heat the two internal boilers. 9. If needed: Top off the water reservoir one final time. 10. The ES.1 will be ready to brew when the internal temperature has stabilized around 200°F or 93°C. This process will take about 30 minutes. -
Page 14: Start Screen Overview
Manual Shot. A Program will automatically pull a shot based off saved parameters including time, temperature, and pressure. Once you select a program, hit the paddle to the left to start the program. The ES.1 will automatically advance through the extraction process. - Page 15 ES.1 User Manual | 4 - Getting Started With ES.1 | 17 Figure 6. Home Screen From the start screen, the ES.1 can be operated as a fully manual espresso machine, or run a saved program. To pull a manual shot follow these instructions.
-
Page 16: Saving A Manual Shot
Note: The approximate times listed above are guidelines. Any of the suggested times might be too short or long depending on your preferences, type of coffee beans, and bean grind. 4. When you have completed the brew process, and the ES.1 has ramped down, a Shot Summary Readout will appear on the touch screen. - Page 17 ES.1 User Manual | 4 - Getting Started With ES.1 | 19 3. On the Save As screen, you can save or update an existing shot or save it as a new shot. Unless you want to update an existing recipe, tap the New Shot button .
- Page 18 ES.1 User Manual | 4 - Getting Started With ES.1 | 20 You have now saved a shot Program. Every time you want to use this program, can access it via the Program button on the Home Screen.
-
Page 19: Chapter 5. Programs Menu
Chapter 5. Programs Menu Navigate, Edit and Organize the Programs Menu The ES.1 has unlimited memory for Programs. Programs save shot settings such as temperature, pressure, and time so you can consistently pull the same shot using your specified settings. -
Page 20: Running A Program
Figure 13. Saved Program 4. Press the Brew Paddle to the left. This will start the brewing process. The ES.1 will run the complete program and automatically progress through the entire extraction process. Figure 14. Brew Paddle 5. - Page 21 ES.1 User Manual | 5 - Programs Menu | 23 1. Tap on the Program button located on the Home Screen. Home Screen Program Menu 2. On the Programs Menu, tap on the pencil/edit icon in the screen's lower right-hand corner.
-
Page 22: Create A Program
ES.1 User Manual | 5 - Programs Menu | 24 Figure 16. Shot Settings 7. If you want to update the parameters of the shot, tap on Shot Settings. Here you can adjust the parameters: Temperature, Volume Output, Pre-Infusion Time, Pre-Infusion Pressure, Infusion Pressure, Ramp Down Time, and Ramp Down Pressure. - Page 23 ES.1 User Manual | 5 - Programs Menu | 25 1. On the Program (Edit) screen, tap the Plus (+) button in the upper left-hand corner. Figure 18. Program Edit Screen 2. Enter a name for the new shot program in the Name screen. Then tap the arrow button.
- Page 24 ES.1 User Manual | 5 - Programs Menu | 26 Figure 21. Shot Settings 5. The new shot is saved and will be ready on the Program Menu. Figure 22. New Program Saved...
-
Page 25: Chapter 6. Software And Firmware Updates
The ES.1 will have periodic software and firmware updates as we add new features and capabilities to the machine. Currently, the ES.1 needs to be updated via USB, but in the future this will be done via WIFI. In the meantime each ES.1 will ship with a USB thumb drive Software and Firmware updates will be announced and available for download on the ES.1 website in the Owner's hub. -
Page 26: Chapter 7. Maintenance And Cleaning
2. Preform and complete the yearly parts maintenance checklist. Warning: Do not use dish detergent in the ES.1. Only used coffee detergent. Dish detergent can leave residue that will break down and destroy coffee bean oils. While the build up of oils that will go rancid is terrible, coffee bean oils are important for flavor. -
Page 27: Auto Backflush
3 seconds. 2. You are now in safe mode. From here you can determine if the ES.1 is set up to be plumbed into a water source or not. If the ES.1 is set up to be plumbed, you can safely connect the ES.1 to the water source and turn the water source. -
Page 28: Preparing The Es.1 For Storage Or Shipping
The pump could be damaged if the ES.1 tries to power up and fill without a water source. To mitigate any danger to the pump, put the ES.1 into safe mode when you turn on the ES.1. If the ES.1 is already off, it will try to fill and heat up when you turn it on during the boot-up process. - Page 29 ES.1 User Manual | 7 - Maintenance and Cleaning | 31 Table 19. Figure 1 Key 1 - Cup Rail 4 - Steam Actuator handle and knob 2 - Philips Head Screws Securing Right Panel 5 - Philips Head Screws Securing Right Panel 3 - Knurled-Head Thumb Screw 8.
- Page 30 Figure 32. Depressurize and Drain 15. Press the Open Brew System Valves. This will open the valves without running the pump so the ES.1 can continue to depressurize. 16. After there is no more steam coming out of the Steam Valve / Steam Wand, the machine has depressurized enough to proceed and begin draining the ES.1.
-
Page 31: Chapter 8. Menus, Settings, And Flowcharts
This flow chart shows the detailed process of pulling a manual or programed shot. If pulling a manual shot then you will need to tap the paddle to the left to advance the ES.1 through the extraction process. When running a programmed shot, the ES.1 will automatically progress through each stage of the extraction process to... -
Page 32: Programs Menu
ES.1 User Manual | 8 - Menus, Settings, and Flowcharts | 34 Figure 34. ES.1 Brew Process Programs Menu The Program Menu is where all of your recipes will be stored. -
Page 33: Auto Backflush
ES.1 User Manual | 8 - Menus, Settings, and Flowcharts | 35 Figure 35. ES.1 Programs Auto Backflush Auto Backflush is a cleaning function that should be regularly performed. -
Page 34: User Settings
ES.1 User Manual | 8 - Menus, Settings, and Flowcharts | 36 Figure 36. ES.1 Auto Backflush User Settings User Settings is where you can adjust the Power Save Mode, Time and Date, and preferred measurement units such as Fahrenheit vs Celsius. -
Page 35: Advanced User Settings
Figure 37. ES.1 User Settings Advanced User Settings Advanced User Settings are password protected and offer a more comprehensive range of settings. The password is 1111 CAUTION: Adjusting some of these settings can result in ES.1 machine failure including burning out the pump. - Page 36 ES.1 User Manual | 8 - Menus, Settings, and Flowcharts | 38 Figure 38. Advanced User Settings...
Need help?
Do you have a question about the ES.1 and is the answer not in the manual?
Questions and answers